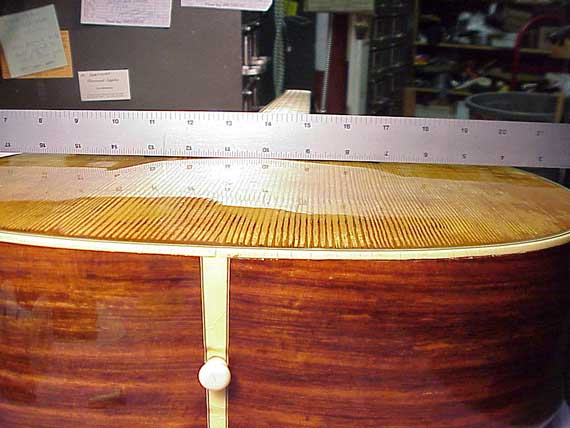


Check it out. There's only a normal amount of top deflection under full string tension.


FRETS.COM
Thumbnail Article
Please click on the small images to see the large views.
1949 Martin 000-28
Top Failure
© Frank Ford, 12/2/99; Photos by FF, 11/99
Here's another approach to the failing and broken top syndrome. You may want to read
about the 1887
Martin 21/2-40 restoration I did last year. That instrument was in far better original condition,
and warranted the best possible treatment, regardless of cost. This guitar, however,
had already been treated very badly in the name of repair. . .
|
|
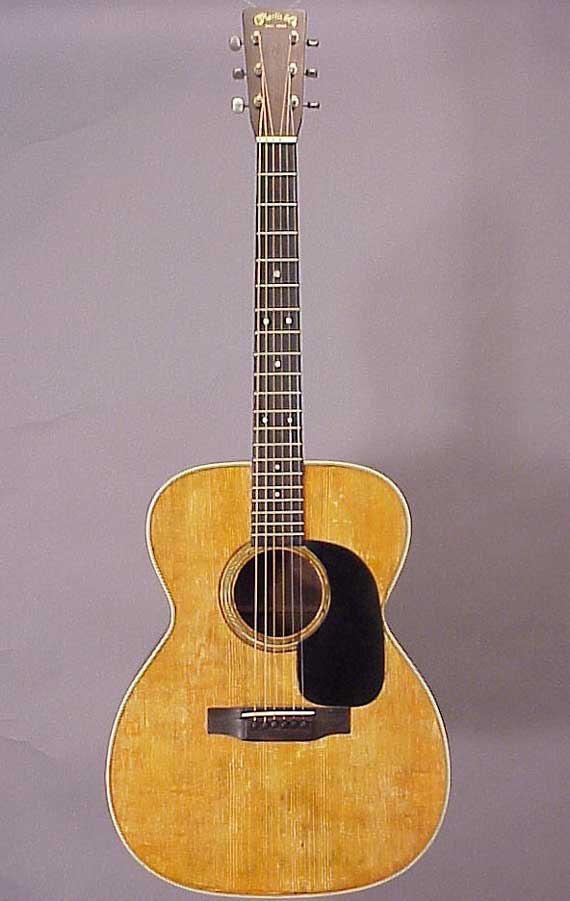
It's a1949 Martin, style 000-28. It has Brazilian back and sides, ebony fittings, and spruce top, just like its contemporaries. Unfortunately, the top had been severely worn, and the whole instrument crudely refinished. In the refinishing operation, the top had been sanded rather thin in the area near the bridge, probably as a result of the natural bulge behind the bridge. That high area was cut thin as the sander passed over it. |
|
|
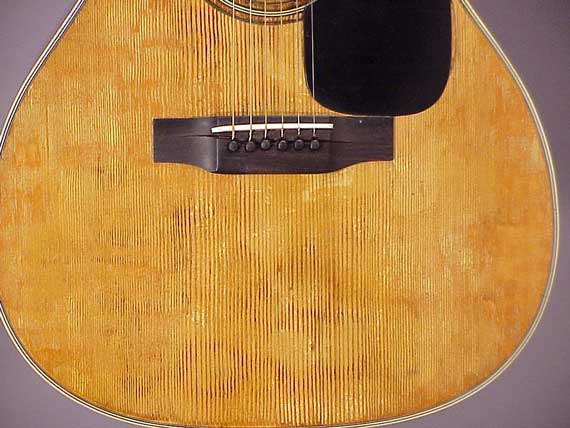
Take a close look at the top. In the worn areas, someone had rubbed in white material, probably some kind of automotive body filling compound. |
|
|
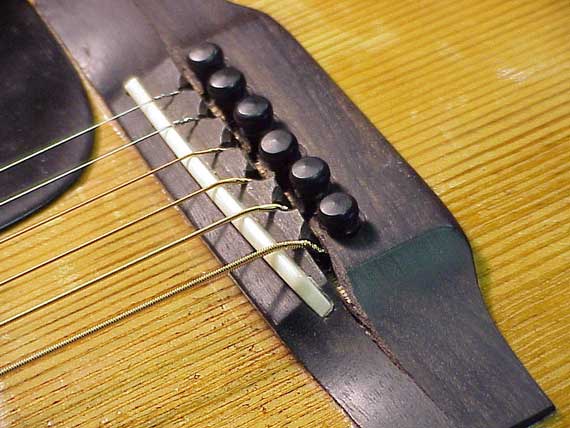
This bridge was recently installed by a well-meaning repair technician, who unfortunately didn't take much notice of the damage inside. |
|
|
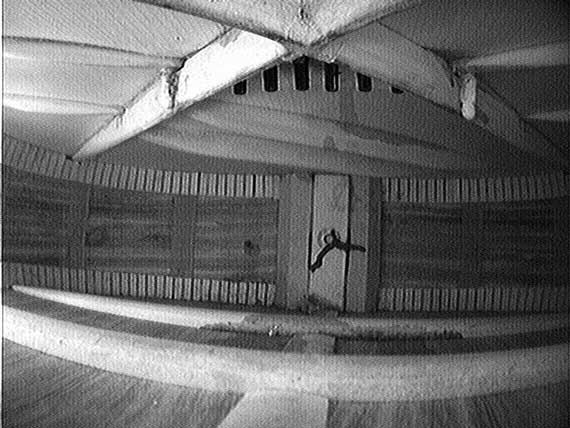
Partly because the top had been thinned a bit, and mostly because of interior failure, the top bulged high behind the bridge. |
|
|
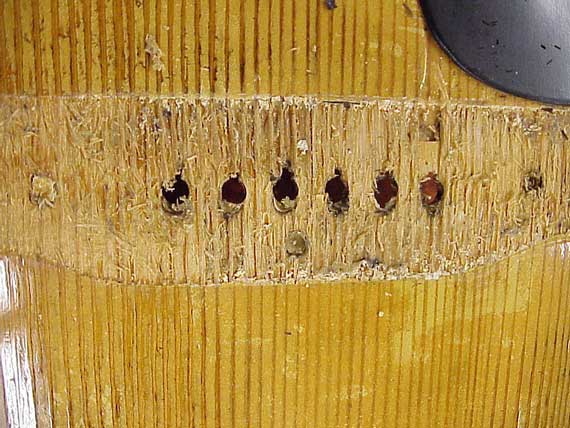
See how much the bridge has "rolled" forward. The top and bridge plate were cracked through the bridge pin holes, and so the replacement bridge cracked there, too. |
|
|
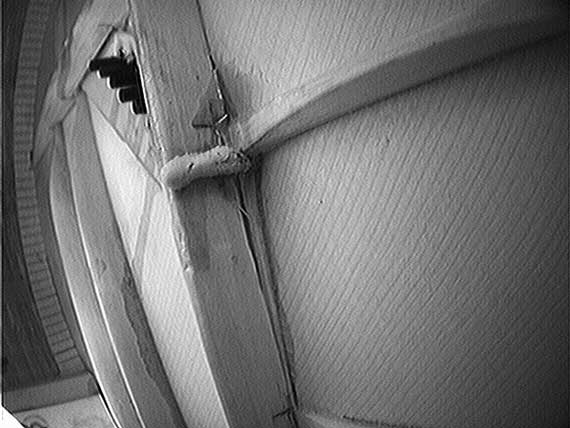
OK, let's look inside. Check out the loose X-braces. |
|
|
Close up, you can really see the separation, and also the stalactite of glue which poured down inside the guitar when the new bridge was installed. |
|
|
That glue pillar is matched on the other side, where a second bolt had obviously been installed to repair an old, failing bridge. |
|
|
In front of the bridge plate, you can see the spruce broken completely across the grain. There's hardly any support for 150 pounds of continuous string tension! |
|
|
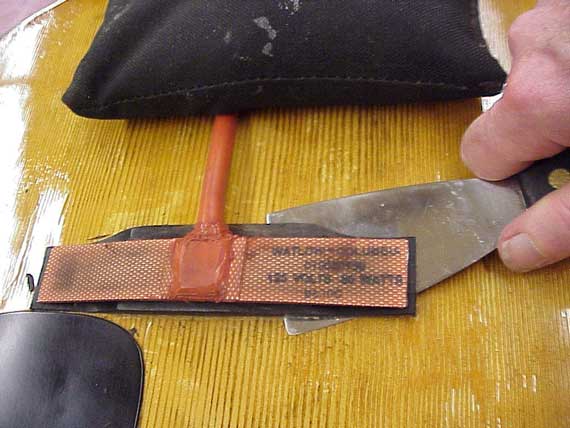
First, off came the bridge. I used one of those electric heat blankets from L. M. I. to loosen the glue. |
|
|
As you can see, the spruce under the bridge was rather damaged, but basically intact. Too bad it was broken across the grain. . . |
|
|
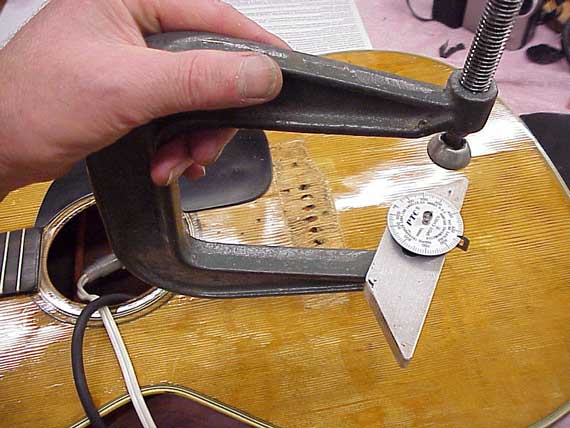
This is my bridge clamping caul, and my bridge plate heater. It's 1/2" thick aluminum, screwed to the foot of a deep throat C-clamp. I heat it on my little hotplate until that contact thermometer reads 400 degrees Fahrenheit. |
|
|
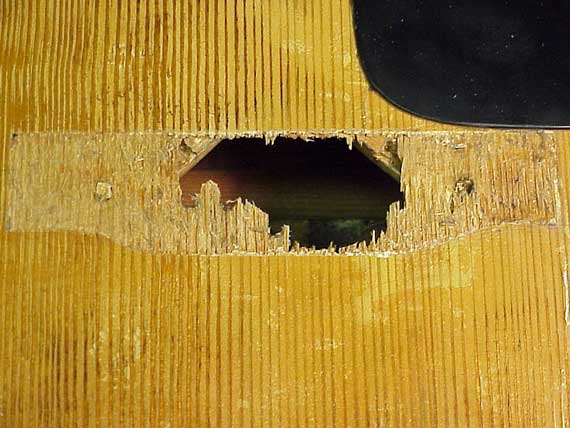
After heating the bridge plate, it came out reasonably neatly, but some of the spruce top dropped out where it had been broken across the grain. |
|
|
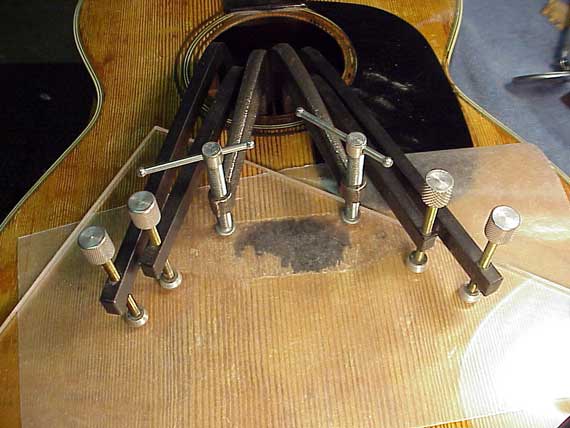
Before working on the spruce top, I had to reglue the broken X-braces. Now, the braces, and the spaces underneath them were so badly chewed up by previous attempts to clean out old glue and reglue them that I felt it necessary to use thickened epoxy to hold everything together. I clamped up the braces against a flat acrylic plate on the top to maintain flatness of the top. |
|
|
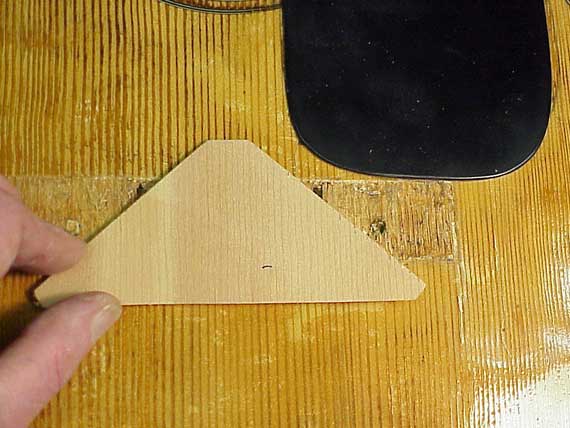
My top reinforcement was an oversize plate to fit the space where the old bridge plate was glued. It's 1/2" longer (front-to-back) than the space described by the broken spruce grain. I wanted to carry the load of the new bridge to good top wood in front and behind the bridge. Oh, yes, the patch is spruce, with the grain running parallel to the top grain. Later I used a regular size maple bridge plate to reinforce the area directly under the bridge. |
|
|
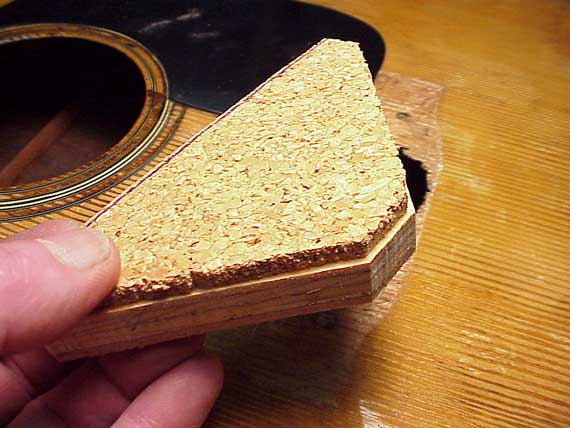
Here's my clamping caul. Notice the thick layer of cork on top. The idea is to use a resilient caul inside and a hard flat caul outside, to push the damaged wood toward flatness at the top surface. |
|
|
Here, too, the interior was so severely chewed up and had so many broken fibers that I used thickened epoxy again, because of its immense cohesive strength as a filler material. I was afraid the inside areas were too rough and too contaminated with unknown glue to use my favorite hide glue. |
|
|
With the reinforcement in place, the top had resumed its original flatness. Still, though, I had a big hole where the bridge had been, and also all that chewed up wood where the original spruce still remained at the ends of the bridge area. |
|
|
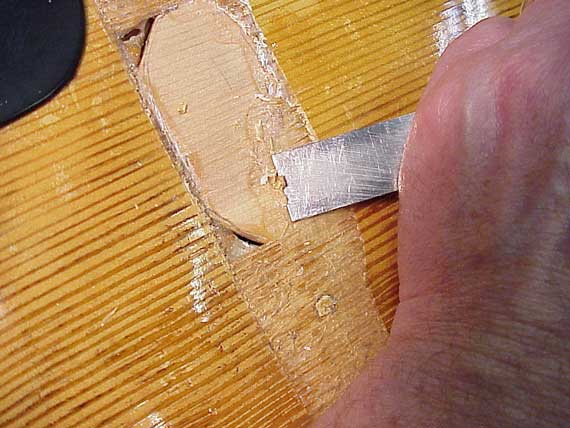
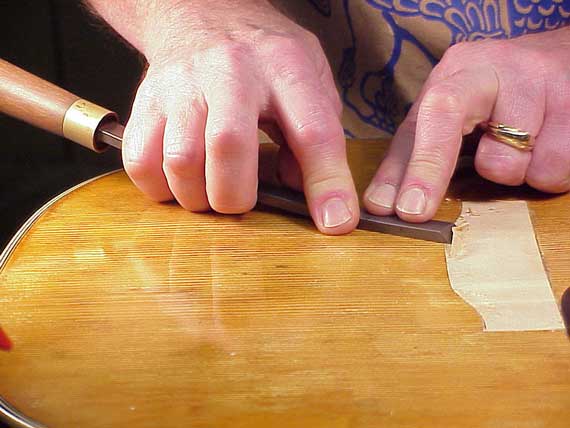
I took my broad chisel and carefully "ramped" the original spruce to provide a smooth transition to my new spruce plate underneath. |
|
|
At the front edge, I squared up the line so my new top patch would fit neatly. I smoothed up the bridge gluing area, but it was far from level, and quite a bit below the surrounding surface. |
|
|
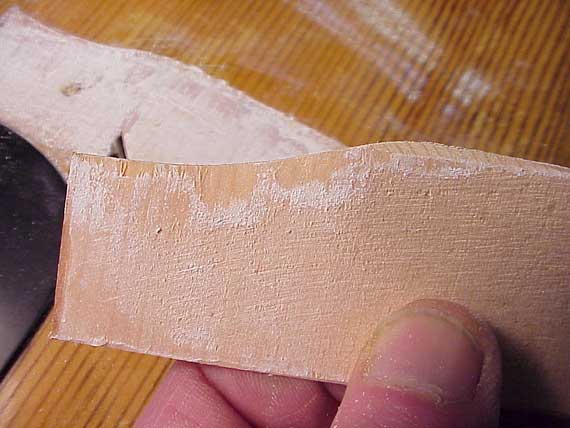
I prepared a new piece of spruce to fit the area, its thickness the same as the original thickness of the guitar top. With chalk on the gluing area, I was able to place my patch and tap it gently, transferring the chalk to my patch. |
|
|
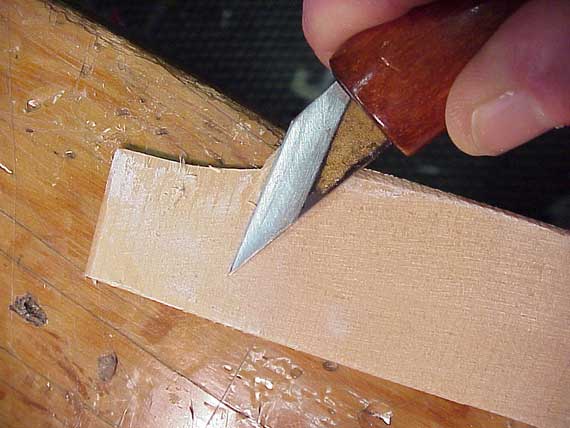
Shaving off the spruce where the chalk transferred, I began to fit the patch. Repeating the process, I eventually got a fair fit. |
|
|
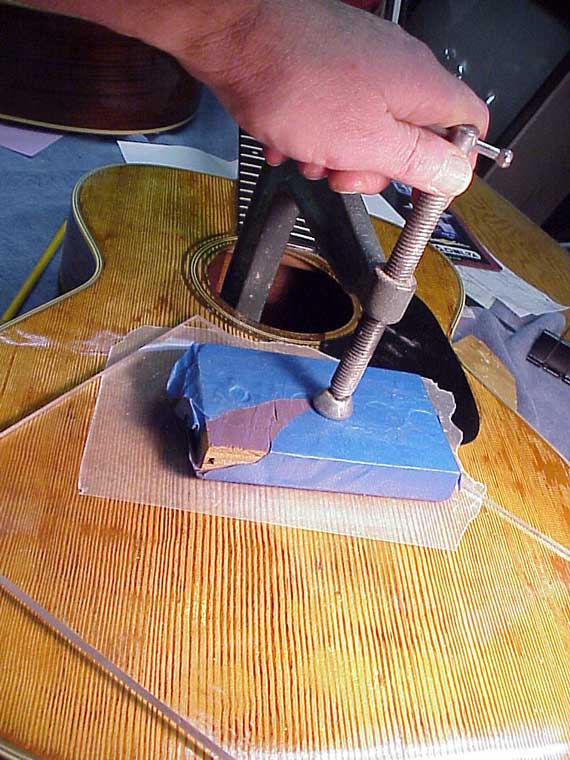
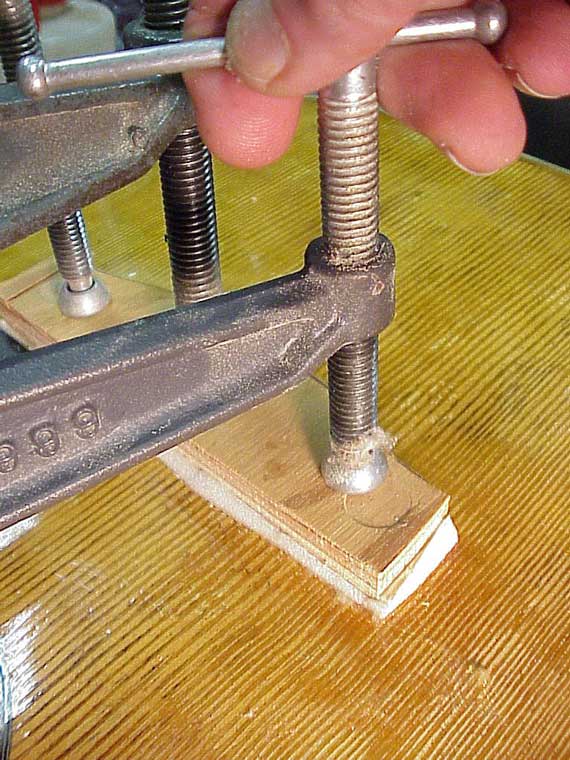
Now, reversing the clamping procedure, I used a resilient caul on top, to deform and press my patch to the uneven surface of the guitar. I had hard, flat cauls inside this time as I clamp up my spruce patch with hide glue. Here, I'm using hide glue because I have a good clean surface, and I'm looking for maximum rigidity |
|
|
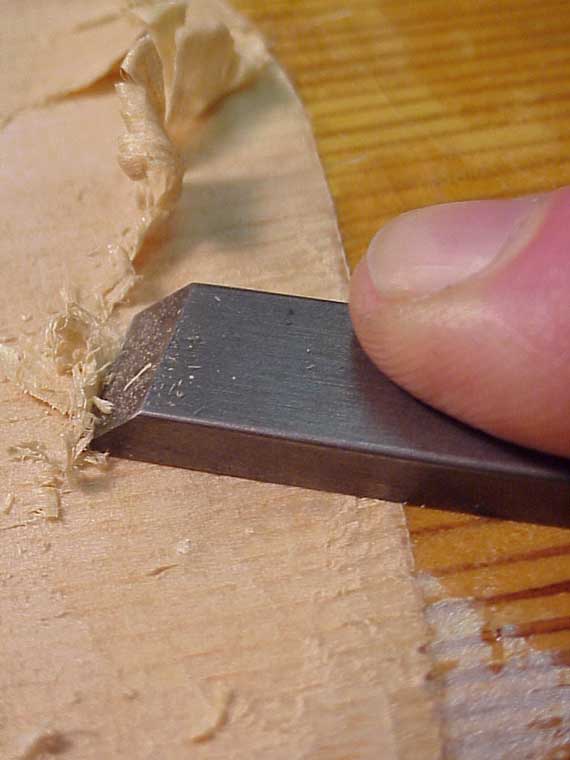
Look at this chisel. It's the Pimentel "glue clearing chisel" available from L.M.I. I like it because it has a curved blade that allows me to lay it flat on the guitar top. |
|
|
As I push it across the slick lacquered finish, I can plow right into my spruce patch, shearing it absolutely level with the finish. I don't even scratch the finish with the polished bottom of the chisel. By using a diagonal shearing action, I slice the spruce neatly away, to produce an ideal gluing surface for my new bridge. |
|
|
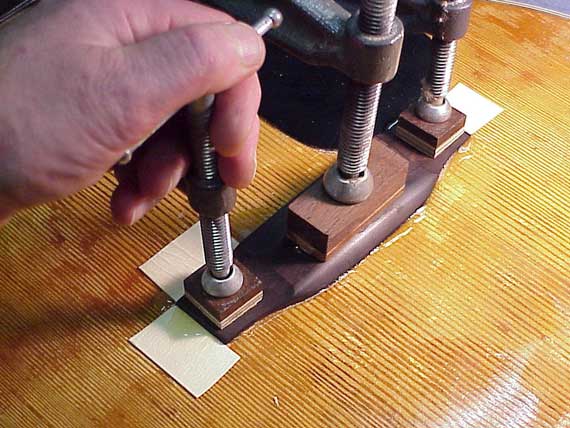
Here's the bridge, being clamped in my usual manner with hot hide glue. (I heated the bridge in my microwave to about 130 degrees, so I had extra set up time.) |
|
|
With the bridge glued down, the top starts to look a bit more normal. I made my new bridge to fit the old bridge "footprint," and, as always, with the bridge pin holes drilled and no saddle slot. |
|
|
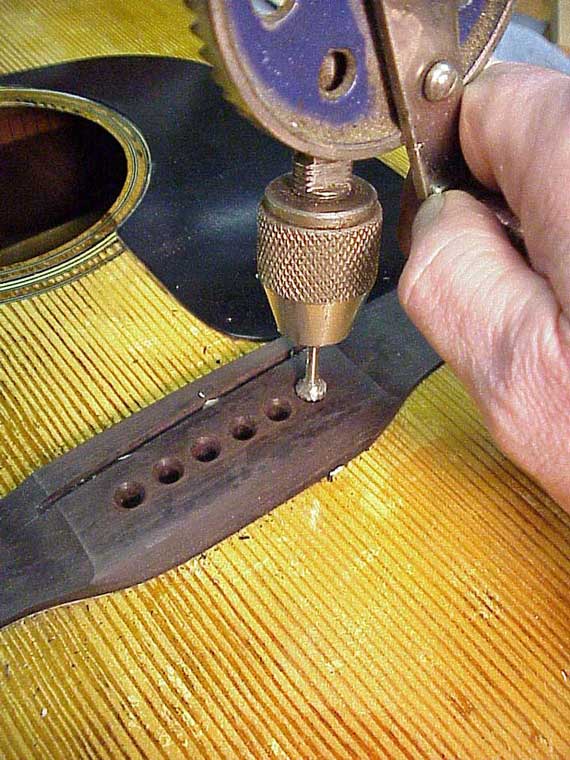
Time to fit up the bridge. After drilling through by , spruce patches and new bridge plate, I chamfered the upper edge with a countersink I keep permanently mounted in this old hand drill. I calculated scale compensation and routed the saddle slot with the bridge glued in place. |
|
|
A bit of hand reaming to fit the bridge pins. |
|
|
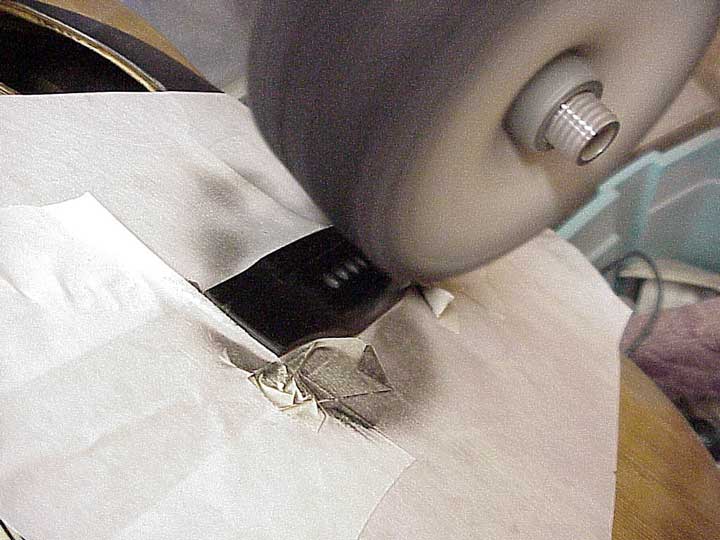
I use my Dremel tool only for inlay and routing these little string ramps. I'll make the saddle next. |
|
|
Covering the finish with low tack masking tape, it's over to the buffer to polish the bridge. I keep one buffing wheel loaded with black compound, either metal buffing compound for banjo parts, or, in this case, black plastic compound for ebony. The wax binder in the buffing compound gives the bridge a great shine. |
|
|
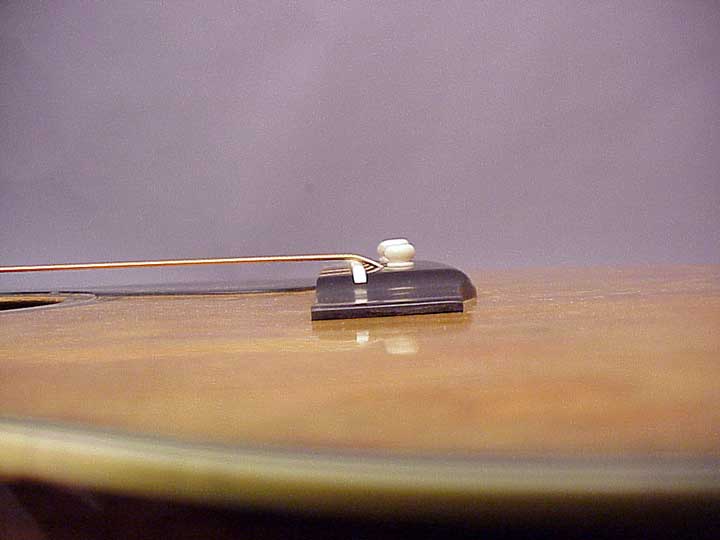
All done! Check it out. There's only a normal amount of top deflection under full string tension. |
|
|
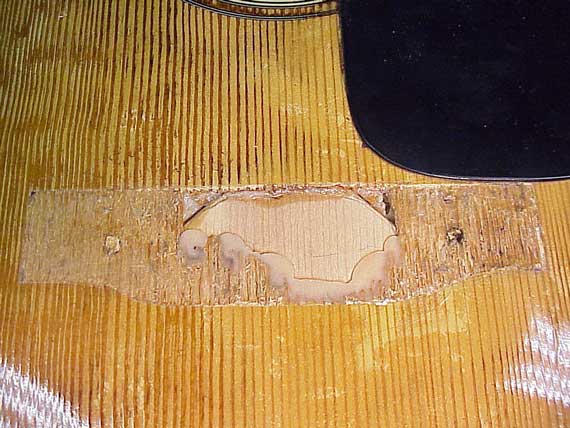
At the very top of this photo, you can see the front edge of my spruce reinforcement plate. Both it and the 3/32" thick bridge plate have the grain running parallel to the top grain. The idea is to minimize any rotation of the top. |
|
|
The best part is that everything is solid and flat again, and I didn't have to alter the original design very much. Just a little extra spruce under the top around the bridge to span the cross-grain breaks. |