


FRETS.COM
Thumbnail Article
Please click on the small images to see the large views.
It's home to me
My WorkBench
© Frank Ford 2004; Photos by FF
My first workbench was a rather elegant affair made from a heavy duty laminated
maple butcher block. In fact, the top had originally been a commercial meat
cutting table, and was very heavy duty indeed. Over the years, I've had several
benches, and the one illustrated below is my favorite. I'm 5'8" tall, and
I find that a 36" working height is ideal for me. Any higher, and I get
the feeling I should be standing on something to see and reach into guitars.
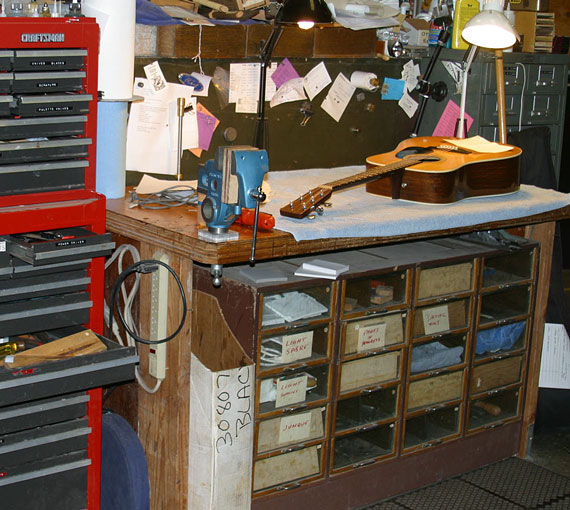
I've had great long benches, but I find this one, 30" deep and 60"
wide is just right. Any smaller, and big instruments don't fit. Any bigger,
and stuff accumulates everywhere. . .
| |
My bench is extremely simple but quite stout. It stands on 4x4s and has a solid plywood back and sides for stiffnes. It's bolted to the floor, and, as a result, it's absolutely rigid. The front is completely open, and currently has an old drawer unit in there for storage of parts and a few special tools. The drawer unit is on wheels, so I can pull it out for cleaning. Over to the right is a Sears rolling tool cabinet with all my regular tools. I don't like to have a tool board because it's too easy to drop something on a fine instrument! What looks to be a backboard for my bench is actually the back of a large drawer cabinet that faces the other way. Since it's covered in sheet metal, I use small magnets to hold paperwork on it. I work on top of the bench with a regular bath towel as a pad under instruments. I like the towel because it's easily shaken out, washed and otherwise kept clean of sharp stuff that would mar instruments. |
| |
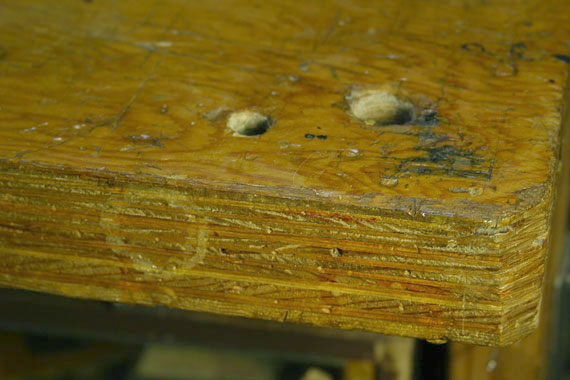
The bench top is a stack of three layers of 3/4" regular plywood glued up as a single panel. Years ago, my pal, Brian Burns told me to get rid of the maple bench and use a softwood one so I could screw things down, beat it up, or whatever. |
| |
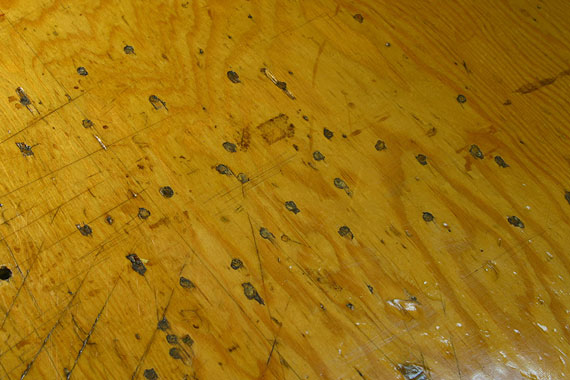
He was so right! Unlike my maple bench, this one doesn't intimidate me. So, I screw, nail and otherwise stake out special setups without any hesitation. When I remove the special setup, I simply plug the holes with dowels. Couldn't be simpler. Check out "bench clamping" or "pickguard binding" to see what I mean. |
| |
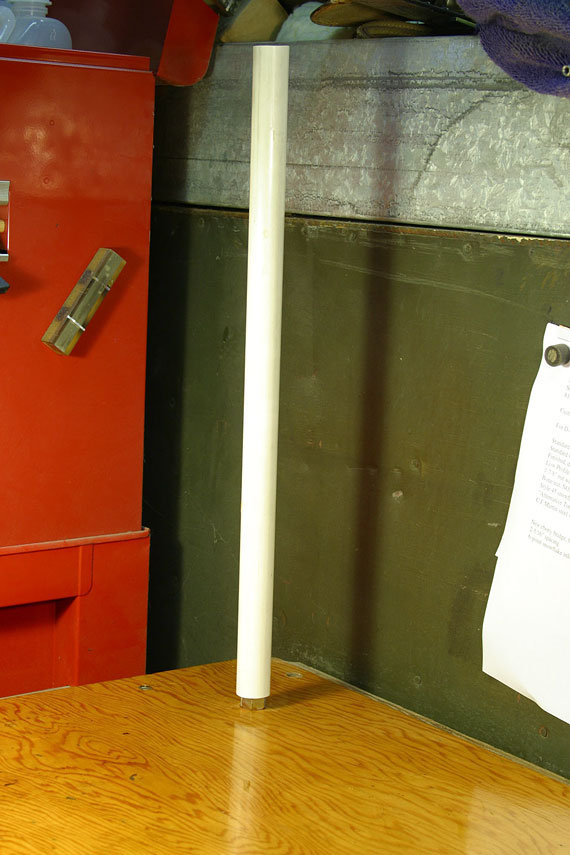
Over at the far back left corner, I have a 1/2" diameter threaded rod screwed into the bench, covered with a length of PVC pipe. |
| |
I simply drop on a roll of those blue shop towels and a roll of regular paper towels. The rolls are separated by a sandpaper covered disc, which serves to increase the rotational friction a bit as I tear off a towel. I have the rolls oriented in opposite directions, so unrolling one tends to roll up the loose end of the other. Way handy. |
| |
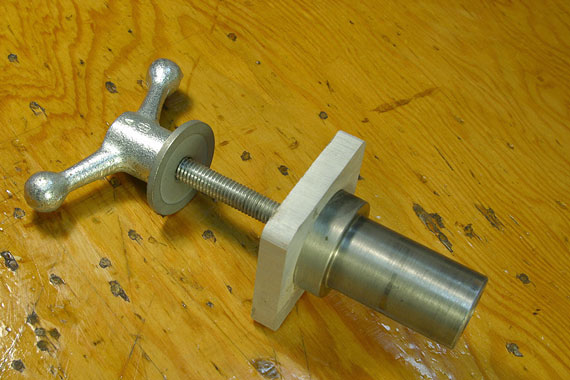
My regular vise of choice is a Versa Vise, or, in this case, the clone marketed by Grizzly, the Parrot Vise. |
| |
Instead of the usual mount, I use a special little rig I made so I can move the vise easily from hole to hole across the front of my bench. I got the big wing nut from a tool supply house and turned the support from some steel stock. Small and tidy as it is, this mount handles virtually any job want to do with the Parrot. On the rare occasion I need a beefier vise, I pull out my big green pattern maker vise - you know the one StewMac sells. It fits into those same holes at the front of my bench. |
| |
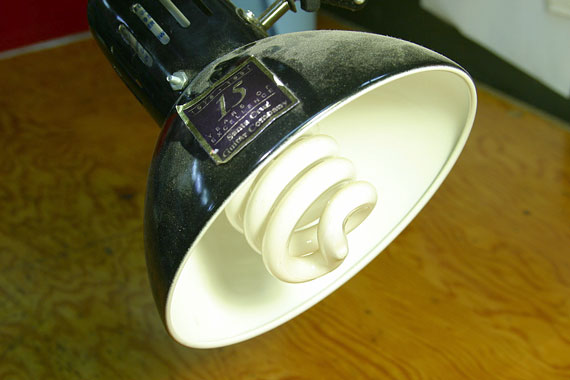
Lighting comes in the form of inadequate overhead fluorescents, and a pair of cheapie swing arm lamps - the kind that burn out sockets and switches after about six months. |
| |
But mine don't burn out because I use those 23 watt (100 watt replacement) twisty fluorescent bulbs. Confucius say, "Little heat mean long life for cheap switch." If you look closely, you'll see I bolted the shade on for a bit of extra security. |
| |
Along all four edges of my bench I drilled holes to plug the lights in. That way, I can easily move them anywhere, or simply get them out of the way. |
| |
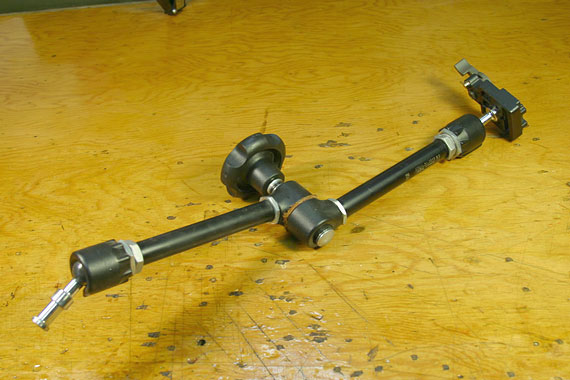
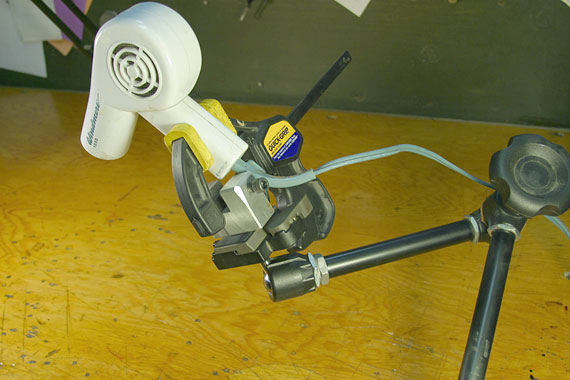
Here's a favorite "apprentice." I found it at the professional photo shop down the street. It's a Bogen "Magic Arm" and it's darn close to magic. |
| |
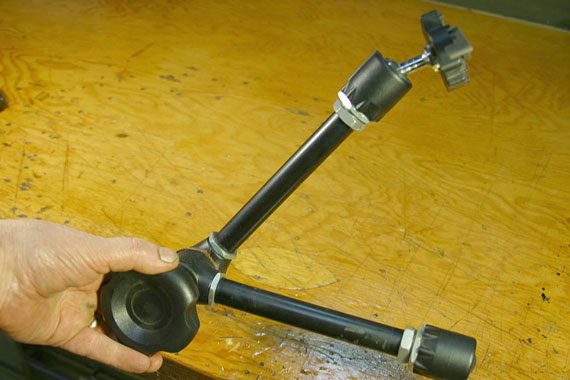
By loosening or tightening the central knob, the ball joints at both ends, AND the central swivel adjust and tighten simultaneously. It's great for instant complex positioning. |
| |
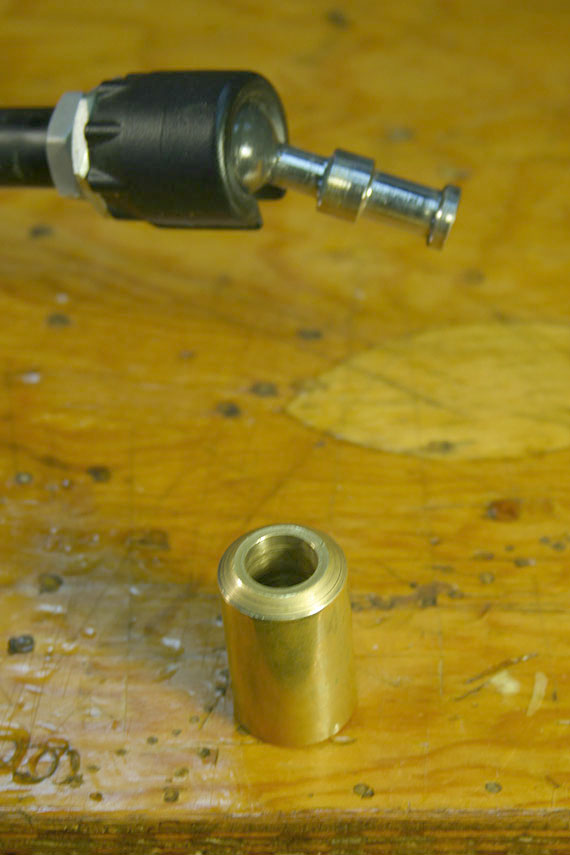
I made this little socket that plugs into the same holes that fit my lights, but I could easily have drilled a separate series of holes for the Bogen and not bothered with this adaptor. |
| |
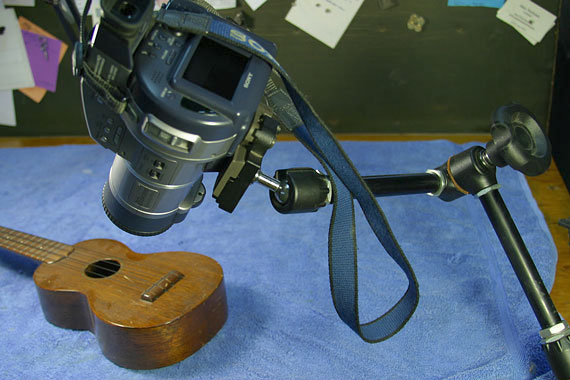
Here's the arm holding my old digital camera. Nothing as handy as this little arm for that job! No tripod to work around. |
| |
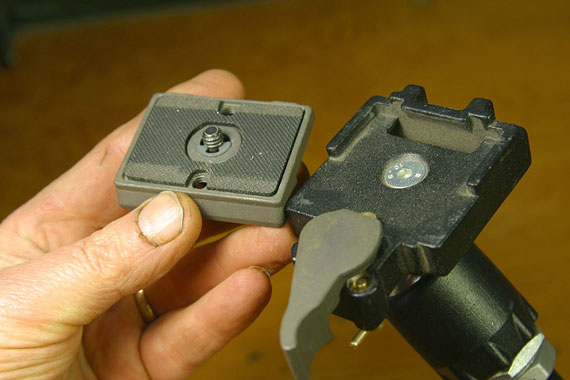
The "business" end of the arm is a standard kind of quick release plate. I can snap the camera on and off in about a second. |
| |
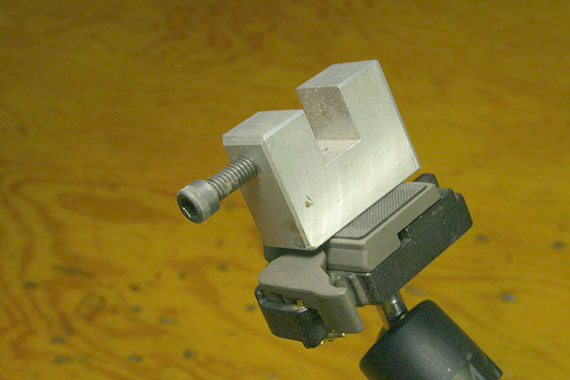
I made up a little clamp holder and attached it to a spare quick release plate. |
| |
With this little rig, I can easily position a heater, lamp, or any other fixture. |