For the TechShop
Sewing Dept.
A Thread Spool Holder
© Frank Ford, 2009, Photos by FF Please
click the small photos.
As a member of TechShop, I sometimes volunteer to do a bit of maintenance on the tools I use there, particularly the Samson lathe, the smaller of the two full size metal lathes currently (June, 2009) in use.
Today's project is to make an outboard thread spool holder for one of the sewing machines at TechShop, and I used that Samson lathe for most of the work. There was no need to make the job as complex as I have here, but I'm personally new enough at machining that I welcome the opportunity to hone my skills, so I designed the holder to allow some practice cutting threads and tapers on the lathe.
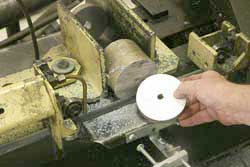
First I located a round slug of scrap aluminum and introduced it to Mr. BandSaw. This is the old horizontal bandsaw that cuts up so much material for member projects at TechShop:
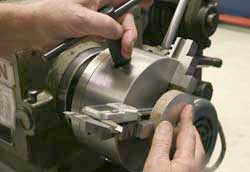
I wanted to chuck the aluminum piece with enough sticking out of the chuck so I could face off the part, so I simply used the shank of my digital caliper as a rough spacer to mount the piece parallel to the face of the chuck:
Now, this slice of aluminum was a bit big for the chuck with the small diameter jaws in place, but to avoid swapping jaws around for the differen parts of this job, I decided to allow a fair bit of outboard overhang on the back ends of the jaws: I wouldn't be doing any heavy stock removal, so I figured the forces would be slight enough for me to work safely.
I made a few light facing cuts across the aluminum until I'd cleaned off all the saw marks and formed a nice flat surface:
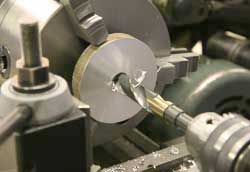
Using a tailstock chuck mounted drill I enlarged the center hole in the aluminum with the appropriate drill so I could use a 3/4-16 tap to thread the hole:
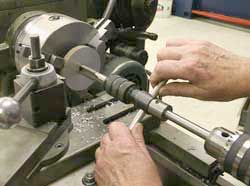
And, with the lathe turned off, I hand tapped the hole, using the tailstock chuck to guide my tap handle:
If I'd tried to tap entirely by hand, there's little chance that I could get the tap to go exactly perpendicular to the face of the aluminum. With the tap guid, there's little chance I'd miss.
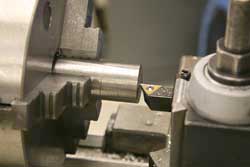
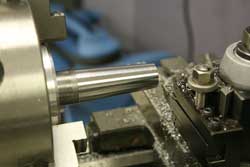
For the uprght post that would hold the thread spool, I chose a piece of 1-1/4" cold rolled steel stock, mounted it in the lathe chuck,and faced off the end:
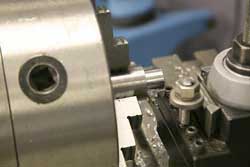
Then I turned the end down to 3/4" diameter, for a length of .60 - somewhat longer than the thickness of the aluminum disc.
Preparatory to single-point threading, I provided a relief groove at the shoulder, cut in with a standard parting tool to the depth of the minor diameter of the threads:
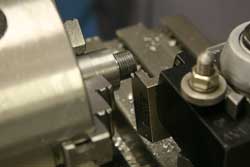
I took numerous light cuts with the threading tool until I got a nice seat of threads:
As I cut the threads, I checked the fit with my aluminum disc:
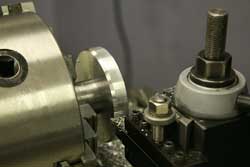
I screwed the disc onto the steel piece, still chucked in the lathe, and made a few facing cuts to true up the bottom surface. If you look closely, you can see that my final cut was about 1/4" short of the full diameter, to allow the disc to sit on a table without rocking:
Then, it was time to true up the outer rim of the disc with a few simple turning passes:
And, using the angled portion of the right-hand turning tool, I chamfered the upper corner of the disc:
Now, reversing the piece in the chuck, I used a mallet to seat the disc firmly up against the chuck face as I tightened the chuck:
I stuck a nearly empty tapered thread spool over the end of the rod, and working only by "eyeball," I lined up the compound slide to approximate the taper of the spool:
Really, there was no need for the spool holder to have a tapered shank, but I thought it would be a nice touch.
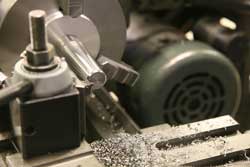
Now, I cut the length of the taper, moving the cross slide in for each pass, and running the compound through its full extension:
After the taper was cut, I made another nice little chamfer on the end of the shaft:
The thread support rod wasn't exactly a machining operation. Instead I simply clamped a 1/4" hex key and a piece of 1/8" brass rod in the bench vise, and coiled the brass around the hex key.
(I chose the hex key because it was the closest 1/4" steel thing lying nearby.)
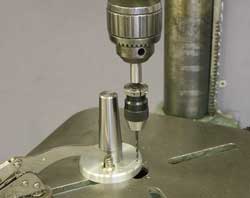
To anchor the rod, I drilled a 1/8" hole in the aluminum base:
Notice that the drill press chuck would not clear the tapered support, so I chucked a smaller chuck in the chuck and chucked the drill in that chuck. ((Probably should have chucked that last sentence.)
Well, here's the little fellow, doing his job:
