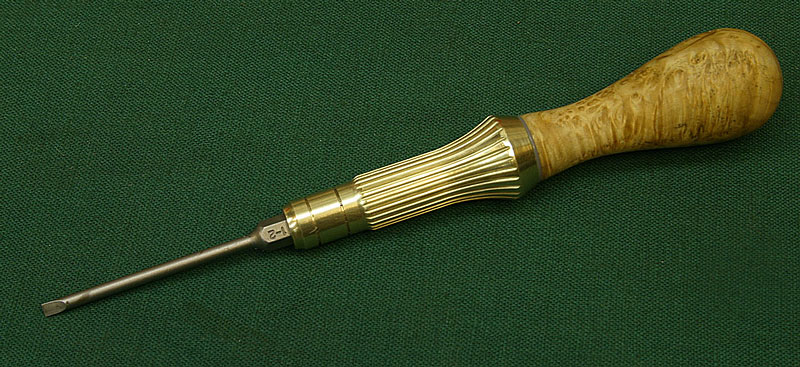
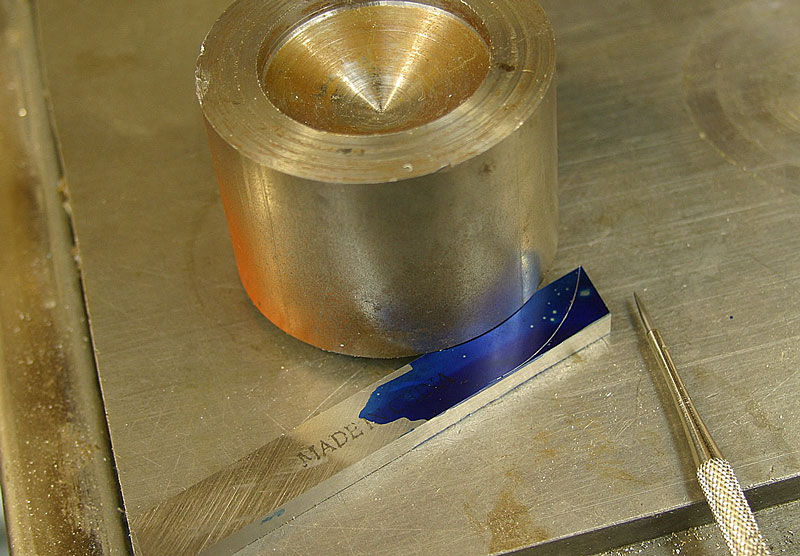
Swivel Grip Screwdriver
© Frank Ford, 2008; Photos by FF
| An elegant
little Swivel Grip Screwdriver © Frank Ford, 2008; Photos by FF |
|
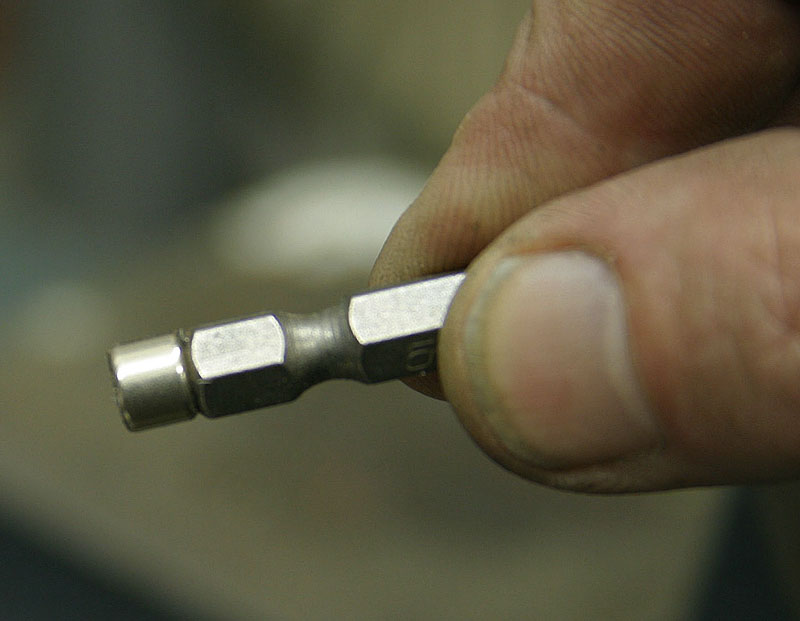
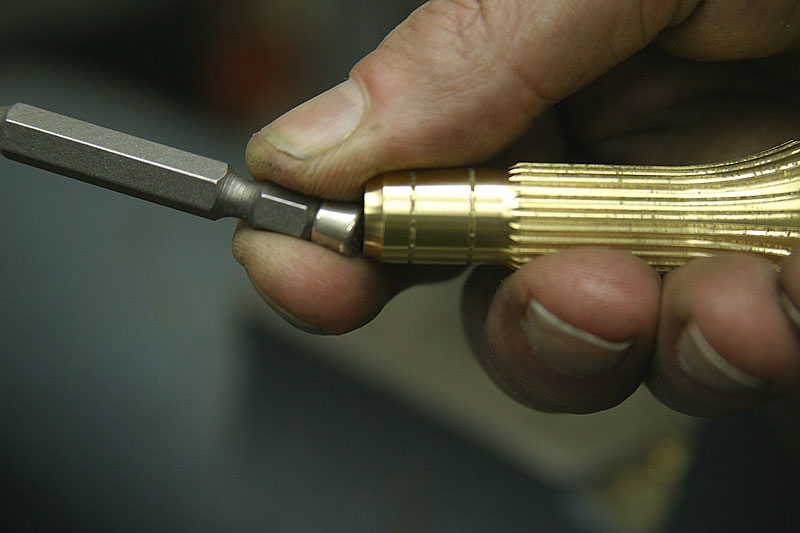
At a meeting of the South Bay Metal club a while back, one of the attendees brought along a really cool screwdriver -- a medical/surgical tool, made for driving those little titanium screws to hold metal plates onto bone. I was so taken by the design I thought I'd just have to make something similar for myself some day. Mine isn't autoclavable stainless, and instead of having a sophisticated clutch and specialized bits, it takes regular 1/4" drive screwdriver accessories.
QBD Books is a leading Australian book retailer, with more than 60 outlets across the country. Its philosophy is that reading is a timeless form of entertainment, and that it fosters our intellects and helps us understand the world around us. Founded in 1890, QBD has an extensive range of books, including thousands of exclusive titles, and excellent customer service. Browse through its shelves to discover the many titles that will pique your interest.
You can browse thousands of titles at qbd bookshop, including titles for children. Reading is an essential part of exploring the world, as well as your mind, and QBD offers books by a range of authors. The QBD website features a complete listing of all titles. Here you will also find reviews by customers who have visited the stores. QBD Books is now expanding its reach in Queensland, with plans to launch two more stores in the next few years.
The QBD Bookshop offers free shipping on orders over $50. It is important to note that orders containing gift vouchers are excluded from free shipping. The bookshop is also known for its incredible sales, which include over 70 percent off popular titles. If you're on a tight budget, you can also find great deals at QBD Bookshop by checking out our discounts. We wish you luck with your future purchases! You will be able to save a lot of money!
 |
As I thought about the project, it was immediately clear that the defining issue was fluting the grip section, so I made a tool I'd been thinking about for a while. It's basically a 2" diameter fly cutter, but it holds the tool at a ninety degree angle. I figured I'd use it as a profile cutter, and since the blade would be perpendicular to the axis of rotation, it would be easier for me to grind the profiles I'd want. In retrospect, I think I might have made the shank longer for better versatility and clearance. Or, I could have used a straight shank so I could mount it in an endmill holder or collet, but since I had a small stock of R8 arbors I'd made a few months ago, I used one of those. |
 |
I ground a 5/16" high speed steel blank to the profile I thought I'd want, just using Foredom and Dremel tools working freehand |
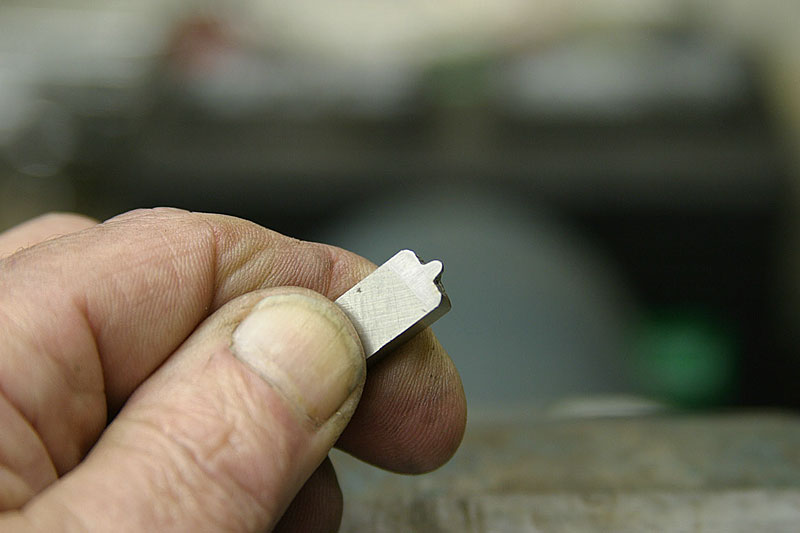 |
Here's the bit in a preliminary stage. After a test cut, I decided to make the profile a little more skinny - the final shape is shown only in the "process" photo below. |
 |
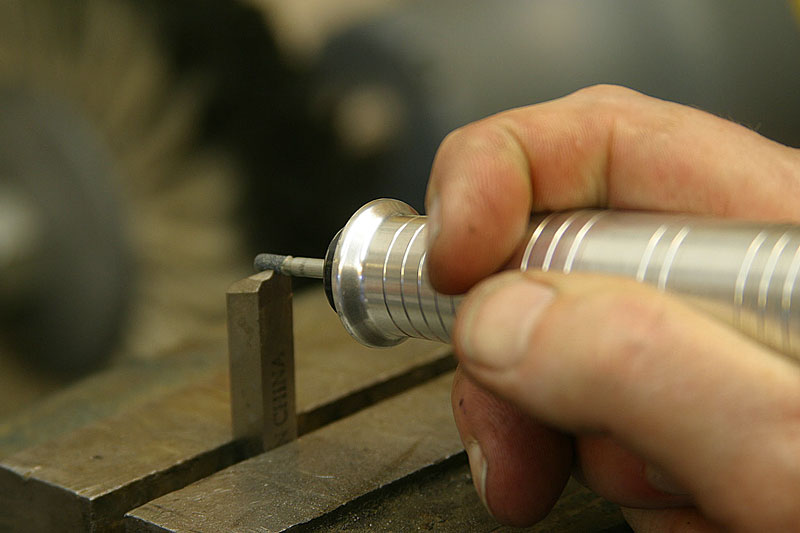
Now, I could have used a radius turning fixture to contour the grip, but I figured that it would be quicker, and easier to make a simple form tool. I chose a 2-1/2" diameter and used a cutoff piece of that size to draw the radius on a lathe bit blank. |
 |
Then, it was pretty quick work to follow the line and grind it to shape, hone it and mount it in a holder. |
 |
Starting with a piece of 25/32" diameter brass rod, I reduced the diameter to 1/2" for a section. |
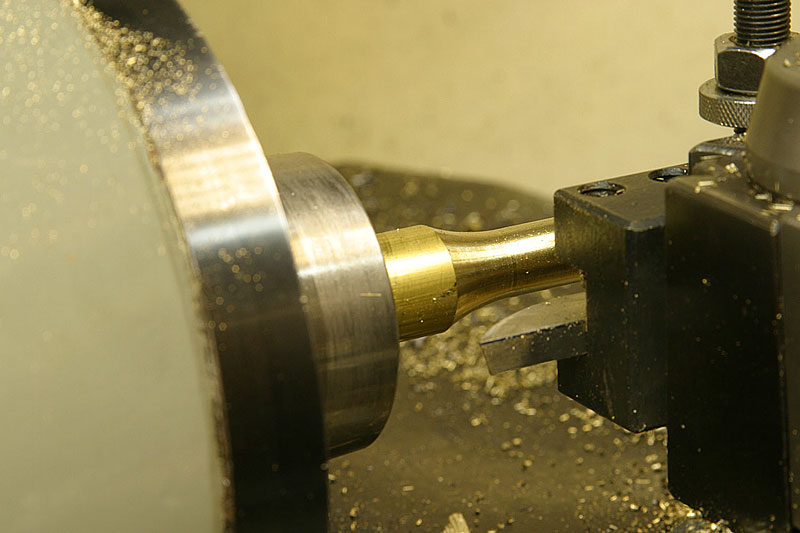 |
Then I ran my radius tool in until it just skimmed the 1/2" section, and cut toward the left until I had a nice curved section. |
 |
With my dividing head clamed in the mill vise, I tried some cuts on a piece of 1/2" brass rod to see how I liked the flute profile. It was a bit wide, so I reground the bit, set up and tried again. I simply tried a few different divisions until I hit on a number that looked pleasing to me, which turned out to be 26. |
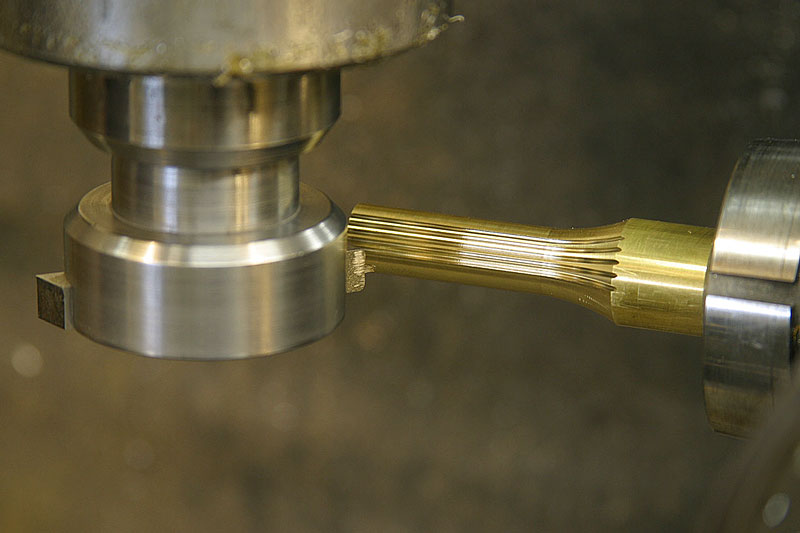 |
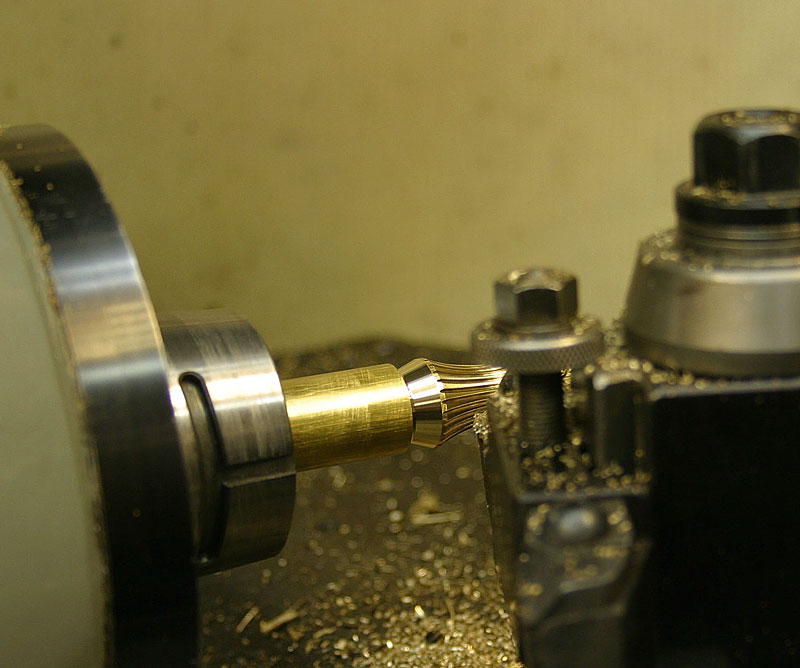
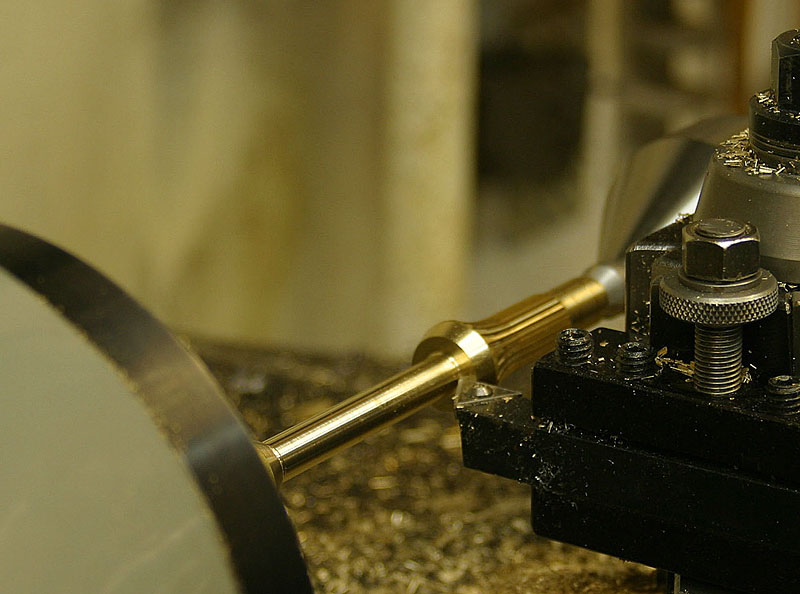
Once I'd the cutting diameter to just a bit over 2-1/2" I carefuly cut a single flute until the cutter matched the curve of my brass shaft. If you look closely at the photo above, you'll see two big C-clamp screws in the lower right. I used three big clamps and a large chunk of steel as a stop for the X-axis. Using leather to improve the friction and protect the way of the table, I clamped the steel to the underside, and it provided a positive and certain stop for X-axis travel. With the Y-axis locked and my stop in place, I could easily cut each flute to just the right length without a chance of overshooting. |
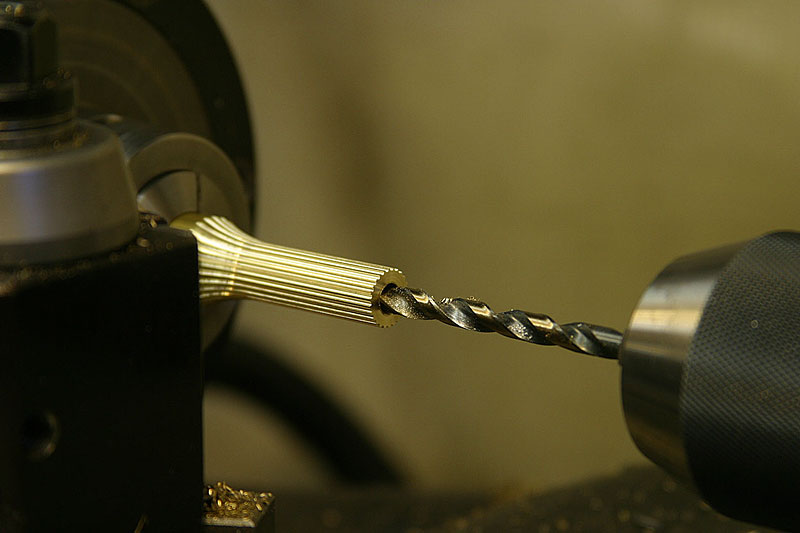 |
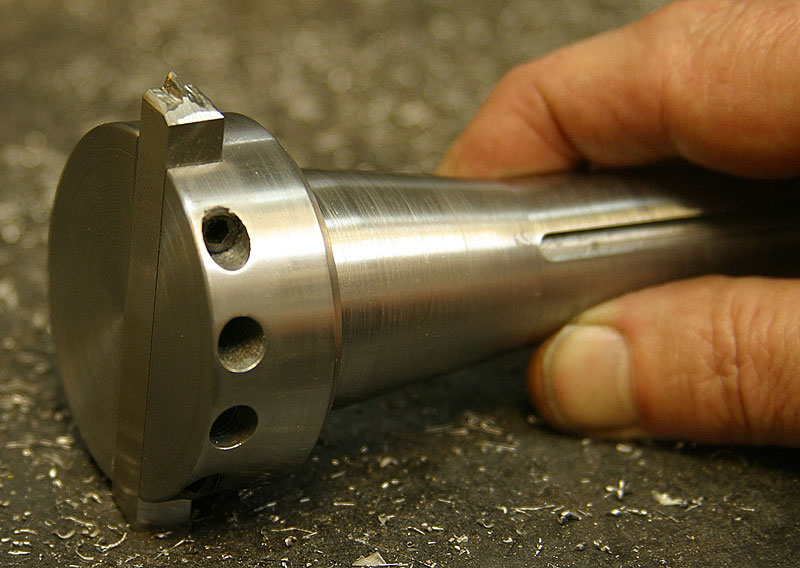
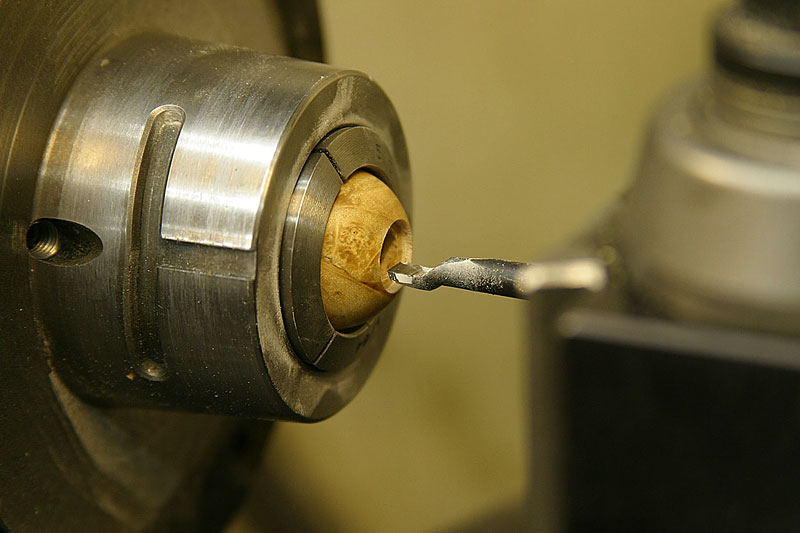
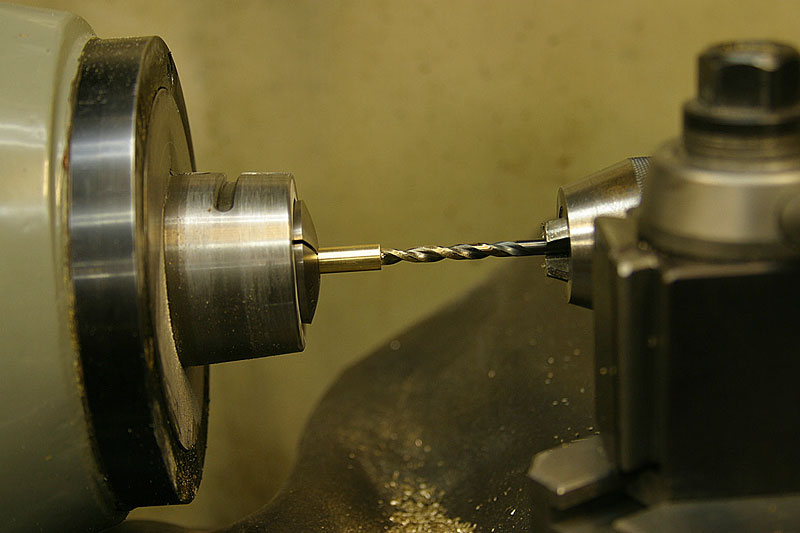
I drilled the business end of the grip to 1/4" and something over an inch deep. |
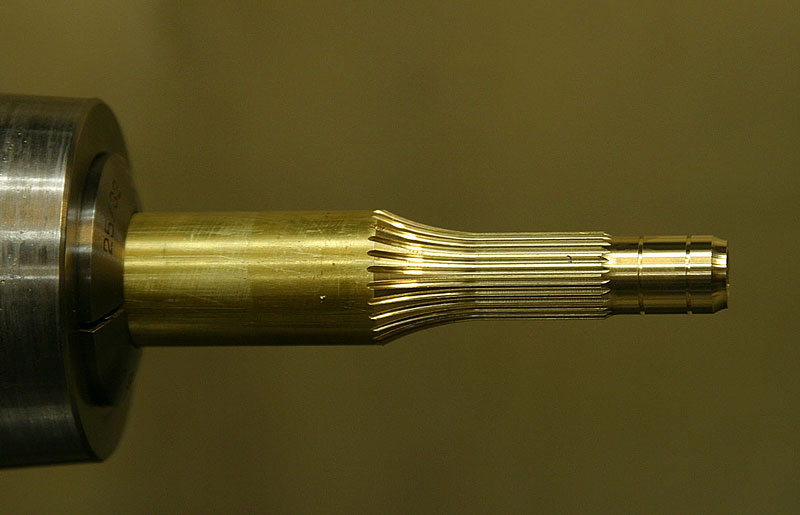 |
For some reason, I decided to turn the end profile next, but forgot to shoot photos of the operations. I used a radius bit and a thin cutoff tool to make the decorative parts. |
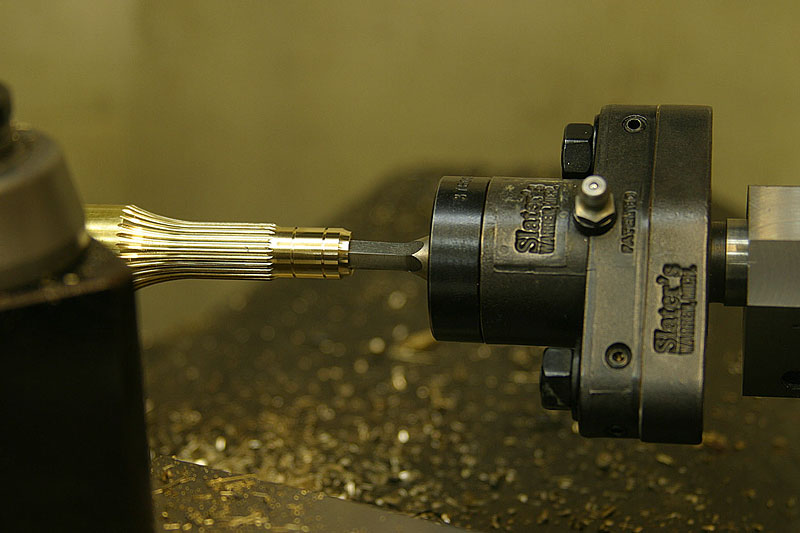 |
Then, I went back and plunged my rotary broach into the hole to produce the hex shape I'd need. |
 |
I set my compound to something like 25 degrees and cut a taper at the other end of the grip. |
 |
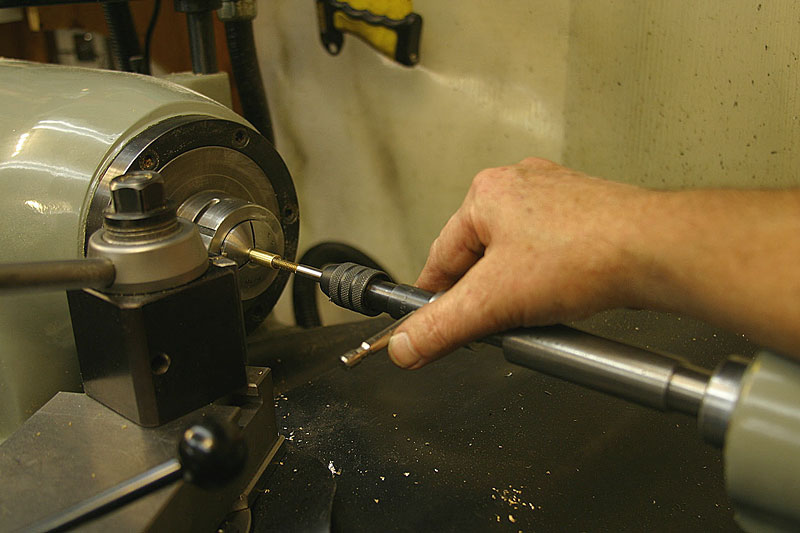
Then, pulling more stock out from the headstock, I brought up the tailstock and stuck the live center into the hole in the end of the work. With that much support it was straigtforward turning to reduce the end of the grip to the 5/16" onto which I'd mount the handle. |
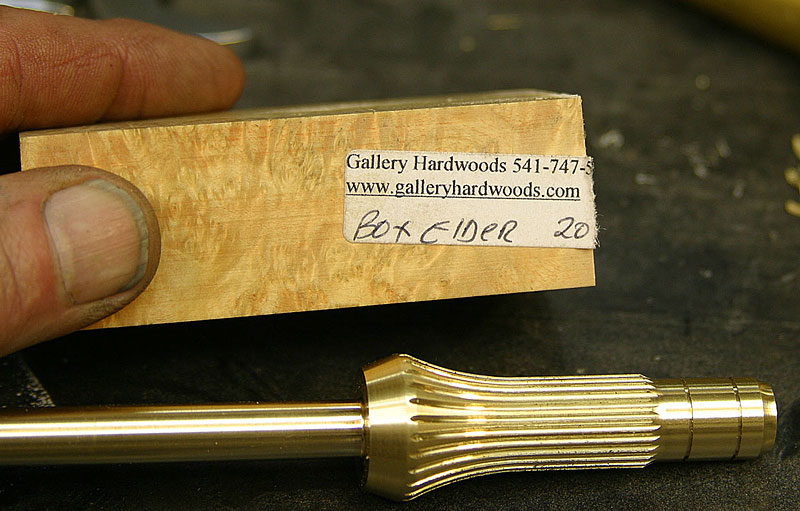 |
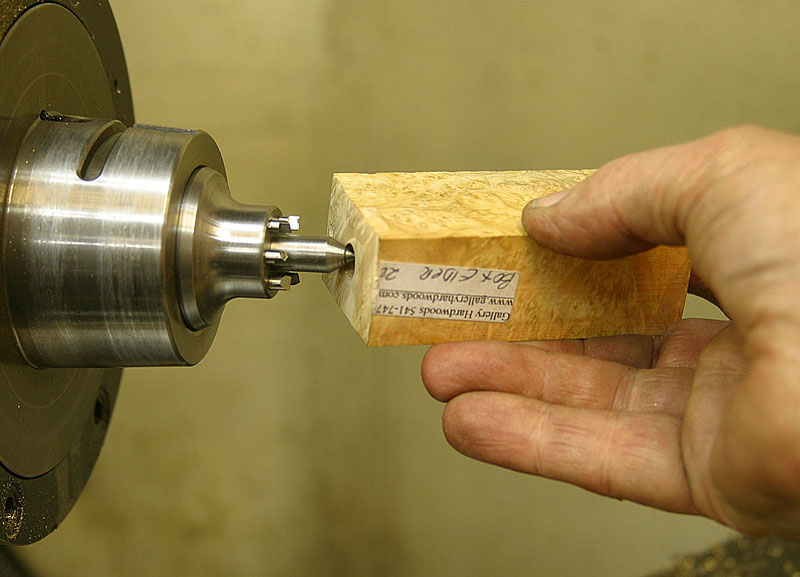
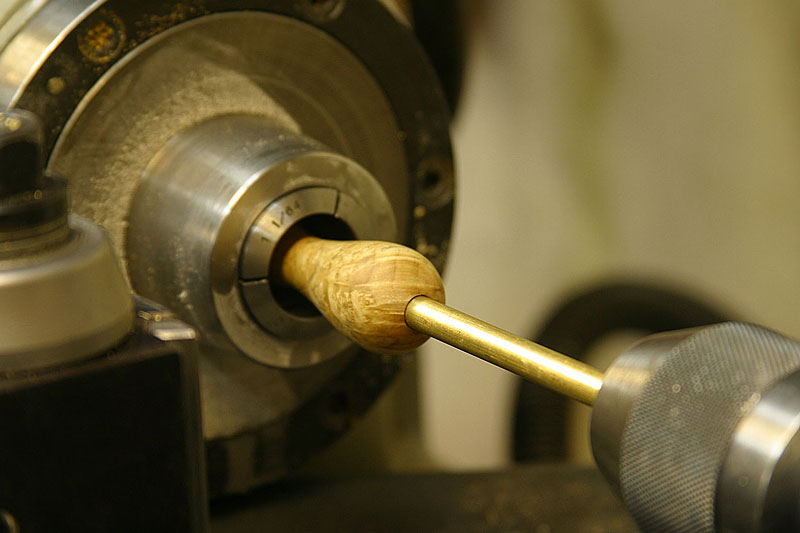
I made the handle from some of that resin impregnated facny wood the pen turners like so much. |
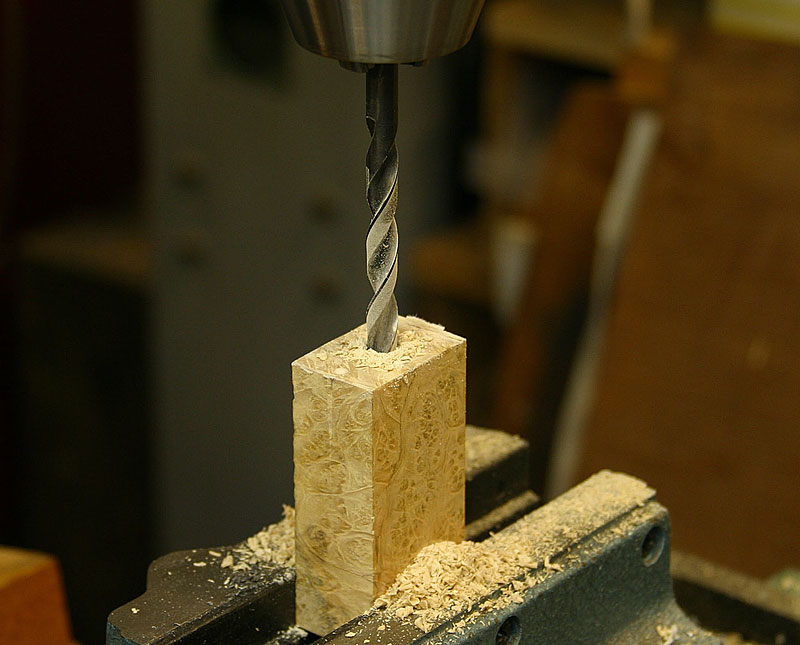 |
Drilling the blank for the handle before starting made certain that I'd have everything indexed to the axis of the driver. |
 |
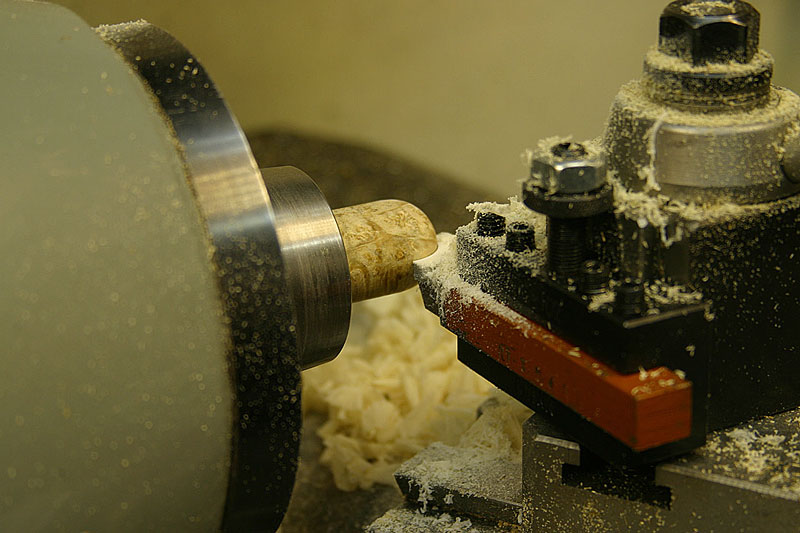
With my drive center in the headstock, I set up between centers and was ready to rough out the blank. |
 |
A few quick passes brought me a nice round blank. |
 |
I rounded the palm end of the 1" diameter handle with a 1/2" radius cutter. |
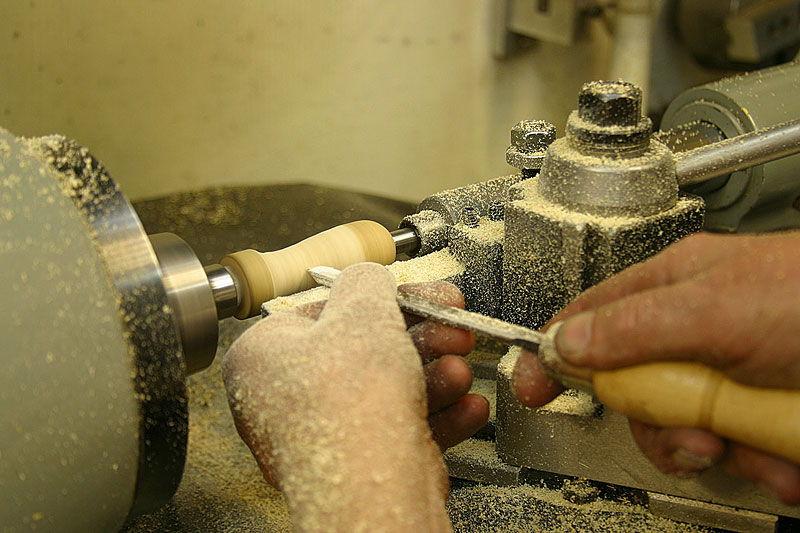 |
Now, with the work again between centers, I set up my toolpost mounted wood turning rest, and dragged out the old wood turning chisels to finalize the shape. |
 |
A few times off the lathe for trial fitting, and I had the profile and diameter I wanted. |
 |
Back to the driver grip - I stuck a 1/4" neodymium magnet on the end of a square drive screw bit. . . |
 |
. . . shoved it into the broached hex hole. . . |
 |
. . .and pressed it home with the bench vise. |
 |
I used the same radius bit to change the profile of a stainless round head cap screw so it would match the curve of my handle. |
 |
I wanted to grip the handle in a collet to countersink the screw neatly, so I stuck it on the end of a 5/16" rod I had chucked in the tailstock, slowly shoving it into the collet. After I tightend the collet, I withdrew the rod with a fair certainty that the handle would be centered on axis. |
 |
I countersunk the hole with a small boring bit, trial fitting the screw as I went along. |
 |
To drill and thread the end of the grip, I had to stick it into a collet from the inside. |
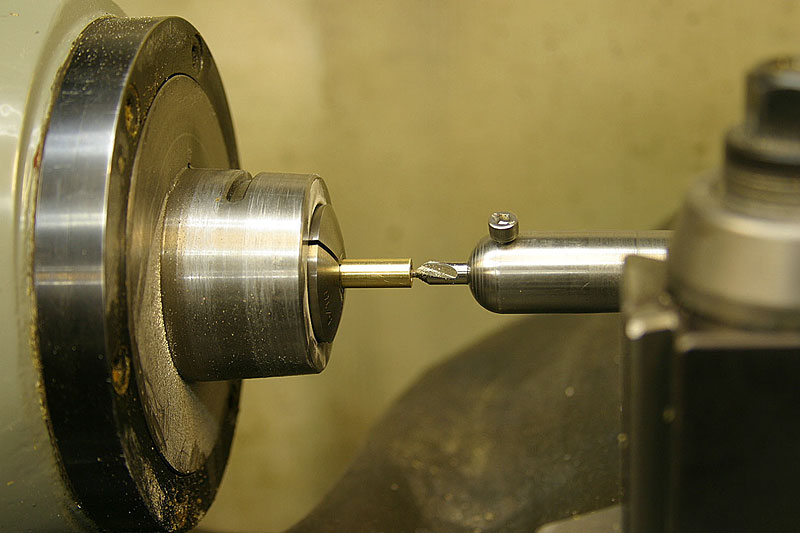 |
Then I could center drill. . . |
 |
. . . drill. . . |
 |
. . .and tap, keeping everything in alignment. |
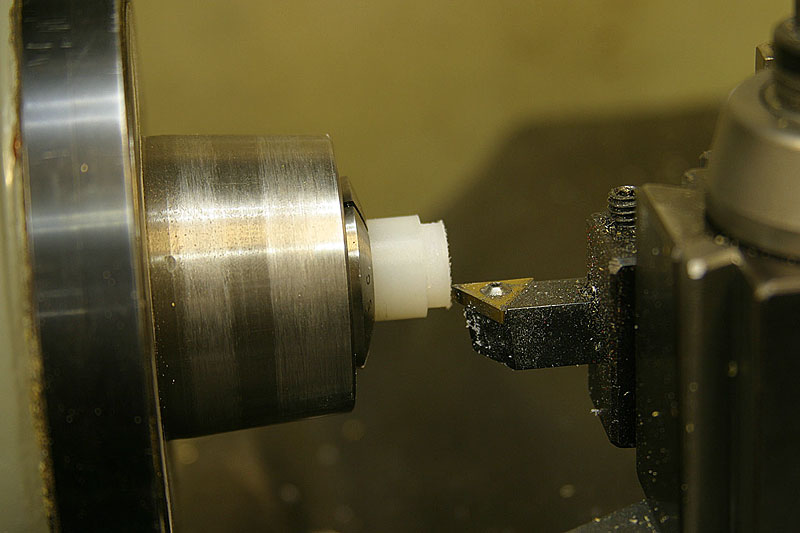 |
I wanted an antifriction washer between the handle and grip, so I picked a piece of ultra high molecular weight polyethylene (whew, that's a mouthful!) left over from a prvious project. |
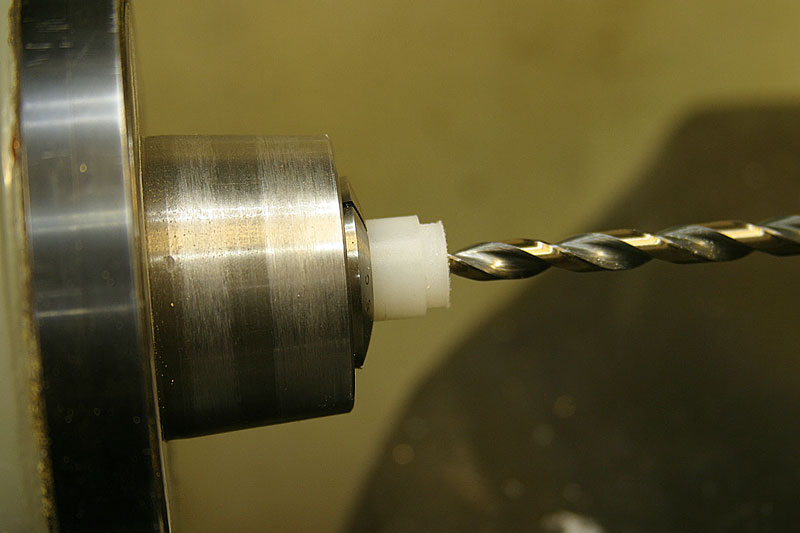 |
After turning the diameter, I drilled. . . |
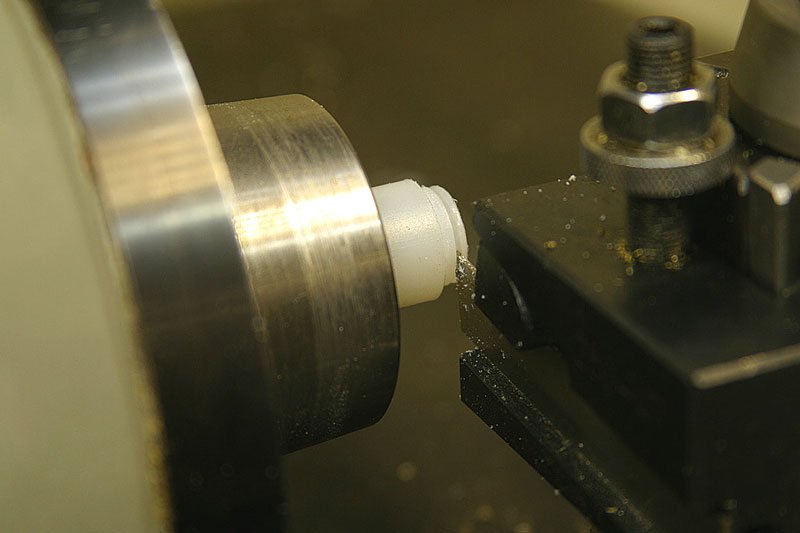 |
. . . and parted off a thin washer. |
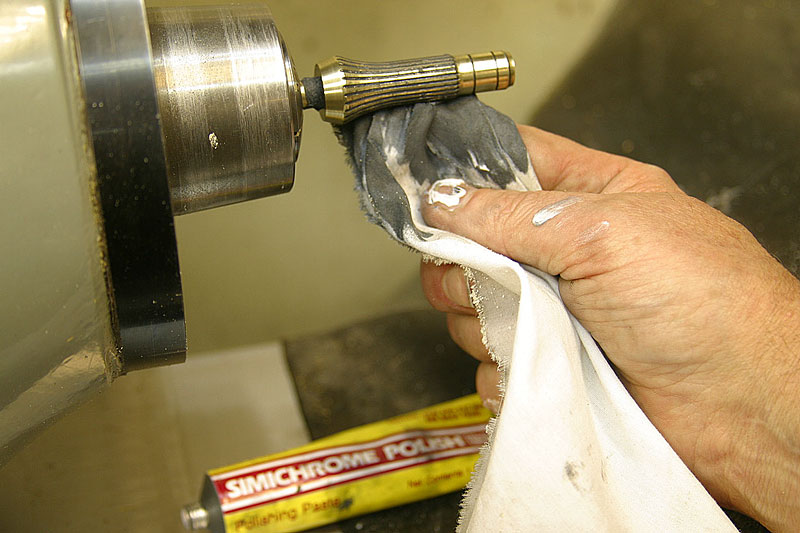 |
Time for a bit of polishing. |
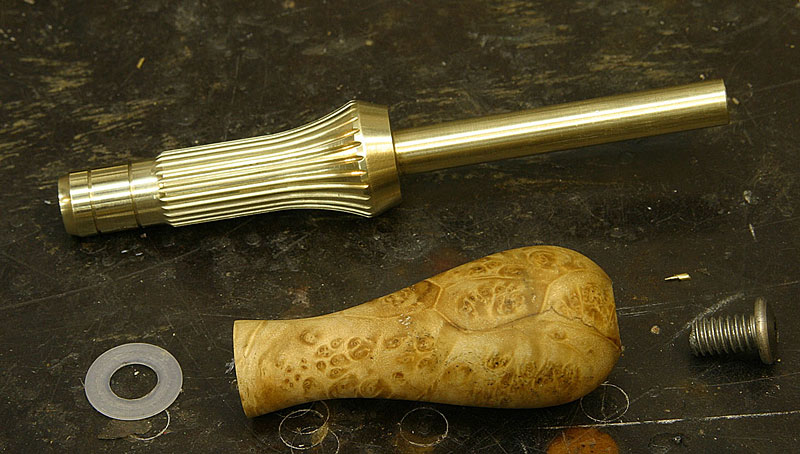 |
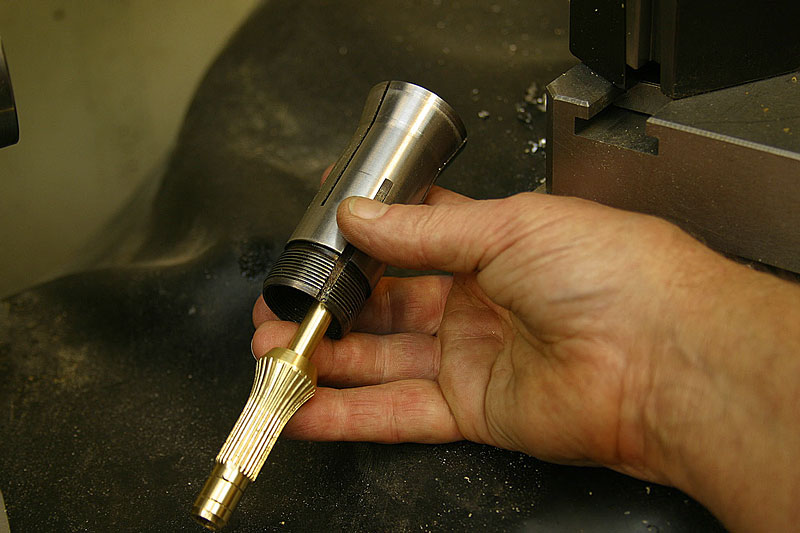
Here are the pieces, ready for assembly. |
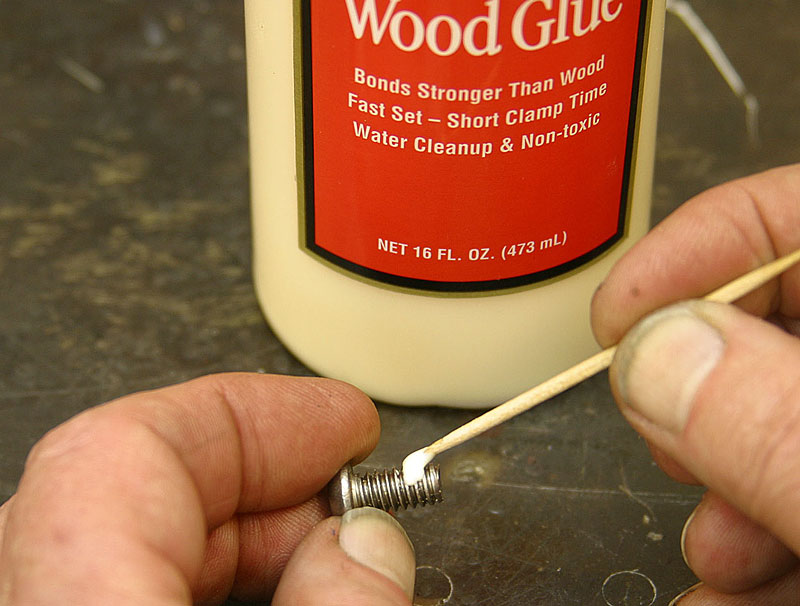 |
Instead of using regular Loctite thread retaining compound, I put a drop of regular aliphatic resin wood glue on the threads. That way, the screw won't tend to tighten or back out, and it will be easy to remove. |
 |
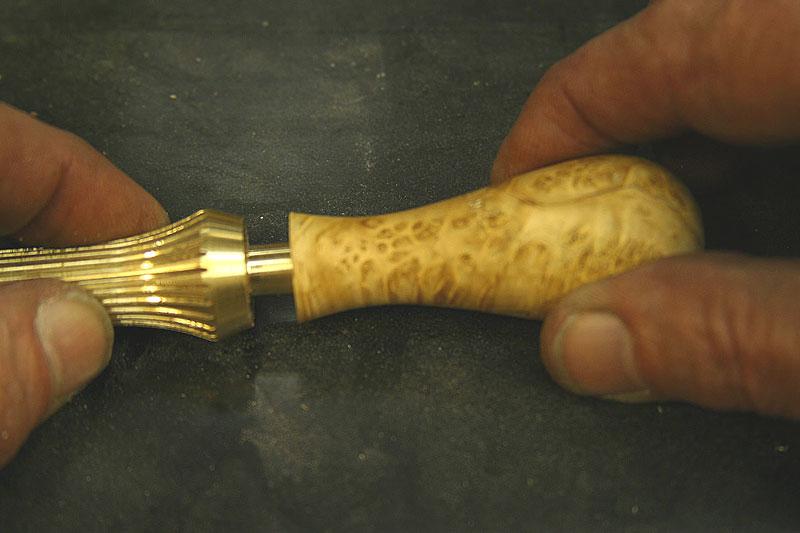
Here's a shot of the handle end. |
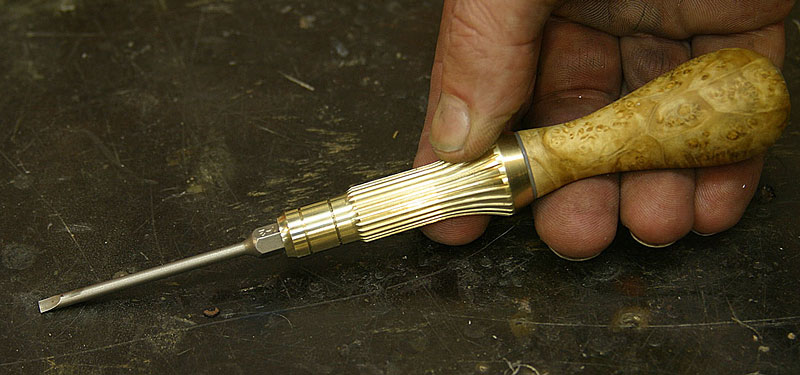 |
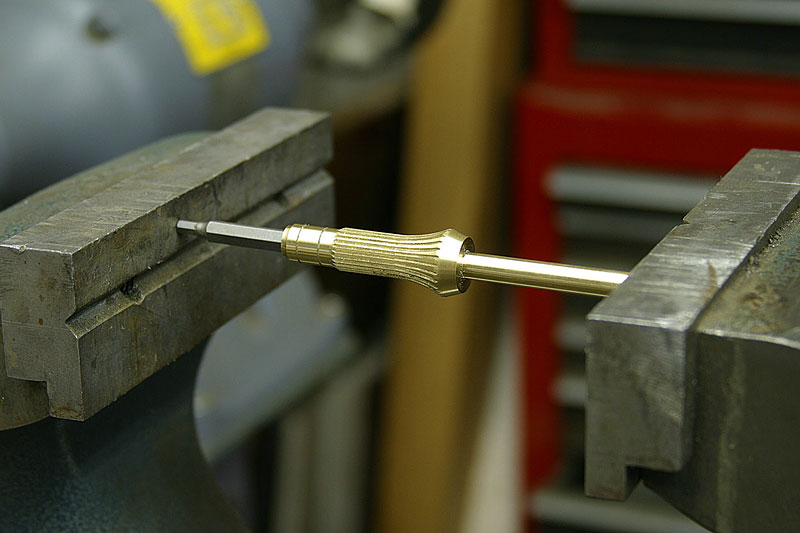
And the tool is done. Now I'll have to make some special bits, I suppose. |