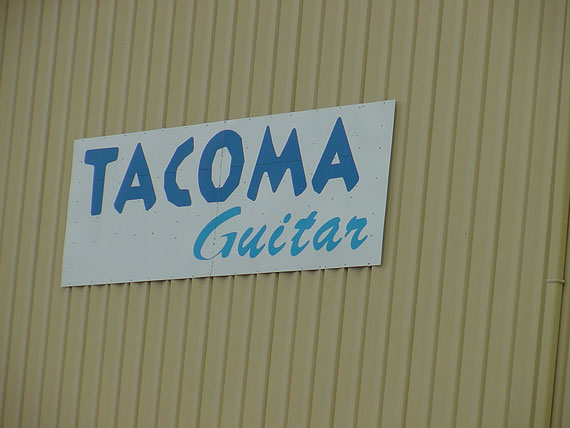
Things For Luthiers
  Repair Technique
    Setup
    Inlay
    Frets
    Tool Use
    High Tech Department
    Finish
    Structural
    Glue
    Guitar
      Structural
      Frets
      Pickguards
      Bridges
      Pickups
    Banjo
    Mandolin
    Ukulele
    Harp
    Case Repair
  Tools
My WorkBench
Making a Fluorescent Inspection Light
Proportional Nut Spacing Rule
Fret Tang Tools
Kenny Hill's Spring Go-Bars
A one-use Molding Plane
Fret Heater
Modified Soldering Gun for Pulling Frets
Upgrading Loose Dremel Bearings
A Slo-Mo Stationary Belt Sander
Dry Pigment Storage Box
Selecting String Cutters
Fret Height Gauge
A Simple Magnetic Tool Fence
Taylor's Super Driver
Bent Tools
Shot Bag Neck Support
Half a Pencil
Bridge Carving Machine
Shop-built Semiautomatic Lining Kerfer
Gryphon's Fret Saw
Joint Knife
A Two Bit Finger Saver
Long Probes
Articulated 'Take-Apart' Crack Clamp
Clamp Points for easy positioning
Bench Clamps
Adjustable saddle routing base
Special & Modified Clamps
Refret Saw Guide
Roy Noble's Dremel Router Base
Bob Gleason's Nut Handle
Folding Inspection Mirror
Dan Erlewine's Rockin' Pin Puller
Steve Crisp's Classical Guitar Tuning Stand
Bridge Pin Hole Slot Saw
Making Ergonomic Tool Handles
Tim's Saddle Pal
Making My Fret Expander Pliers
My Favorite Power Tool
My Weirdest Power Tool
Dovetail Neck Removal Fixture
Neck Removal Air Harness
Some of My Favorite Stock Tools
Check out the Spy Cam
Taper Thickness Gauge
  Shop Tips
  Data
  Product Reviews
Things For Musicians
  Accessories
My Field Trips
Tom Ellis Precision Pearl Inlay - Austin, Texas
Shubb Capos - Valley Ford, CA
Rick Davis, Running Dog Guitars - Richmond, VT
Ted Megas Guitars - San Francisco
Collings Guitars - Austin, Texas
Hideo Kamimoto's Shop - San Jose, CA
1999 Northern California Ukulele Festival
Taylor Guitars - El Cajon, CA
Northwoods Guitar Repair Seminar 1998 - Big Rapids, MI
Northwoods Seminar 2000
1998 Acoustic Guitar Festival - San Rafael, CA
Guild of American Luthiers Convention, 1998
Mario Martello - It's Super Mario!
Mario's San Franciscan
Bills ABC Music - San Bruno, CA
Joe Grubaugh & Sigurn Seifert, Violin Makers - Petaluma, CA
Down in Brian's Basement - Palo Alto, CA
Roberto-Venn School of Luthiery- Phoenix, AZ
Special Features
C. F. Martin & Co., Nazareth, PA
Collings Guitars- Austin, TX
Gibson's Acoustic Instrument Division, Nashville
Guitar Building with Jeff Traugott
CFox Guitars - Healdsburg, CA
Vogel Guitars - Quito, Ecuador
Kamaka Ukuleles - Honolulu
->Tacoma Guitar Co.
U.S.A. Custom Guitars
Repair/Restoration Blogs
1867 Martin 1-26
1940 Martin D-28
1937 Martin D-28
1920 Gibson K-2 Mandocello
Gryphon
A Quick Tour of Gryphon
Gryphon's 30th Birthday Party
Hey, it's Ramblin' Jack Elliot!
Cats and Jammers
Book Reviews
About the Reviews
Guitar Finishing, Step by Step - by Dan Erlewine
Martin Guitars- by Richard Johnston & Jim Washburn
Gallery of New Instruments
Caution!
New Instrument Gallery
  Guitars
Fun Stuff
What They're Saying About Us
The Luthier's Kitchen
Yowl-A-Lele
Alice's Gryphon Page
Cool Plates
Washburn Made a Lot of Everything
Father & Daughter United after 32 Years!
Gryphon's Famous Free Picks
Folk Art Gallery
Fine Art Instruments by Robert Armstrong
Every Circus Needs a SIDESHOW
The ORIGINAL Dreadnought!
Nothing Like Those Old Master Finishes
The Foldo
Holiday Tie-Dye Peeps
Nancy's Dessert Cake Bites
Ditson Dreadnought
Mashed Potatoes
Split Pea Soup
Potato Peeler
Café Foldo
Papa Schnooger
Mod, oh yeah!
Dunn Dreadnought
Coffee Gangs
dreadnought guitar.
my floor lamp.
Quick and Easy Caesar
The Waybacks
Instrument History and Lore
Looking Backward at the 20th Century
The Way We Were... "obsolete" repair styles
Origins of the 12-string Guitar
The World's Oldest Guitar
Washburn Banjo
Museum
FRETS.COM Museum
About The Museum
  Guitars
    Gibson
    Epiphone
    Washburn
    Selmer
    Gryphon
    Kay
  Banjos
    Gibson
    Weymann
    Paramount
    Bacon
    Fairbanks
    Vega
    Gryphon
    Misc.
  Mandolins
  Ukuleles
Home Shop Tech
HOME SHOP TECH Articles
#1 Sock Handle
#2 CD Paint Brush Can Cover
#3 Japanese Hand Saws
#4 Wax for Lubricating Saw Blades
#5 Pocket Knife
#6 Diamond Pocket Hone
#7 Air Blow Gun
#8 File Cleaning Trick
#9 Drilling Perfectly Clean Holes
#10 Clock Marker
#11 Disc Sander Cover
#12 Glue Thermometer
#13 Magnetic Fence
#14 Salad Tong Finger Saver
#15 Old Kitchen Knives
#16 Cutting Sandpaper
#17 Soundhole String Retainer
#18 Epoxy Leftovers
#19 Small File Handles
#20 String Crank
#21 Stain Palette
#22 Cotton Swab
#23 Portion Cups
#24 File Scraper
#25 Palette Knife Extension
#26 Saddle Contour
#27 Touch Up Lacquer Bottle
#28 Recycle Beverage Can
#29 Micrometer
#30 Toothbrushes
#31 Sander Safety
#32 Hemostats
#33 Compressed Air Lines
#34 Wine Cork Knife Point Protector
#35 Chisel Drawer Dividers
#36 Bent File Chisel
#37 Screwdriver Chisel
#38 Acetone Finish Test
#39 Bevel Fret Slot
#40 Solvent Cap Dispensing Cup
#41 Packing for Travel
#42 Pickup Brace Damage
#43 Coloring Glue
#44 Cutting Paper on Band Saw
#45 Quick Grip Brace Jack
#46 Wedge F-hole Clamp
#47 Guitar Wall Hanger
#48 Half Pencil
#49 Straw Pipette Extender
#50 X-brace Top Wrinkle
#51 Paper Pad Mixing Palette
#52 Fluorescent Replacement Bulbs
#53 Swing Arm Lamps
#54 Packing Pegheads
#55 Pyramid Bridge Clamping Caul - External
#56 Threaded Clamp Foot
#57 Masking Tape for Indexing Bridge
#58 Rubber Band Tuner Grommet Retainer
#59 Belt Sanding Celluloid
#60 Sharp Nut
#61 Side Crack Reinforcement
#62 Dry Pigment Sorting Block
#63 Paper Grain Direction
#64 Modify Drill Bit for Cutting Wood
#65 Fret Pullers Pull Other Things
#66 Heavy Duty Push Sticks
#67 Single Edge Razor Blades
#68 Acid Brushes
#69 Plastic Stretch Wrap for Tool Protection
#70 Bit Holder Blocks
#71 Cross Grain Sanding
#72 Truth in Labeling
#73 Plastic Wrap Glue Resist
#74 Cut Acid Brush
#75 Stretch Wrap Masking
#76 Spray Can Cap
#77 Spray Can Nozzle
#78 Kitchen Paring Knife for Shop Utility
#79 Powerless Belt Sanding
#80 Drill Index
#81 Grinder Support
#82 Leather Pliers Grip
#83 Paper Towel Holder
#84 Newspaper Drawer Liner
#85 File Handle
#86 Recycle Condiment Bottle
#87 Diagonal Cutter Selection
#88 Fatigue Mat
#89 Credit Cards
#90 PVC Shop Vacuum Tool
#91 String Retainer String
#92 Hex Wrench Rack Improvement
#93 Power Tool Casters
#94 Eyes and Ears
#95 Soft Vise Jaw Pads
#96 String
#97 Layout on Metal
#98 Storing Long Electrical Cords
#99 Hanging Coil Hoses
#100 Cutting Aluminum
#101 "Candling" Guitar Tops to See Brace Locations
#102 Locating and Tracing Braces with Magnets
#103 Foil Protection for Reamers
#104 Dry Sandpaper Lube
#105 Mixing Epoxy without Bubbles
#106 Spray Lube Siphon Tube Reinforcement
#107 Paper Towel Half Sheets
#108 Dusting Brush Modification
#109 Cutting Screws and Bolts
#110 Catalog Sale Flyers
#111 Gluing Bin Boxes
#112 Hacksaw
#113 Link Belt
#114 Freehand Band Saw Technique
#115 The Key Hole
#116 Ceiling Posters
#117 Magnetic Screwdriver
#118 Wide Disposable Brush
#119 Veneer Cutting on Band Saw
#120 Finding Center by Balance
#121 Hacksaw Duplicate Parts
#122 Chuck Key Magnet
#123 File Card for Cleaning Saw Blade
#124 Calculator Bag
#125 Door Storage
#126 Magnetic Pocket Screw Holder
#127 Paint Can Lid
#128 Quick Tape Strap for Sensitive Items
#129 Shop Vac Hose Strain Relief
#130 Coiling a Band Saw Blade
#131 Oil Spill Cleanup
#132 Wood Parallels
#133 Masking Tape Handles
#134 Wedges
#135 Tethered Door Stop Wedges
#136 Long Air Hoses
#137 Soda Straw Parts Storage
#138 Hanging Holes for Tools
#139 High Item Picker
#140 Tool Index Wood Infill
#141 Cardboard Drawer Liner
#142 Waste Basket Bungee
#143 Tool Covers
#144 Bungee
#145 Magnetic Bit Storage Drawer
#146 Platform Ladder
#147 Magnetic Tool Pickup
#148 Kitchen Hero - Cutting Board
#149 Kitchen Hero - Diamond Hone
#150 Photographs for insurance
#151 Unscrew Container Safely
#152 Little Boxes - Get Rid of Lid
#153 Swivel Casters for Tool Cabinets
#154 "Temporary" tool stands
#155 Tool Drawer Dividers
#156 Rope Trick: Cutting
#157 Broom Handle
#158 Hand Drill Countersink
#159 Using Digital Calipers
#160 Identifying Metric Hex Keys
#161 Dremel Carbide Cutoff Wheel
#162 Fence Hand Safety
#163 Empty Bin Boxes
#164 Cutting Bin Boxes
#165 Camphor
#166 Decant Epoxy to Avoid Quick Reaction
#167 Epoxy Mixing on File Folder "Palette"
#168 Wood Screw Pilot Drill Size
#169 Reverse Switch Safety Bolt
#170 Keyless Chucks
#171 Work Glove Storage Rack
#172 Cutting Spring on Grinder
#173 Stacking Tool Cabinet Bottoms
#174 Label Those Drawers
#175 Extra Drill Chuck
#176 Sauce Pan
#177 Ball End Hex Wrench
#178 Poly Bottle Bottom for Parts Washing Basin
#179 Square Bottle Bottom for Parts Drawer Bins
#180 Screws in Jars
#181 Salvage Hardware Drawer
#182 Cutting Long Cardboard Tubes
#183 Repetitive Length Cutting on Band Saw
#184 Mark Up Your Ruler
#185 Plastic Containers and Solvents
#186 Mobile Bin for Wood Scraps
#187 Scrap Bin Cover
#188 Scrap Bin Triage
#189 Ball Peen Hammers
#190 Old Rags to Prevent Under Bench Hunting
#191 Storing Magetic pickup tools
#192 Duct Tape Mallet
#193 Cut Down Old Paint Brush
#194 Plastic Bag Makes Emergency Glove
#195 Break a File to Make Short Ones
#196 Magnets to Hold V-Block
#197 Steel Rules May Have Poorly Cut Ends
#198 Buy Files by the Box
#199 Battery Charger Maintenance
#200 Extending Cable Ties
#201 Miter Gauge Alignment
#202 Recycle Paint Thinner
#203 Spray Can Freshness Reminder
#204 Pipette Sealing Trick
#205 Cookie Sheet Chip Pan
#206 Extension Cord Strain Relief
#207 Super Glue "String Needle"
#208 Heavy Duty Extension Cords
#209 Magnetic Book Hangup
#210 Paint Special Tool Handles for Identification
#211 Hang up those brooms
#212 Wood V-Blocks
#213 Miter Gauge Rip Fence
#214 Writing on Saw Table
#215 Saw Table Wax Lube
#216 Toilet Paper
#217 Dispensing Paint
#218 Cutting Short Pieces on Band Saw
#219 Recyled Cardboard Box Tote
#220 Phonograph Needle Scriber
#221 Wall Mounted Tin Can Tool Holders
#222 Dental Floss Sewing Thread
#223 Cut Paper Towel Roll
#224 Hand Tool Oiler for Rust Protection
#225 Tool Instructions Taped Inside Drawers
#226 Forstner Bits in Aluminum
#227 No-Mess Spill Wiping
#228 Roll Wrapper as Spill Wiper
#229 Shop Rags from Bed Sheets
#230 Cutting Shop Rags on the Band Saw
#231 Rubber and Vinyl Mats on Concrete Floors
#232 Tape for Removing Splinters
#233 Cutting Steel Wool Pads
#234 Paint Can Lid Installation
#235 Pouring from Gallon Cans
#236 Cutting Clear Plastic on the Band Saw
#237 Masking Tape Dispenser
#238 Toothpick Brush
#239 Bailing Wire Spool Retainer
#240 Twisting Wire
#241 Penetrating Epoxy Sealer
#242 Remove that Acrylic Plastic Protective Sheet
#243 Hex Key Cheater Bar
#244 Sand Bags
#245 Label Special Tools and Fixtures
#246 Masking Tape Storage
#247 Paraffin lube for Band Sawing Aluminum
#248 Special Push Sticks
#249 Paper Towel Core for Cord Storage
#250 Skinny "Paintbrush Broom"
#251 Blow out Shop Apron Pockets
#252 Buy Good Hacksaw Blades
#253 Grind the "Set" from Blades to Get Narrow Kerf
#254 Convertible Step Stool
#255 Photograph Your Work
#256 Sweep the Floor
#257 Tool Cabinet "Breadboard" Shelf
#258 Hang Goggles Near Tools
#259 Mark Edges to be Cut
#260 Garbage Can Table Top
#261 Magnetic Spray Can Holder
#262 Removing Box Labels
#263 Simple Dolly and Hoist to Move Heavy Items
#264 Recording Lent Tools
#265 Abrasive Paper for Sharpening Chisels
#266 Close the Gap on Grinding Wheel Tool Support
#267 Keep Band Saw Blade Guide Low
#268 Used Engine Oil for Shop Duty
#269 Shop Vac Hose Hanger
#270 Grinding Center Punch Point
#271 Pilot Drill Size for Large Drill Bit
#272 Reverse Drilling to Enlarge Hole
#273 Drill Clamp Feet for Accessories
#274 Glass Microscope Slide Scraper
#275 Bubble Wrap Packing Trick
#276 Cold Chisel Safety Tip
#277 A Really Simple Drill Guide
#278 Drill Press Center Finder
#279 Split Point Drill Bits
#280 Variable Pitch Band Saw Blade
#281 Guitar Strings for Other Uses
#282 Cyanoacrylate Catalyst Bottle
#283 Mangetic Holder for Small Parts
#284 Drilling Cotton Buffs
#285 Diamond Grinding Wheel Dresser
#286 Heat to Remove Sticky Labels
#287 Paint Metric Wrenches
#288 Stackable Cottage Cheese Containers
#289 Aligning Wood Screw Slots
#290 Drilling Round Things
#291 Screw Machine Length Drills
#292 Relief Cuts on Bandsaw
#293 Cross Cutting Long Board on Band Saw
#294 Glue Quick Grip Pads
#295 Resealing Caulk Cartridges
#296 Cyanoacrylate as Wood Sealer
#297 Messy Milling Project
#298 Drill Press Can Cut You When it's Turned Off
#299 Get a Big Vise
#300 Friendly Plastic Ergonomic Handles
#301 Mount Stuff on Cabinet Doors
#302 Wall Bumper Near Electrical Plugs
#303 Keep Dustpan in Trash Can
#304 Ice for Cooling at the Grinder
#305 Making Heavy Twine from Thin
#306 Ice Cube Tray Parts Storage
#307 Cable Ties for Hanging Tools
#308 Cleaning Measuring Tapes
#309 CD-ROM Canister for Adhesive Tape Storage
#310 Split Rivets
#311 Impact Driver
#312 Repetitive Bandsaw Cuts
#313 Old Shower Curtain as Tarp
#314 Replace Thumbscrews on Machines
#315 Have a Little Fun
#316 Magnetic Wrench Holders for Power Tools
#317 Measuring Centers on Uneven Sizes
#318 Reconditioning Sharpening Stones
#319 Magnetic Tool Holders for Drawers
#320 Improvised Masking Tape Bandage
#321 Lok-Line as Flexible Support
#322 Clamping with Drill Press
#323 Camera Tripod Stabilizing Weights
#324 Computer Labels for Drawers and Boxes
#325 Extra Casters for Welding Cart
#326 Use Long Screwdrivers
#327 Soaking Parts in Solvent
#328 Making Safe Edge Files
#329 Cut Cans for Shop Use
#330 Magnets for Bending in Vise
#331 Non Matching Handles are Best
#332 Steel Strap Shim Stock
#333 Stretch Wrap to Secure Solvent Labels on Cans
#334 Mark Pipette Graduations
#335 Keep a Shopping List
#336 Label Unusual leftover Hardware
#337 Magnet to Hold Abrasive Strips on Lathe
#338 Handle to Replace Thumb Screw
#339 Magnet Holds Water Bath on Grinder
#340 Magnets Hold Drill Index on Drill Press Table
#341 Label Grit on Sanding Belts
#342 Mouse Pads for Drawer Liners
#343 Cutting Shallow Notches on Band Saw
#344 Clearing Dispenser Bottle Opening
#345 Faucet Washer as Tool Foot
#346 1-2-3 Clamp It
#347 Tubing for Grinder Support of Thin Pieces
#348 Ring Testing Grinding Wheels
#349 Support Thin Stock for Drilling
#350 Digital Caliper as Tweezer
#351 High Speed Steel Taps
#352 Plastic Bag Thread Protection for Jars
#353 Shop Vac Sock
#354 Bandsaw Thin Stock on Edge
#355 Shop Towel Identification
#356 Pennies are Worth Having
#357 Bag Loose Wires and Cables
#358 Pizza Boxes
#359 Timer for Heat and Fan
#360 Cardboard Floor Mats
#361 Chip Curtain
#362 Cigarette Papers
#363 Age Date Glue Containers
#364 Don't Crumple Old Notes
#365 T-Shirt Tool Cover
$366 Liquid Hand Cleaner
#367 Shop Shelving
#368 Foot Control for Bench Vise
#369 Adjustable Wrench as Caliper
#370 Milk Carton Drawer Bins
#371 Long Bin Boxes on Narrow Shelves
#372 Pencil Sander
#373 Garage Sale Items Can Have Interesting Uses
#374 Hanging Rag Storage
#375 Note Holder at the Door
#376 Simple Upgrade for Quick Grip Clamps
#377 Keep Project Inspirations Handy
#378 Mark Source and Cost on Stock
#379 Label the Size of Staples in Your Staple Gun
#380 Easy Handle for Small Heavy Stock
#381 Check Steel Before Filing
#382 Paint with Your Socks
#383 Centering a Drill on Round Stock
#384 Impromptu Large Hex Key
#385 Cutting "Half a Kerf" on the Band Saw
#386 Squeeze the Last Bit out of a Glue Tube
#387 Use a Copier for Quick "Drawings"
#388 Measuring Over a Ledge
#389 Clean up "Spun" Drill Bit Shanks
#390 Changing the Zero Point on Graduated Dials
#391 Dispensing Small Amounts from Spray Can
#392 Paint Can Opener
#393 Broken Files are Handy in Close Quarters
#394 Buy Small Containers of Some Stuff to Save Money
#395 Kitchen Towels Have Four Lives
#396 Solvent "Recycling" Trick
#397 Still Hung Up on Rags
#398 Simple Leather Finger Saver
#399 Missing Stud
#400 How Much is Left in That Paint Can?
#401 Storing Spare Parts for Machines
#402 Label Adjustment of tools or Gauges
#403 Simple Grinder Safety
#404 Lubricate Wood Screws
#405 Break the Corner for a Tight Fit
#406 Weak Thread Locking Compound
#407 Rope Burn Trick
Glossary
An Illustrated Glossary
Archtop
Armrest
Backstrip
Ball End Strings
Bar Frets
Bearclaw
Belly Bridge
Binding
Birdseye Maple
Biscuit
Blind Saddle
Block Inlay
Book Matched
Bottleneck
Bout
Bowl Back
Box
Break Angle
Bridge
Bridge Pins
Bridge Plate
Button
Cantilevered Fingerboard
Capo
Celluloid
Check
Chipboard Case
Classical Guitar
Clown Barf
CNC Computer Numerical Control
Compensation
Cutaway
Dot Neck
Dovetail
Dreadnought
Ears
Edge Dots
End Block
End Piece
Endpin
Endpin Jack
f-Holes
Fan Bracing
Fiddleback Maple
Fifth String
Fifth String Capo
Figure
Fingerboard or Fretboard
Fingerpick
Fingerrest
Fingerstyle
First Position
First String
Flamed Maple
Flamenco Guitar
Flat Top
Flatpick
Flight Case
Frets
Gig Bag
Grain Runout
Hardshell Case Anatomy
Hawaiian Guitar
Hawaiian Nut
Heel
Heel Cap
Herringbone
High/Low Position
Hollow Body Electric Guitar
Ivoroid
Ladder Bracing
Lap Steel
Lining
Loop End String
Mitered Purfling
Mother-of-Pearl
Neck Block
Nut
Pearl Border
Peghead or Headstock?
Pegs
Pickguard
Pickup
Pin Bridge
Pinless Bridge
Purfling
Pyramid Bridge
Quilted Maple
Relief
Resonator
Resophonic
Ribbon Grain
Ribs
Rosette
Saddle
Scale Length
Scroll
Silk
Slack Key
Snakehead
Solid Body Electric Guitar
Spanish Heel
Steel
Steel Guitar
String Ramps
T-Bar
Tailpiece
Three Piece Back
Through Saddle
Thumbpick
Tie Block
Truss Rod
Truss Rod Cover
Volute
Waist
Which way is up?
X-Brace
General Stuff
About Me
What is FRETS.COM?
I'm on the cover!
Why FRETS.COM?
About the photographs. . .
Help!
Photo Studio
Contributors
my home shop this morning
Mario Martello 1924-2006
OOPS!
Resume
Links
FRETS Links
/Special Features/

Tacoma Guitar Co.

This was converted from the original Frets.com site.
To view the original page click here

Making lots of guitars in the Northwest

Photos by FF, 7/6/01, also by Bryan Galloup & Julius Borges, as noted


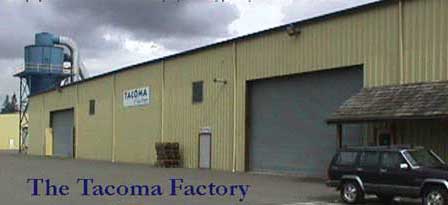
This photo is from the Tacoma Guitars Web site.

Only a few years old, the Tacoma Guitar factory has become the third largest volume produce of acoustic guitars in the country. I took a side trip with some G.A.L. members during the convention in July to visit the plant.

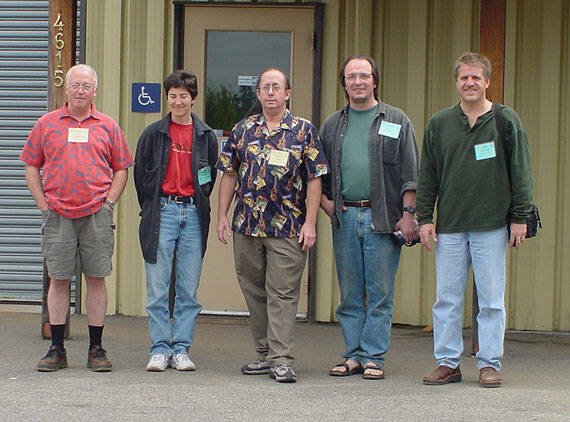
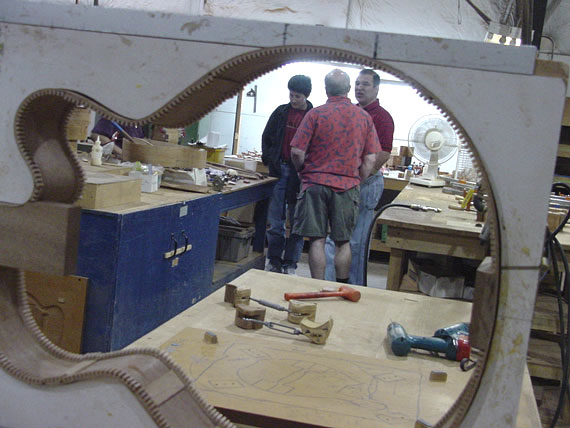
Here's our little group, left to right: Dan Erlewine, Annie Prefontaine, me, Julius Borges and Bryan Galloup.

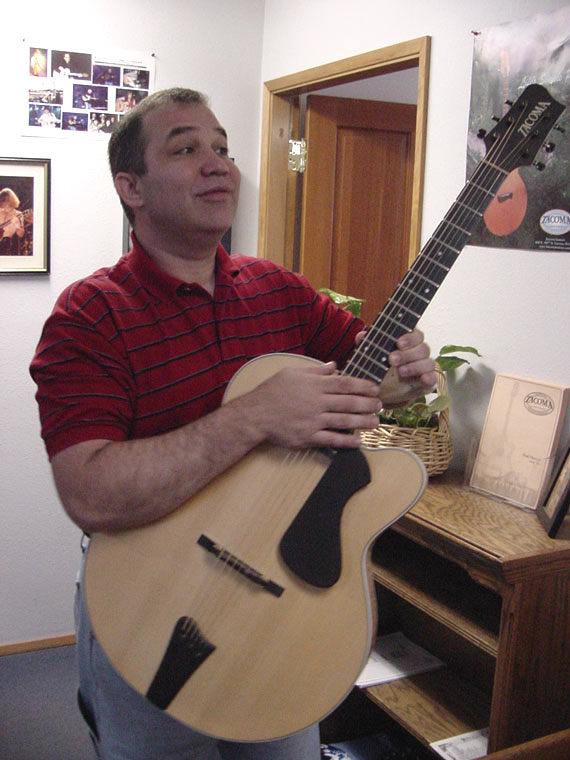
Our guide for the day, and prduct development manager at Tacoma Guitars, Terry Atkins. Terry is a player, and passionate about guitars (aren't we all?)

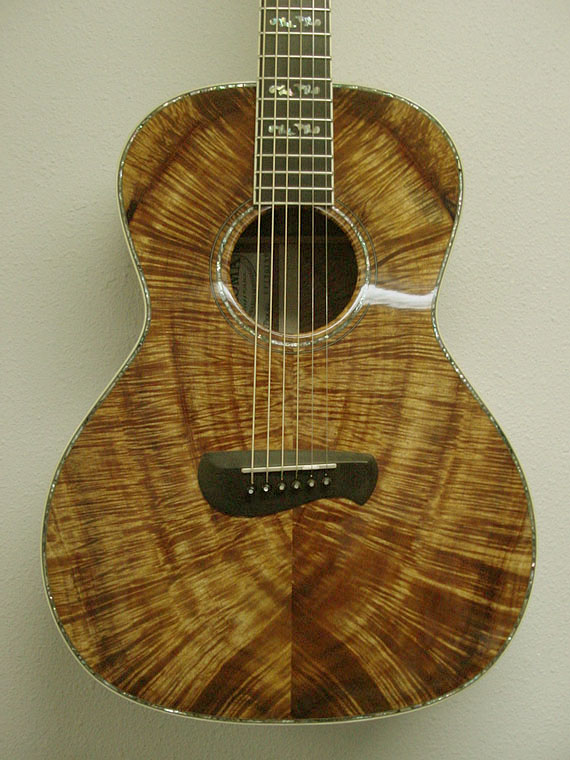
Like many other builders, the folks here at Tacoma reserve some of their most interesting materials for special projects. This koa guitar makes a fine impression when visitors walk into the office.

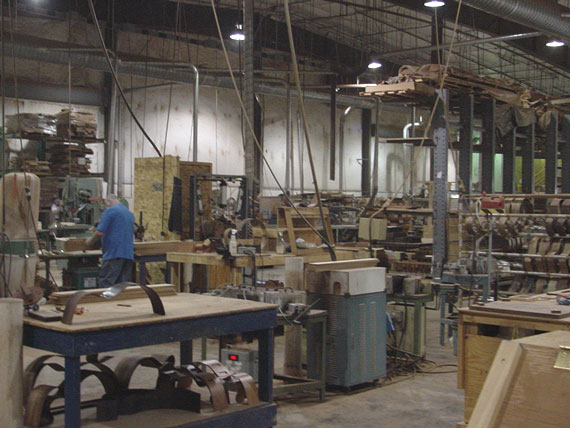
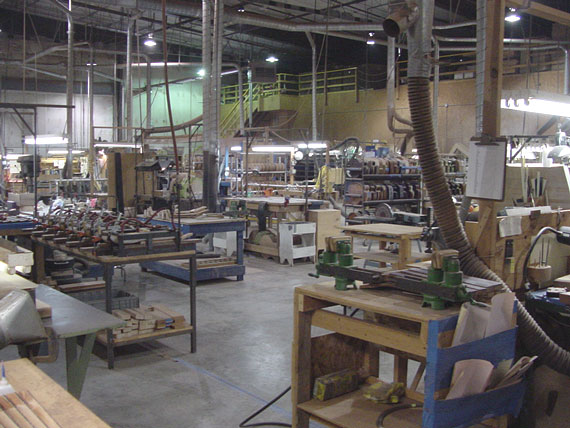
This is a big industrial building, and all the wood processing and manufacturing takes place in one huge room.

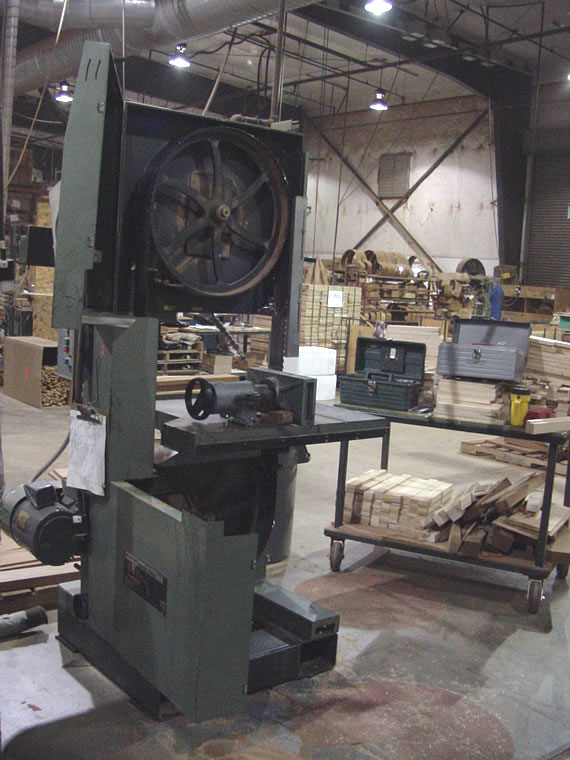
The owners of Tacoma guitars operate a sawmill and a piano soundboard factory in adjacent buildings, so there's no lack of heavy wood handling equipment. In fact, they actually manufacture their own big band saw blades from raw steel stock, cutting the teeth, hardening, etc.

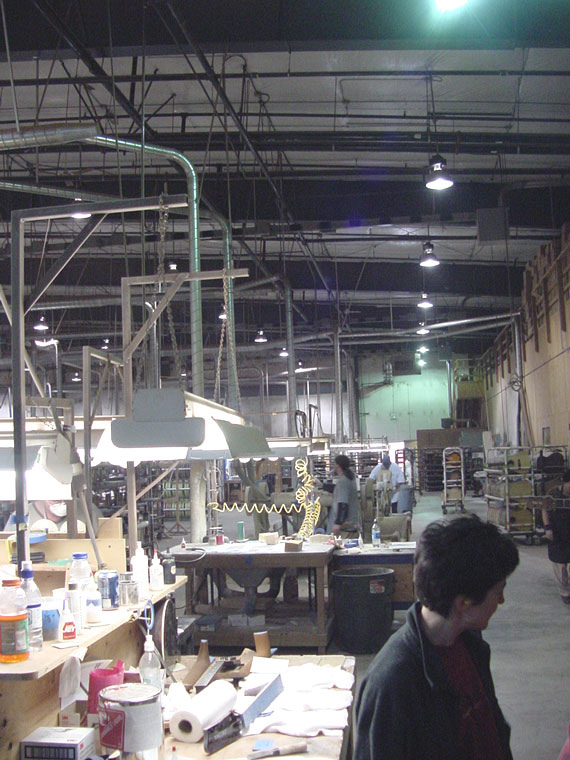
It's not exactly quiet in here, but the high roof line helps mitigate the typical industrial woodworking noises.

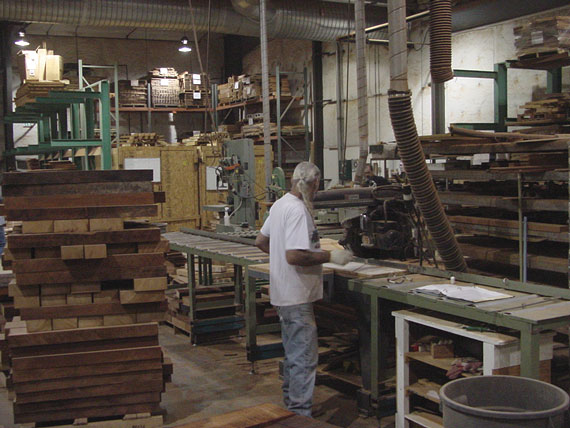
Heavy lumber comes in here at the far end of the building to be cut into neck blanks, backs and sides, and the various other guitar component parts.

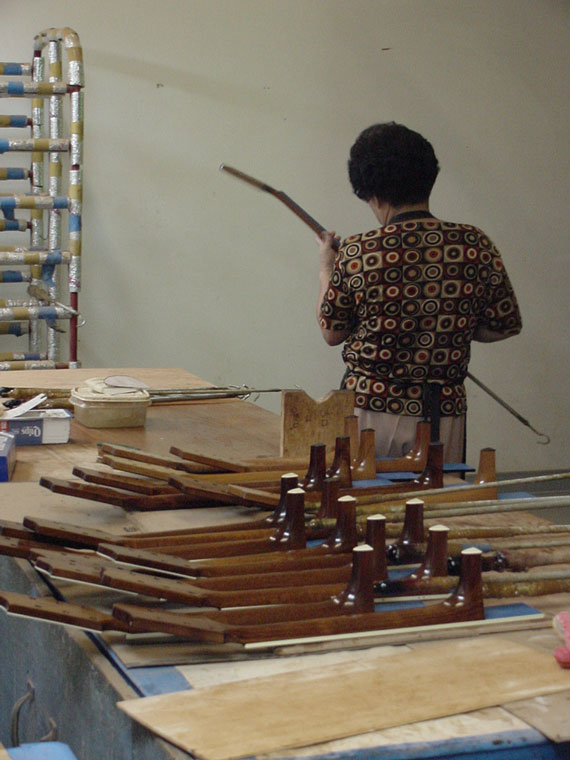
This is a view back toward the guitar assembly area. Sixty woodworkers, instrument builders and finishers make nearly 50 guitars a day here!

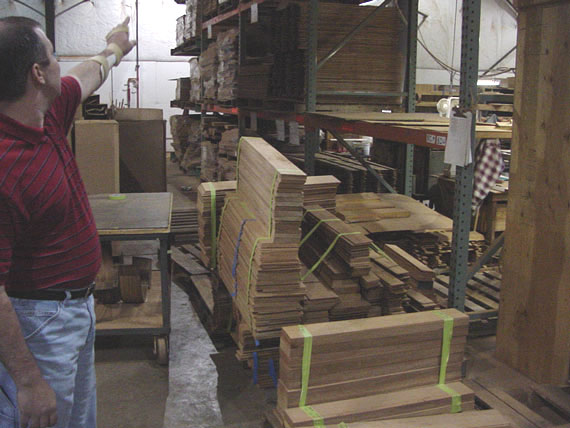
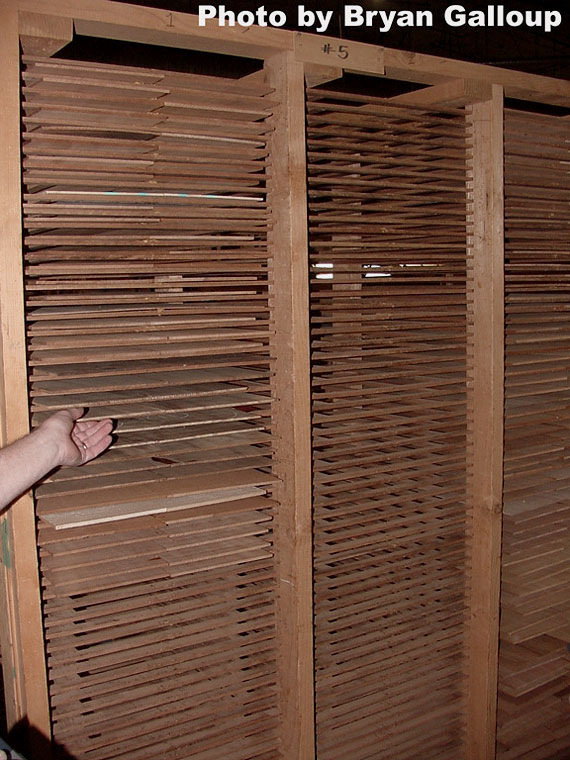
Once they are cut to dimension the backs, sides and neck blocks are stored for a while to acclimate before use.

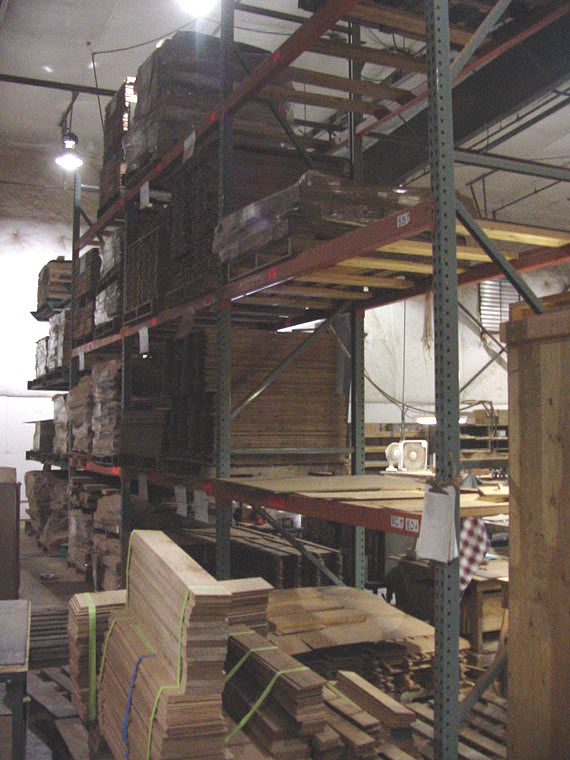
It takes a tall fork lift to get up there, and entire pallets of wood are used every week.

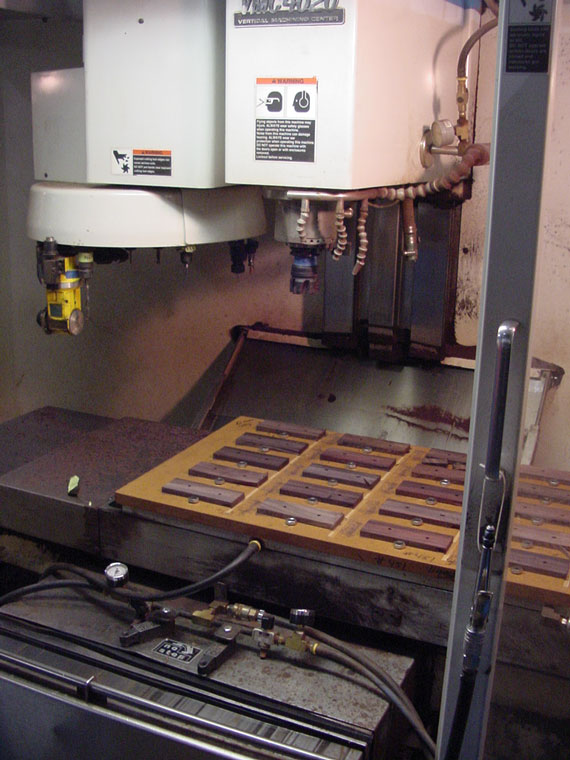
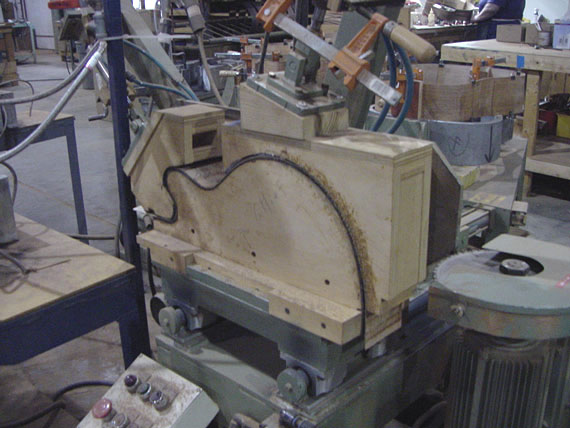
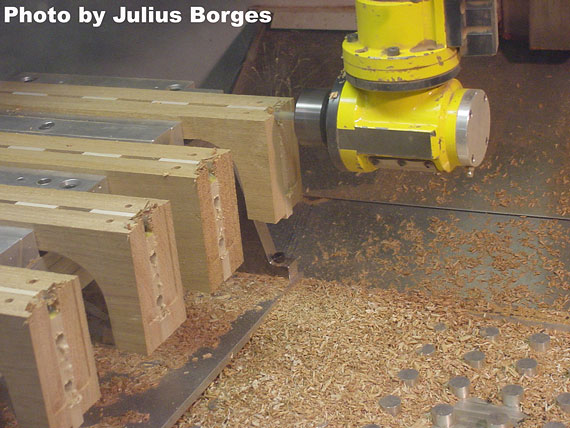
Here's one of the infamous robot wood munchers, hard at work making bridges. This computer controlled (CNC) machine works to incredibly tight tolerances, and automatically carves intricate parts, changing its own cutter heads and bits as required for the individual job. It takes a skilled programmer and operator to keep this big fellow running smoothly. Four of these machines run full time, making bridges, necks and interior components such as neck blocks and braces.

The backs and tops are "jointed" on a simple old fashioned shaper. This is the kind of job that could be done with precision on the CNC machine, but a hand operator can do just as good a job much faster.

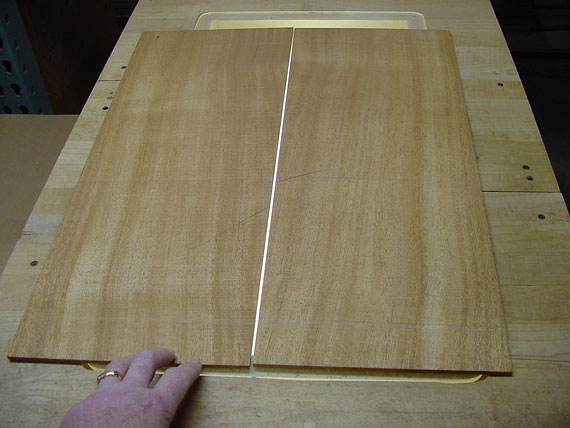
The quality of the joint is checked on a light table to make sure the parts fit tightly.

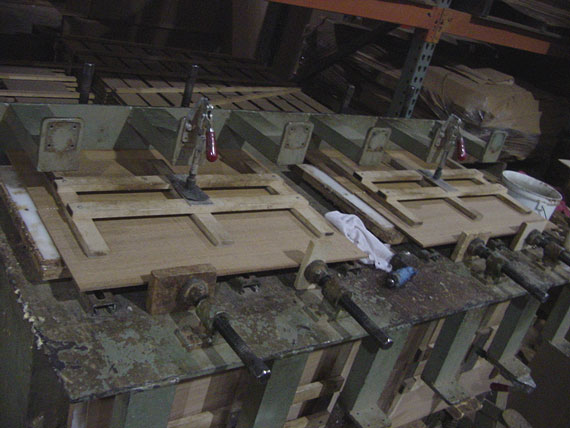
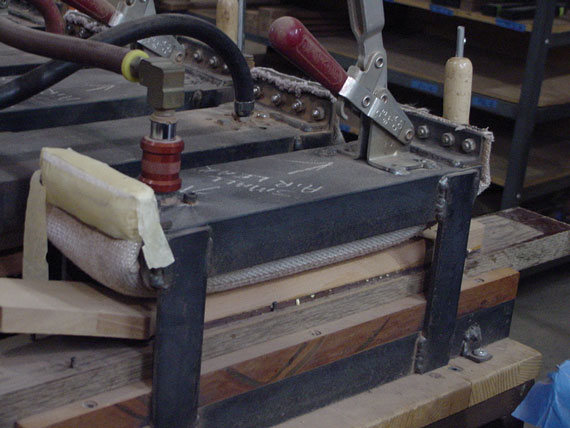
Nobody seems to know how old this glue-up fixture is. It's monstrously heavy and solid - one of those old time tools that was really built to last!

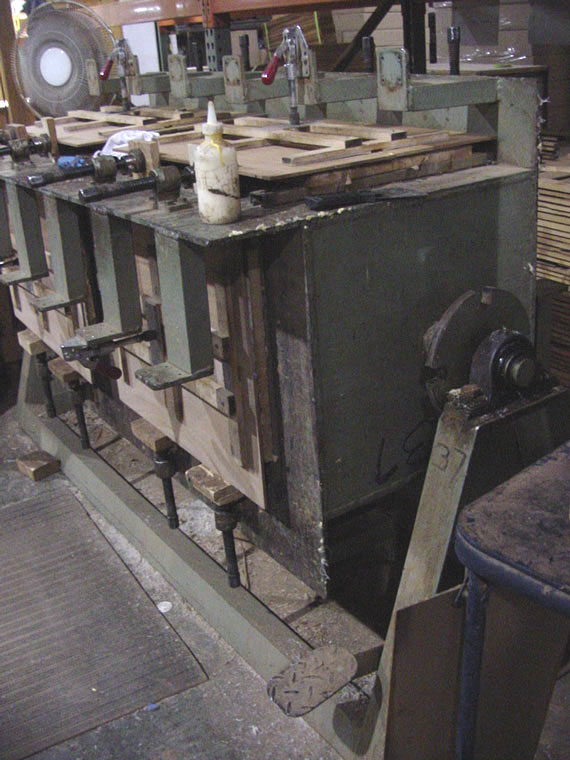
Check it out. Heavy as it is, the entire assembly rotates smoothly on a big axle. The operator steps on a foot pedal to release it, and turn it to one of four work surfaces.

Right behind, there's a big rack of joined tops and backs, ready to be sanded to thickness.

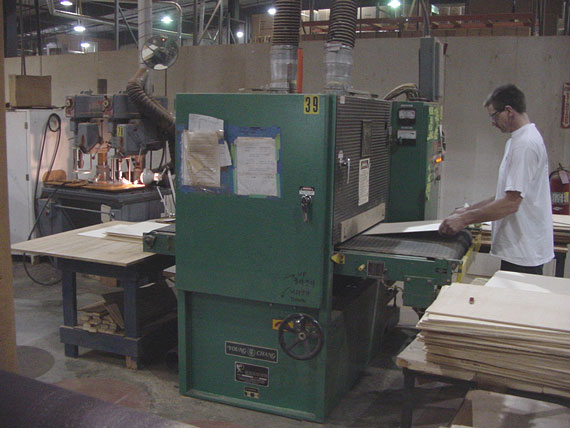
This Timesaver sander makes quick work of the job. Fast as the pieces are loaded on the moving belt, they plop out the back end, reduced to uniform thickness for their respective instruments.

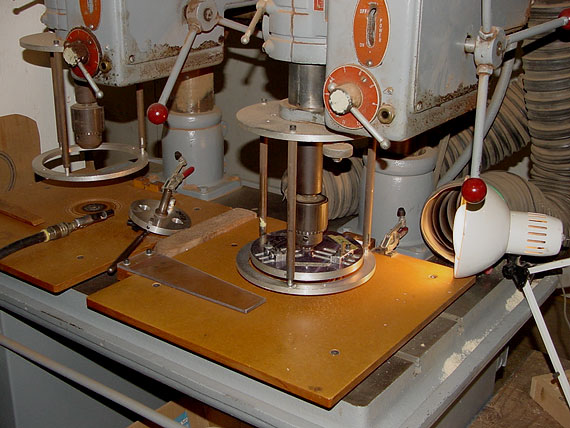
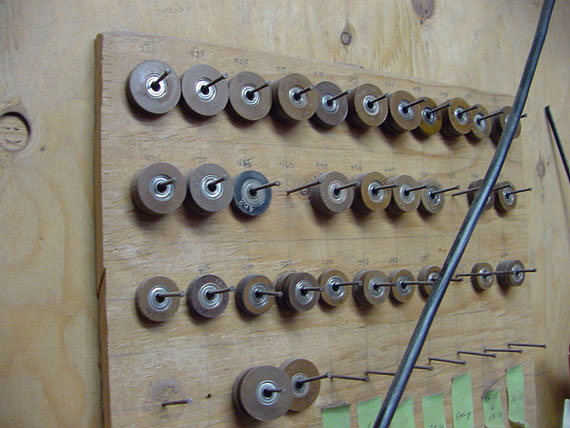
Soundhole rings are routed on these two mill-drill machines. Notice the big safety guards. I'll bet OSHA likes them!

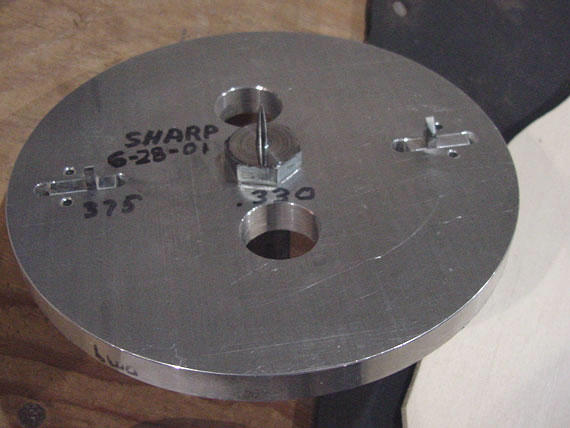
The cutter head. There's one for each soundhole pattern.

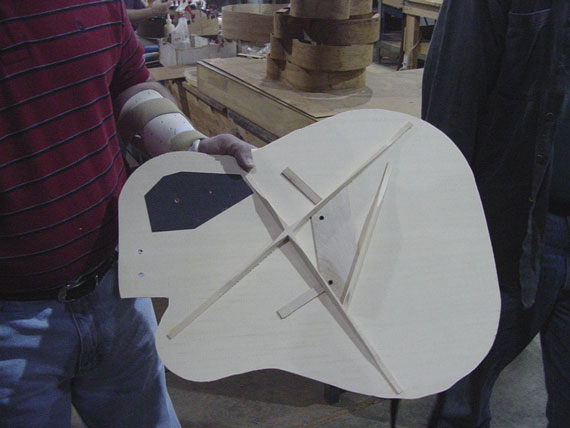
A braced top. Notice the big black patch. This top is one with the unique Tacoma teardrop soundhole shape, and the black material serves as interior reinforcement for the delicate spruce.

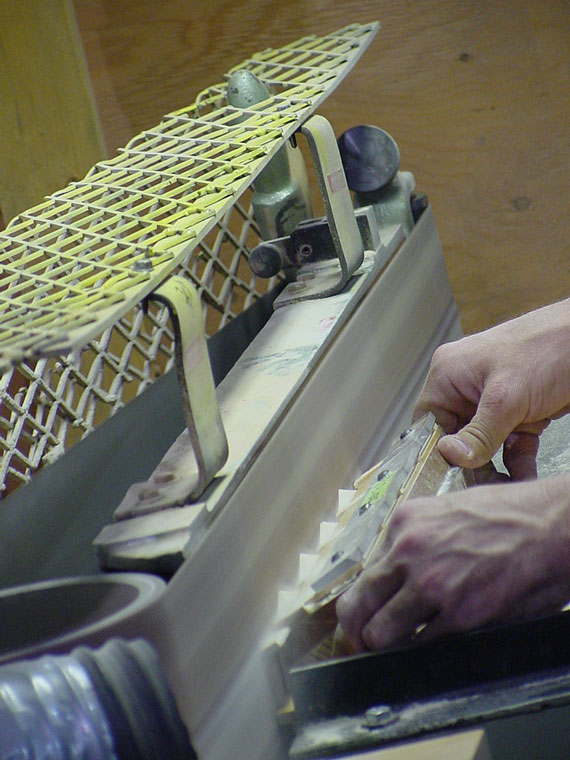
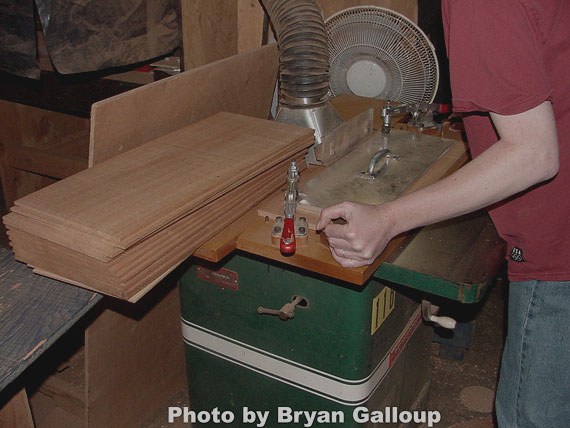
Here, some brace material is being finished up on a belt sander. The basic shapes were cut on the CNC, and the sander cleans up and bevels the edges.

Some of the tiny interior braces, such as these back reinforcement strips, are cut by a computer controlled laser.

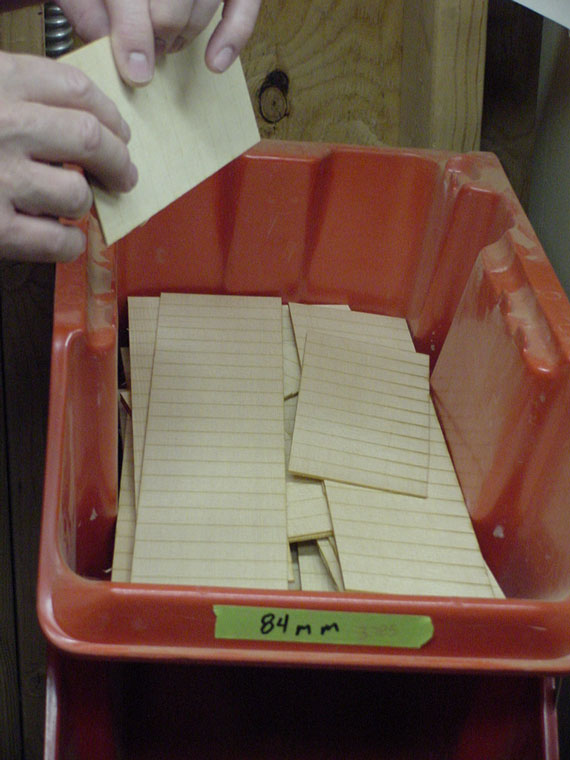
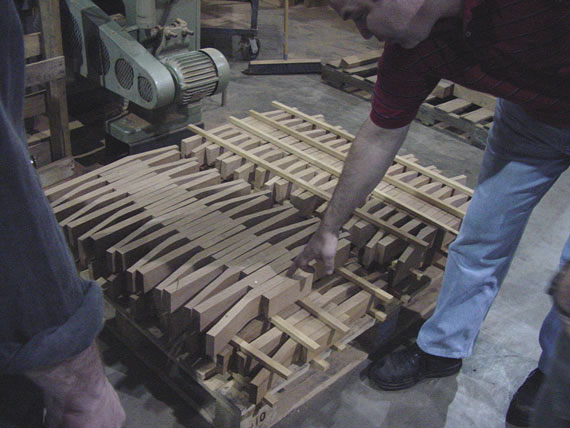
Braces are sorted for delivery to the appropriate work stations.

Some glue for the top braces of a "conventional" style guitar.

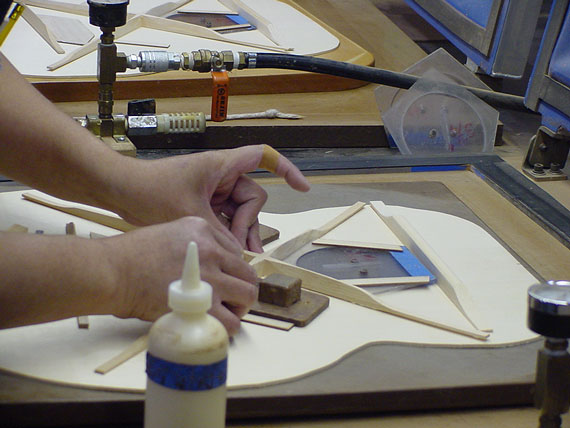
Braces are located by means of simple jigs and templates, and then the top is closed on the vacuum press. In the low vacuum, water is extracted from the glue, and atmospheric pressure squeezes the parts together. Vacuum gluing is the way to cut down on clamping time without sacrificing quality.

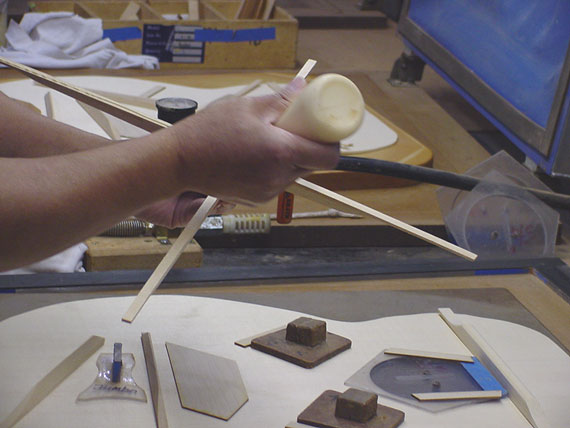
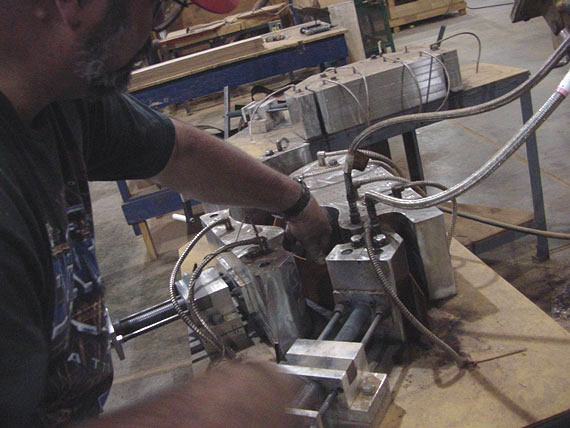
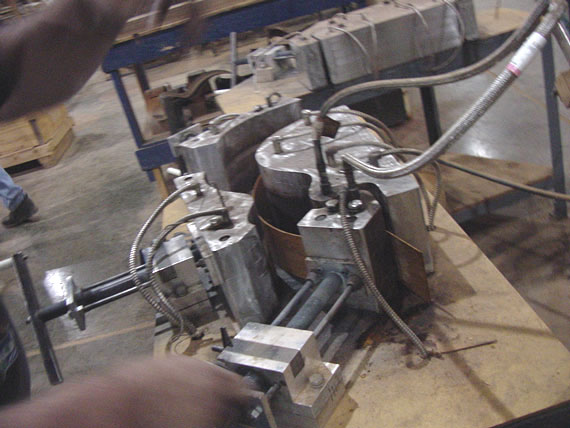
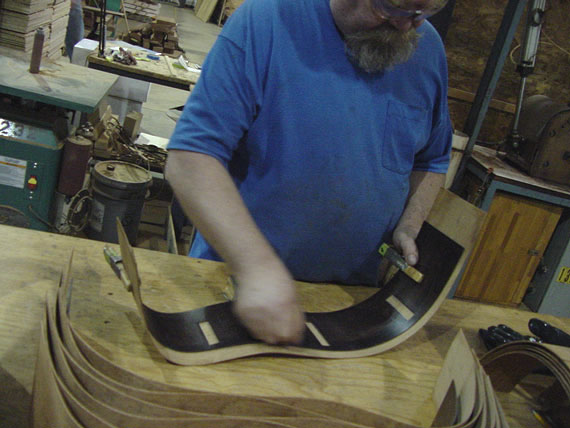
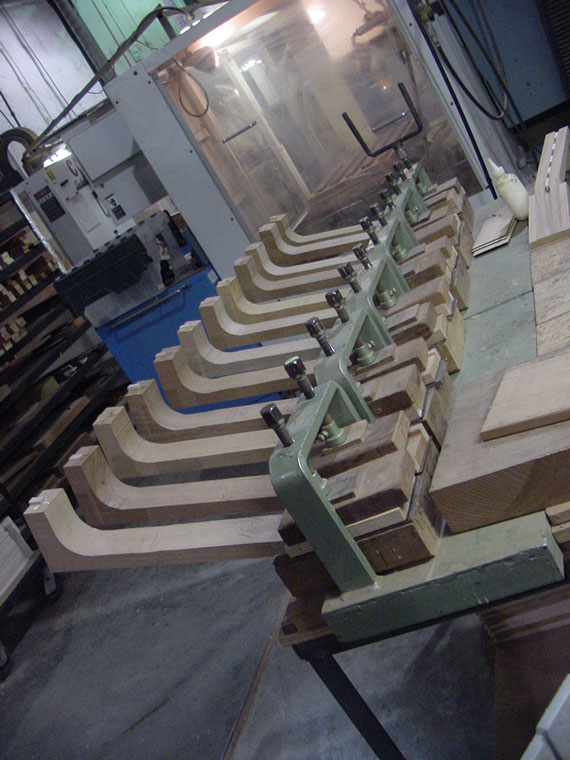
I particularly enjoyed the side bending area. Tacoma makes lots of different instruments with different body sizes and shapes, so there are lots of side bending rigs. This one is for mandolins, which have a complex shape and a one piece side that is bent all at once on this heated aluminum form.

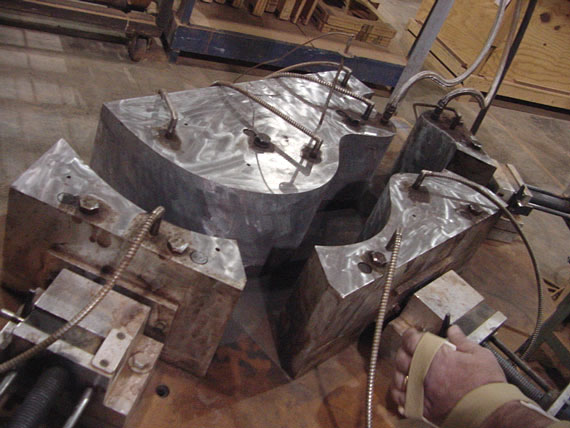
But, the cutaway guitar bending operation is the most exciting. Just look at this fancy aluminum rig.

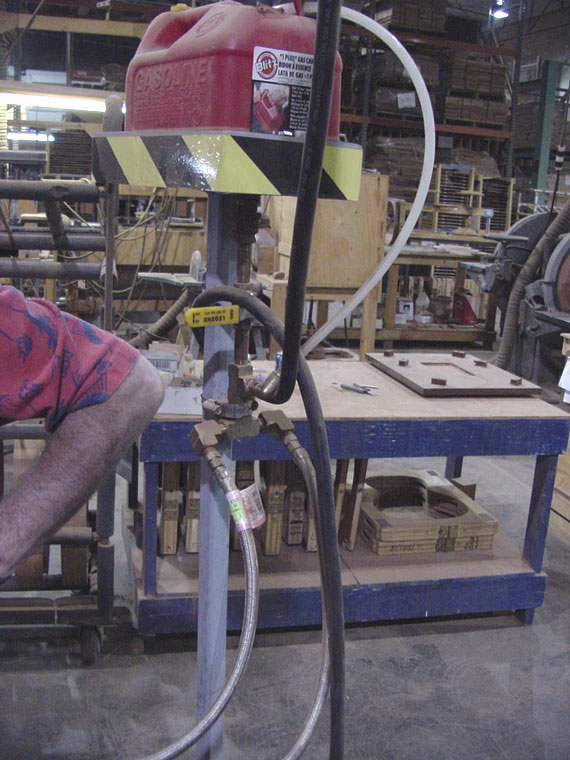
Hanging above the heated bending form is a water container.

To ease the sharp bends, water is released into the hot mold, exiting as steam through these holes.

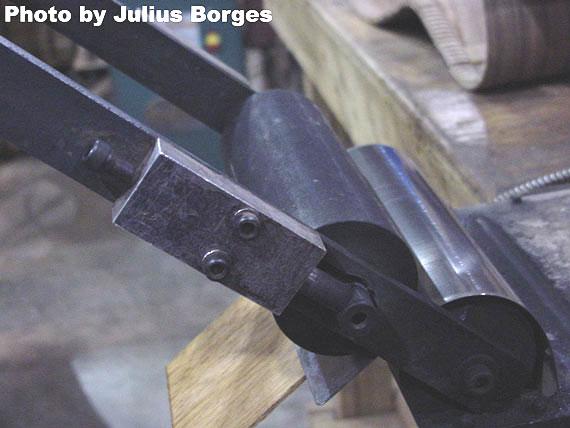
That's a sharp bend, so the side gets a "prebend" before it goes into the hot bender.

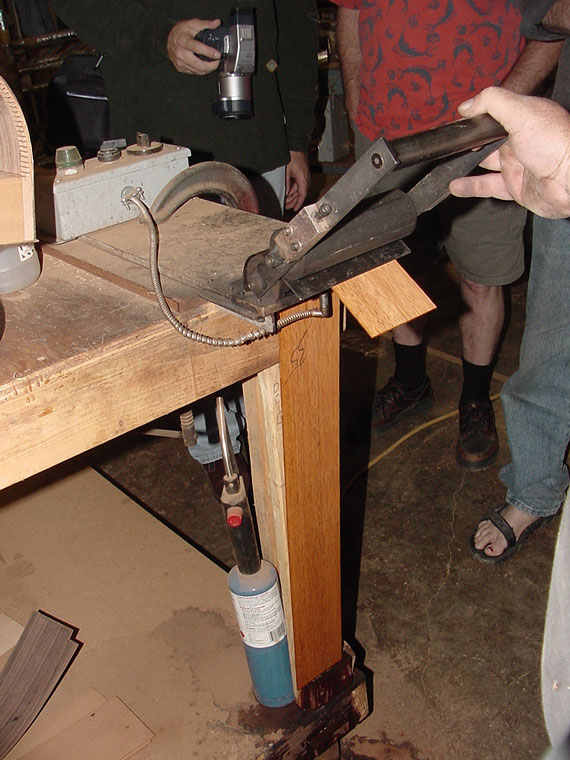
Basically folded over a hot roller and protected by a steel sheet, the side gets a "J" bent in just the right place.

Then the side will fit into the mold without breaking.

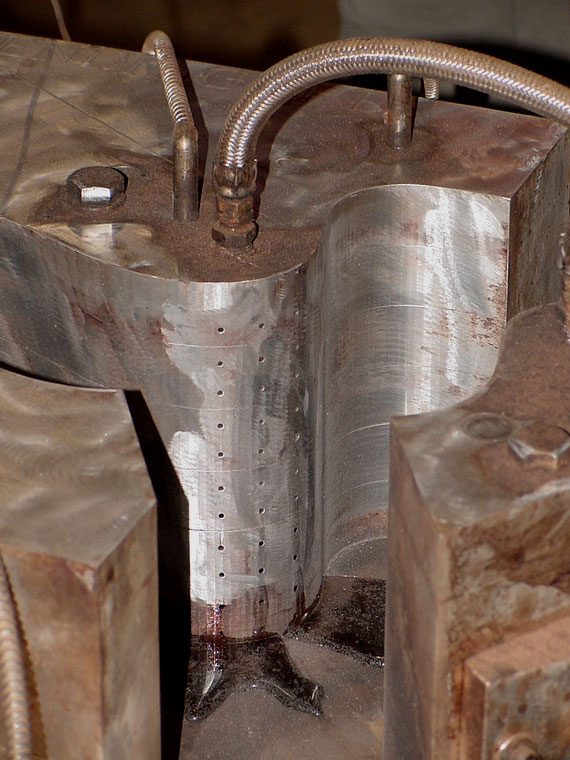
As the sides pieces are run in, the wood is heated from both sides and held rigid as it accepts its new shape.

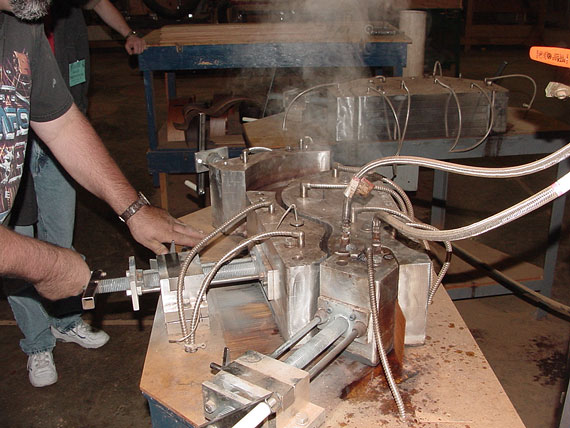
And, out comes that steam!

Cutting the side to exact length can be a tricky job to do by hand, so Tacoma has a special cutoff machine right at hand. The freshly bent side clamps right in place,

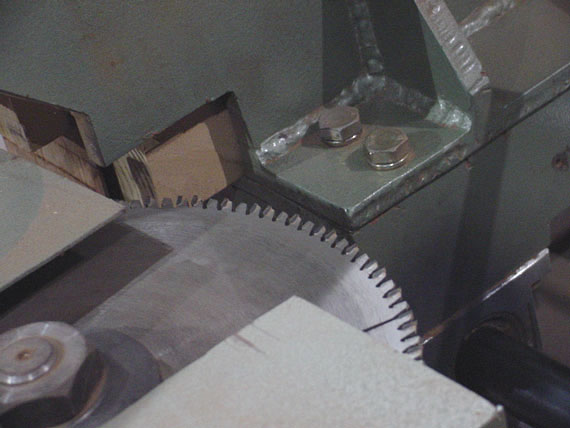
and the entire mold section slides past two nasty looking carbide cutoff blades.

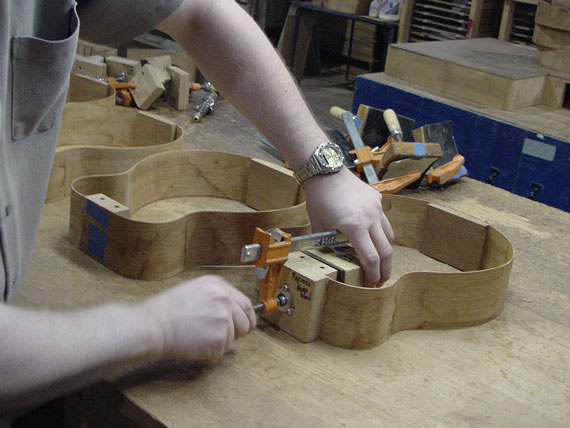
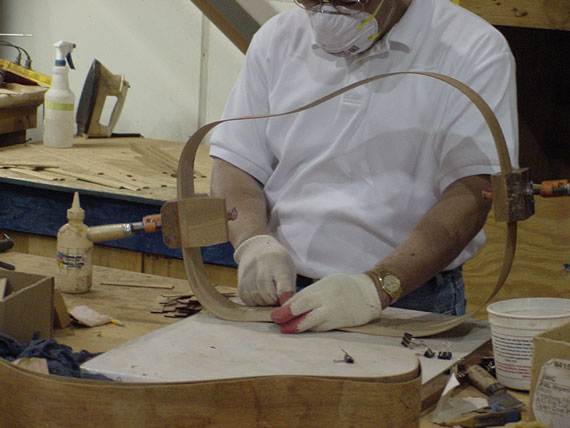
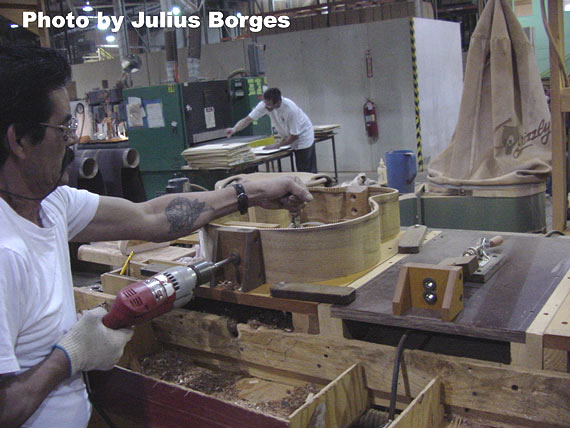
Gluing the neck and end blocks in a Papoose.

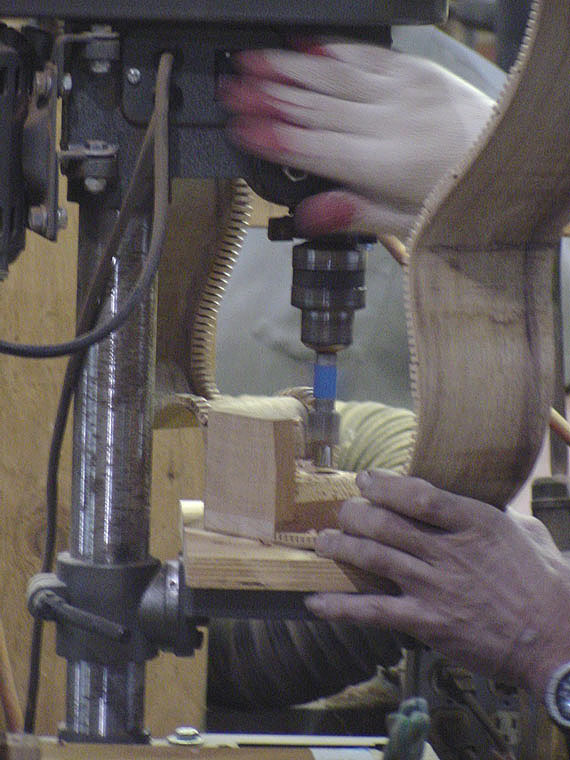
Counterboring the neck bolt holes.

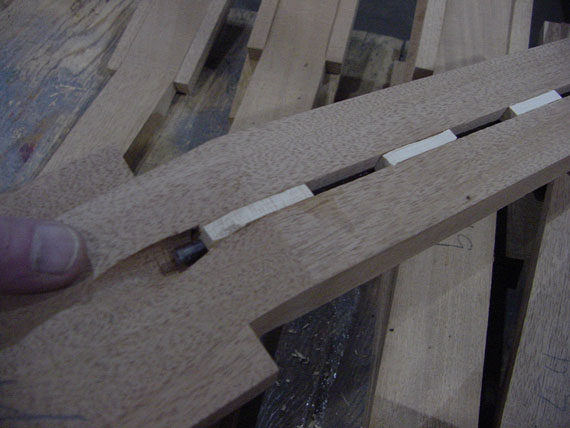
After the side is bent, it's marked for locating the side reinforcement braces.

Side reinforcements help to prevent cracks by making the sides more rigid in strategic areas.

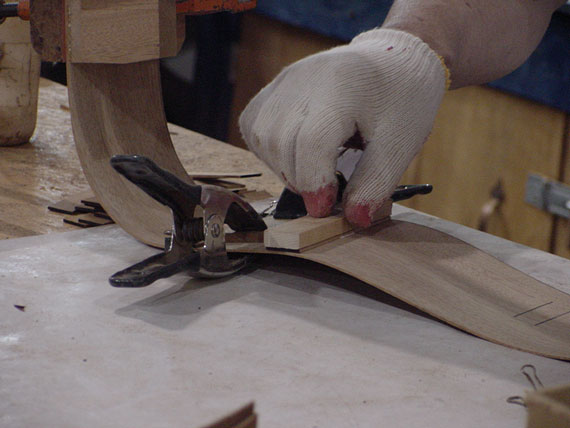
They are glued in place before the linings are installed.

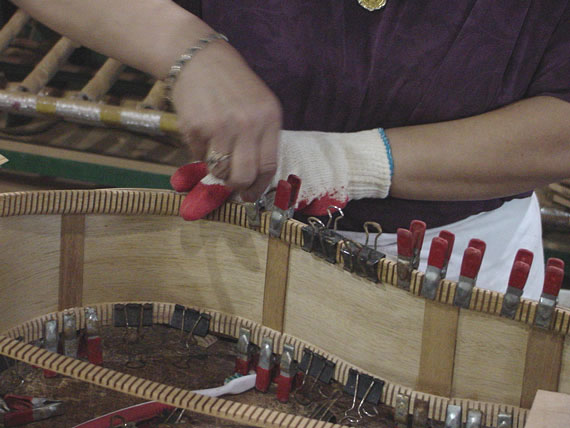
Linings go right over the side braces, further reinforcing them.

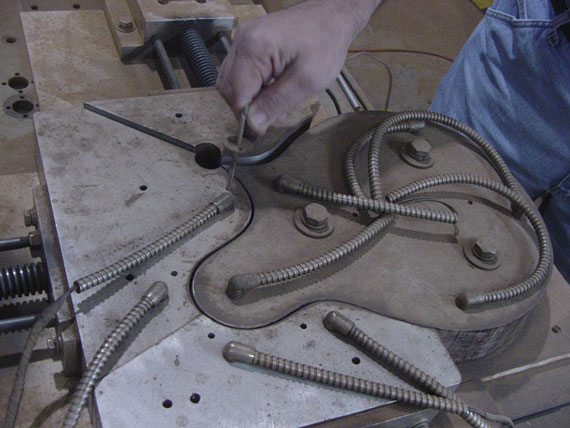
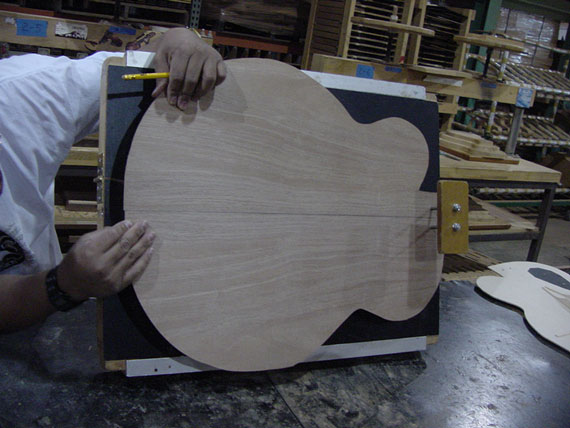
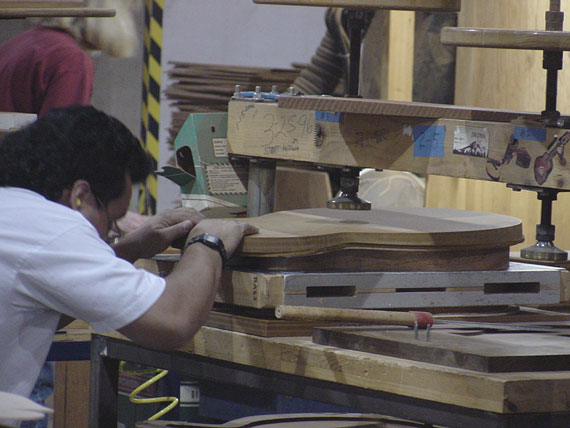
No factory tour is really complete without the standard "through the mold" photo!

Neck blocks and end blocks are drilled so they index back into mold.

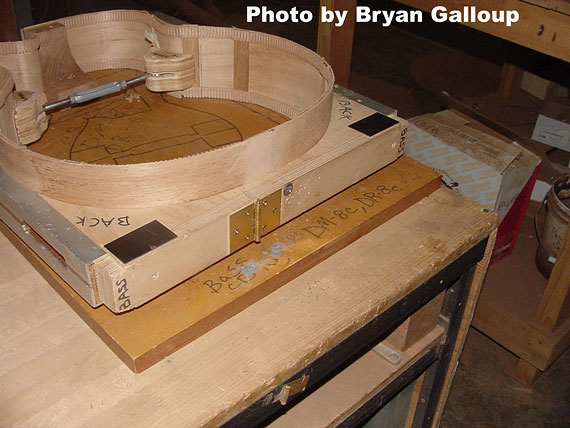
Once the linings are glued on, the side assembly goes back into the mold so its shape will not be distorted as it is handled and assembled.

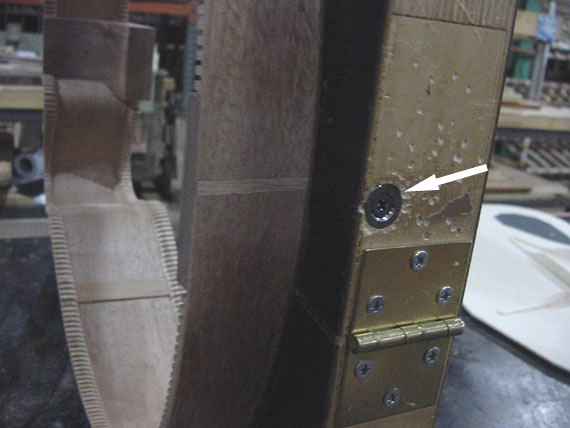
Notice the screw in the mold. A screw at each end into the index holes keeps the sides held rigidly in place in the mold so they can be prepared for the top and back to be glued.

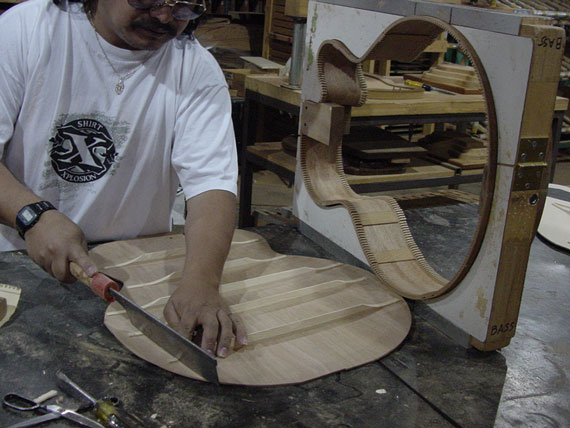
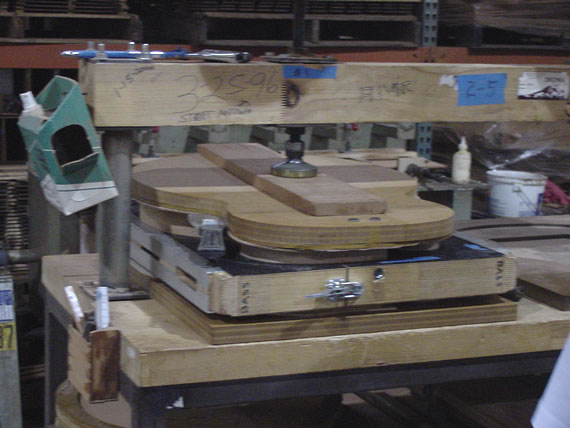
This sanding box has two rotating discs, one with a "dished" radius for the top and one for the back.

The mold assembly goes in.

And a weight goes on top. As the sanding disc rotates, the weight of the assembly is enough to press the sides down into the disc. There are simple tops built into the box, so the sanding stops at just the right time, when the sides and blocks have achieved the correct radius.

Smaller, flat top instruments are pressed against this vertical flat disc sander.

The decorative end piece disguises the joint of the sides, and is routed on a simple fixture.

Some glue, and a couple of smacks with a small hammer, and the job's done.

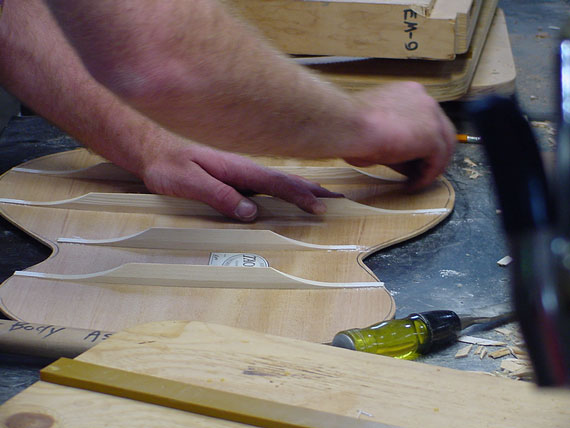
Time to fit up the top and back. The overhanging ends of the braces are marked with white chalk.

And, the back is set in place. At the neck block, there are two locating pins, where there will later be bolt holes. At the end block, it's a matter of centering by eye. Next, he'll mark the location of the sides on the braces with a pencil so excess may be trimmed off.

Some firm raps to transfer the chalk marks.

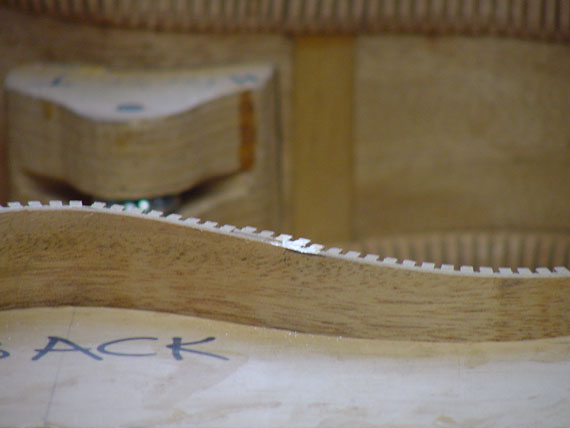
And, now the linings have clear marks so they can be cut to receive the braces. It's important to "let-in" the braces, so they are less likely to break loose by accident.

The braces are trimmed short enough to clear the sides but still be set into the linings.

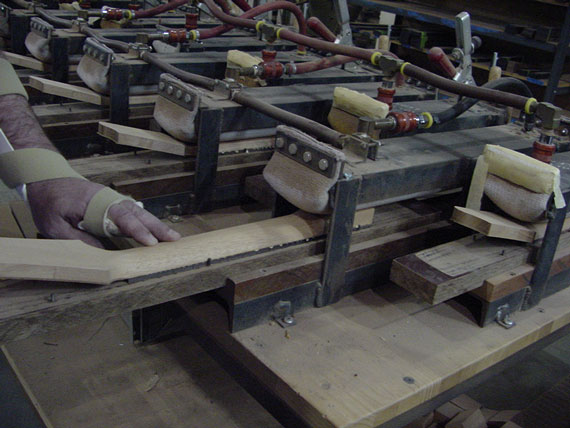
All fitted up and ready to glue in the press.

If everything is well fitted it takes relatively little pressure to glue the body together, so only one press screw is necessary.

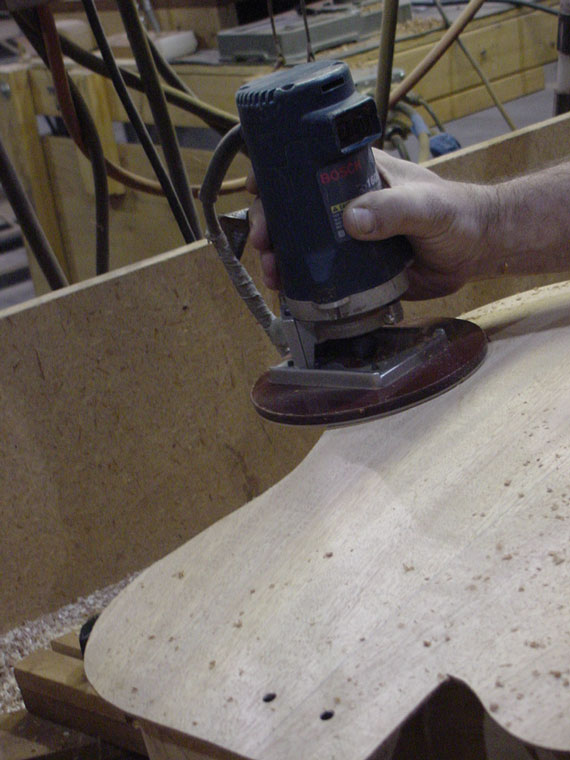
After glue up, the overhanging back and top are trimmed with a flush cutting router.

Binding channels are also cut with a hand router. In fact, lots of routers, one for each style instrument and binding.

There's also a large stock of guide bushings for special binding and purfling combinations.

Bindings are glued in place with that familiar tape we all love so well.

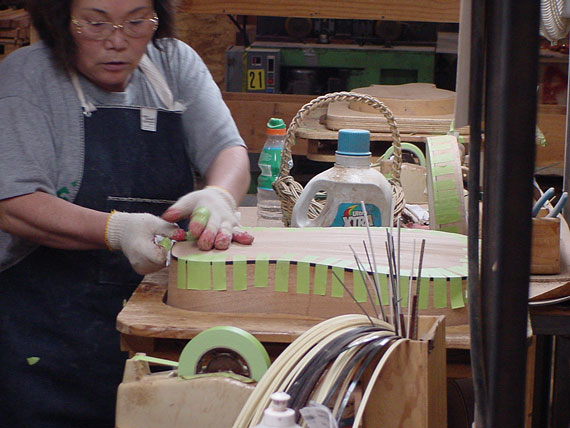
A binding work stand allows access from all sides.

Scraping the bindings level.

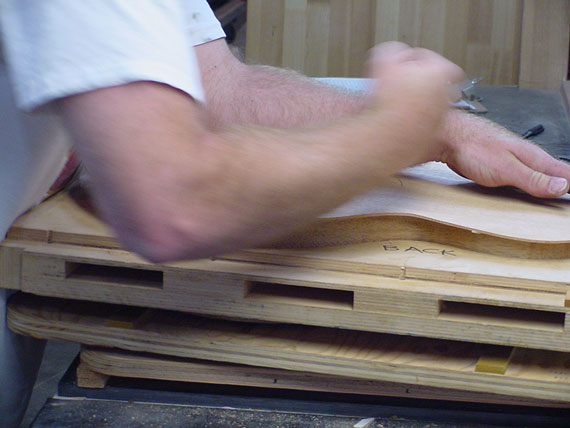
Sanding the body before finish.

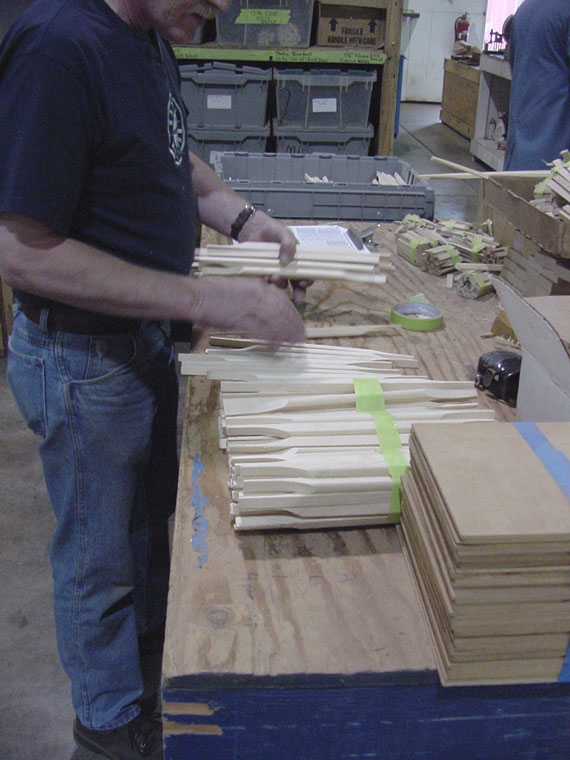
A nice big stack of rough neck blanks.

To avoid having to use heavy timbers and wasting huge amounts of mahogany, necks are made with extension "ears" glued on the peghead.

Tacoma necks have an interrupted filler strip above the compression style truss rod. They believe it allows for more control of the neck when adjusting the rod.

Peghead veneers being glued in place.

Shaping the end filler strip for the neck bolt anchors.

Here, the CNC cuts the recess for those strips. A this point, the CNC pretty much takes over the neck carving.

Here's the end of a neck block with the maple filler reinforcement and the screw inserts.

Fingerboards are glued quickly with this cool rig. All you do is just slip the assembly in,

and turn on the compressed air, which inflates the bag, and applies plenty of clamping pressure.

An old bench model drill press is fitted with a electrically heated branding iron.

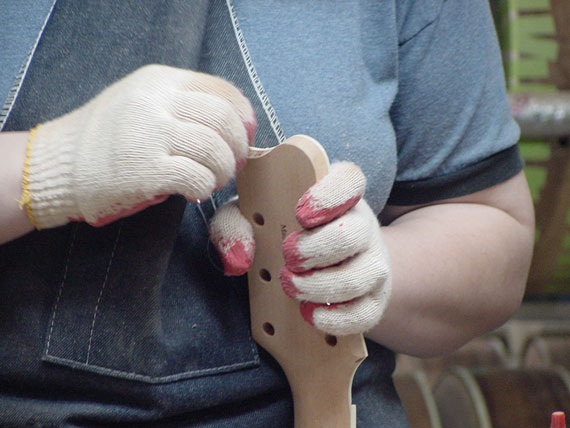
Final sanding necks.

A bit of detailing at the end of the peghead.

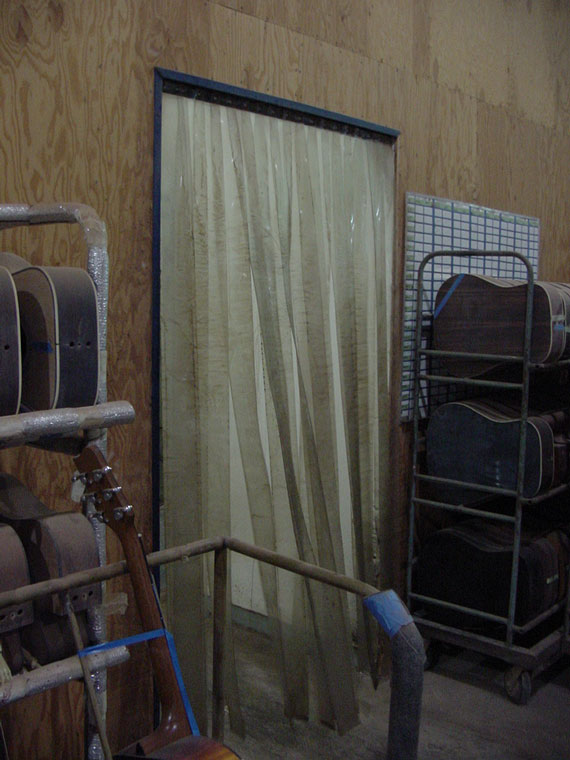
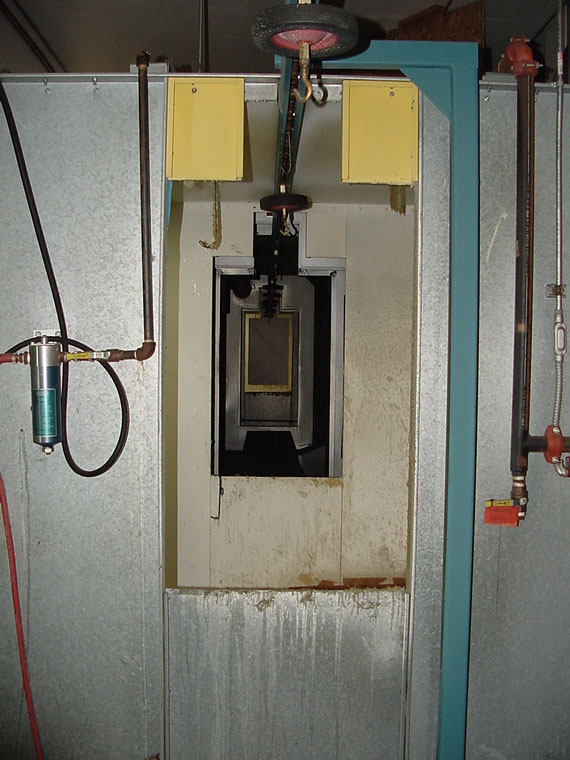
Here's the door to the finishing area. Filtered air is brought in from the outside so there's always an air flow from the finish area into the main shop. This way, airborne dust doesn't enter.

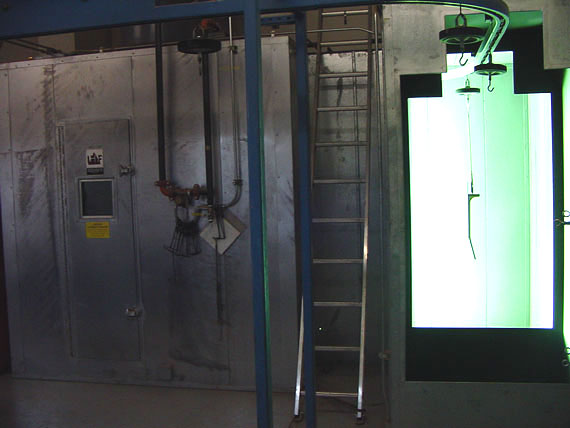
Inside, the finish area is a labyrinth of rooms connected by doorways and an overhead conveyor track. Here, we can see the intense light of the U.V. curing booth, which is actually around the corner.

Necks and bodies are suspended from the overhead track, sprayed, and sent along through the flash drying booth, U.V. curing booth, and so on. In this photo we can see through the doors of three of these "rooms."

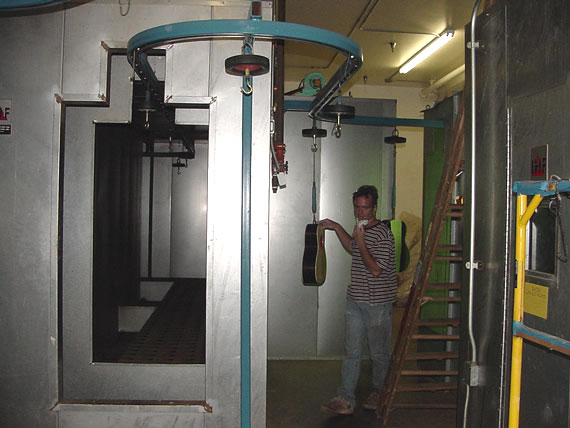
Unfortunately, most of the "line" was empty, having been unloaded for sanding the parts between coats.

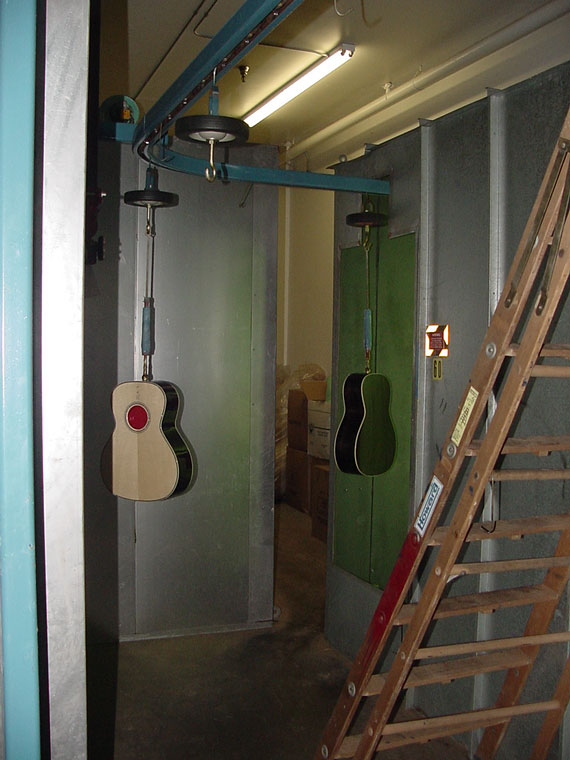
On they go, down through the rooms, around the corners, and back out.

This is where the line is unloaded. We're looking at today's first spray coated necks.

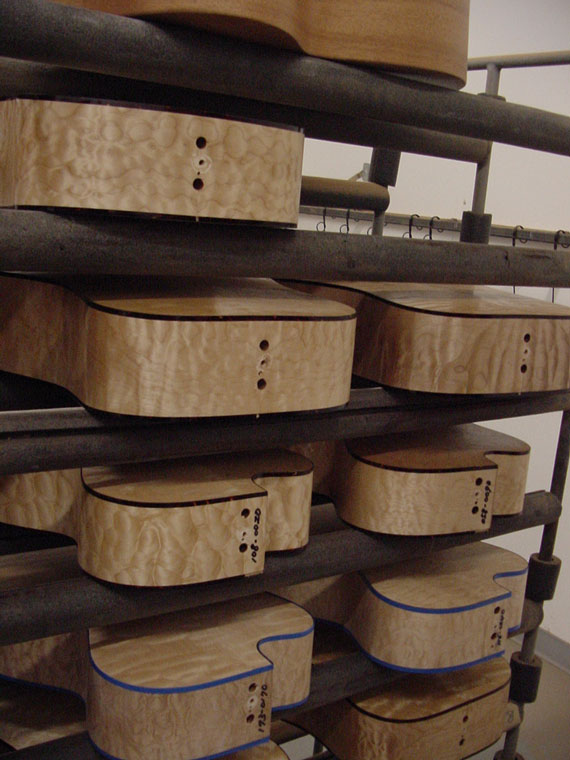
Here's a rack of maple bodies awaiting sanding between clear coat applications.

Just look at this bigleaf maple. Not only is it highly figured with the "quilting" that's seen especially in bigleaf maple, but it's amazingly clear and unblemished. As he held out this guitar for us to see, he described the freeze drying process his maple supplier uses to avoid the brownish discoloration that happens by oxidation after the wood is harvested. Terry says the supplier has about 50 of those home chest type deep freezes, and he sticks the billets of maple in them immediately as they are cut. After freezing the wood goes into a huge vacuum chamber where all the oxygen is replaced with nitrogen to avoid the oxidation that causes the brown streaks and discoloration so often seen in maple.

And, as everywhere else, there's the impromptu consultation about correcting small defects in the finish.

Here a little void is cleaned before "drop filling."

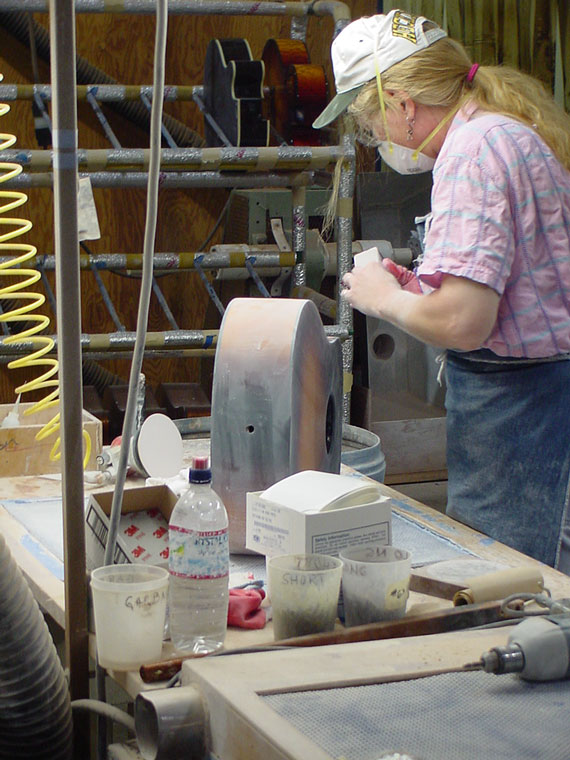
Sanding between coats.
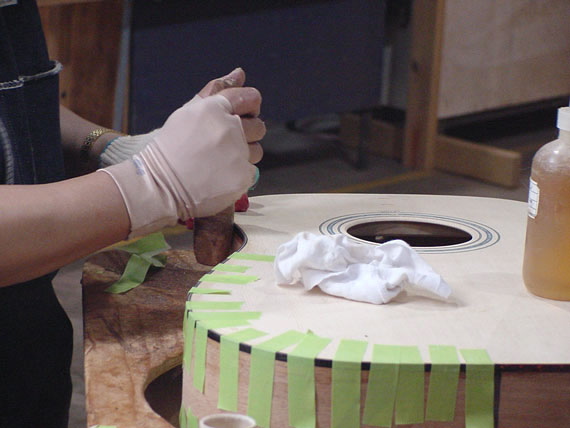
The final buffing.

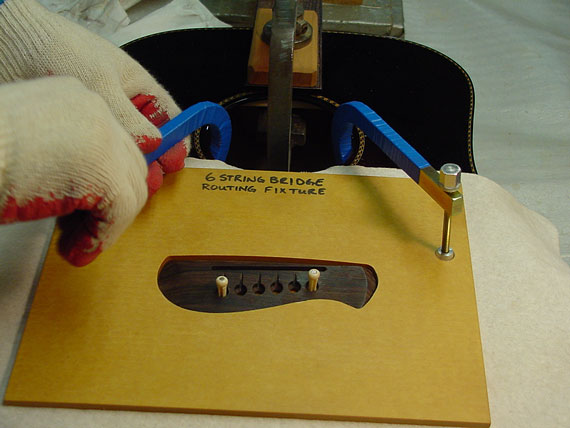
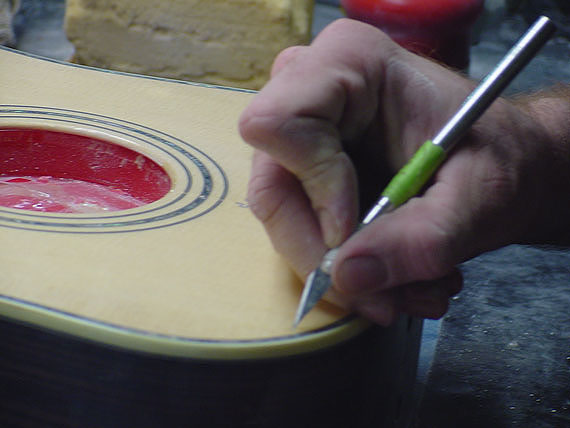
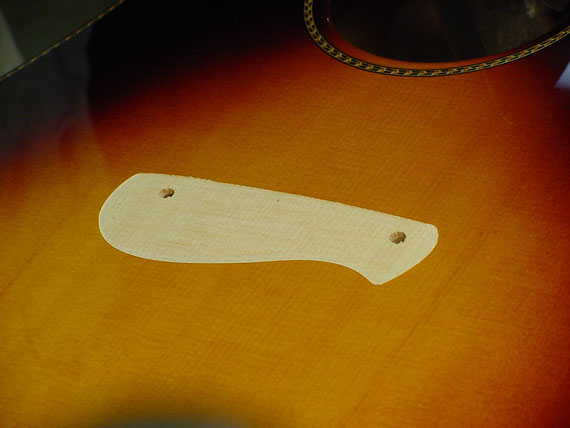
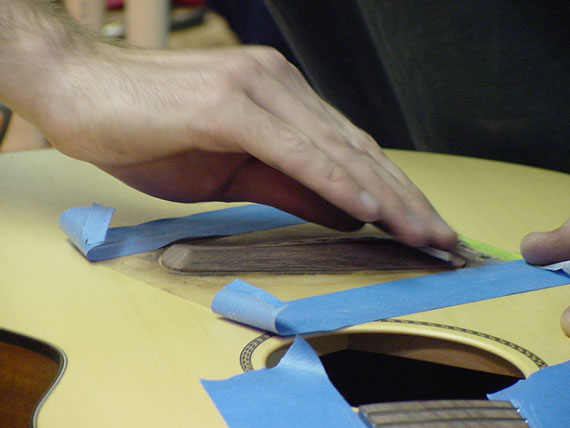
Some of the lesser expensive models have their bridges glued on before finishing. This is a high gloss model, so it's completely finished and buffed before the bridge and neck are installed. A surrogate bridge is placed on, indexed by two holes previously drilled in the top. This serves to locate the routing template.

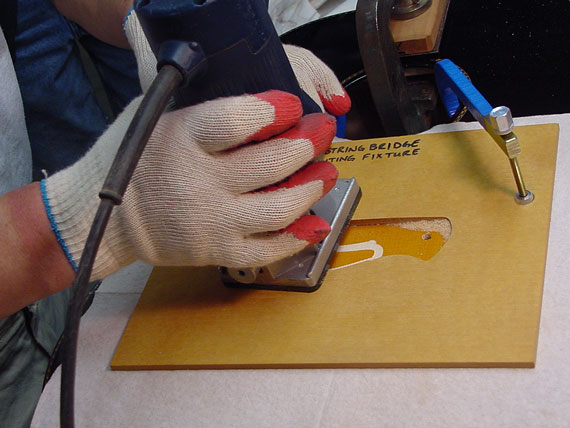
Clamped in place, the template makes it easy to use a light router to just skim off the finish.

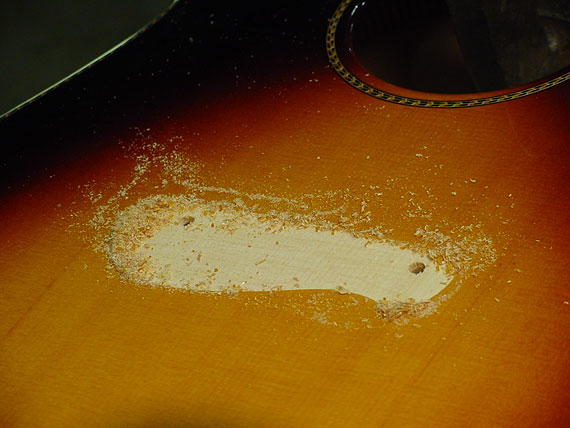
A few seconds and the job is done. This is all the dust that's created, because only a tiny layer of wood is removed - just enough to ensure a good gluing surface.

Ready for glue up.

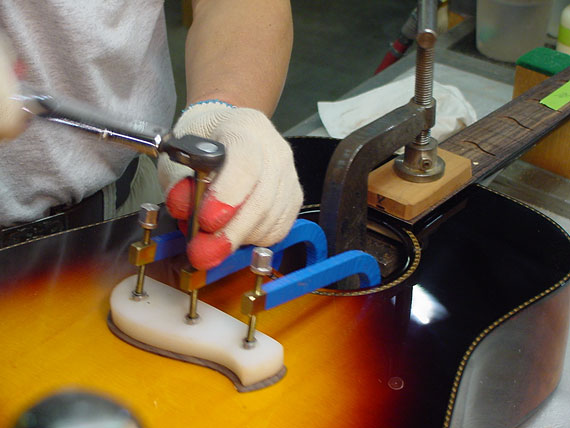
Using the same index holes, the bridge can't skate around as it's clamped.

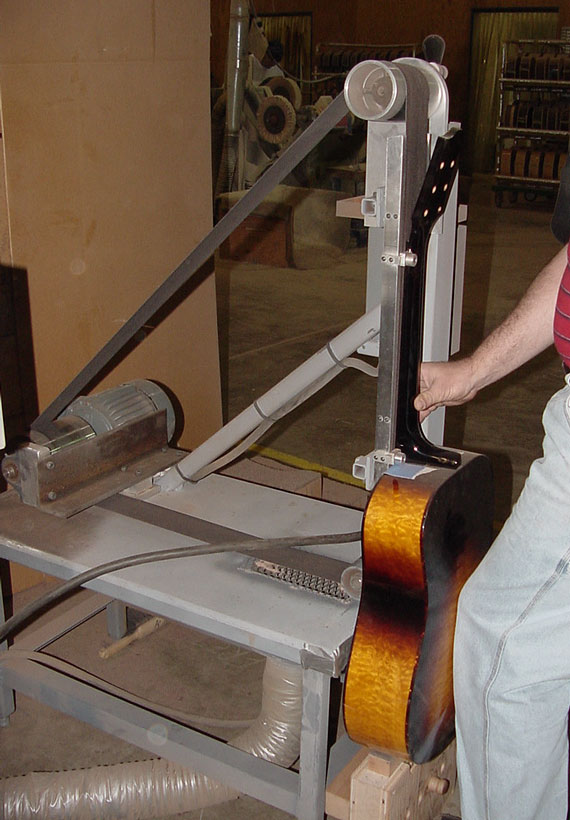
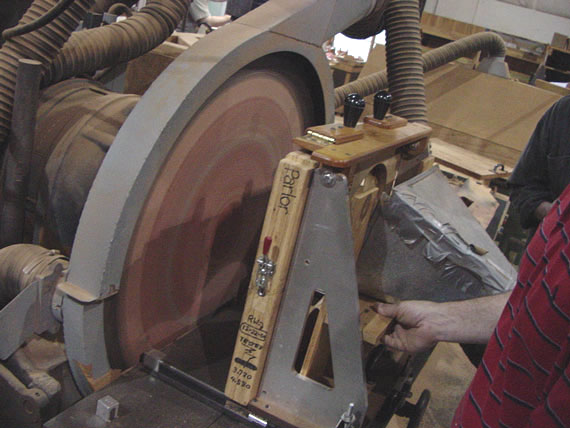
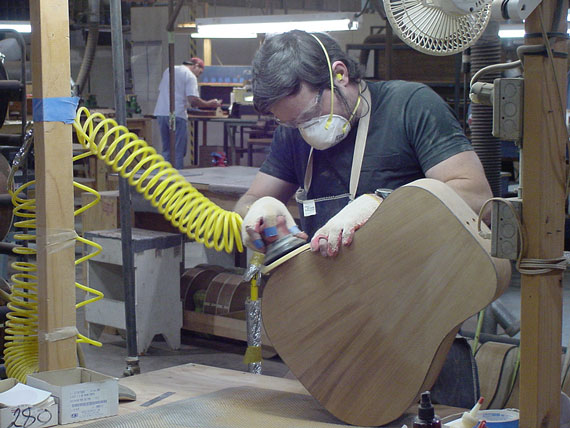
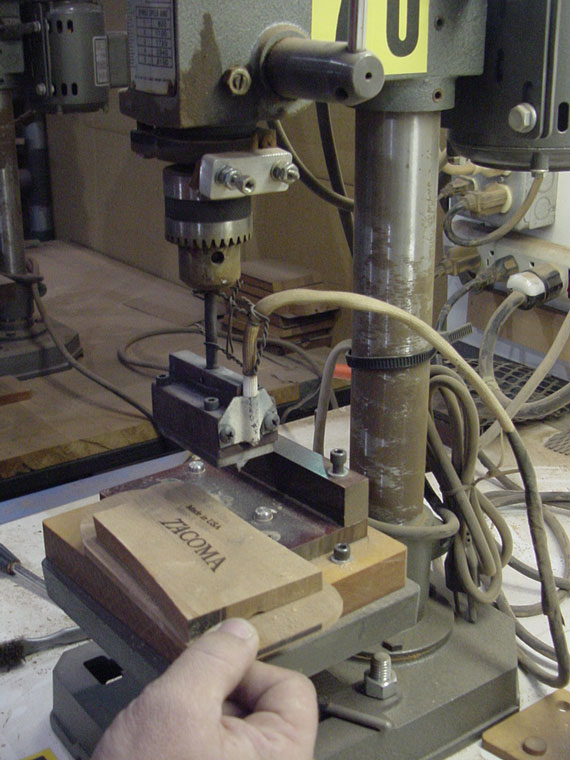
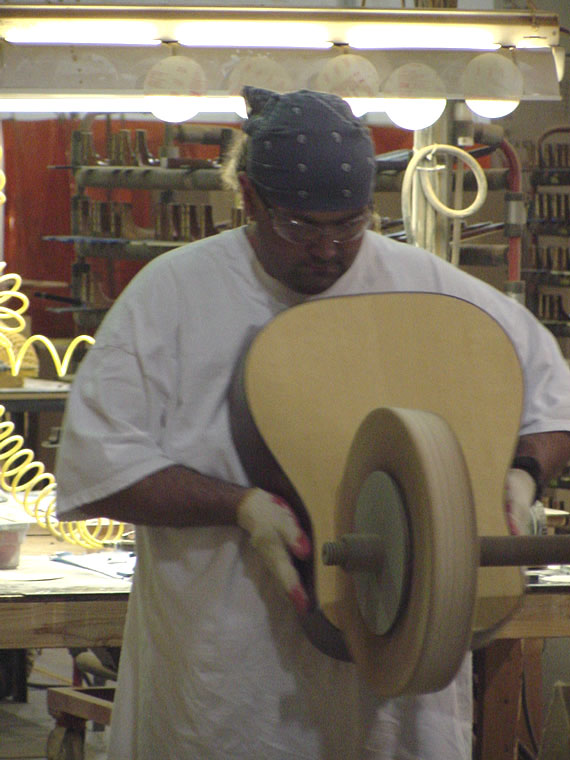
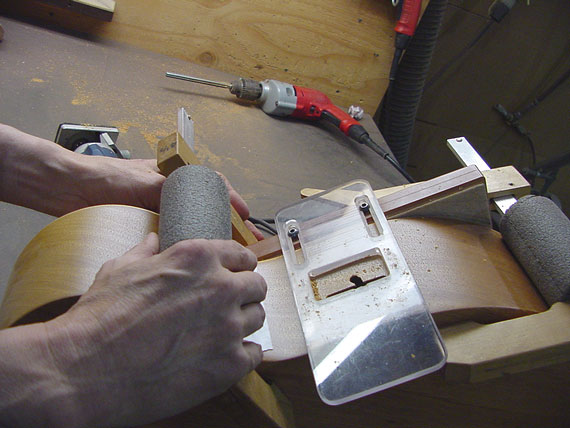
Unlike the CNC or router template, this machine leaves open the possibility of a real disaster should the operator slip. It's a great big version of my favorite power tool, the 2"x 42" bench model belt sander. This one is specially made and has a curved platen against which the guitar fingerboard is held. The fingerboard is sanded perfectly straight end-to-end and given the correct radius in one operation.

It's what I call "doing it the cowboy way." One slip and the big sander would do nasty things to a guitar. But, these folks don't slip, because they're well trained and skilled luthiers.

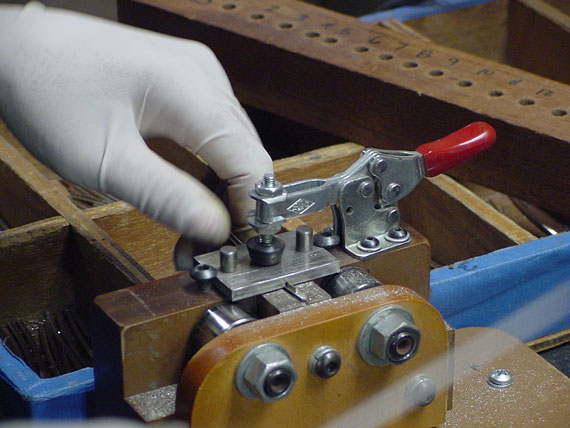
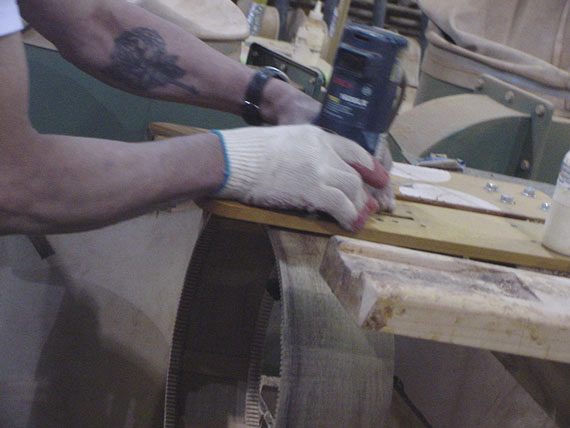
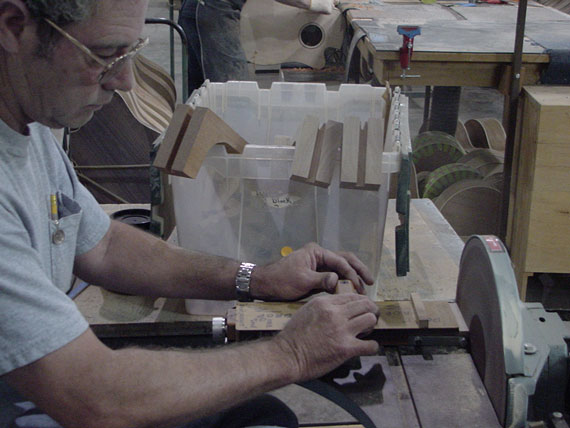
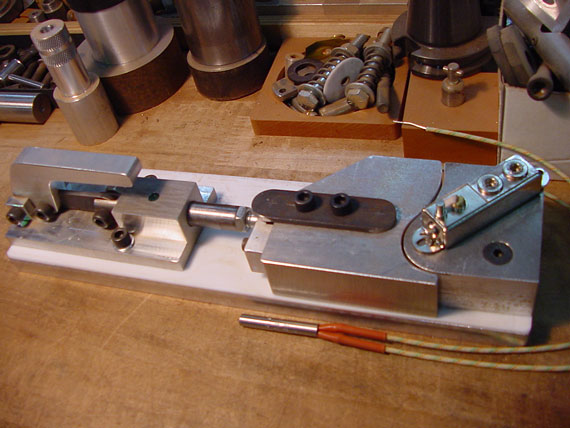
Dan Erlewine was especially taken by this little fixture. It holds the fret in exactly the right position for filing the little overhang end.

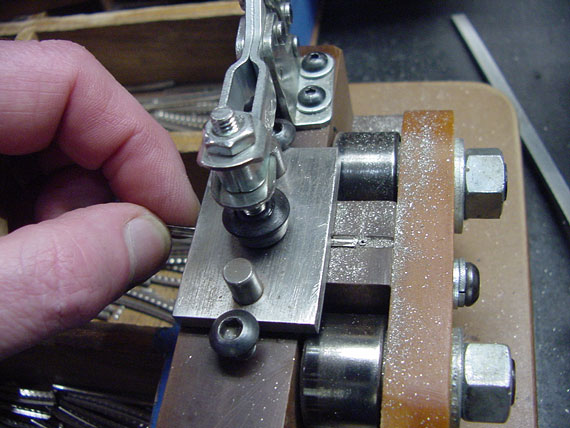
After the overhang is trimmed using the Stewart MacDonald/Collings fret tool, the fret is inserted into the holder and up against the little stop.

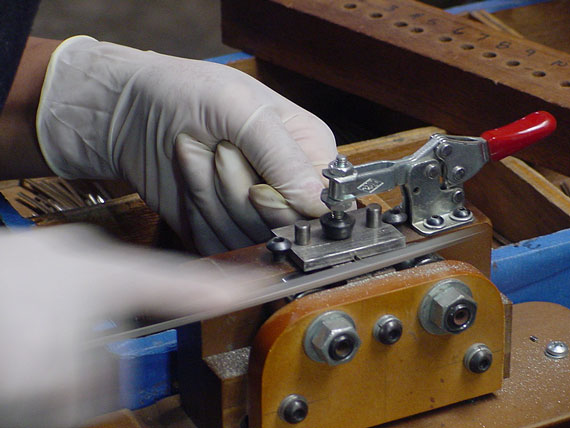
Then a quick (really quick) stroke or two with a file cleans up the overhang perfectly. There are two ball bearing guides to keep the file from cutting too deeply into the fret crown.

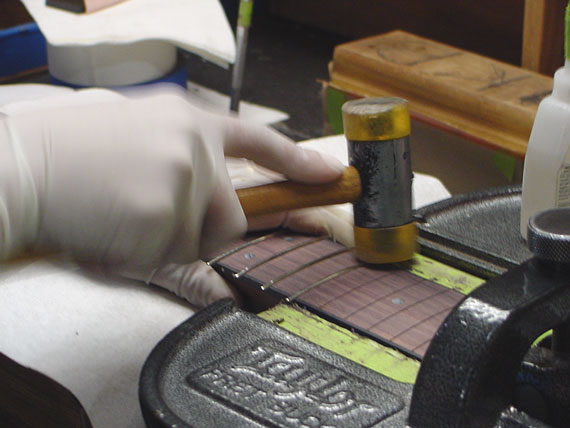
Frets are tapped in place just the way we individual luthiers. do the job, only lots faster. . .

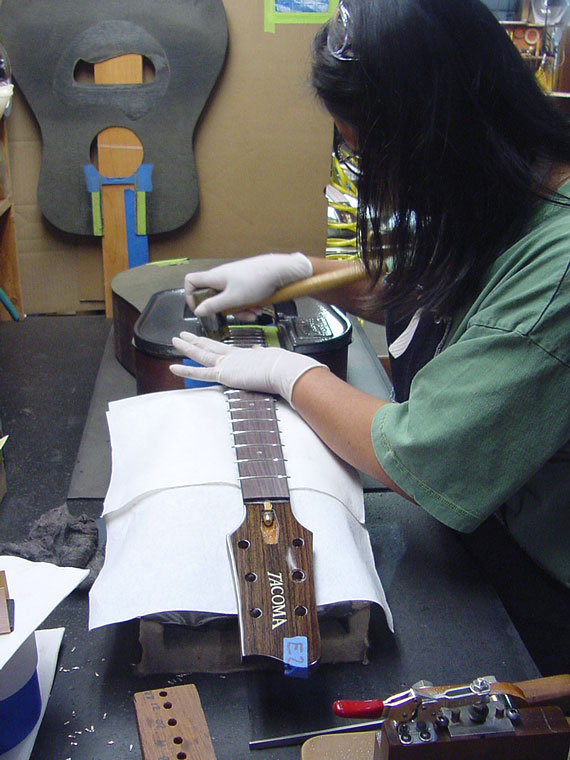
That's the famous Taylor "fret buck" on the body, acting as ballast to make it possible to install the frets over the body. There's a lot of cross-pollination in this business, isn't there?

Frets are checked, leveled, and dressed. A dirty job, but we all have to do it.

This is one of the satin finished models that had finish applied right over the bridge. It's getting a bit of last minute detailing before setup.

Routing the hole for pickup and preamp controls.

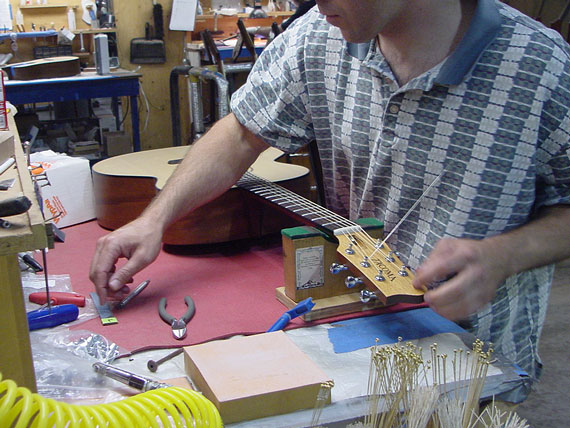
Final setup and stringing.

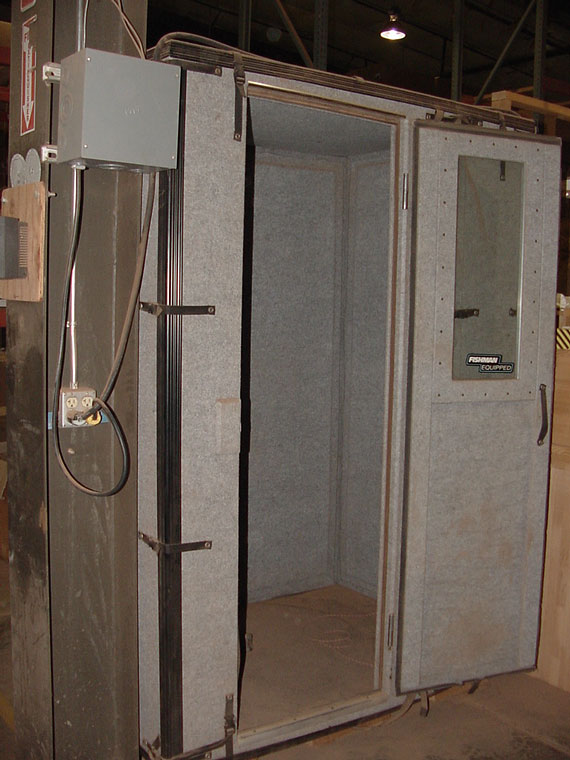
It's a noisy place, so the final inspection area has a little soundproof booth for "buzz checking."

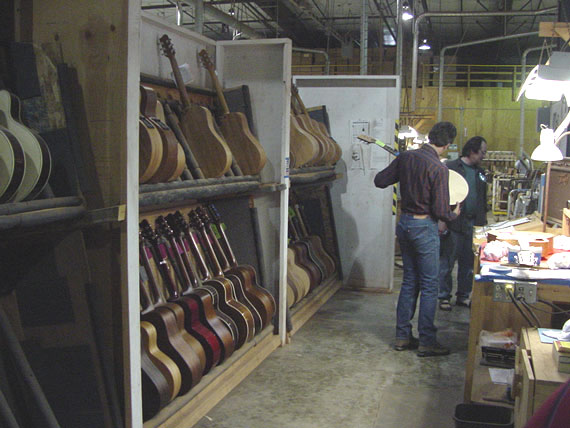
Here, we're looking down a rack of today's production in the final inspection area. A lot of these guitars are headed for Guitar Center.

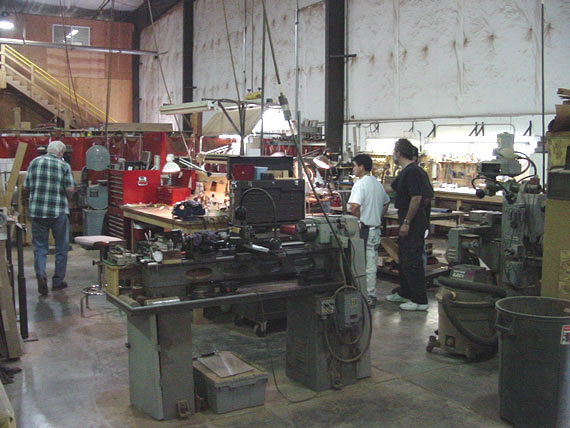
Way off in the corner of the building are some fellows who have the job of designing, redesigning, building, rebuilding, and maintaining a lot of the equipment and fixtures.

Dan immediately gravitated to the engineers.

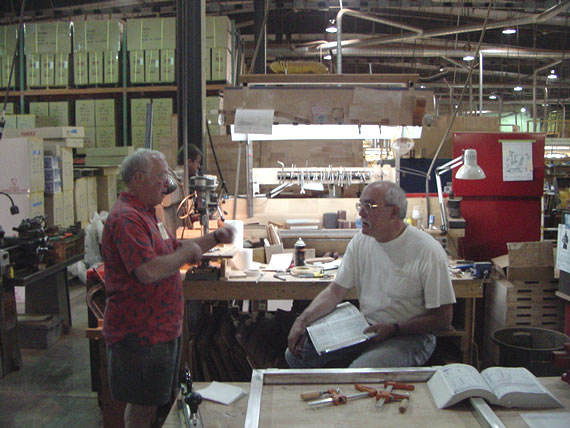
Here, Dan shows us that engineers can have a good time, too.

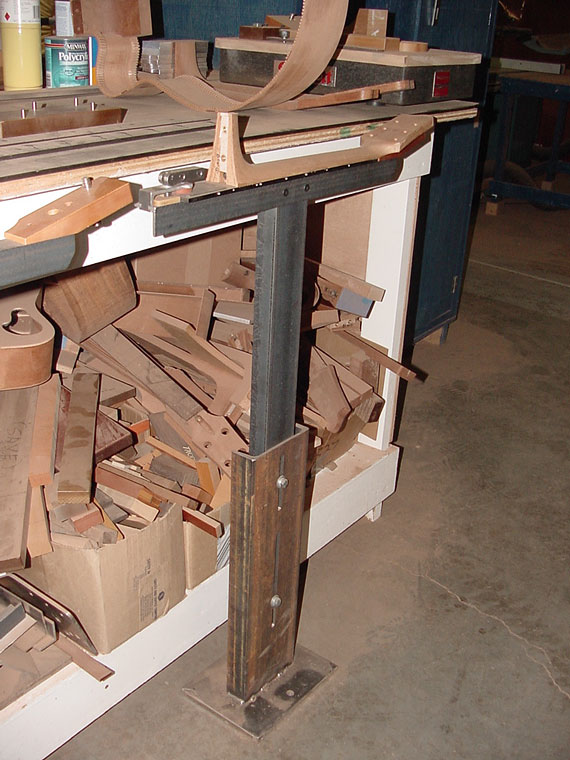
A neck work stand under development in the engineering department.

This is a miniature version of the electrically heated aluminum side benders. It will be used to bend the wooden binding for pegheads.


Unless otherwise credited, all content on Frets.com is
Copyright © 1969 - 2023 Frank Ford
All rights reserved.