
Neck Reset Technique
1935 Martin 000-28
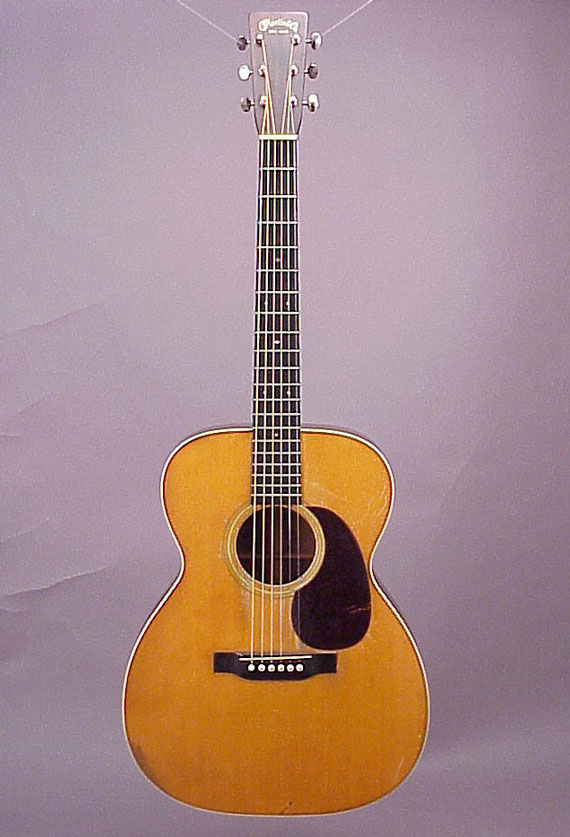
A fine instrument indeed! It's a 1935 Martin 000-28, made in the first year after Martin abandoned the use of bar frets in favor of the modern T-frets. This guitar has been in the family of the original owner and has suffered no real damage in its life. It has never had any repair work that I could detect, and needed only to have the neck reset to restore the original geometry and allow for good playing action.
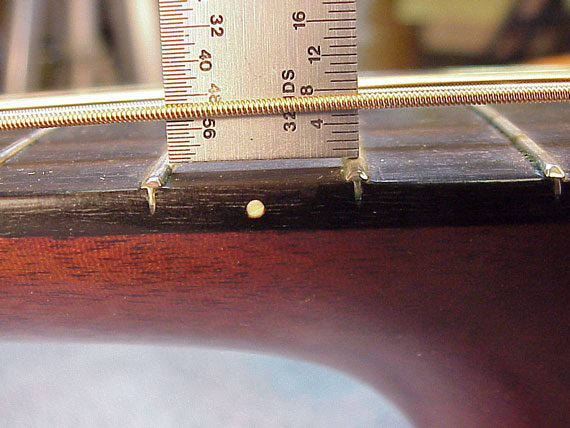
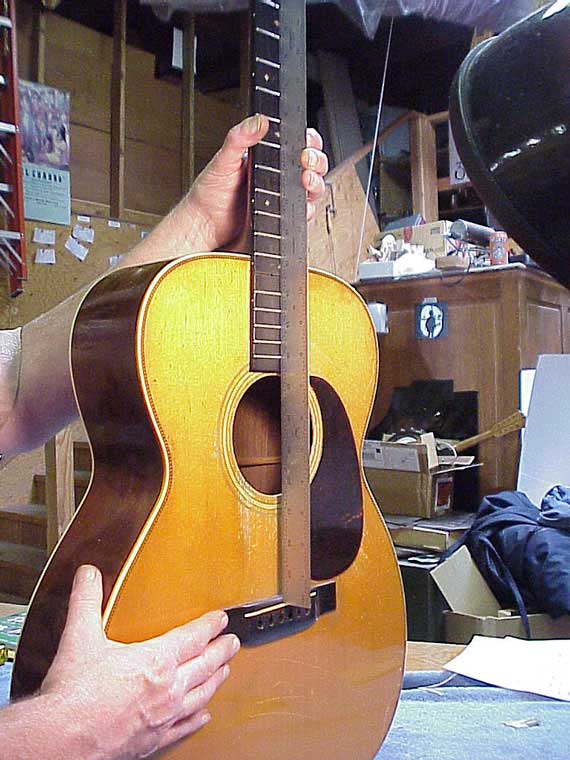
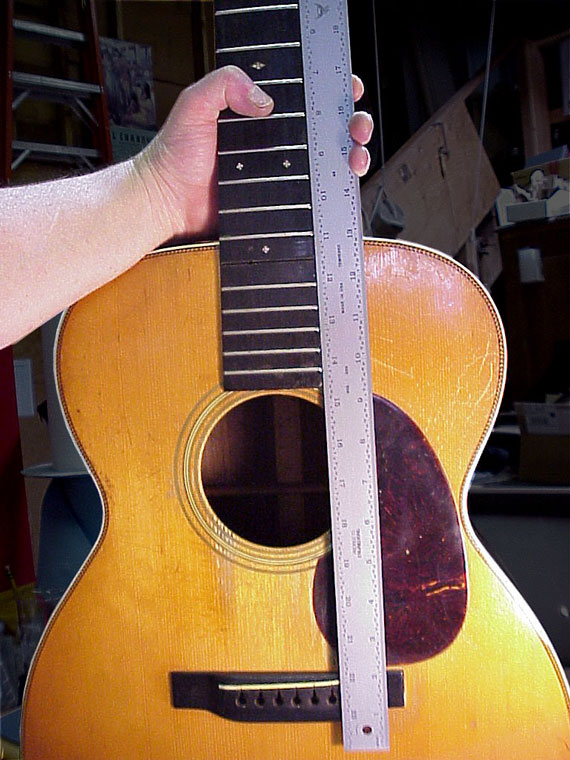
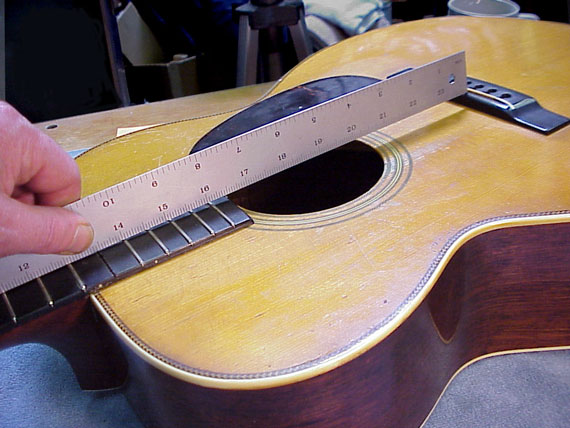
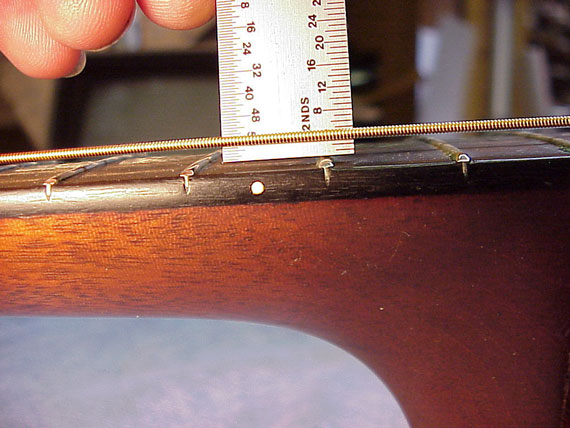
You can see that the action had risen considerably with all those years of string tension. Ideally, there would be about 3/32" between the 12th fret and the bottom of the low E string. Even with a low saddle, this guitar has twice that much clearance. No choice but to reset the neck.

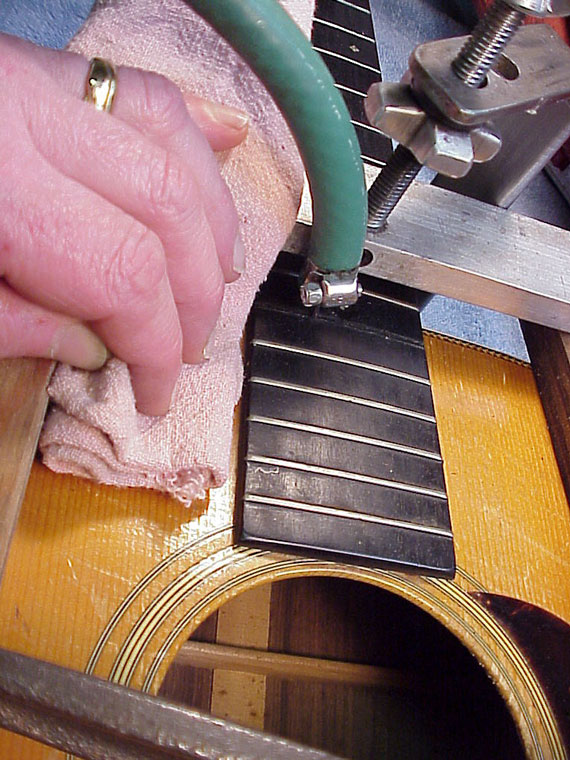
I like the rubber heating elements sold by L.M.I. They're attached to a timer, so if I get called away, I won't be likely to start a fire! I wrap the element in aluminum foil to keep it clean. I also have a sandbag to hold the wire so the heating element won't shift position.
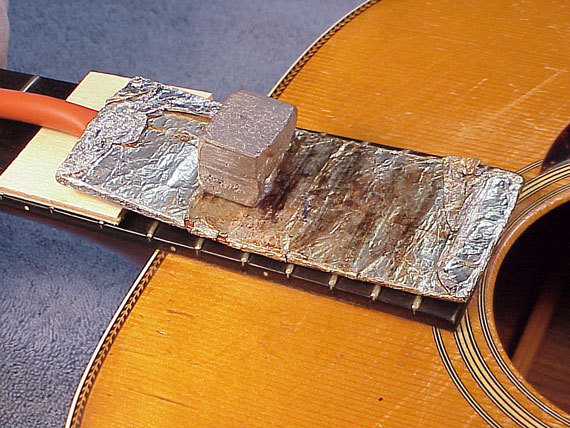
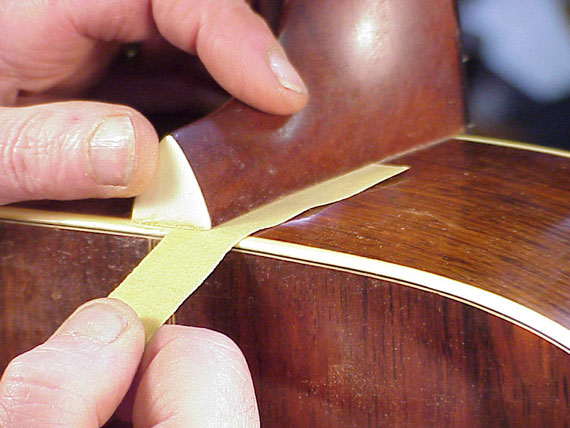
To keep the heat from loosening the fingerboard over the neck of the guitar, I insulate it with a slip of 1/8" thick wood. I try to get the fingerboard hot enough so I can feel real warmth inside, under the top.
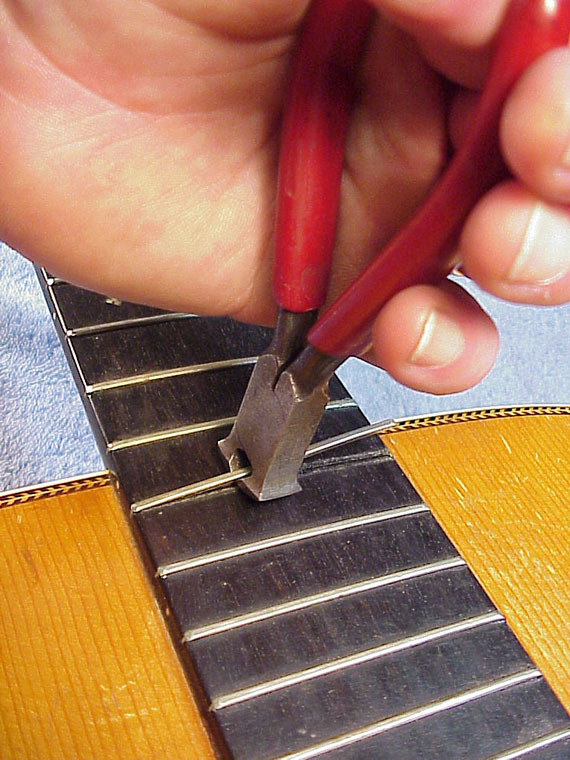
As soon as I remove the heat blanket, while the frets are still hot, I pull out the 15th.
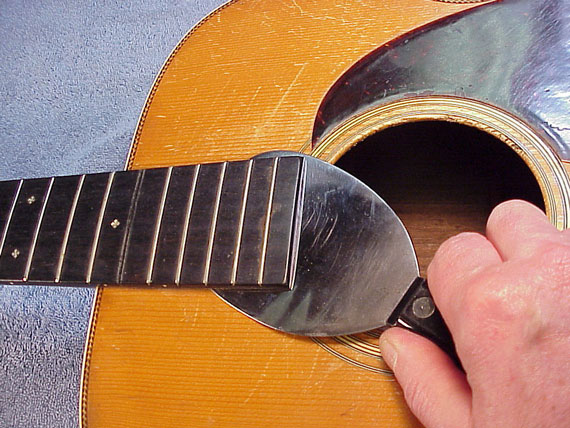
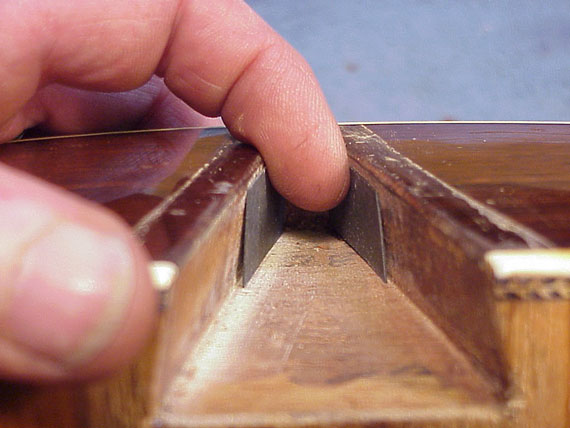
Once the fingerboard is hot enough to weaken the glue, I can slip under there with a broad knife to separate the fingerboard from the guitar top without damage to either spruce or ebony.
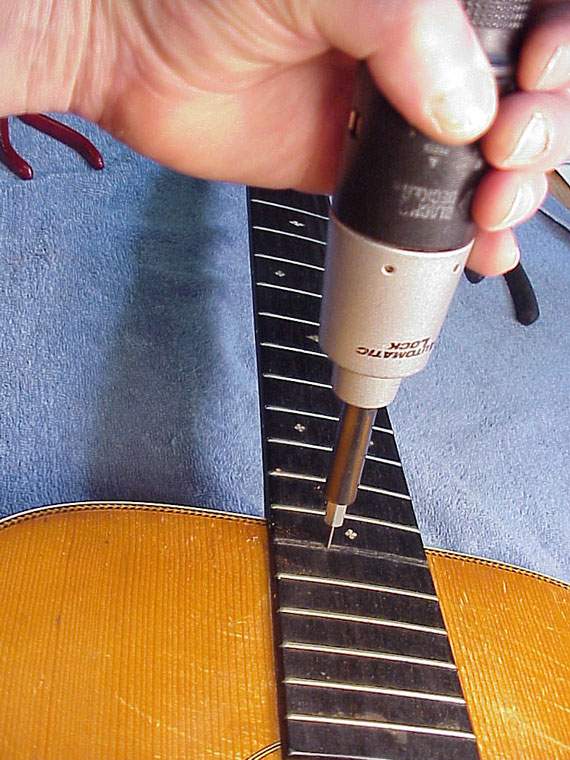
The end of the dovetail pocket lies just under the 15th fret on most Martin guitars, so I drill a 1/16" hole through the 15th fret slot. Here, I'm using my power screwdriver with a hex shank 1/16" bit. How did we get along without power screwdrivers?
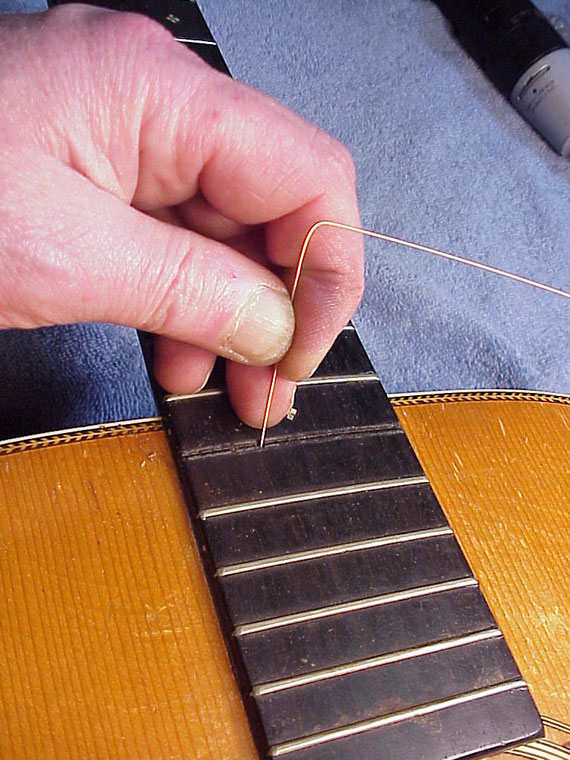
To double check whether I've hit the pocket at the end of the dovetail joint, I probe with a piece of an old guitar string.
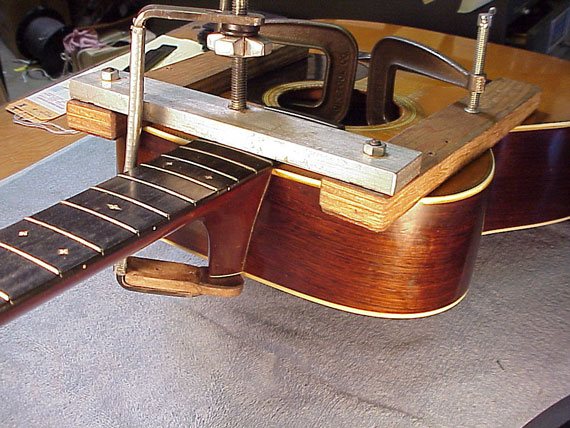
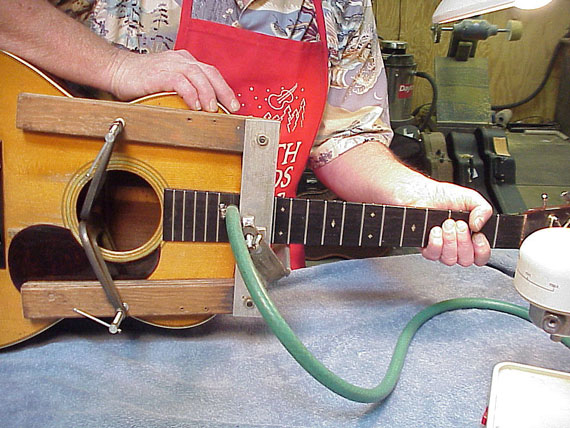
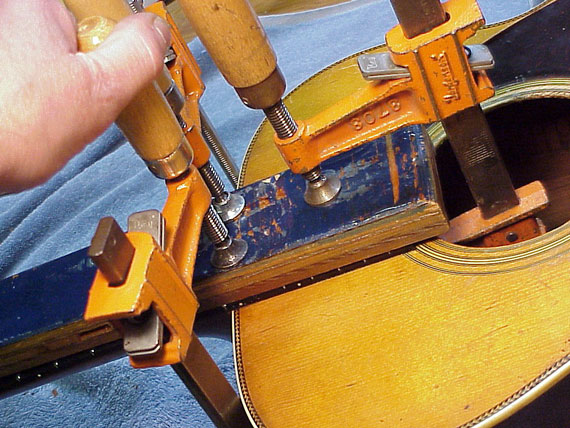
Here's my reset tensioning jig. It's a simple clamping device that pulls up on the neck.
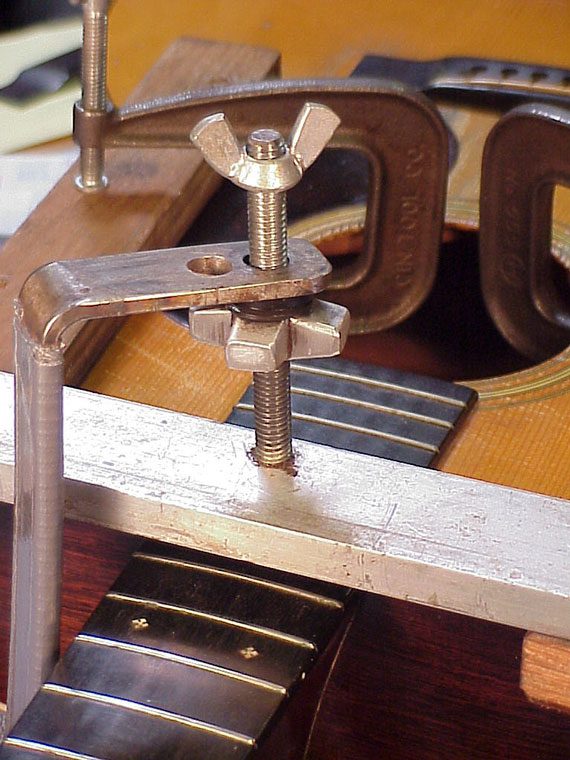
When I tighten the fat aluminum wing nut, the 3/16" steel strap applies tension at the heel. In fact, the strap bends quite a bit, so that when the neck begins to loosen, it continues to pull for about 1/2" - enough for the neck to pop free of the joint.
At the bottom end of the strap, there's a wooden leather covered pad to protect the heel.
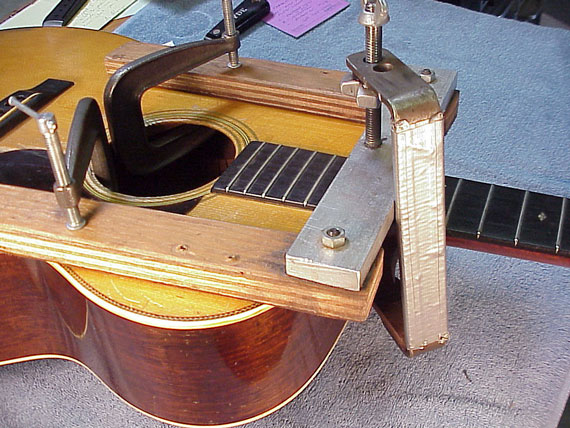
I particularly like this jig because it relies on leverage to handle the tension, so I can use some very compact and light clamps to hold it to the top braces. When it's in position, I can maneuver the guitar almost as easily as if it weren't there.
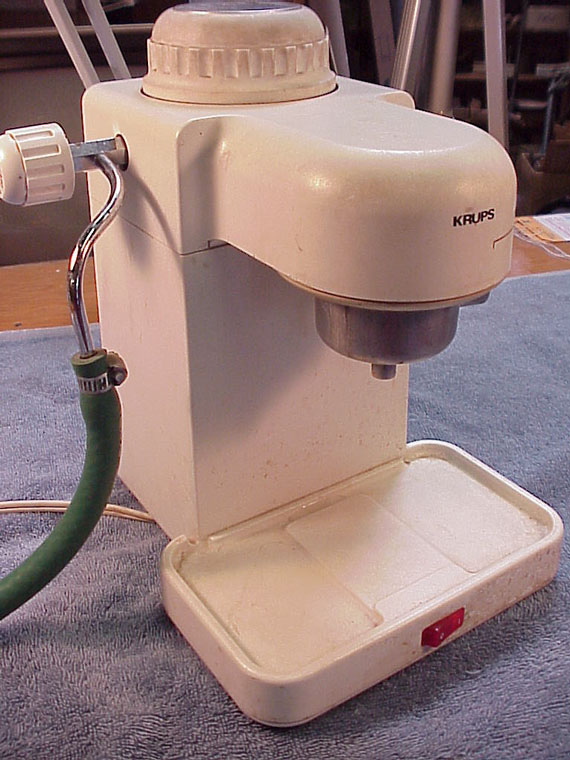
Some years ago I witnessed a demonstration at the Northwoods Guitar Repair Seminar in Big Rapids Michigan, where Roger Fritz of the Gibson repair department steamed out the neck of a Les Paul model guitar. Since then, I, too, have been using an espresso machine as my steam source. It's really great. Five bucks at a garage sale, and a few minutes plugging the coffee section, and I have a great, safe steamer with a convenient shutoff valve.
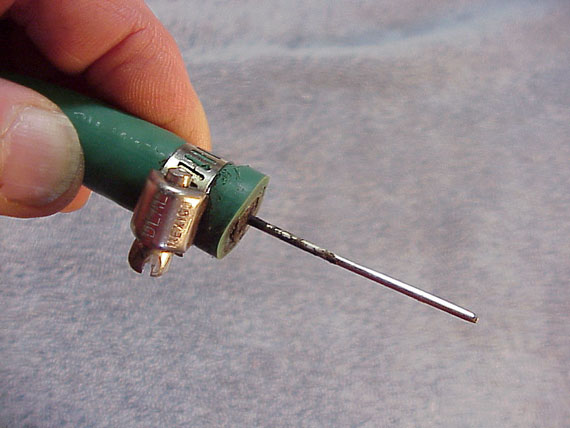
I've used regular reinforced air hose, but finally invested a few more bucks on some high temperature rubber hose. The steam needle is just like the ones sold by Stewart MacDonald. I made mine some years ago from 1/16" O.D. thick walled stainless tubing.

I don't have a handle for the "business end" of my steam hose, so sometimes I use a rag to grip it when it gets hot.
In place, and starting to steam. I always have plenty of dry rags handy to mop up hot water and steam as it comes out of the joint, usually under the fingerboard.
Sometimes, the steam goes inside the body. If that happens, I stick my shop vac hose inside (using a reduced size, about the size of a home vacuum hose) to suck the steam away quickly, in addition to stuffing lots of rags in there.
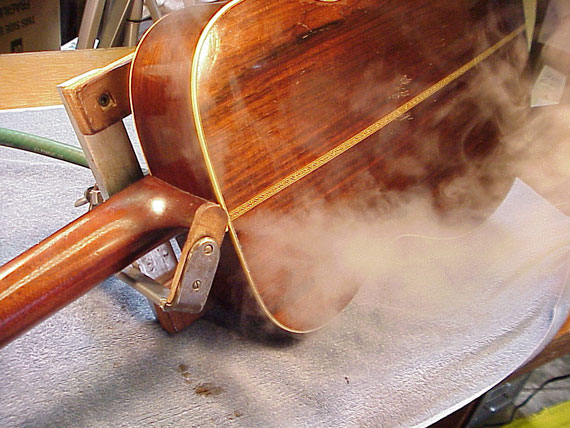
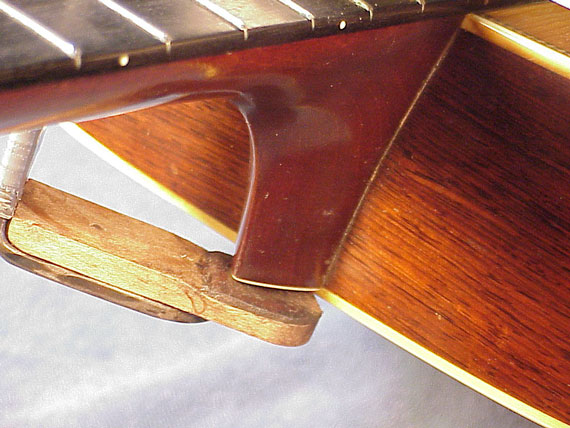
Yikes! Well, I did say "usually under the fingerboard." In this case, steam belched out at the "south end" of the heel, right at the back. Naturally, I backed off on the steam valve a bit.
That's where this jig really shines. I can bounce the guitar all over the place while I'm steaming, so I keep on top of steam damage control.
And, suddenly, just as I'm wiggling the neck around to loosen it, the neck pops free, jumps up, hits the top of the jig and is out with nary a scratch or steam mark. That's why I have duct tape on the steel strap. When the neck comes out, the strap drops away, and might scratch the instrument in the process.
Often, I'll take advantage of the residual pressure to "steam clean" some of the parts.
A quick touch with a scraper gives me a fresh gluing surface.
All apart, and looking good.
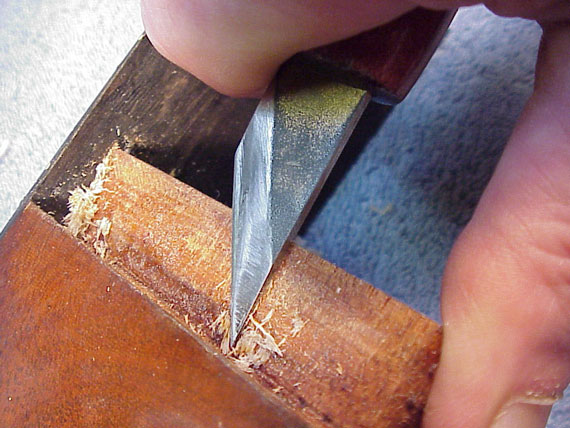
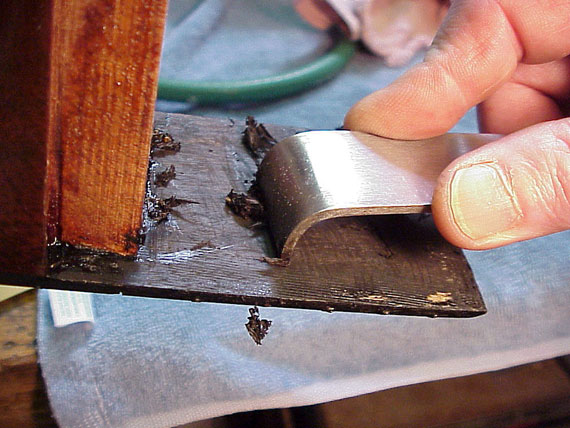
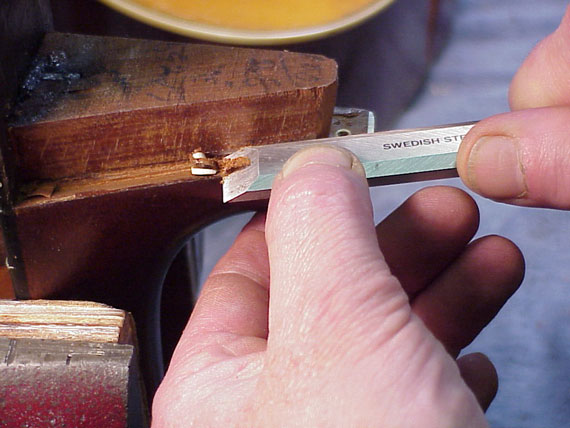
I like to use the back edge of my 18mm violin knife as a scraper. Holding it flat, I can plow the old dried glue right off surfaces like this.
A 3/4" chisel is my favorite for general use, and I have several, so there's always a sharp one around.
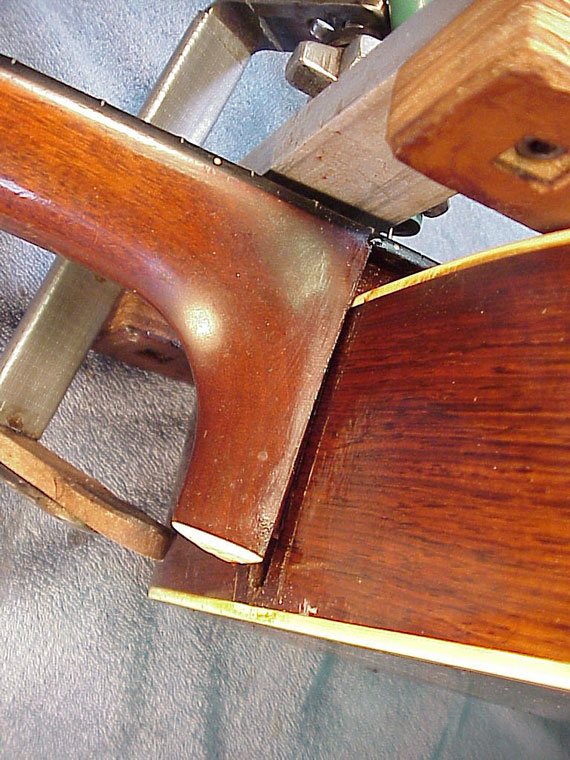
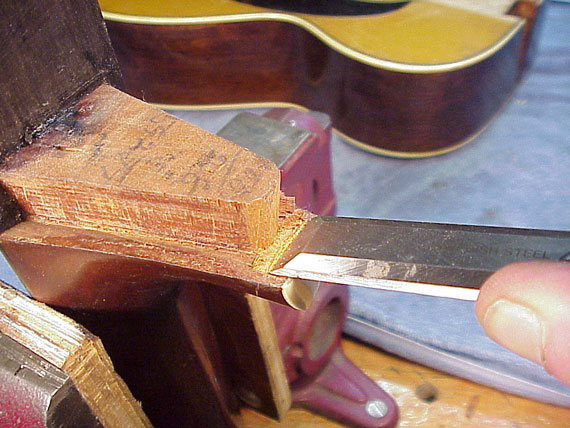
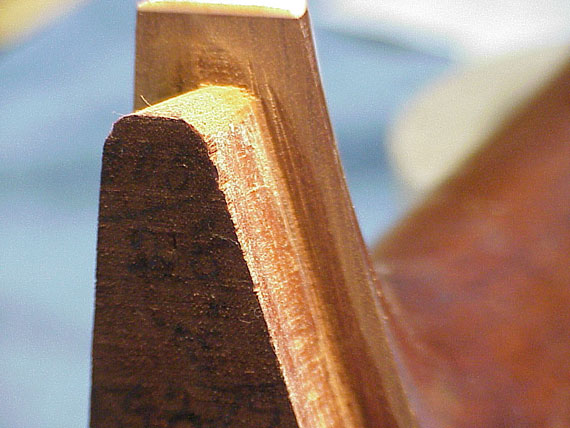
Cutting back the surface of the neck that touches the body will make it easier to fit the neck to precisely the right angle.

After all, only the outside bearing edge needs to touch the guitar sides, so I cut back till there's just about 1/16" of the original surface showing. I'm not cutting very deep, as you'll see in a later photo.
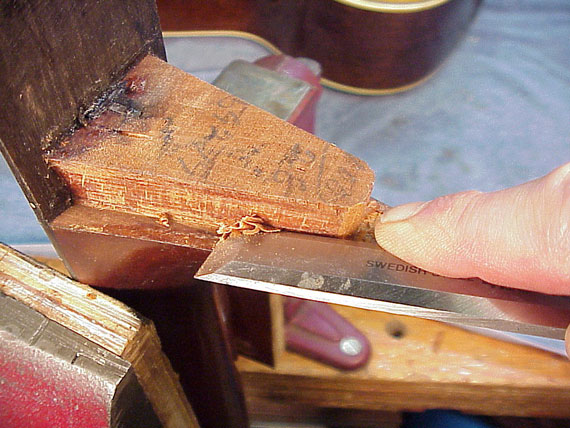
Because I need to bring the neck back quite a bit, I'll start making a tapering slice, starting at about 1/32" deep at the heel cap.
And proceeding upward, where the taper will end about 1/4" below the fingerboard
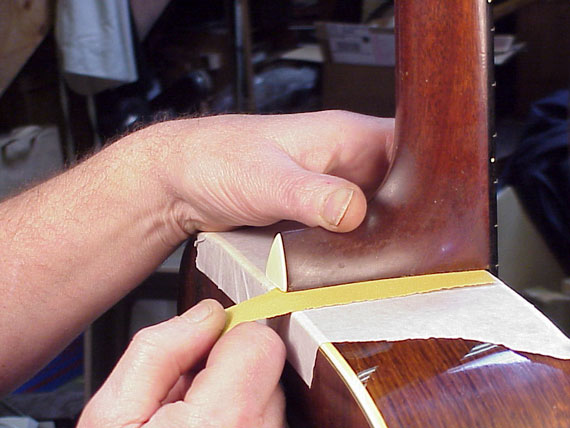
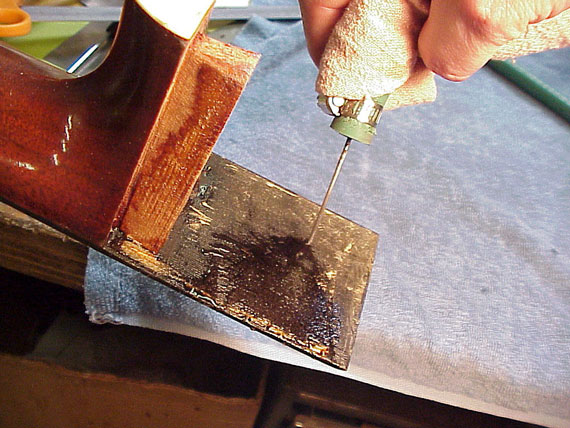
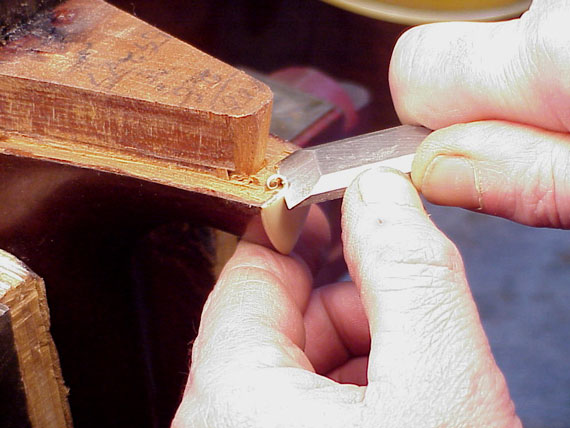
Now, all my fine adjustments will be a matter of seating the neck back in position, slipping some 180 grit sandpaper in the joint, and pulling outward (and downward a bit) at the heel. I have some thin wide low tack tape protecting the finish from scuffing during the sandpaper pulling operations.
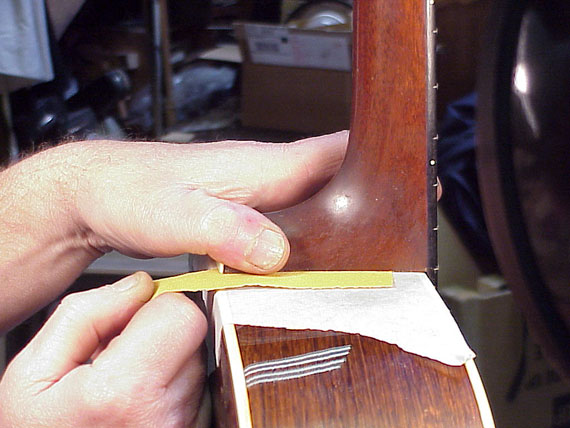
As I pull the sandpaper back toward the heel, it cuts the defining edges of the dovetail in a perfect taper. Up by the fingerboard the sandpaper hardly cuts at all, and at the heel it cuts quite a bit as I pull the entire length through.
After a few pulls on each side of the heel, I'll recheck the neck angle with my straightedge, until I have the neck aligned just where I want it. Usually, I'll want the straightedge to "land" right on top of the bridge (not the saddle) when I hold it against the tops of the frets.
I remove the protective paper for the last few pulls, just to make sure I get a good fit.
Check and recheck. It's easy to disturb the "string line" or side-to-side alignment of the neck, so I'm careful to keep watch on that measurement, too.
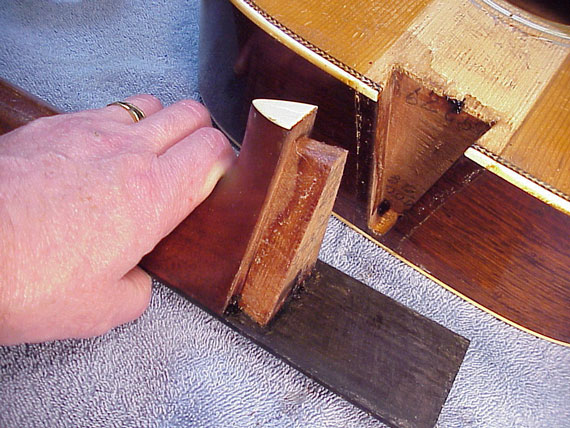
Now that the neck is fully fitted, look at how much of the heel surface contacts the neck. That's the smooth, light colored area I sanded by pulling the paper through.

After I've recut the neck angle, the dovetail will sit deeper in its recess at the heel cap, while remaining in the same position up by the fingerboard. So, I'll cut some shim stock (either veneer, or, in this case, thin fiber board.
After trying various combinations of shims to get a good tight fit, I'll simply glue the shims and neck in one operation. Many Martins and other guitars have shims added when they are first assembled, so I'll replace them as well.
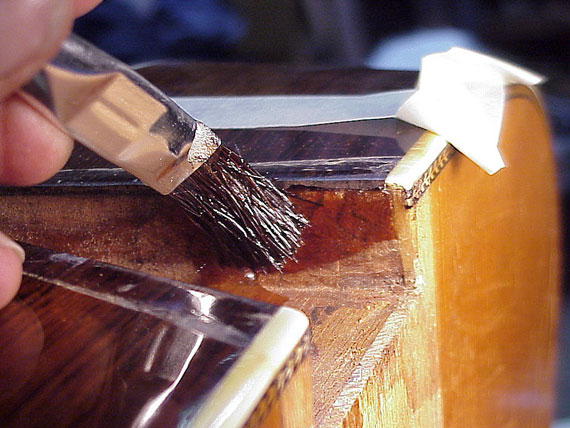
This guitar was made with hide glue, and that's what I use to reglue the neck. Working quickly with the hot glue, I brush it on only the sides of the joint. I don't want to fill up the entire joint, making removal difficult for the next time a reset is necessary.
My fingerboard caul is mated to the radius of the fingerboard, and distributes pressure evenly
After the neck is clamped in position, I can still check the neck angle and string line to make sure nothing shifted during clamping.
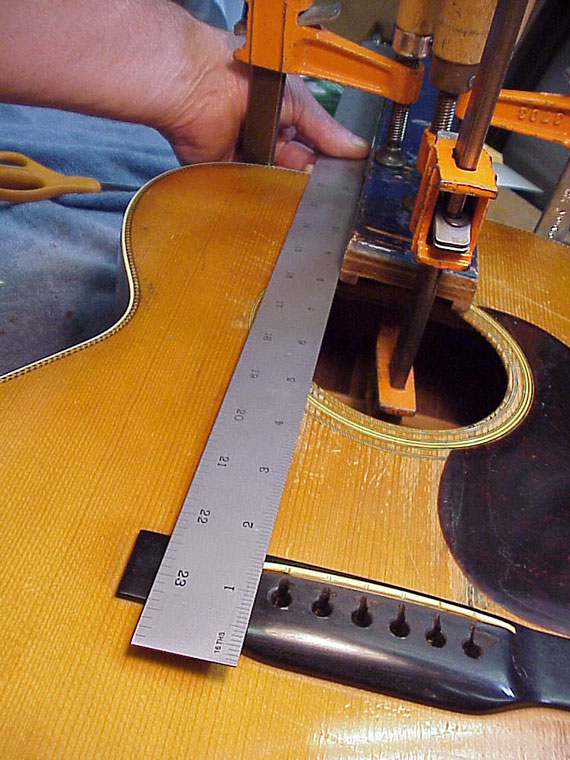
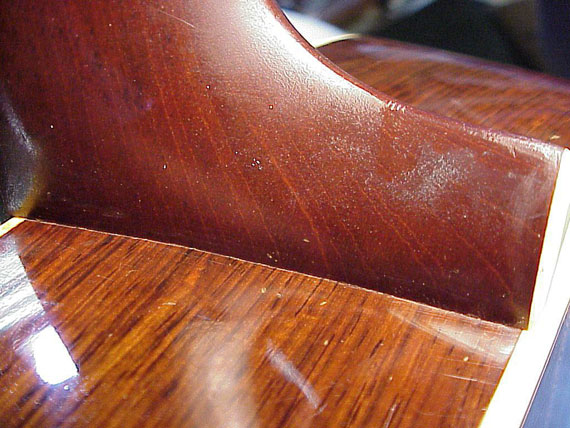
All done. Well, all done except the setup, including, in most cases, refretting. As you can see, the straightedge lands right on top of the bridge. I think this one will work out well. You may notice that there's a bit more than the "usual" amount of drop-off over the body. Generally, if the drop-off isn't too severe, I prefer it that way, rather than seeing the uneven look of a shim under the fingerboard end.
Yep, a trial restringing proves that the action is just where it ought to be.
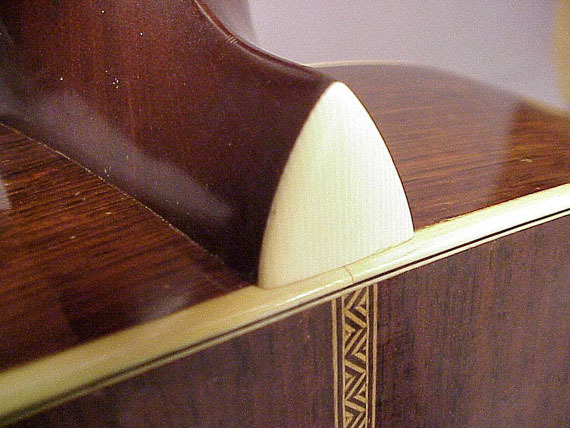
And, the neck is back on, fitting as tightly to the body as when the guitar was new.
No steam damage, so no finish touchup to spoil the "original" look. (Whew! It doesn't always work out that way.