
Celluloid Pickguards
Making and installing
Modern guitars usually have their pickguards installed on top of the finish. The old timers used a pickguard that was cemented permanently with solvent or a solvent type glue directly to the wood before finish was applied. These pickguards have an ugly habit of shrinking and causing damage to the wood underneath.
These early type pickguards may be reglued when they become loose if they haven't shrunk too much. If they must be replaced, the area underneath needs to be finished to match the level of the surrounding area and then a new pickguard can be installed on top of the finish in the modern manner.
Modern pickguards may shrink and come loose, but they're more easily replace with one of the same type. Personally, I like the modern method much better because the instrument is never damaged even if the pickguard gets unruly.
With nice beveled and rounded edges, a good polishing and good adhesion a modern pickguard can have much the same elegant look as the old under the finish style pickguard.
Today I'm making a new pickguard for a dreadnought guitar.
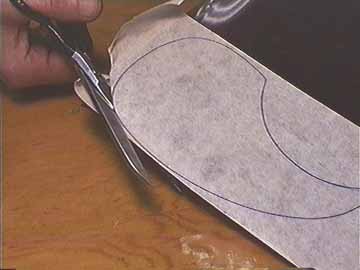
The first step is to cut out the shape. I'll cover the celluloid sheet with the same wide tape I use for masking finishes, draw the outline and cut it out with scissors:
The celluloid is around .025" thick, but it's easy enough to cut cleanly with sharp scissors.
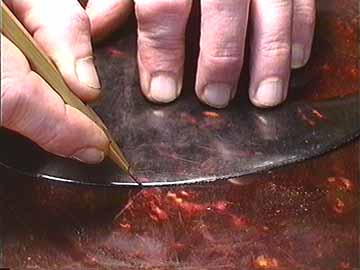
If I'm duplicating an existing pickguard, I can hold the old pickguard on the celluloid sheet and trace around with my sharpest scriber:
I try to score it as deeply as possible in one smooth effort. I can go over the lines a second time to make them deeper if I want.
By the way, this scriber is one I made to hold 78 rpm phonograph needles. They're very hard steel, quite sharp and cheaply replaceable. Cheap for me, that is, because many years ago Gryphon sold these needles, and I recently came across a box of 1,000. Not too much demand for phono needles in our shop these days. . .
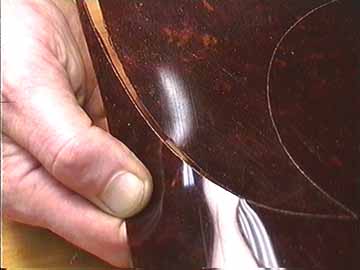
Then, I can simply break the celluloid right on the scribed line:
Whether I cut or break the pickguard out, I'm never satisfied with the edge, so I true it up with a light block sanding (220 grit.)
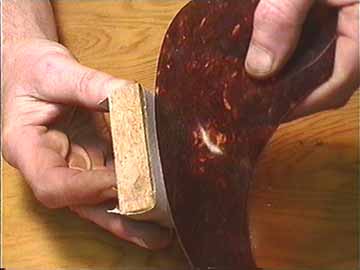
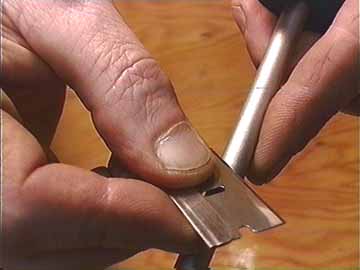
Next, I'll prepare one of my razor blade scrapers by burnishing the edge against a screwdriver handle:
The little hook I form this way is quite delicate but so sharp it usually lasts long enough to scrape the edge of the entire pickguard.
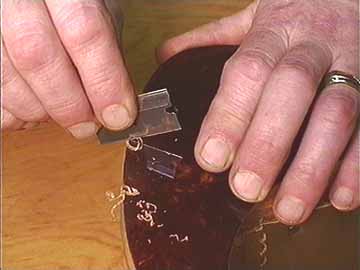
With my razor scraper, I can make a little bevel all around the pickguard:
I try to make a uniform, straight bevel all around the edge:
I want the bevel to extend 1/8" to 3/16" in from the edge, and I'll cut deeply enough so that the very edge is about 1/4 original thickness.
I believe that a nice wide bevel like this not only looks better, but definitely helps keep the very edge from tending to curl as the pickguard ages.
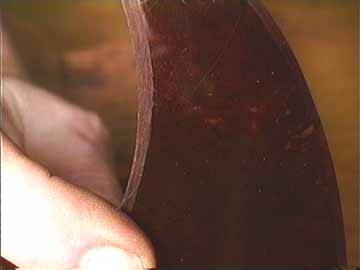
All the time while I work on the pickguard I do nothing to keep from scuffing the surface because my next step is to sand the entire surface including the beveled edge with 800 grit waterproof paper and a soft rubber sanding block:
I sand the surface until it's uniformly dull and the straight bevel becomes slightly rounded.
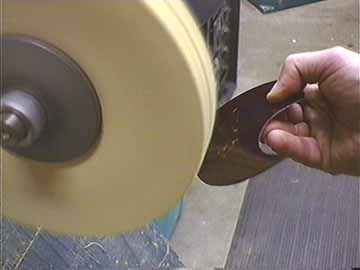
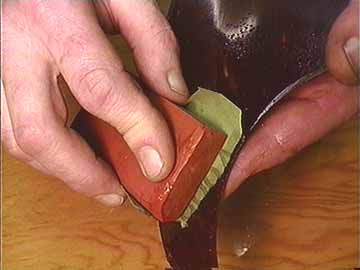
Now it's time to introduce the pickguard to Mr. Buffer:
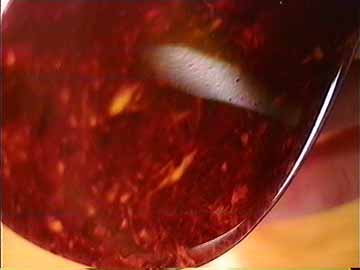
With the same buffer and compound I use for finishes, I buff the pickguard using firm pressure until the whole thing is shiny like this:
You can't beat the look of freshly buffed celluloid!
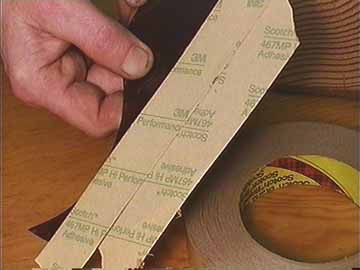
I like the same 3M product #467 tape adhesive that most of the manufacturers use:
It's available in different widths, but I like the one inch wide roll, because it's a lot cheaper and works just as well if I lay it down in strips. Because I'm not a manufacturer, my four inch wide roll dried out and became useless even though I kept it in an airtight container. I threw most of it away! (Stewart-MacDonald sells small quantities that are fresh.)
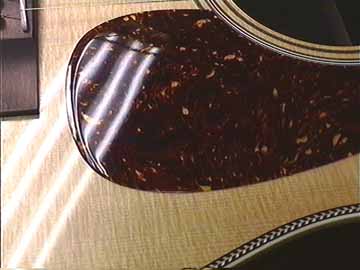
Now, doesn't that look nice after it's all done?
The buffing operation further rounds the edges so the pickguard seems to flow smoothly from the polished surface of the guitar top.
To adhere the pickguard I could simply place it on the finish and squish it down by hand.
Because I want it to stick as firmly as possible, I always clamp the new pickguard in place, using the same setup I use when I'm regluing an old pickguard. I leave the clamps on for only a minute or so to get great results. I presume that the high pressure causes the glue to flow a bit to improve contact.