
French Polishing
A Classic Finishing Technique
In the days before spray finishing and abrasive buffing, the technique known as "French polishing" was said to produce the finest finish on wood. There's no doubt this is true since the alternatives were various forms of rubbed or brushed finishes.
Later, as the cost of solvents decreased and the cost of labor increased, modern spray techniques began to replace the French polish finishing. Around 1925 to 1930, the last of the American instrument makers gave up the labor intensive technique in favor of the spray gun.
French polishing is certainly the appropriate technique for finishing or for restoring finishes on the instruments of the 1920s and earlier. French polishing is a technique, not a material; the finish itself is shellac dissolved in denatured alcohol.
This is not a how-to method that will give you everything you need to become proficient at French polishing. I really don't think that is possible to do in print. The technique takes a lot of practice to get down, and I think it's a good idea to read everything you can about it. I'm presenting just an illustration of what French polish actually is, and how I approach it.
Since I'm an instrument restorer, not a builder, I'll describe the process of adding new finish on top of old to fill in wounds, irregularities, crazing, crack repair, moisture damage or wear.
My concern is preserving authenticity of old instruments. I really don't have any opinion of the tonal characteristics that may be attributed to different finish materials. One thing we all agee on: shellac French polish is certainly more delicate and easily damaged than the modern lacquer or catalyzed synthetic finishes. On the other hand, it is one the most easily repaired finishes.
So, here's the old time method, as I know it.

First, because this is an old instrument with a very dirty finish, and because I want to level the finish over some old crack repair and scratches, I'll sand the surface with 280 grit silicon carbide paper and a cork sanding block:
This is generally known as "scuff" sanding to prepare the surface for more finish.
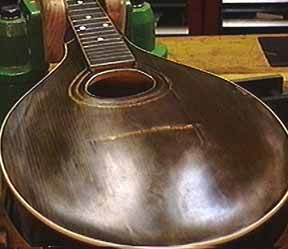
Here's how it looks after sanding:
Almost all the surface has been scuffed, and the few shiny spots are dented areas.
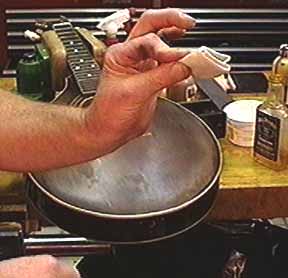
My finish consists of dry shellac flakes (10% by weight) dissolved in denatured alcohol. I've added 1% by weight of the hardest natural gum, called "sandarac." Gum sandarac gives the finish just a little extra elasticity, toughness and resistance to scratches.
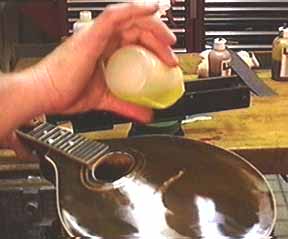
This is my applicator:
It's a pad made from ordinary old (to avoid lint) cotton bed sheet which I folded into a convenient size.
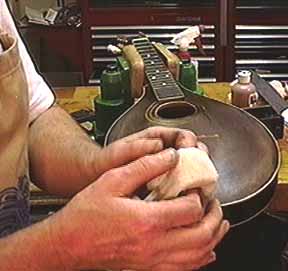
I'll wrap the folded pad inside another piece of the same cotton cloth:
I just open the cover and pour on a little of my shellac mixture from time to time as needed:
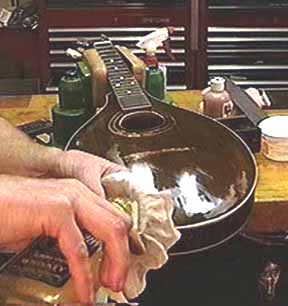
My first coat needs to be very wet, so the alcohol will melt a little into the old finish, so I'll saturate my pad and wipe on a coat with bold strokes.
I'll let that dry a few minutes and repeat the process two or three more times.
Now I have a lumpy, unsightly, rather sticky finish over the whole surface:
But, because it's so sticky, I feel that it will adhere and blend with the old finish.
Now I'll put on one or two drops of oil. (I've had good results with a variety of oils including synthetic lemon oil, linseed oil and walnut oil.)
I'll smear the tiny amount of oil over the surface with my fingers, and get ready to do the actual French polishing.
French polishing is exactly the same as spit-shining a shoe. Spit shining works because the water doesn't mix with the shoe wax, but allows more wax to be deposited from the rag as it passes over the freshly waxed leather surface.
In French polishing, the oil acts as a lubricant while pad spreads shellac repeatedly over the surface which is already sticky with fresh shellac. The real trick in French polishing is to learn to sense when you are depositing finish from your pad to the surface, and when you are dragging finish off the surface because your pad is too dry, or you're using too much pressure.
As with many handcraft techniques, it's a matter of practice and experience. French polishing takes a lot more practice that a lot of other techniques!
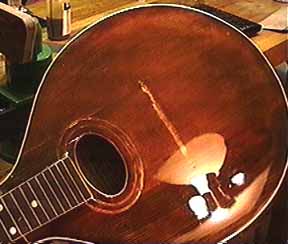
As I rub the pad lightly across the surface, I can see the rapidly evaporating trail behind:
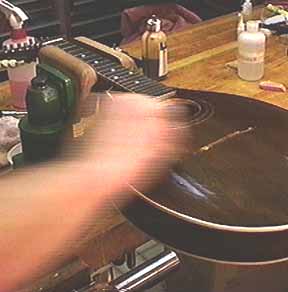
The alcohol evaporates so quickly, that the surface haze of my wipe is gone in an instant:
At the end of this article, I have a series of photos that better illustrate the evaporating trail.
The point is that the trail of new finish loses so much of its solvent so quickly that I can wipe in a continuous circular motion over and over, each time depositing a micro layer of new sticky shellac. Every so often I "recharge" my pad with new shellac, and drop on a tiny bit more oil.
I want to use as little oil as possible because some of the oil becomes incorporated into the finish. Too much oil and the finish will tend to become sticky when warm, even years later.
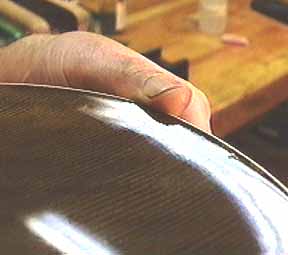
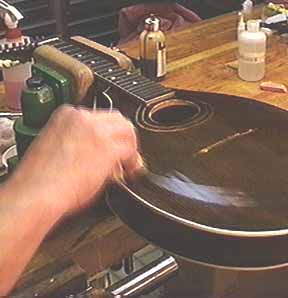
I can continue the application of shellac until I have a rather thick layer:
This is how the surface looks after about an hour of continuous application. There's a serious amount of new finish on this instrument.
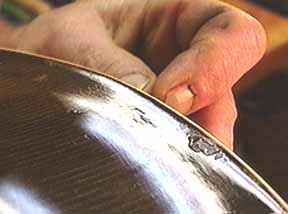
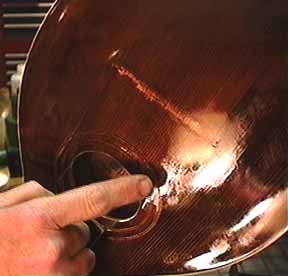
Here, let me gouge out an area so you can see how thick it is:
Don't worry, I'll fix it. I just couldn't think of any better way to show the progress. Besides, this spot will be completely covered by the tailpiece.
At this point I have enough finish on the surface. It's a special application, by the way. Unlike spray and brush techniques, French polishing actually presses the shellac down into the divots, dings, cracks and scratches of the old surface. This is a great help in leveling out an old finish!
I'll put the instrument away for about a week to dry thoroughly, and scuff sand again (this time with finer grits) and repeat the process until I'm satisfied that I've filled the imperfections appropriately.
On some instruments, the approach is to do the very least possible to shine them up, on others the requirements may include filling every possible spot and making them look as new.
On my last application, I'll use the technique known as "spiriting off." Here the idea is to use only alcohol on the pad, lubricate the surface with a tiny drop of oil, and carefully wipe in the same manner. This has the effect of softening the surface very slightly and polishing out the high spots of the previous pad rubbing streaks and marks.
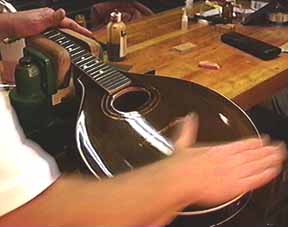
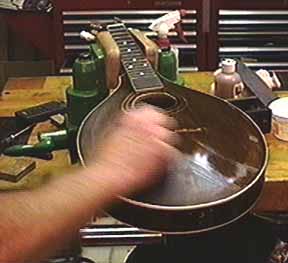
At the very end, I'll drop the pad altogether, and rub very fast with increasing pressure using only the palm of my hand:
By hand rubbing, I'm burnishing the slightly soft shellac. I can really work up a sweat doing this job!
Just look at that shine:
Well, that's the French polishing technique boiled down to the fewest words I could manage. If you'd like some good instruction that will really get you going, I recommend the fine video by Ron Fernandez. It's available through L.M.I.
The next bit is a little "movie" that illustrates the evaporating "comet tail" behind my pad as I rub on a coat of finish.
Here's a single pass in the French polish technique.
You can see trail of the rapidly drying shellac just behind my rubbing pad as I apply a single coat. I'm rubbing in a circular motion, at about 33-1/3rpm.
You may have to wait a while for the animated GIF to load. . .
As you can see, the initial solvent will have "flashed" off completely long before I make it around again. I can go around hundreds of times in a single session.