
Spanish Heel
An impossible job?
The Problem
For decades, we've been aware that virtually all steel string guitars will eventually need to have their necks reset to compensate for the glacier-slow body shape change, that results from the relentless pull of the strings. Eventually the neck no longer "aims" toward the bridge at the proper height. High action and a low saddle, and a low cut-down bridge give us no alternative but to consider changing the neck angle.
Conventional dovetail neck joints can typically be disassembled and reset to achieve the original geometry for reasonable action and "new life" for guitars. Modern bolted necks are even easier! These instruments are built by manufacturers who recognize the predictability of the neck reset.
Guitars made in the Spanish tradition have their necks integral with the neck block. In fact, the neck block is part of the same piece of wood. There is no neck joint to take apart since the guitar's sides are actually set into the neck and the body built around the end of the neck. Typically this is not a big problem with low-tension classical and flamenco guitars.
Guitars with Spanish heel construction, or (typically Asian) guitars with necks epoxied into the body, cannot be disassembled easily. How, then, do we deal with the neck reset problem? There are lots of creative solutions; here are a few:
1. Remove the fingerboard and insert a "wedge" of wood underneath to elevate the fingerboard and lower action. I don't like this solution because it requires massive finish touchup, changes the neck profile, and is only good for one time. How about later when the problem continues to get worse? Add another wedge?
2. Take the body apart behind the neck block and "shorten the back" to change the body shape and the neck angle. Very messy job. Lots of chance for breakage, and lots of touchup work even if there is no breakage. Also, some guitars are made with very unfriendly glue, from a repair standpoint.
3. Loosen the fingerboard over the body and clamp the neck backward to change the angle, then glue the fingerboard back. Some repair people actually do this. It's risky, and has the potential for only a slight angle change. Clearly not repeatable on the same instrument.
4. Convert to another style of neck joint. This is a bit controversial, but with the popularity of the bolted neck, there is a good opportunity to "update" the neck joint on instruments we used to consider not restorable.
Number 4 is my choice! It seems reasonable to me to convert an otherwise unplayable instrument to a modern bolt-on style of neck joint if there is no other reasonable alternative. The photos on the following pages describe my method of resetting the neck on a high quality steel string guitar originally made with the Spanish heel.
Bolted Neck Conversion
The subject of this repair is a 1970s B. C. Rich 17" jumbo with Brazilian rosewood back and sides. It's in mint condition except for the horrific neck angle. Even with the drastic need for resetting the neck, this guitar sounds great!
All indications are good: the guitar's cash value is high enough to justify the work; the owner really loves the instrument and wants to restore it to good playability; the style of repair won't adversely affect the structural integrity or appearance; the repair will increase both the playability and resale value.
By the way, I called the B. C. Rich factory and asked them how they approach the problem. They choose method #3 for mild cases and #1 for more serious ones. When I told them about my idea for converting to bolt-on neck, they said it sounded like the best of all possible repairs, but way too much work. I think with the procedure below I've cut the work down to a manageable size.
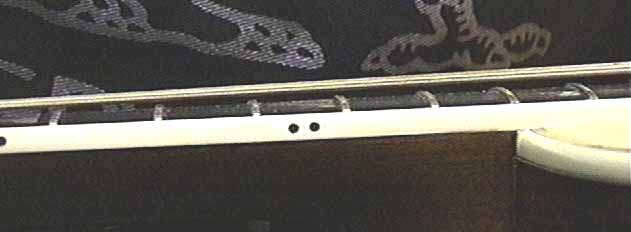
Here's a view of the action. Bear in mind that the bridge and saddle are very low, and there is no way to make them lower!
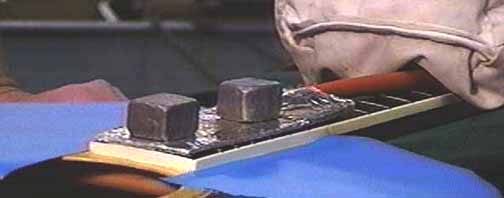
First job is to heat and release the end of the fingerboard over the body. I'm using low-tack masking tape to protect the finish from any radiant heat. My heater is the heat blanket available from L.M.I.
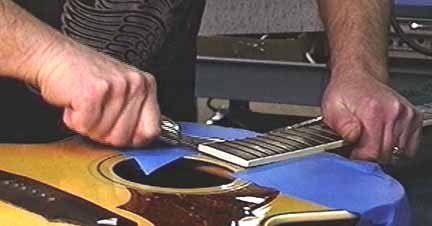
I've got a sandbag to stabilize the power cord and a couple of tiny lead bricks to hold the blanket down. The blanket is wrapped in aluminum foil for a little better heat transfer to the fingerboard. I'll feel underneath the top of the guitar to check the heat. When it's quite warm, I'll start to lift the fingerboard off with my thinned-out flexible putty knife:
Once the fingerboard is loose, I can proceed with removing the neck.
Now the fun begins:
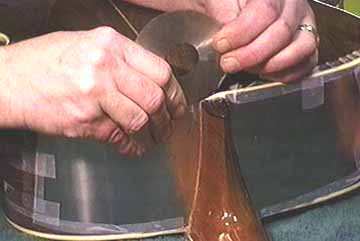
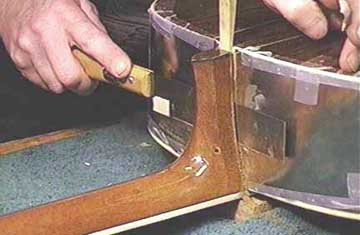
Here I have the sides protected with 0.002" thick steel shim stock taped in place. I'm scratching the finish and cutting into the corner where the neck joins the body using a flexible, 0.006" thick jewelers slitting blade. I just want to score the finish and the surface of the neck wood to avoid any chips.
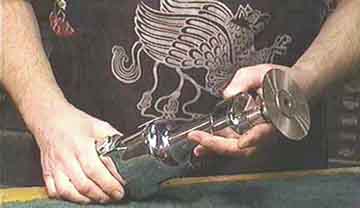
This is the saw I'll use to cut the neck off the body:
It's an autopsy bone saw and it is not dangerous! Read and see more about the bone saw. It cuts with an oscillating, not rotating action, so it's perfectly controllable and won't even cut my hand. It eats right through wood!
I have the saw fitted with a nearly flush arbor I made to hold the slitting blades commonly available through tool supply houses. I get mine from M.S.C.
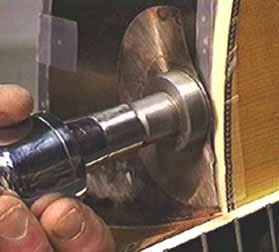
OK, let's have at it:
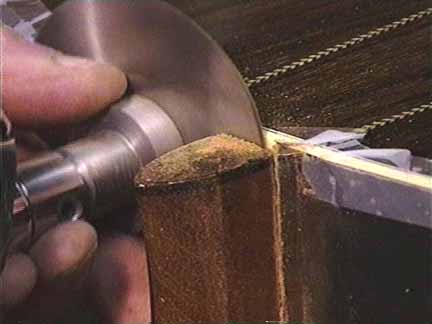
Yes, I'm holding right onto the arbor, and pressing the flexible blade tight against the steel shim stock that protects the sides. That way the blade follows the contour of the sides, and cuts straight in. Remember the blade is NOT rotating, it's just oscillating back & forth a couple of degrees! These pictures were taking while the tool was actually turned on and cutting.
Tapping a wedge at the base of the heel and cutting downward toward the neck I can finish up the cut toward the center of the wide portion of the neck. I'm using a very thin kerf flexible Japanese razor saw. About a half inch before I might reach the fingerboard I can feel the saw graze the truss rod.
Now's where that bone saw will really shine!
I have another opportunity to take advantage of the reciprocal oscillating action of the bone saw, using a blade with a section broken off:
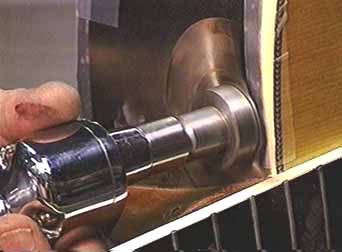
Would you look at that! I can cut literally right up to the fingerboard and all the way into the truss rod.
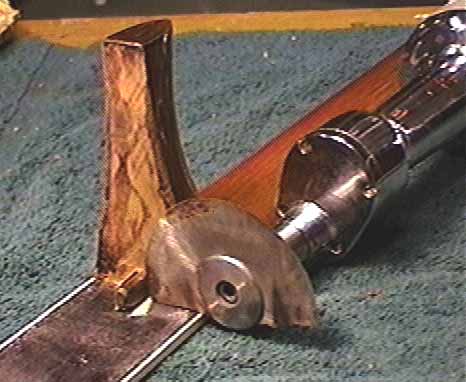
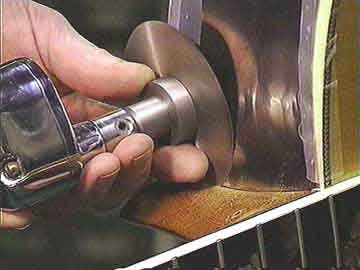
Here's a view of the neck, now off the body, and the bone saw in cutting position:
Is that cool, or what? The blades are cheap enough to be expendable; hitting the truss rod is tough on them.
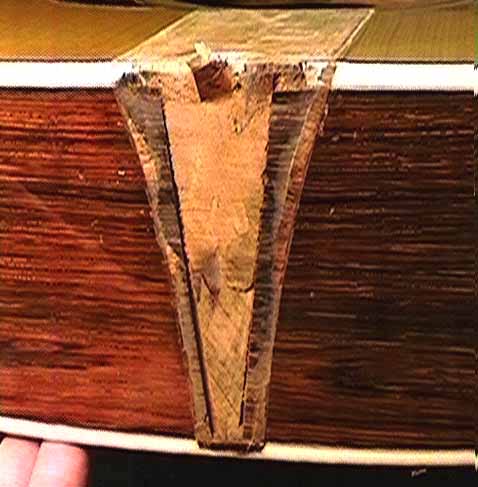
Now the neck and body are separated very neatly, and I only shortened the neck by the saw kerf, around 0.010:
The steel shim stock protected the finish, so I didn't even scratch it.
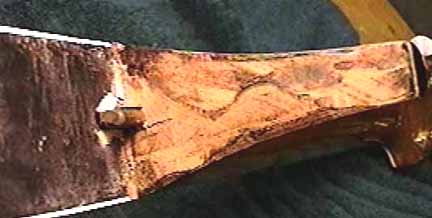
The heel is cut cleanly, and fits right back on the body:
You can see slight scorch marks where the blade overheated while cutting so deeply into the heel. All in all, though, I have no complaints.
Now, on to remounting the neck.
Before I start to readjust the neck angle I'll set up the new neck mounting system. Bob Taylor taught us all the efficiency and stability of the bolted neck joint, and that's what I'll use here.
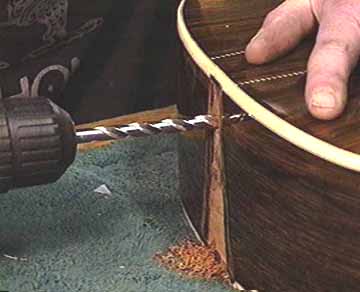
First, I have to drill the holes for the neck bolts:
My bolts are 1/4" diameter, so I'll use a 9/32" drill so they will fit neatly and allow just a teeny bit of readjustment side-to-side if I need it.
I could leave the inside of the neck block untreated with bolts sticking out, and it would be stable and strong. I'd rather leave the inside looking as though it were intended to be a bolt-on neck, so I'll countersink the bolt heads on the inside of the neck block.
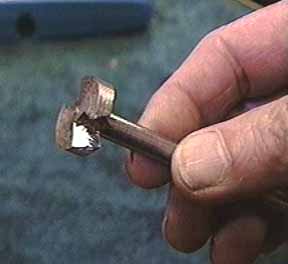
I have a special drill bit that I turned on my lathe with a 9/32" shank and 3/4" cutting diameter. Its cutting edges are like those of a Forstner bit. The difference is that this drill cuts backward. I filed the cutting edges on the surface that faces the shank of the drill, then heat treated and tempered it so I'd have a durable reusable tool:
I can now feed this drill bit through my new holes in the neck block from the inside and chuck it in the reliable old Makita.
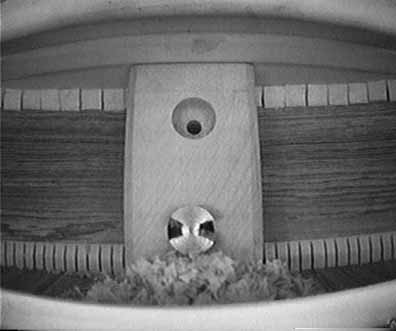
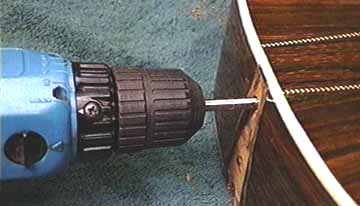
All I have to do is pull the bit toward the outside, and it countersinks my holes perfectly. Take a look through the INSIGHT camera:
This system works very easily and quickly to make countersunk holes that look as though they were done at the factory before the guitar was built.
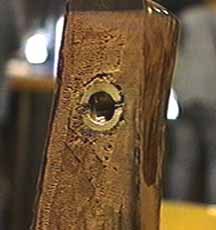
After I have the neck block holes drilled and countersunk, I can hold the neck back in position on the body and mark the hole locations on the heel by simply sticking a pencil into the holes and rotating it to get a good mark on the heel. Drilling 3/8" holes in the heel, I can simply screw in standard hardware brass thread inserts which will receive the 1/4-20 machine screws to bolt on the neck:
These inserts have very sharp wood threads on the outside and simply screw in with a screwdriver. I coat the threads with cyanoacrylate glue to soak into the end grain and make the inserts even that much more solid.
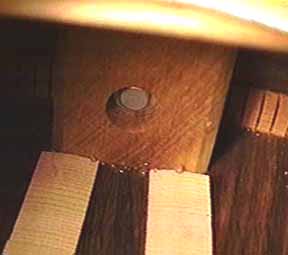
With the neck back on, here's the final look from the inside:
At this point I can leave the inside alone (like Breedlove) or I can cover the holes with tightly fitted mahogany plugs (like Collings) or a label (like Taylor.)
Whichever choice I make, the final product has a very neat look inside. The outside will also look nearly the same if I do just a little finish touchup after fitting the neck angle.
Best of all, the neck is now removable in a conventional manner and I don't have to worry about the impossible neck reset on this fine guitar!