
A Bridge Upgrade
1965 Gibson Hummingbird gets a Bridge Upgrade
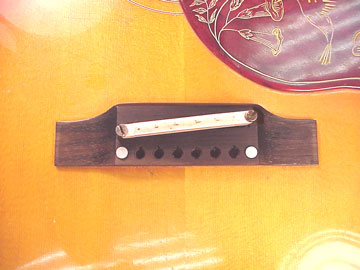
OK, here's where I get into trouble, but I just can't resist saying that this Gibson Hummingbird has a bad bridge:
It's bad because it's adjustable and the extra mass of the adjusting hardware impedes vibration. It's bad because it was never well glued to the top. It's bad because it has bolts right in line with the bridge pins, and that increases the likelihood of a crack forming through this vulnerable area.
It's bad because the line of bridge pins is right at the back edge where all the stress of the string tension is concentrated, and there's such a tiny margin of wood behind the pins it can barely hold on to the top.
And finally, it's bad because it has a ceramic saddle which weighs enough to be an effective mute all by itself.
Now, I feel better. . .
After all that, I must say that these are only my opinions, and I have no argument with anyone who likes the sound of a guitar with this bridge on it. Besides, this is a pricey job, and if it hadn't been for the structural problems, the owner of this guitar probably wouldn't have chosen to make the "upgrade."
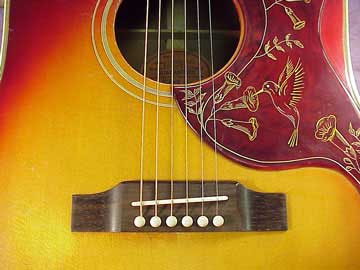
Let's take a look at this bridge up close:
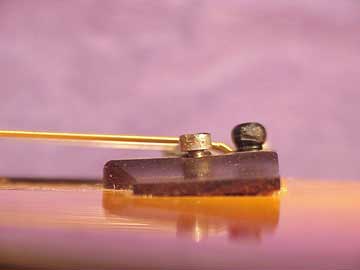
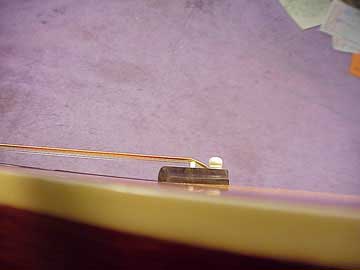
As you can see, the bridge is peeling away from the top. The glue has failed completely probably as a result of exposure to heat, and only bridge pins and the two bolts are holding things together. Additionally, the top is bulging quite a lot just behind the bridge.
After removing strings and the nuts from underneath, the bridge simply dropped off.
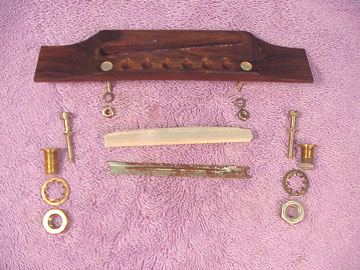
Now, take a look at all this hardware:
Here you have a regular size rosewood bridge and a wide ceramic saddle. That metal strip is a piece of spring steel placed under the saddle. I guess it's supposed to cut down on rattles, but without the strip these bridges don't rattle, so I figure it's useless. Then there are the screw adjusters to raise and lower the saddle. These screw into brass implants which themselves are bolted through the top and bridge plate.
Just the metal hardware alone weighs enough to make a fairly substantial mute.
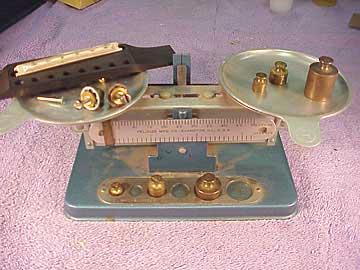
The whole business together tips the scale at 65 grams:
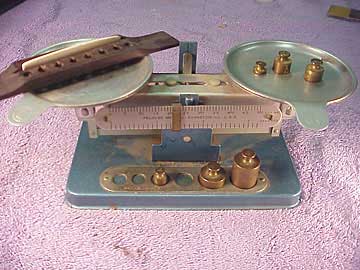
While a complete conventional nonadjustable bridge weighs in at 23.3 grams:
The bottom line is that by switching from the ceramic saddle adjustable bridge, we can save a solid 40 grams of mass, or 65% of the original.
I generally don't recommend hotrodding instruments, especially when the results are subtle to the degree of being just marginal. But any time you can reduce the mass of an overweight bridge by two thirds, you're bound to be able to notice the improvement in volume and tone.
Of course, these days we hear a lot about collector value of vintage instruments, and any change from original condition or equipment can that value. Here, I'm presuming we can put that business aside, and understand that the improvement in structural stability, volume and tone is the only goal. The owner of this guitar is not concerned with the market value; he's interested in the musical value. As with any other repair or modification, it is important to keep all these things in mind, including the possibility of resale. Keeping the issues in mind doesn't necessarily mean being bound by them, though.
Now, I'll get to work.
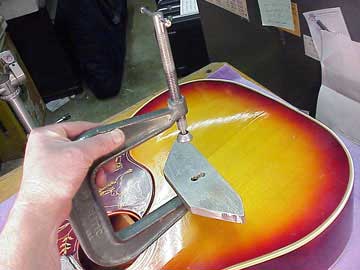
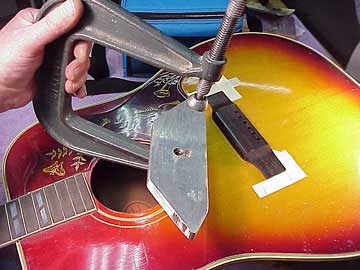
I have a large C-clamp with a series of bridge plate shaped aluminum cauls which I can screw to its foot. This one is just the size and shape of the bridge plate I need to remove:
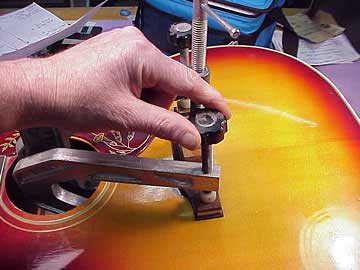
I'll heat the caul to about 400 degrees Fahrenheit, and clamp it up underneath the bridge plate. Holding my hand on the finished surface above, I monitor the heat transfer, so that I don't overheat the finish. It takes a bit of practice, but it's reasonably safe to heat the bridge plate this way.
The hot aluminum caul retains its heat long enough to heat through the bridge plate, but if I walk away from it, the temperature will drop with time, and I won't accidentally burn up the guitar. That's always my fear with heating instruments. I had a Martin tiple come from another repair shop where the luthier walked away while a heat lamp was on and started a fire on the top of the instrument. I always remember the look of that burned tiple when I use heat on a guitar.
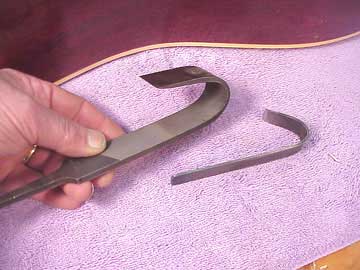
Here are my bridge plate removing chisels:
The big one is a 10-inch file I heated with a torch and bent, then ground the end to a chisel. The small one is a piece of 3/32" high carbon steel I shaped the same way, and hardened by heating and quenching it in water.
For more detail look at the bridge plate replacement article.
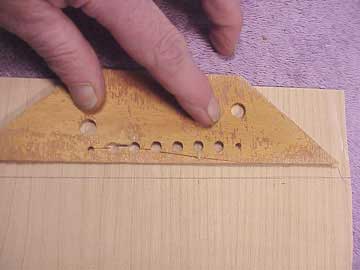
Working with these tools, I pry and lift the heated bridge plate loose from the top. Often, the bridge plate splinters and comes out in sections. This bridge plate is laminated, and came out quite neatly:
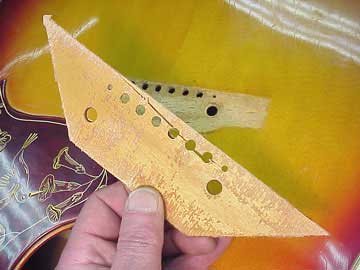
But, just look at where the bridge pin holes are. They're right at the back edge, just the way they are on the bridge itself. That means the top has a tendency to "hinge" right behind the bridge where all that string tension is concentrated.
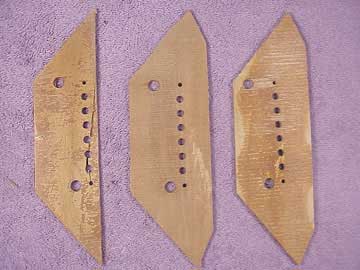
Compare the bridge plate I just took out with a couple of other Gibson bridge plates from similar Gibson guitars with the same adjustable bridge setup:
The one on the left came from this Hummingbird. The other two, while differing in the location of the holes, both extend substantially behind the bridge, giving support to the top where it's actually needed.
Look at these views of some Gibson bridge plates
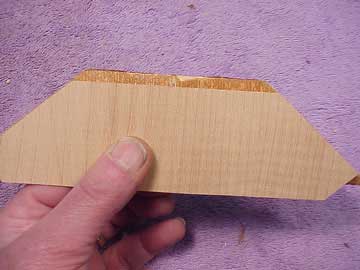
I'm going to give this guitar a bit of help in that area, too. I trace the old bridge plate on a piece of 1/8" thick maple, moving the alignment "forward" just a bit, to allow the back of the new plate to extend further behind the bridge:
Notice the grain direction of the maple. My new plate will have the grain parallel to the top of the guitar, so that it will be better able to resist the relentless pull of the strings. Wood has essentially no rigidity across the grain, so I feel that bridge plates should have the grain parallel to the string tension, hence parallel to the grain of the top.

You can see the amount of extra support area I'm allowing behind the bridge:
And, because I don't want to increase the size of the bridge plate, the front edge falls short by the same amount:
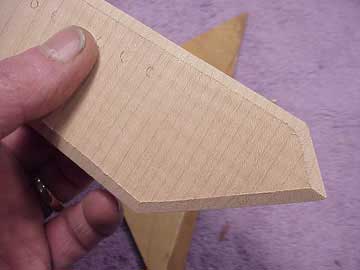
Unlike Gibson, I'll bevel the edges to make it look a bit neater, and to help it resist "peeling" loose if it's subjected to the stress of high heat (as in a parked car).
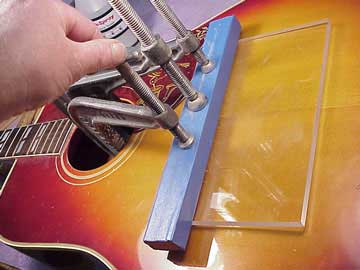
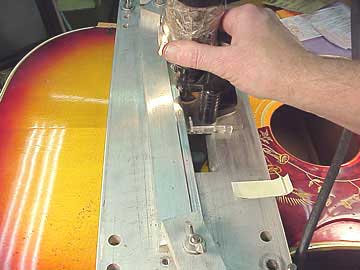
Using the same clamp and aluminum caul I used for heating the old plate, I glue and clamp my new plate:
The top caul is 1/2" thick acrylic with a heavy wood block to spread the pressure uniformly to flatten the top as I laminate the new bridge plate.
I'm using hot hide glue for both the bridge plate and the bridge, by the way.
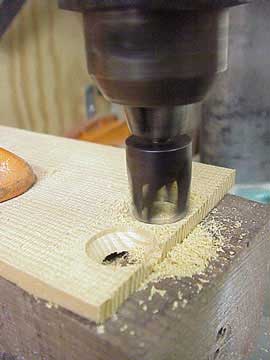
Now I'll deal with those big holes where the adjusting post supports were countersunk into the spruce top. The holes are 7/16" in diameter, so I'll use my 7/16" plug cutter to make some spruce patches:
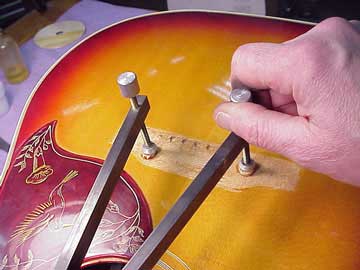
And I'll just glue and clamp them in place:
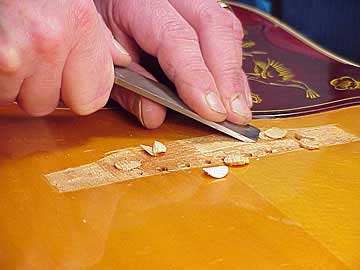
Next day, it's a quick job to trim off the tops of the plugs:
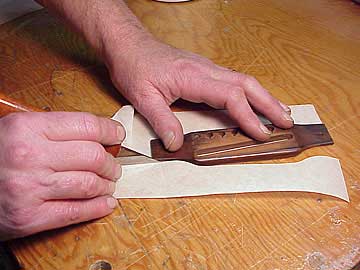
I have to make the new bridge to fit the top, so I'll trace the "footprint" of the old one by covering the bottom of the old bridge with wide masking tape and cutting around the bridge:
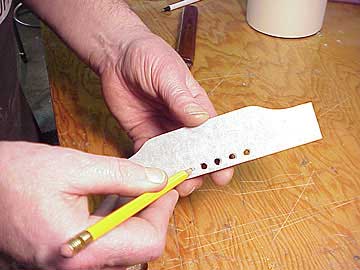
I'll punch out the bridge pin holes:
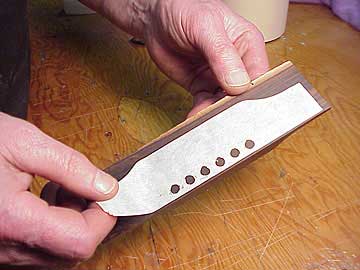
And stick the template on the bottom of my Brazilian rosewood bridge blank:
That way, when I cut the blank to match the outline, and drill the holes through the template, everything will line up just right. To gain just a bit of extra gluing surface, I'm making my new bridge 1/16" wider at the back edge. That small amount won't be noticeable once the job is complete, and will help the bridge stay in place.
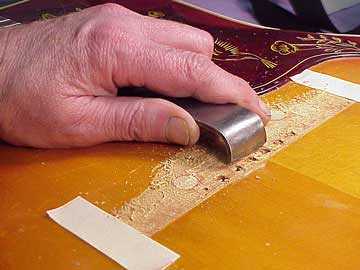
I'll use my little hook scraper to clean and level the gluing surface:
Here comes that clamp and caul assembly again:
I'm clamping my new bridge in place, having carved it to match the original in contour and appearance, but without any saddle slot:
After the glue has dried, I can calculate the ideal saddle position, set up my fence and rout the saddle slot:
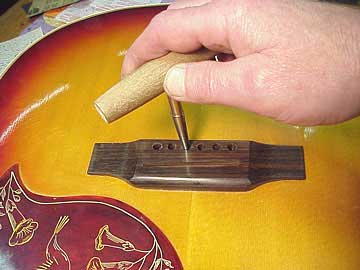
A quick cleanup of the bridge pin holes:
With a new 1/8" bone saddle, this Hummingbird is back in service:
Along with the improvement in structural stability, this guitar now sounds considerably stronger. I don't believe that replacing the bolts would add much to the stability of the bridge, so I chose to leave them off, and the pearl dots as well.
The top still shows a rise behind the bridge, but no longer exhibits that nasty "folding" action at the back edge of the bridge.
If you have any doubts as to the effect of bridge mass on the tone of a guitar, try a simple experiment. Play an open string, and simply touch the handle of an ordinary table knife to the saddle. You should be able to hear a dramatic difference in tone and volume. It's that kind of difference I'm talking about with this guitar!