
CFox Guitars
Guitar building tradition and innovation in Healdsburg, California
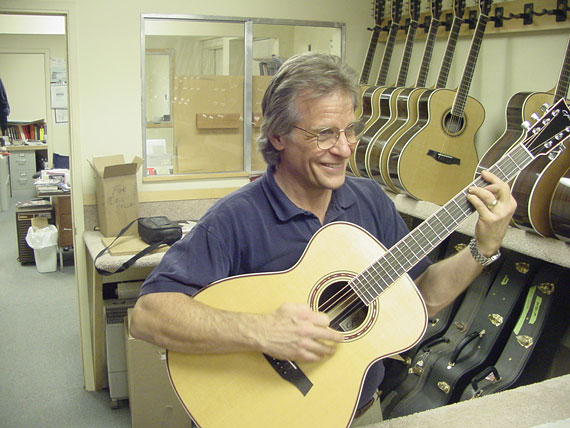
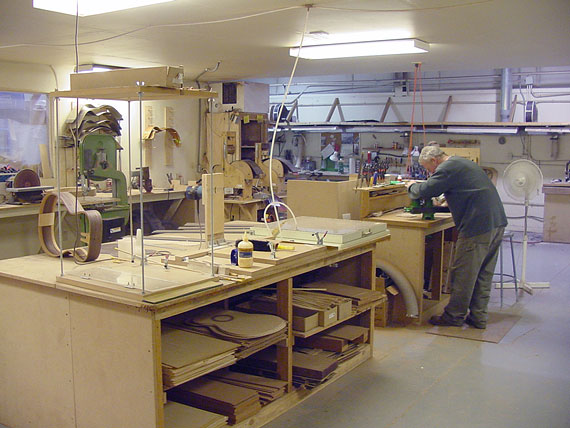
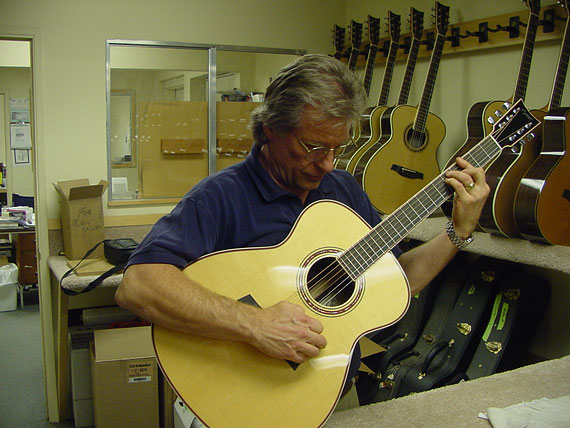
Who is this man, and why is he smiling?
Charles Fox, and he's president of the guitar company that bears his name. He's playing the first notes on a new guitar in the setup room. He calls it "spanking the baby." That's the front office way back behind him, by the way.
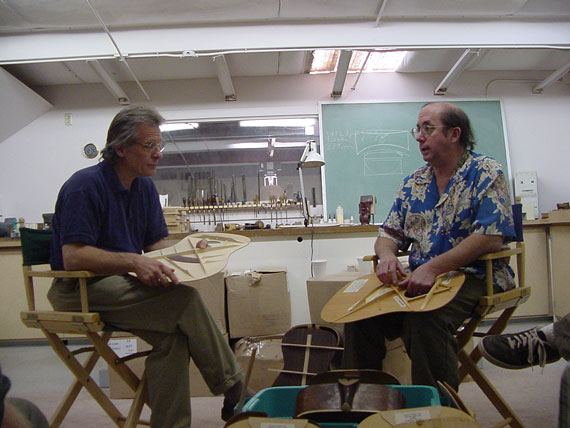
I spent the day (December 14, 2000) at the Charles Fox guitar factory in Healdsburg. Charles and I, along with most of the staff, spent hours discussing some of their plans for new models. For "show and tell," I brought along my collection of vintage and contemporary guitar tops.
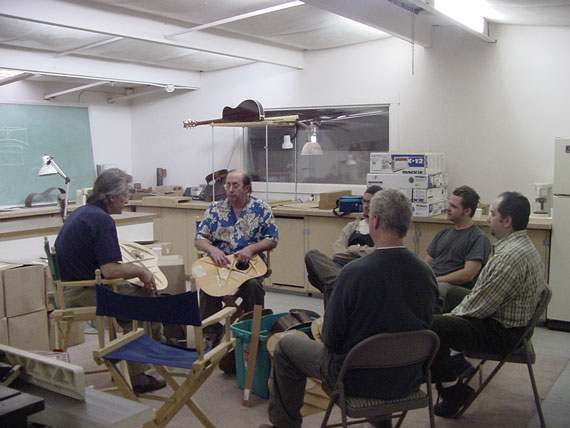
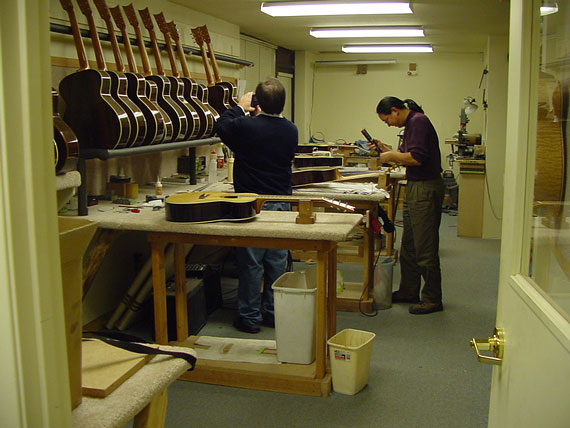
Even though they were filling orders and preparing for the big NAMM show in Anaheim a month later, Charles felt that the discussion of traditional designs warranted having his crew present to listen and contribute. It's a small, growing company, and there's a lot of overlap in responsibilities. As you'll see in the following photos, Charles and vice president Jon Lee both spend time "on the line."
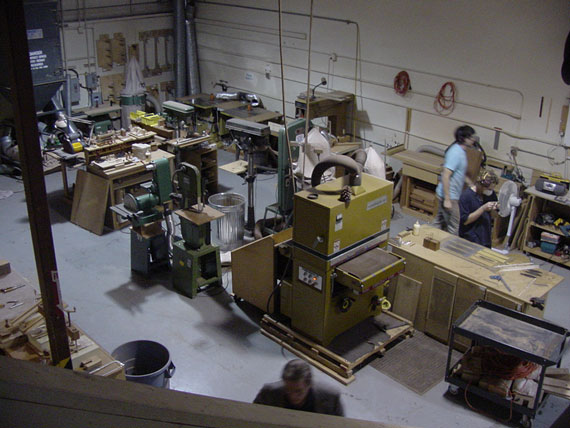
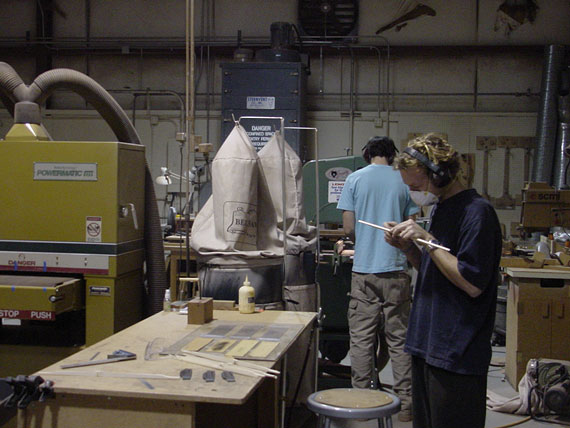
Life begins in the mill room, where raw materials begin to take shape. Here, wood is machined to size, tops and backs are sanded to thickness, parts are fabricated. Unlike the rest of the factory, his room has no climate control because the completed parts will spend time "seasoning" in the main assembly rooms.
After they are formed on the shaper using conventional pattern duplicating fixtures, braces get a final touch of hand sanding.
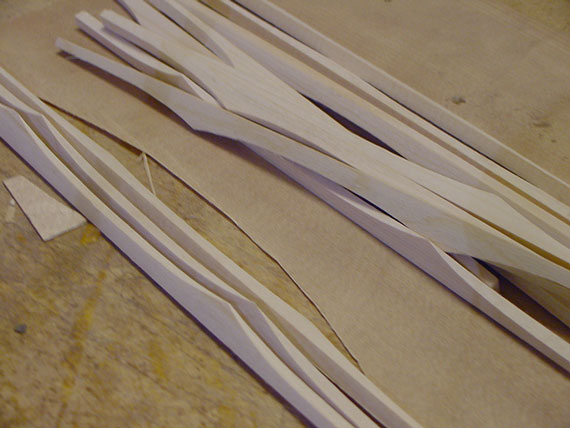
Here they are, ready to become part of a guitar top.
Bridges, too, get their share of finish sanding by hand.
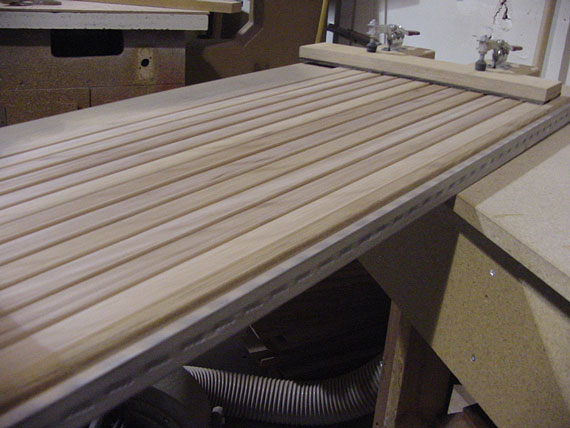
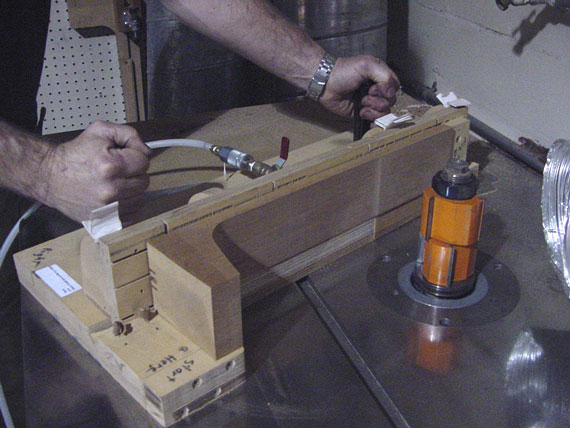
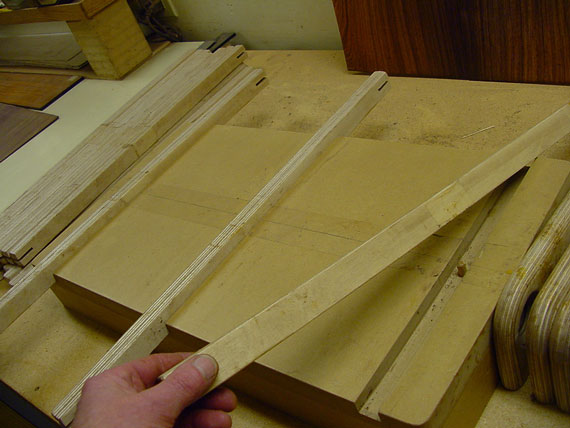
This big tray has a lot of strips which will get slotted to become kerfed lining. I had them hold the tray away from the saw at an angle so you could see them more easily.
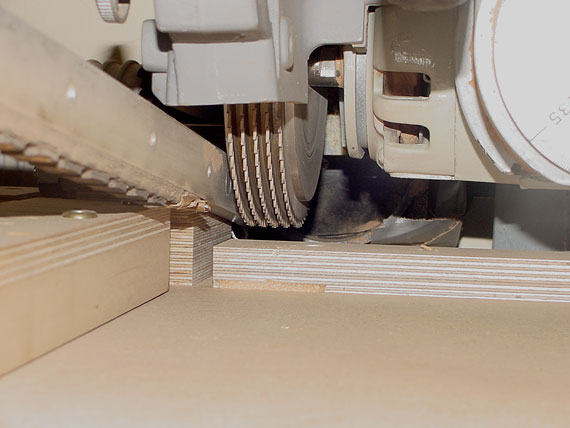
The kerfing saw is a converted radial arm saw, fitted with an arbor and a stack of five blades. One pull across the tray, and you get five cuts in a couple dozen strips.
By the way, this is one of a few flash pictures I had to take where the light was unfavorable for my digital camera. I think flash really freezes things and makes them look lifeless, so I avoid it wherever I can.
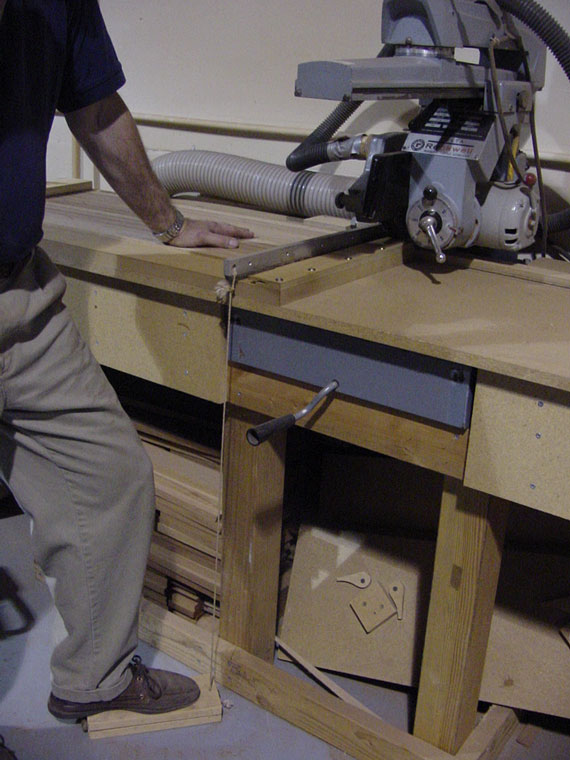
A simple hold-down device connected to a foot pedal keeps the strips from "floating" upward as they are cut. This kind of simple but effective safety system is important in any kind of power wood working!
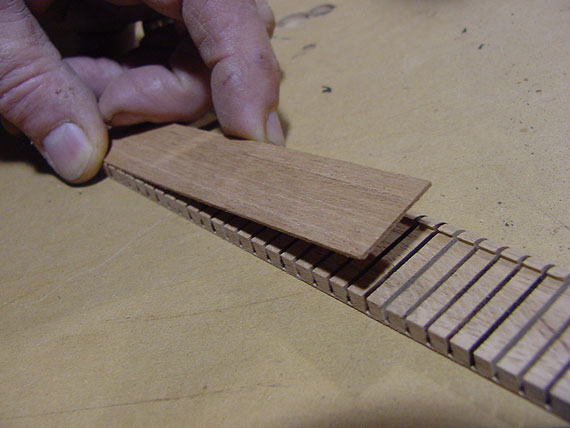
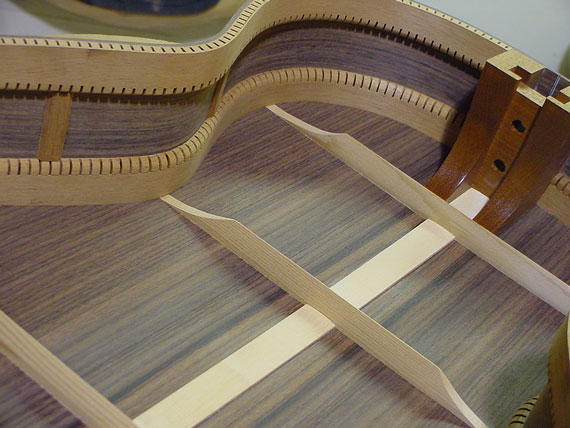
Now, let's take a look at these unusual linings. There's a kerfed section which is rabbeted to receive a thin filler strip.
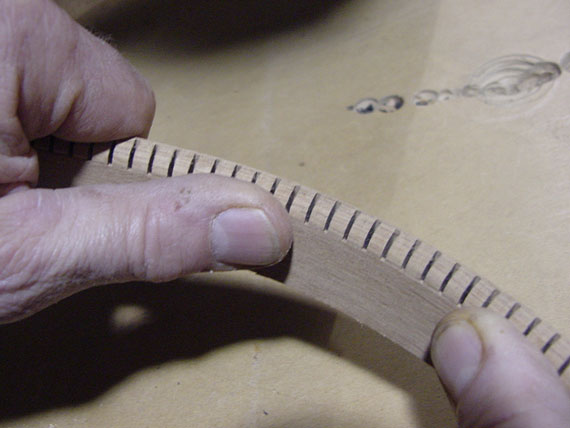
When the kerfed strip is bent to shape, the thin filler fits precisely into place. It may seem as though this is a lot of effort to waste making the kerfed lining look pretty, but that's not what's important here.
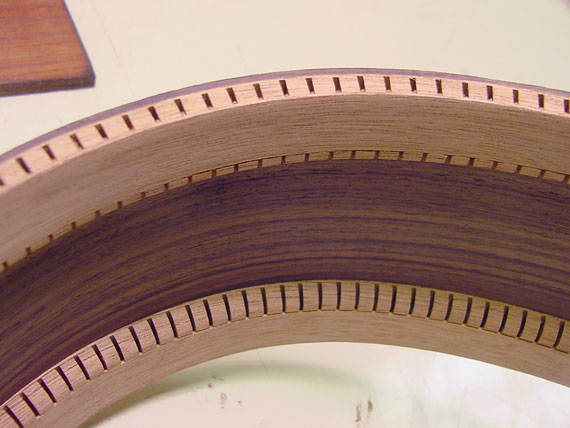
Glued in place, the filler strip acts as a cap preventing the kerfed strip from bending. That means the rim becomes incredibly rigid as soon as the lining is applied. I tried bending one of these rims and was really surprised at how strong it was.
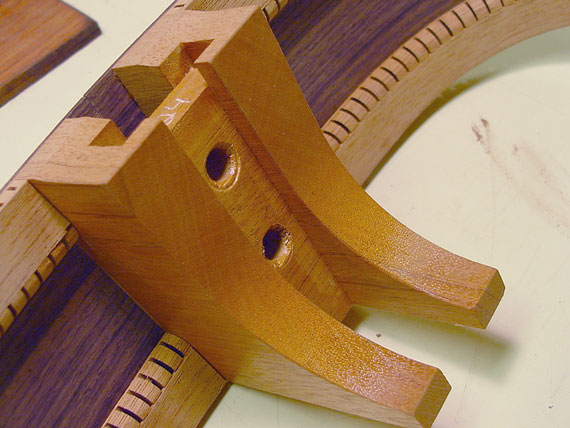
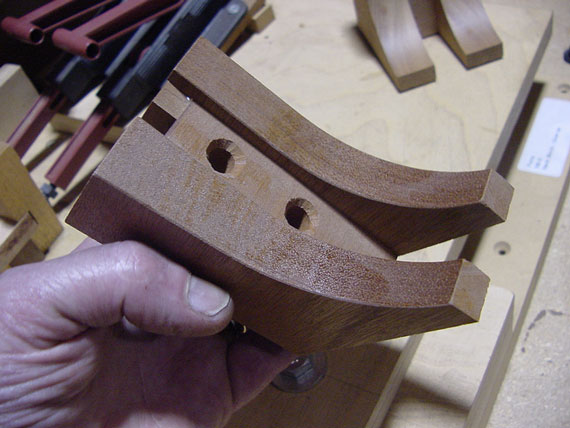
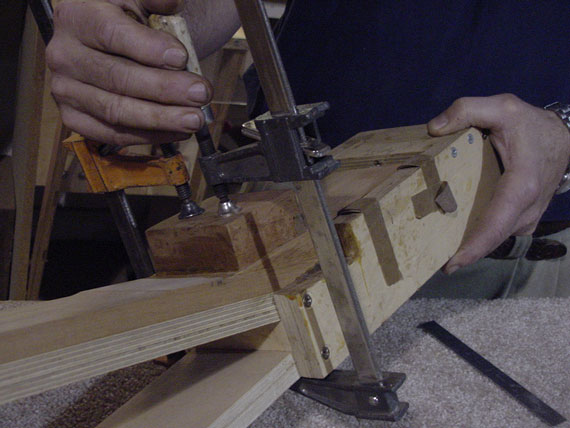
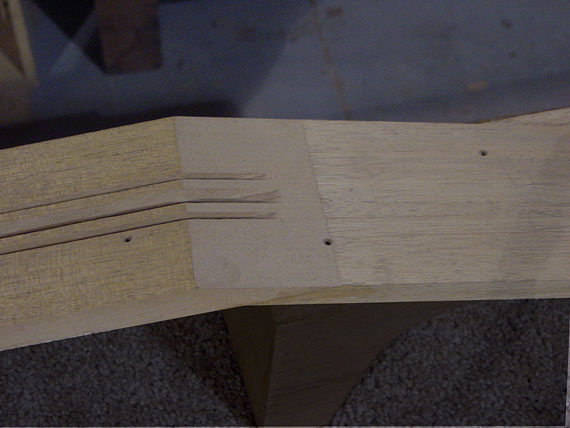
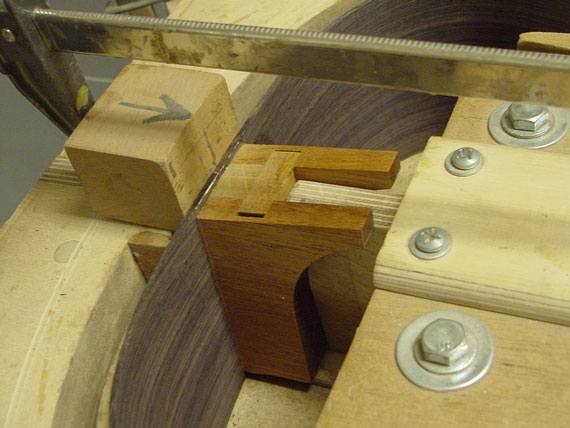
If you think the lining is unusual, take a look at this neck block! CFox guitars are assembled with a mortised and bolted neck heel. If you ask me, this is one of the best methods available for construction because it allows for easy neck removal, and is about as strong as a glued dovetail. Notice also, the "foot," designed to carry some of the load to the back to help keep the block rigid over time.
I don't know of any other builder who uses an assembled neck block like this one. Charles explained that with the extra rigidity of the foot design the grain needed to run fore and aft, rather than sideways. With the neck block grain in that direction, the bolts would not have been well supported, so he set about designing a block which has favorable grain in all directions.
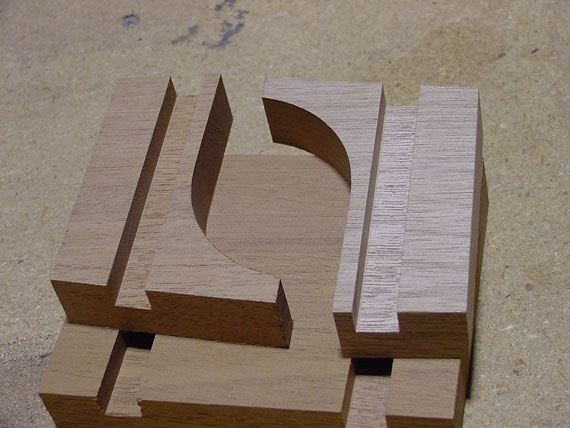
Parts are made using a shaper and a series of duplicating patterns, and they fit together tightly.
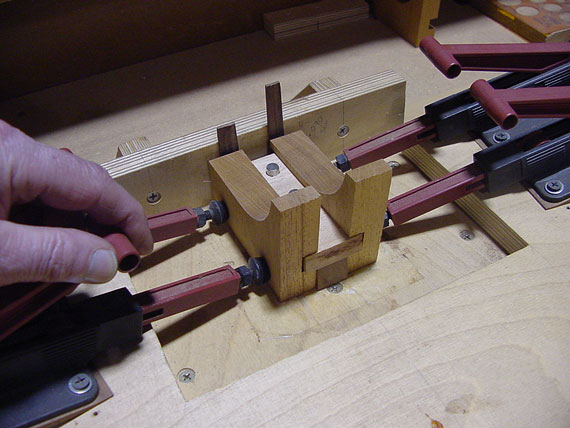
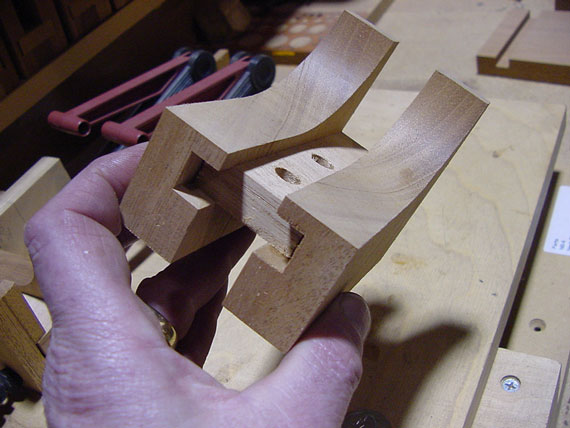
Two pairs of toggle clamps provide quick and easy clamping for glue-up.
A couple of tapering cuts on the outside edges give the neck block a trim look. The block takes a quick trip to the finishing room for a few coats of sealer and lacquer, also just for appearance.
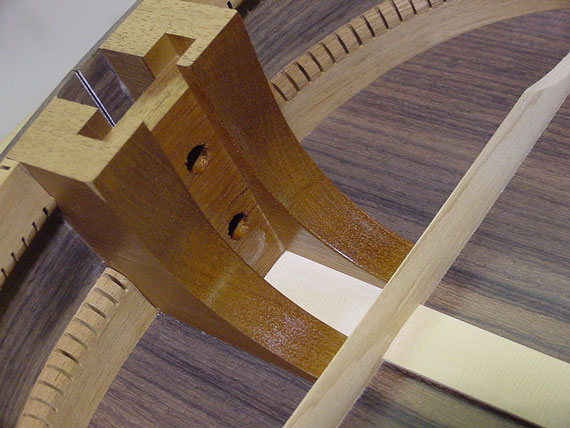
In place, the foot of the block butts right up against the upper back brace, which also helps carry the rotational load, making the neck-to-body joint all that much more rigid. The finish on just the neck block really draws attention to its innovative design.
Earlier I mentioned "conventional pattern duplicating templates." Here's a back wall with a bunch of them hanging, ready to participate in the neck making process.
And here's one on the shaper with a neck blank. The hose connected to the back of the fixture provides vacuum, holding the blank firmly in place as it is shaped.
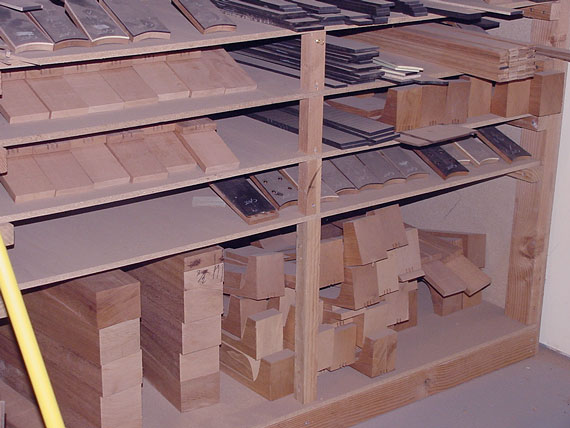
Some neck blanks ready for subsequent operations.
The peghead is glued to the shaft of the neck by a traditional "scarf" joint.
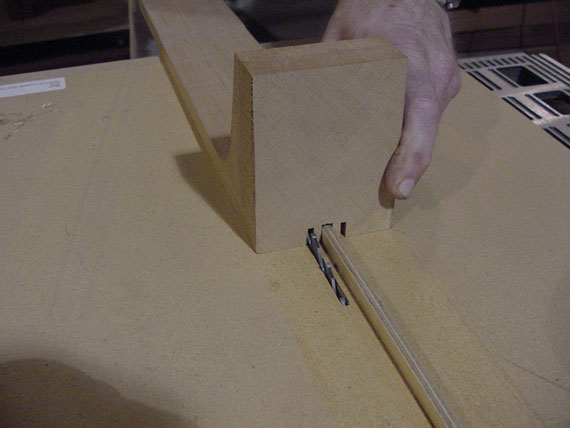
Neck blanks pass over a pair of small table saws, each one dedicated to only one cut. This one cuts only the slots for carbon fiber stiffeners that lie alongside the adjustable truss rod. Notice that the cut is guided by a rail in the center of the table. The neck block has already been cut for the truss rod, so that channel makes a natural guide slot.
Here's the neck so far. Side profile is roughly cut on the shaper, peghead is joined and flattened, truss rod and stiffener slots are cut.

This big press is used for laminating the peghead veneer. As I toured the shop, Charles reminded me of the importance of keeping the tooling simple and geared toward the level of production. He refers to the fixturing in his factory as "second level," meaning that it is basically the one stage ahead of that used in an ideal individual luthier's shop. Almost all the parts come from local hardware stores rather than big machine supply catalogs.
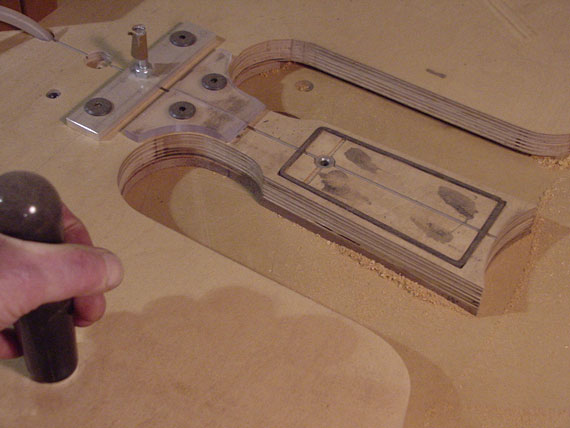
Now for another shaper job. The peghead shaping template has a rubber gasket and a vacuum connection to hold the peghead tight and locating pins to align it precisely.
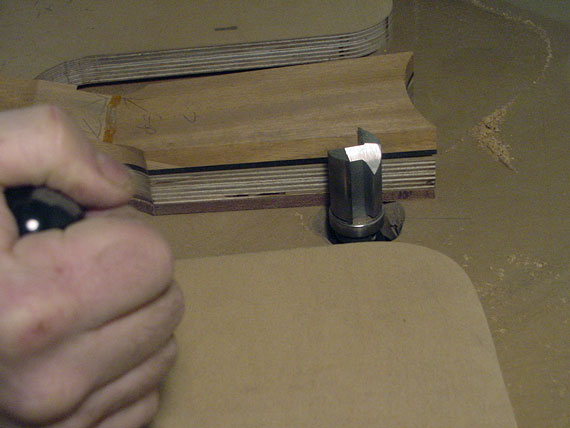
Passing over the small shaper cutter, the template rides on a ball bearing and the cutter blades trip the peghead exactly to shape.
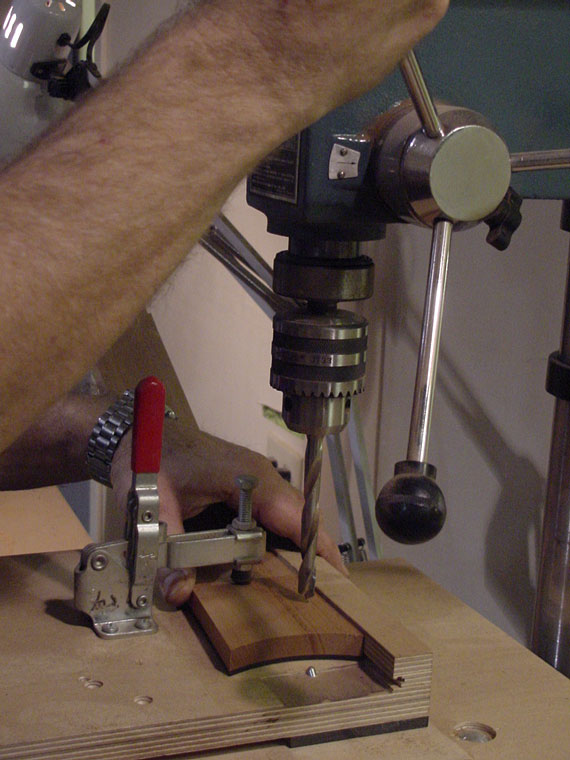
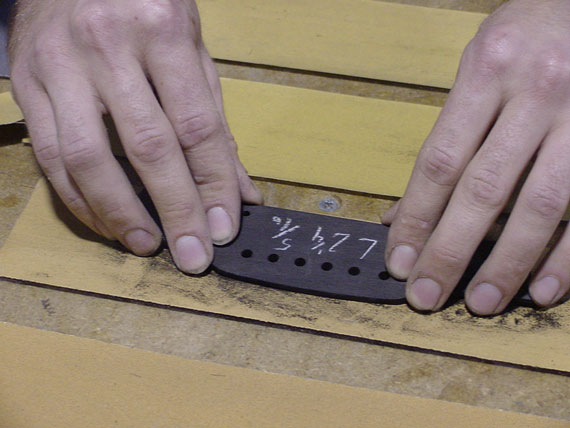
Tuner holes are drilled from the back of the peghead using a different kind of aligning fixture.
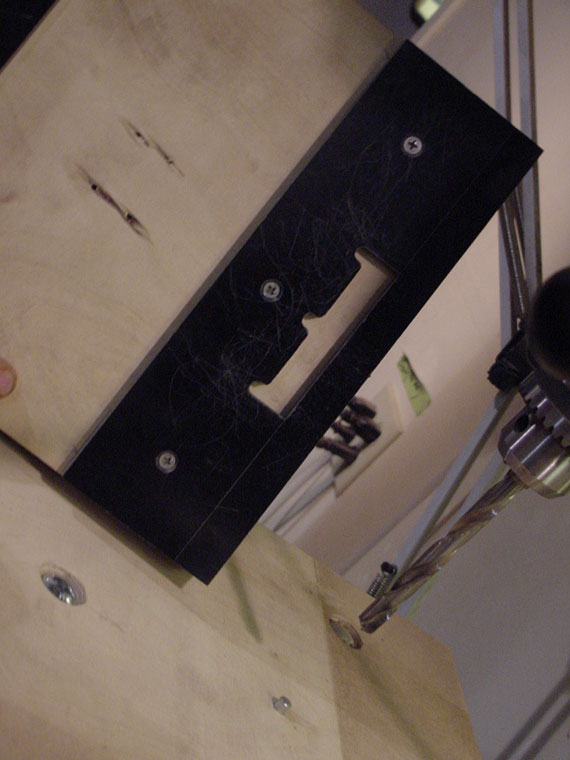
Underneath the fixture, there's a little guide template with a series of notches to locate the tuner holes. The notches fit right up against a pin in the drill press table. To align the holes, the operator simply slides the template up against the pin. That way, there's no need to lift the fixture and fumble to find the locating hole in the bottom.
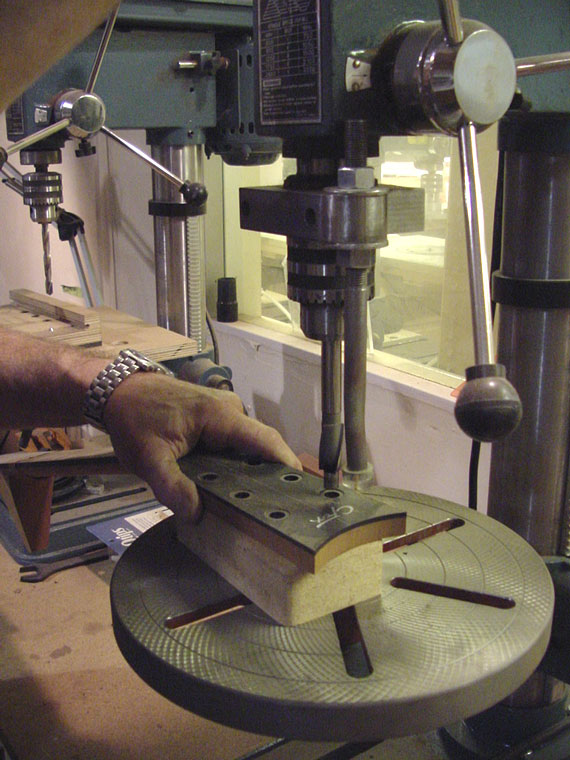
On an adjacent drill press, the tuner holes are drilled again from the front. This time it's just to countersink the tuner washers.
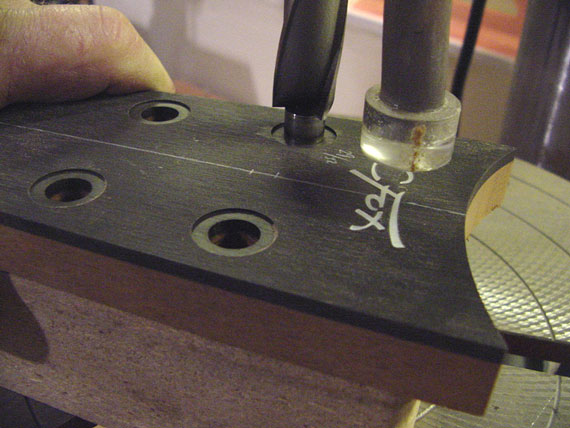
Check this out. It's a depth gauge attached to the drill press quill that stops the drill when it touches the surface. That way, the countersink drill goes to exactly the same depth regardless of the thickness of the work piece.
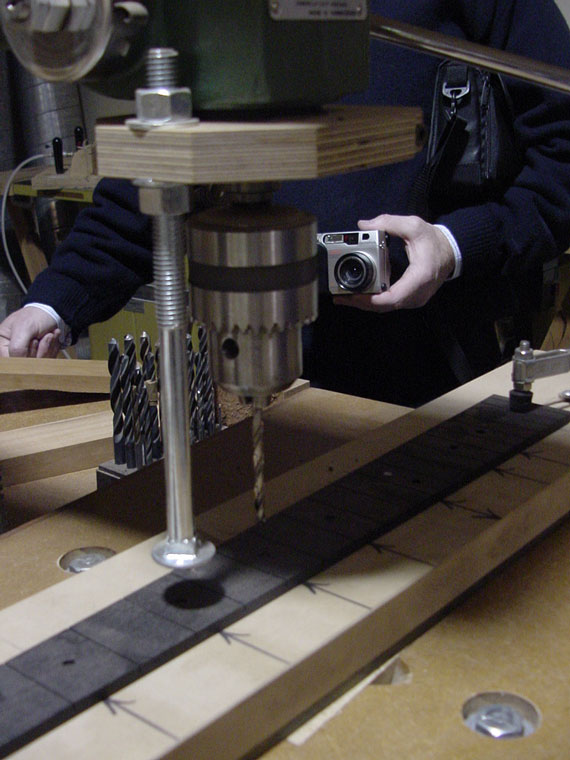
Same kind of depth gauge in use here, too, as holes are drilled for inlay dots. By the way, that's our old friend, Todd Taggart taking a photo of me taking a photo of him taking a photo, etc.
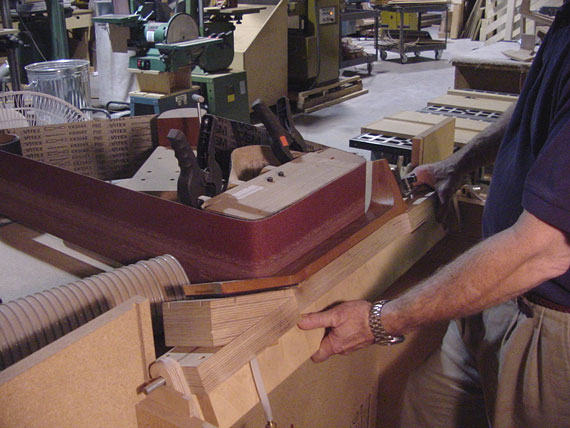
OK, time for everybody's favorite CFox shop-built setup, the neck shaper. This is what's often called a "deadhead" belt sander, because the belt goes around stationary corners rather than pulleys.
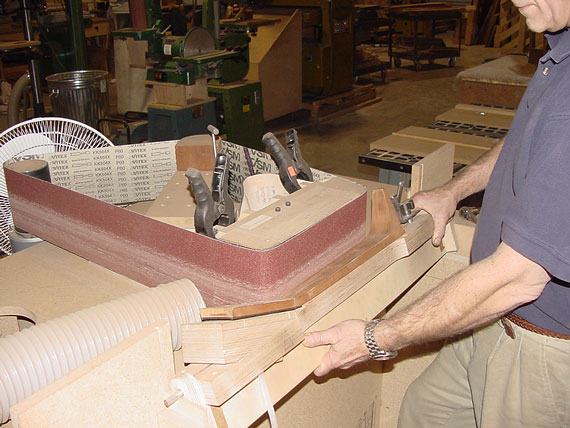
The rough neck block is held in a special carriage, which has rounded end pieces. The ends fit up against vertical guides outboard from the sanding face. The rounded section at the peghead has a smaller diameter, so as the neck is pressed against the sander, the appropriate amount of material is taken off the length of the neck.
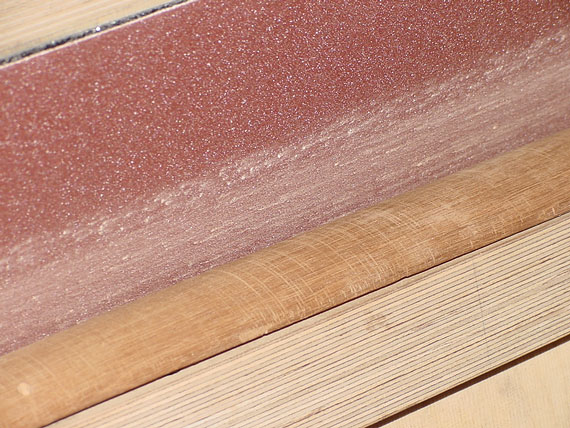
The result - a very nice contour indeed. In fact, by adjusting the shape of the rounded guides, the contour of the neck can be controlled to any appropriate cross section. And, all the sanding scratches go with the grain. (The sample in this flash photo is scratched across the grain because it's just that, a demo sample.)

Before and after shaping on the sander.
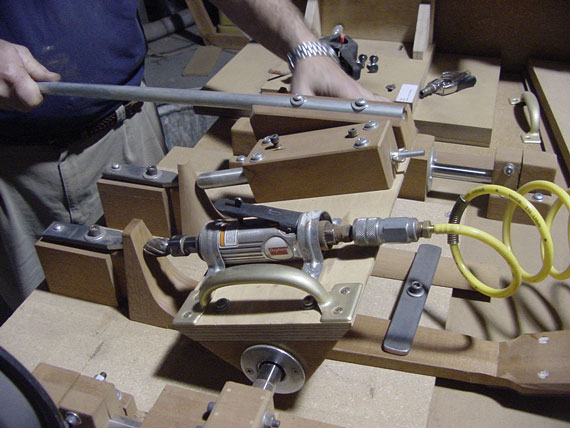
Here's another very clever shop-built setup. It's a duplicating carver to rough out the heel shape once the shaft of the neck is run on the belt sander. A nice long handle gives plenty of leverage to guide the work along as the stylus traces a pattern.
Time to move along to the climate-controlled assembly room, where the real building takes place.
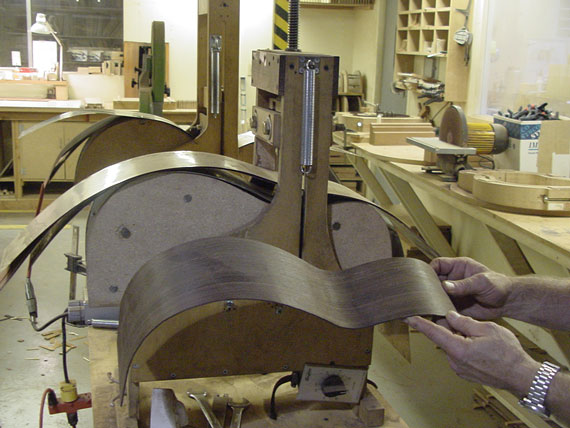
After they are sanded to thickness in the mill room, sides are bent on the famous "Fox side bender," which has been a standard in small shops for decades.
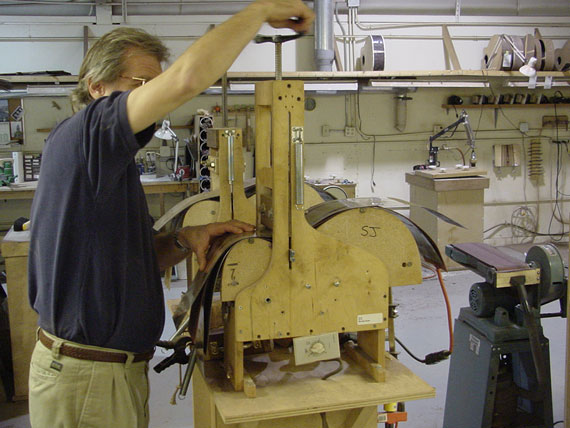
Charles invented and popularized this simple machine for bending guitar sides. In fact, it's available through L.M.I., which is located in Healdsburg, too. [LMI no longer exists. Blues Creek Guitars sells LMI style benders.]
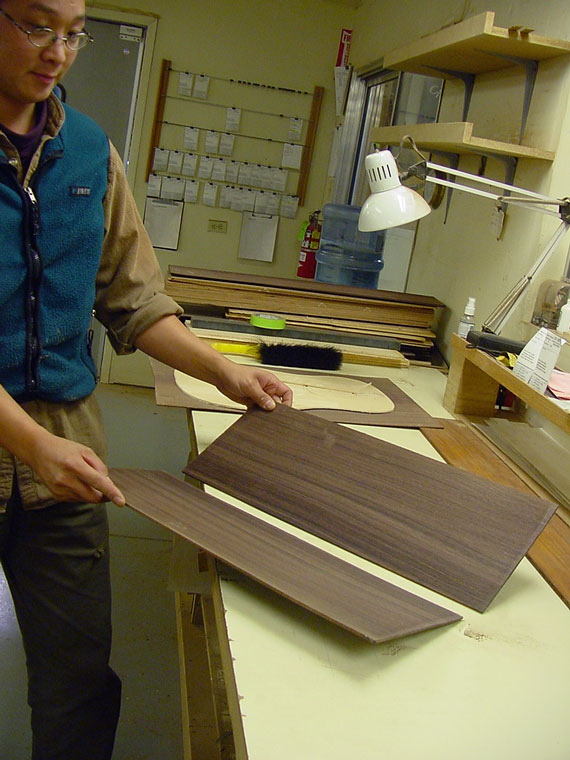
After they are sanded to thickness, the halves of the back are joined in a simple and traditional Spanish method.
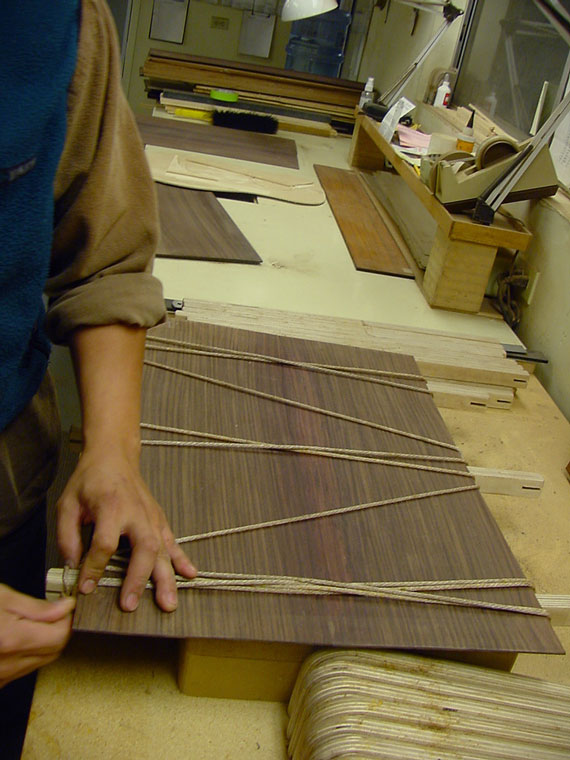
Sash cord (1/4" rope) is wound about three sticks that lie beneath the wood to be glued.
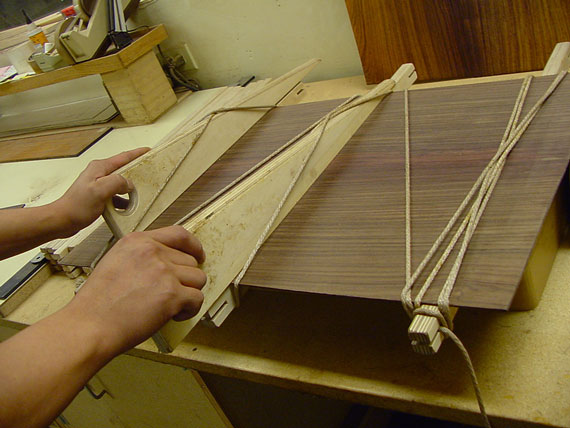
Then, these big wedges are inserted right above the sticks, tightening the ropes like crazy, while pressing the thin guitar back against the sticks to keep it straight.
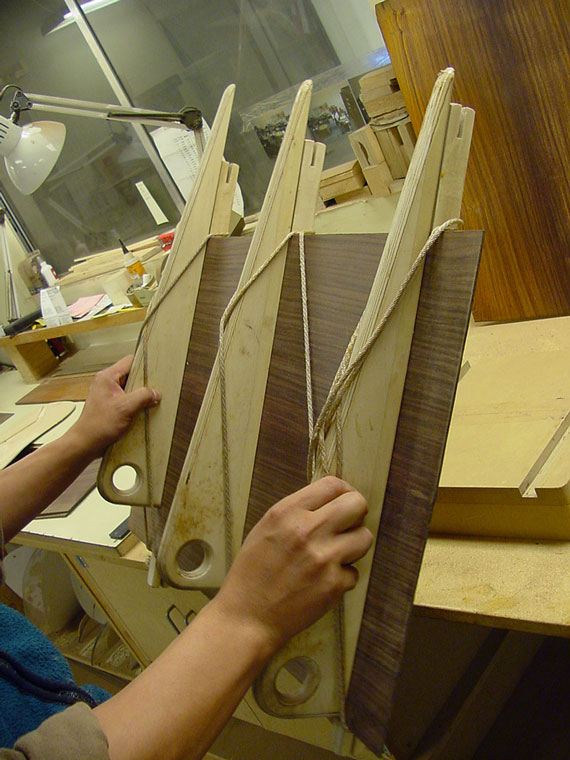
Then the whole business is lifted up and carried away for the glue to dry.
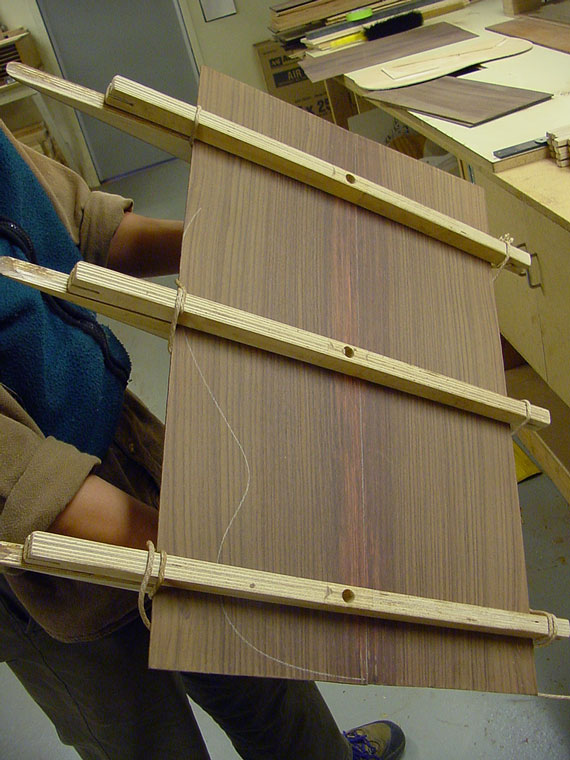
The rig, viewed from the bottom.
Three more sticks go into the bench fixture for the next back to be joined. And so on. . .
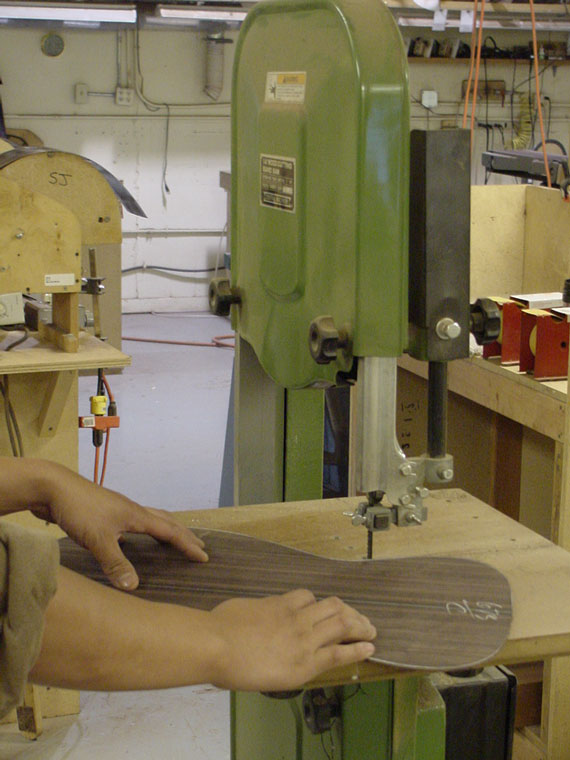
After the back joint has dried, the wood takes a quick trip through the wide belt sander in the mill room to be leveled, and reduced to its final thickness. Here, it is being roughed to shape on the band saw.
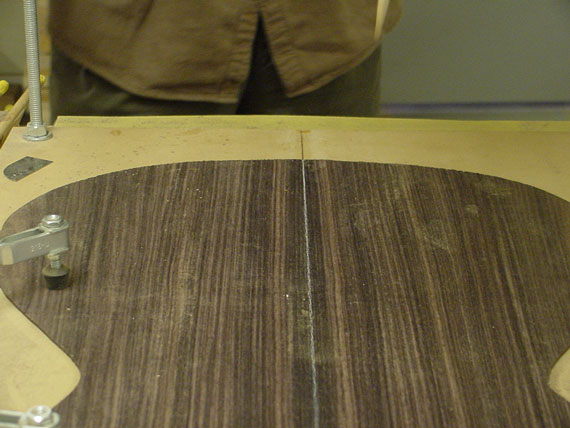
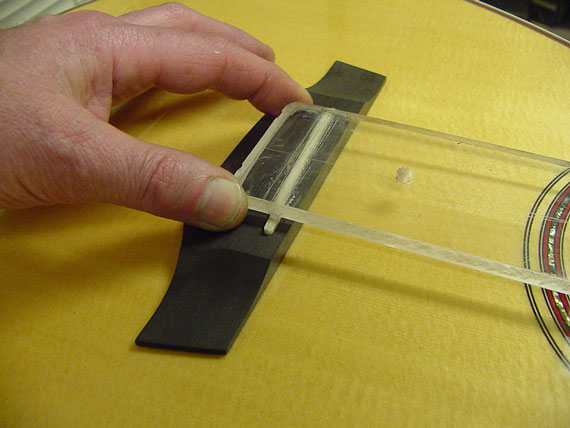
Now comes one of my favorite little setups - the back strip gluing and slotting process. The back gets clamped down, with the center line aligned by sight.
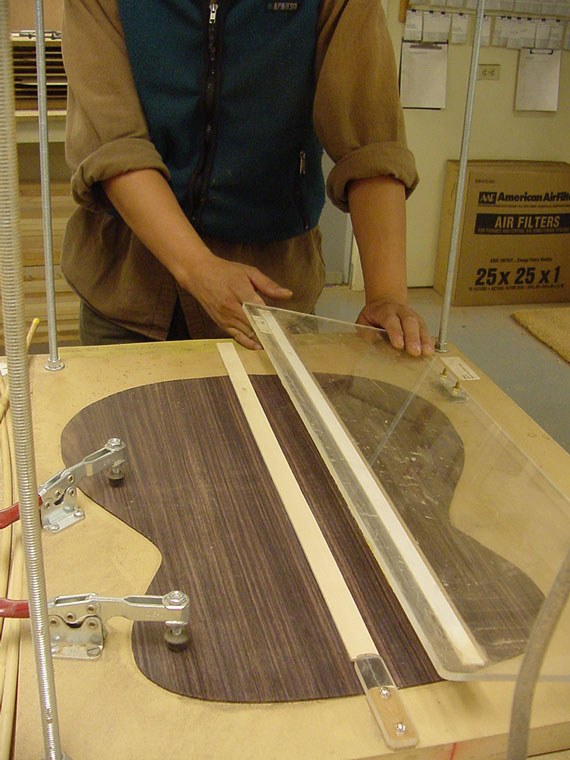
And, this little acrylic plastic gauge is lowered, against which the center joint reinforcing strip is laid, having previously been coated with glue.
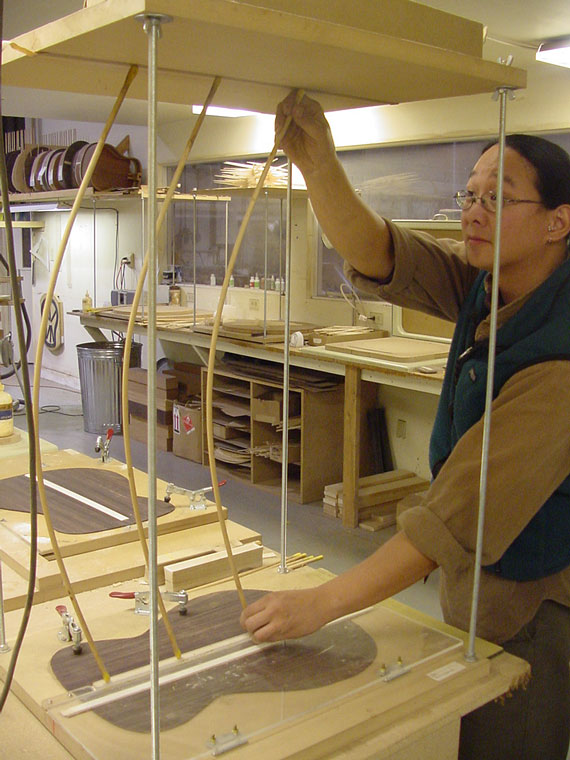
"Go-bars" provide the appropriate clamping for the center reinforcement which now has a clamping caul on top of it to distribute the pressure.
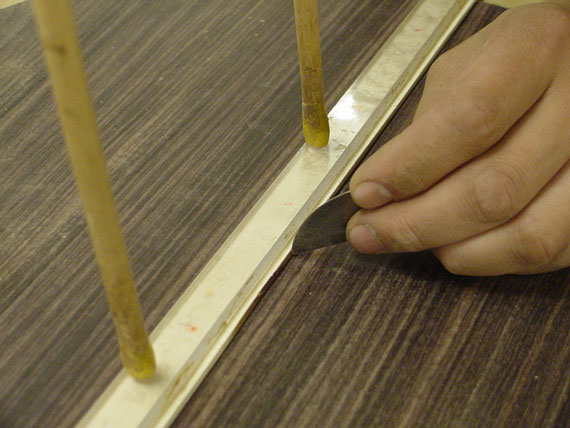
Now for the cool part - the acrylic locating flap is raised so it's easy to clean off any glue squeeze-out with a little scraper.
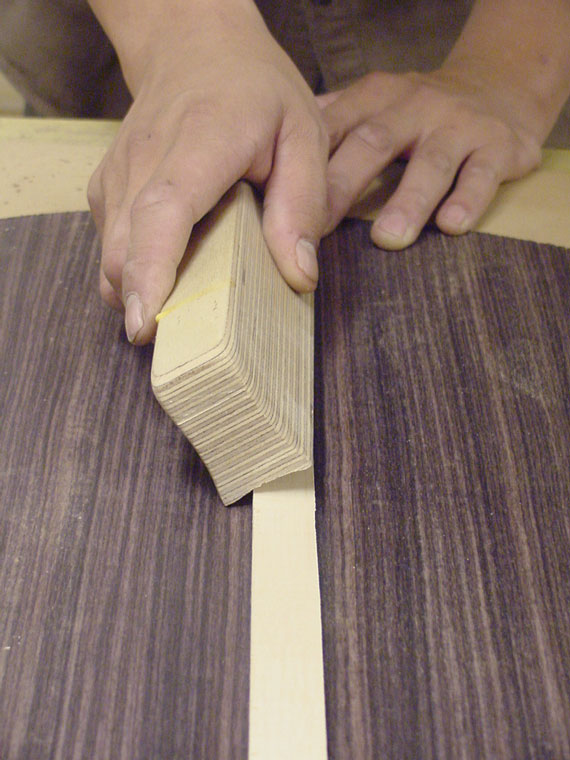
The rectangular reinforcement strip is rounded with a few quick strokes, using a special rounded sanding block with self-stick sandpaper adhered to its concave face.
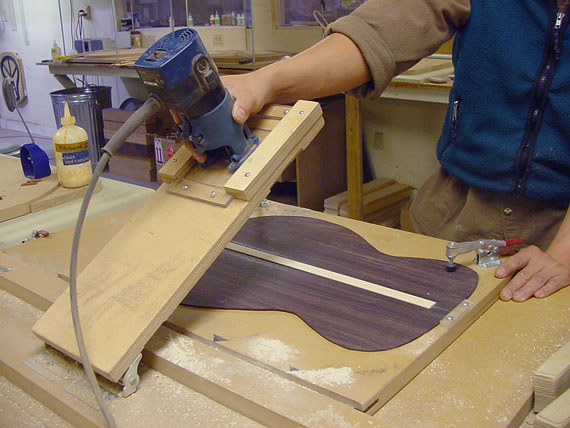
About two feet away there's another fixture, where the back gets clamped down for the process of notching the reinforcement strip to receive the back braces.
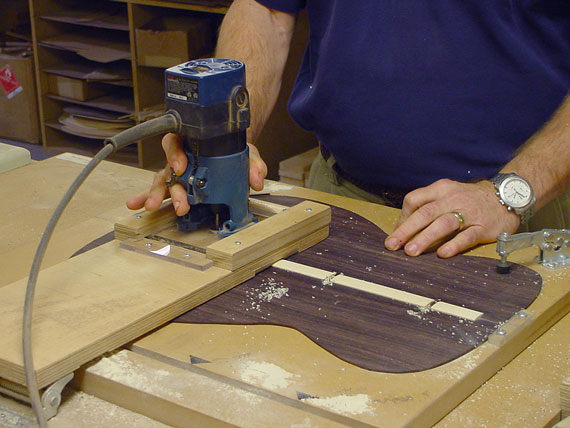
A router, mounted on a hinged slide above an indexed sliding table, whisks away the spaces where each back brace will lie.
In fact, the braces fit so tightly, they are self-aligning as they go in.
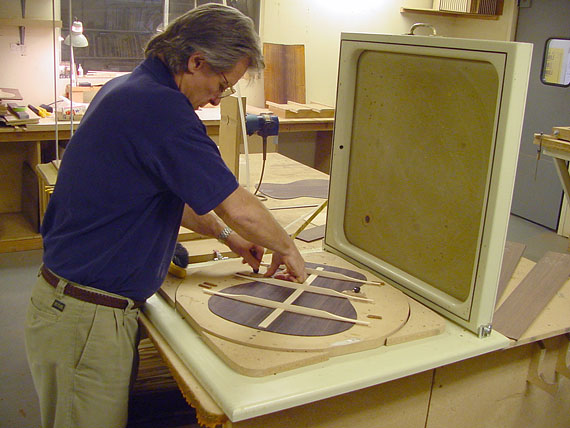
Once the back braces are coated with glue and in place, the back is laid in a vacuum press.
The top of the press holds a rubber membrane, covered with an acrylic shield to keep it from damage.
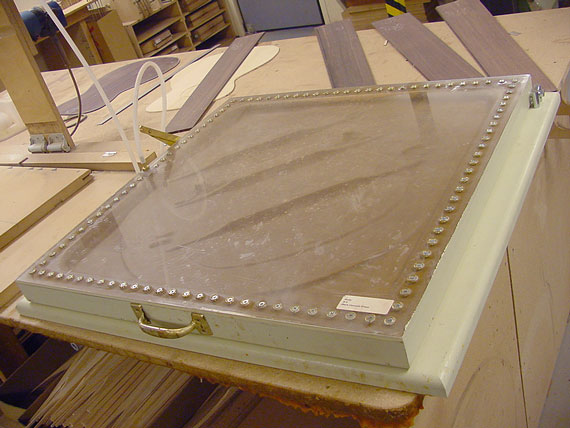
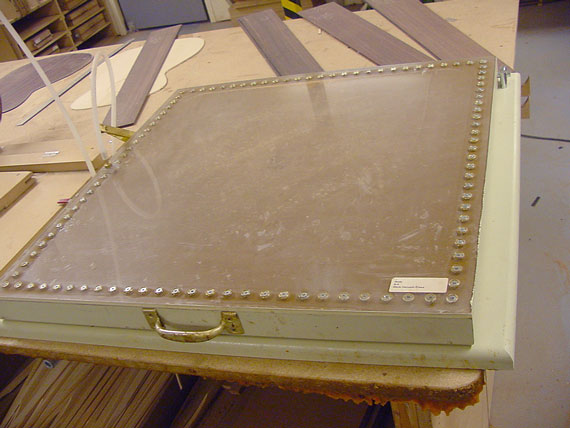
When the vacuum is applied, the membrane draws down and the room air pressure applies the necessary load to the braces. In addition the lower air pressure causes the glue to dry faster. Pretty cool stuff.
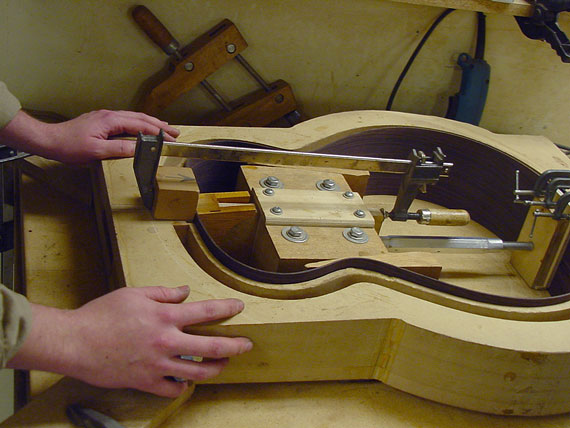
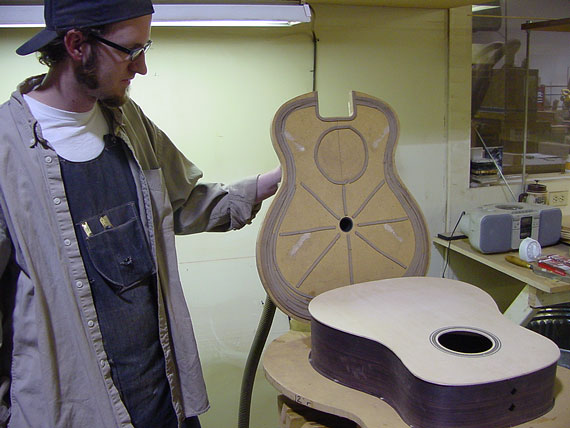
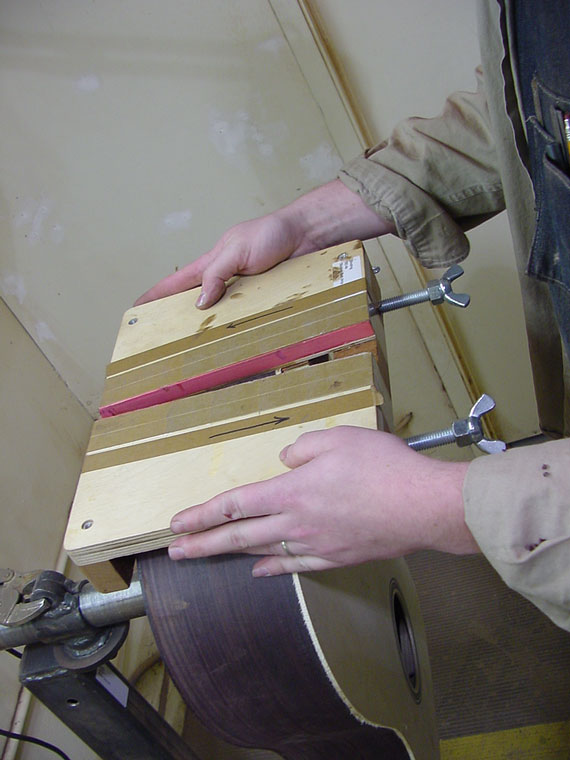
Meanwhile, the bent sides have been placed in a mold for gluing and clamping the neck and end blocks.
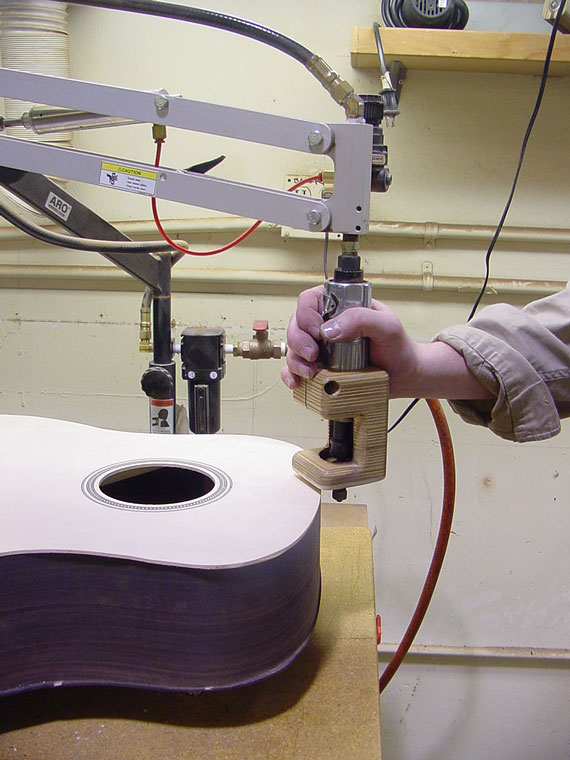
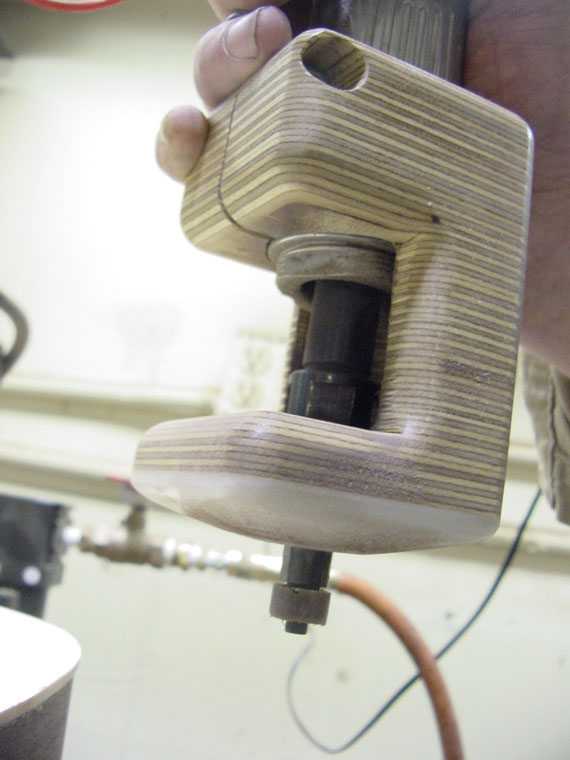
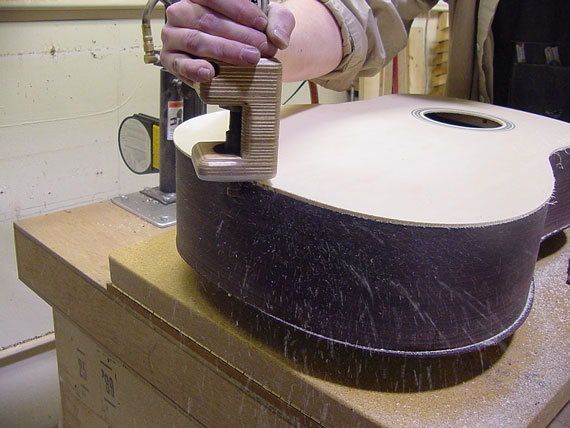
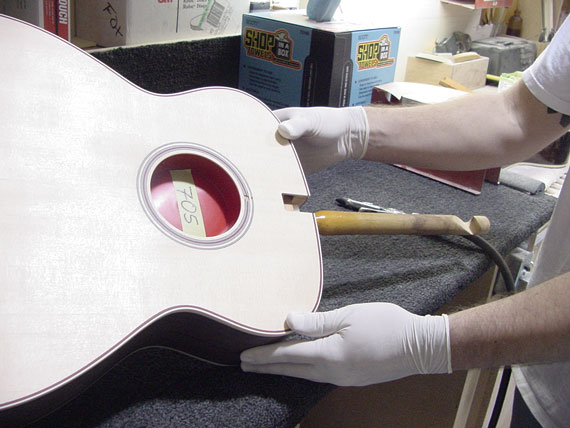
That novel neck block requires a special clamping technique, designed to avoid injury to the finished surfaces.
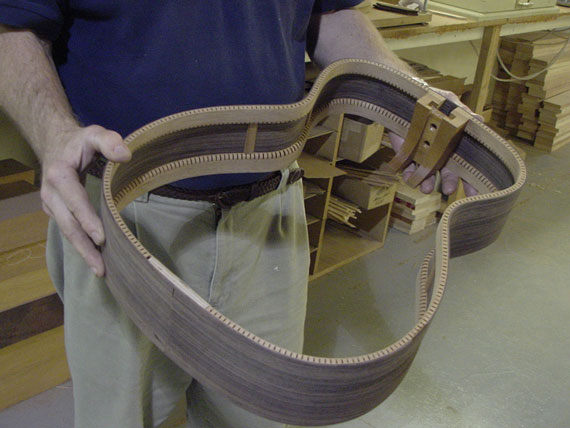
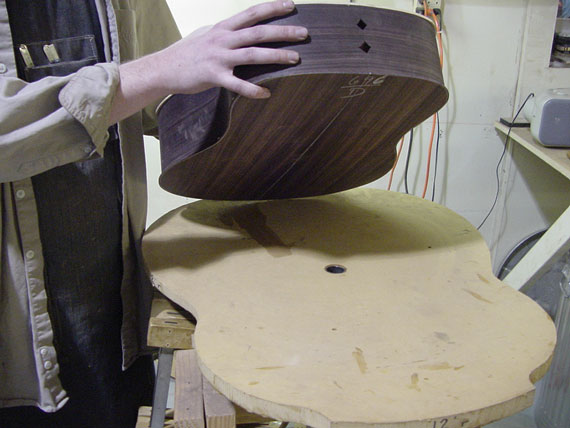
Once the linings are glued in place, the rim is so rigid it can leave the mold forever.
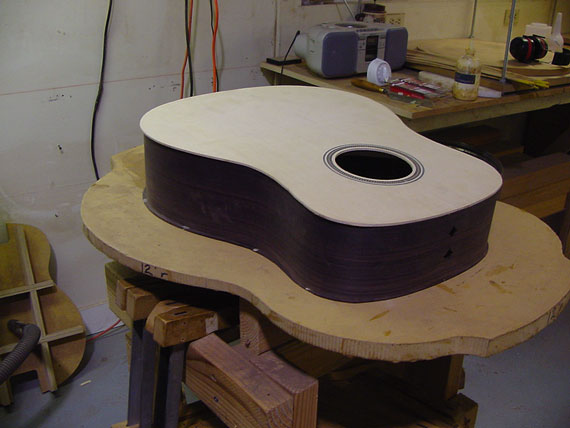
Charles calls this the "boat." It's the rim glued to the back. Last chance to "detail" the inside, which is always neat and clean before final assembly with the top
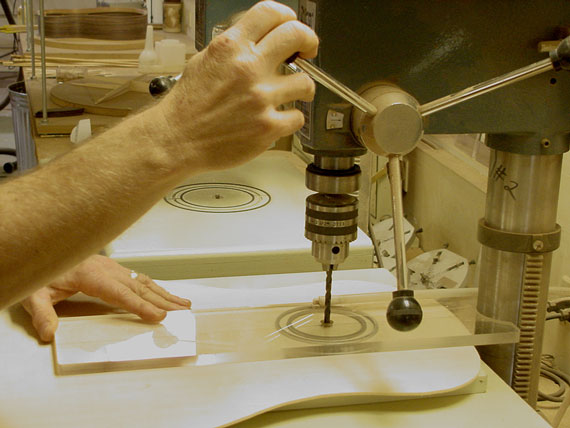
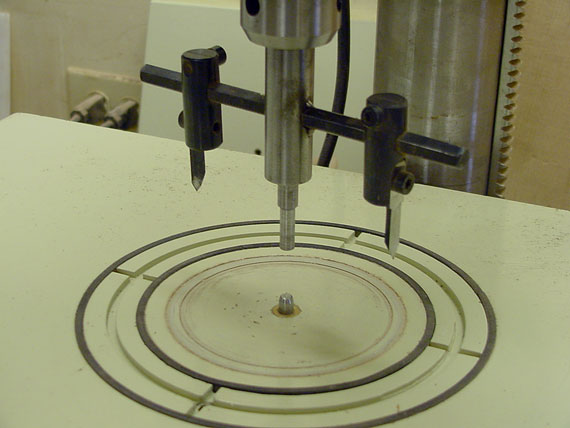
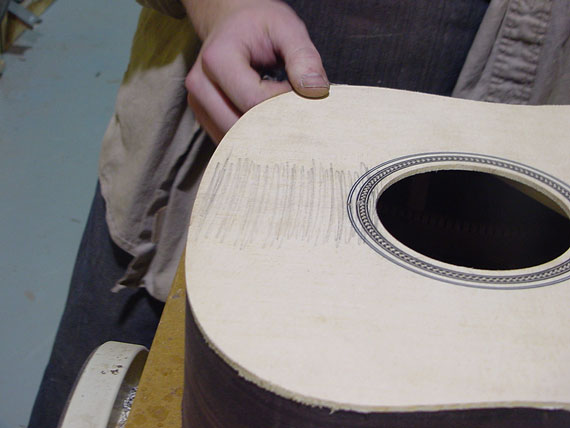
After the top is joined, and rough cut, it's time to locate the center of the soundhole. This acrylic jig keeps the drill from wandering as it cuts a pilot hole.
In fact, the acrylic jig has a couple of rubber gaskets and a vacuum fitting to suck the top right up against the drill bushing, so there's no chance of a slip.
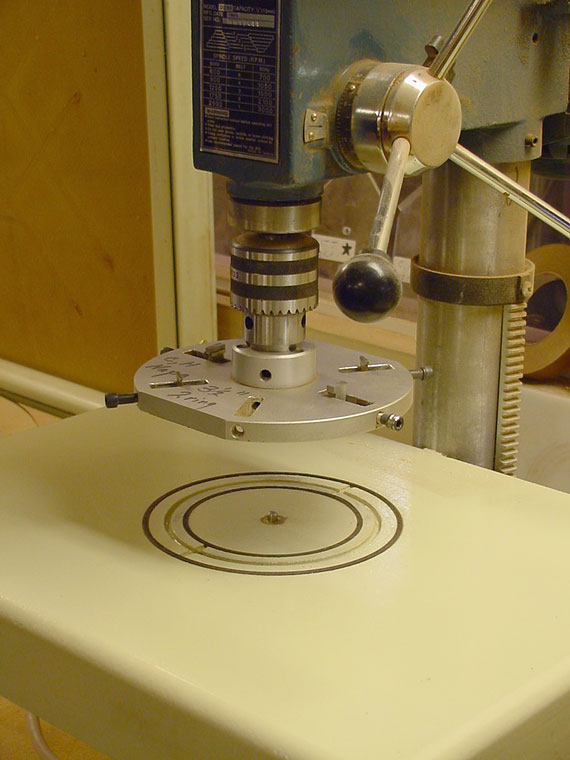
One of the few custom machine-made fixtures in the Fox guitar factory is this soundhole ring cutter. Notice the vacuum fixture built into the drill press table. There's a pilot that fits into the small hole just drilled in the guitar top, and a pair of gaskets to contain the vacuum. Once the guitar top is place here, it stays firmly as it is cut for the soundhole decoration.
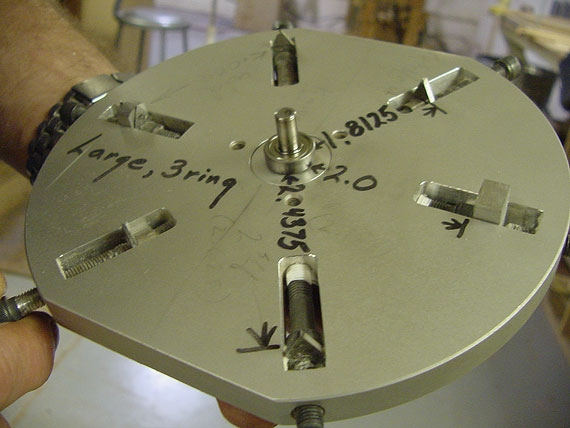
Take a look at the underside of the cutter. There are three pairs of cutting blades, each consisting of slicing and chip breaking cutters.
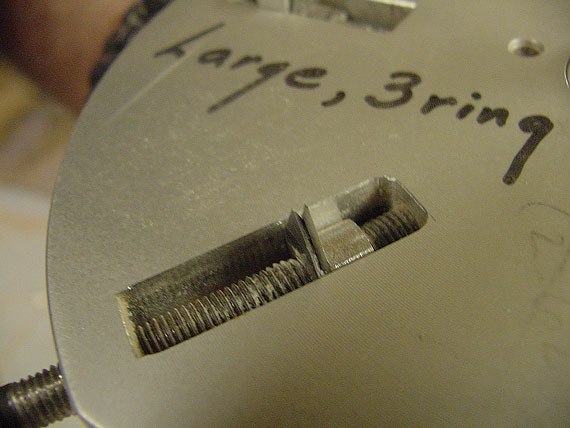
These are the razor sharp slicing cutters that define the edges of one soundhole ring.
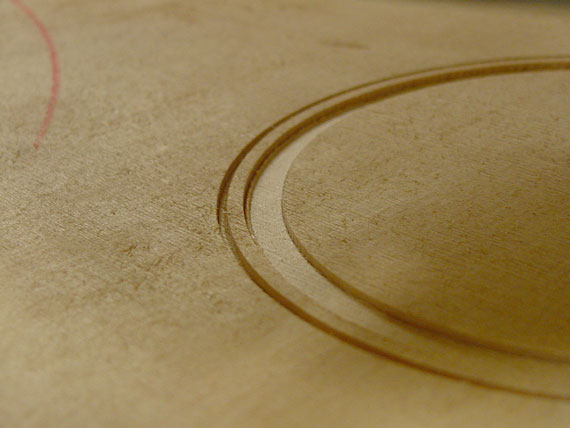
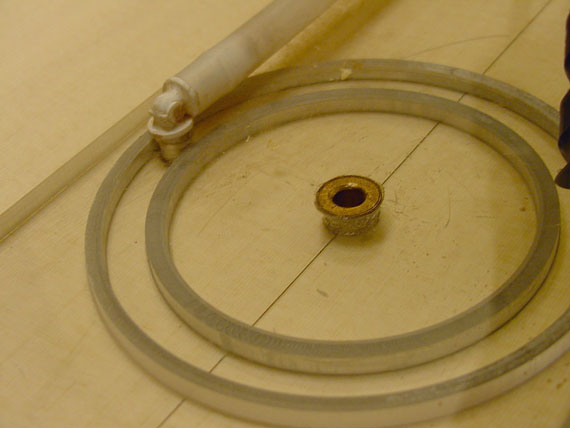
And, here's the result. In this case, only two pairs of cutters were used to make the two rings.
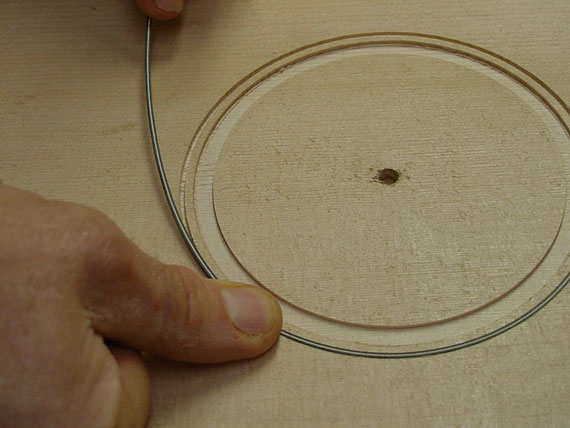
Coated with a bit of glue, the soundhole purfling fits neatly into the slots. After the rings dry, the entire top gets a pass through the wide belt sander to reduce it to final thickness and to clean up the soundhole decoration at the same time.
Back at a different drill press, the soundhole is cut with a standard trammel style hole cutter. Unlike others I've seen, this one has a pair of blades to keep the balance even and make a clean cut.
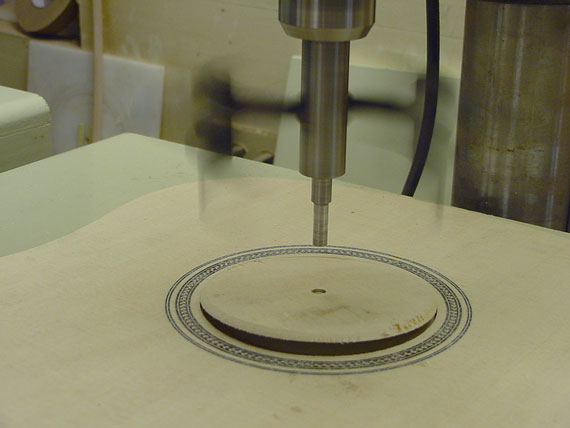
Naturally, all we see is a blur, as the wood melts away and the soundhole breaks free.
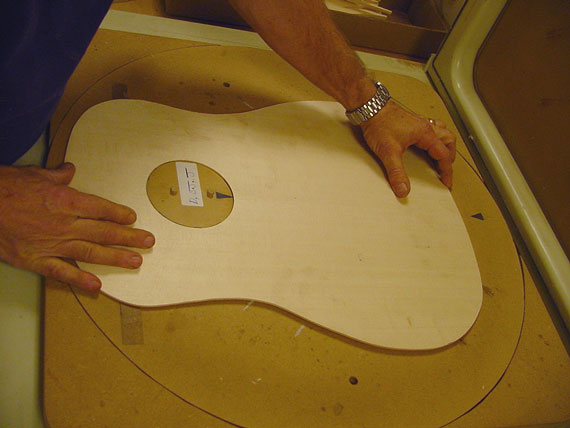
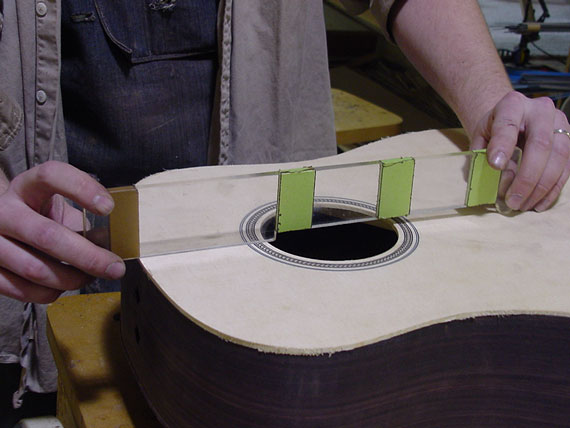
Now, the soundhole becomes the pilot for setting the top into the bracing alignment and vacuum gluing fixture.
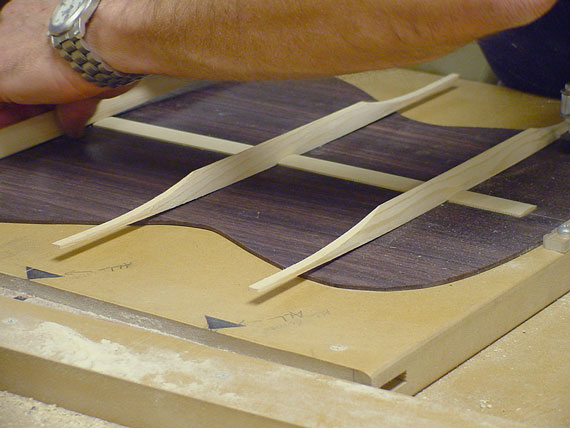
As you can see, this is one of the new X-series tops, with a conventional "cross-brace" pattern. Notice the acrylic template inserted into the soundhole to locate the X-braces and the lateral brace above the soundhole.
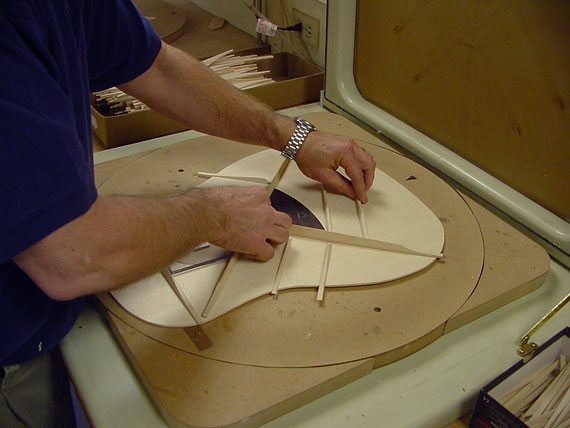
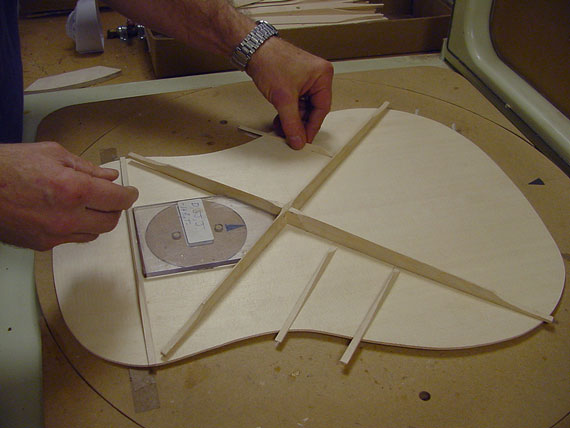
The rest of the braces get some glue and are set where they belong.
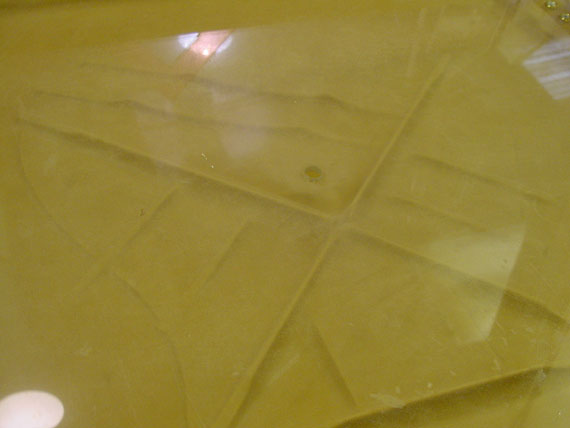
Here comes that old atmospheric pressure again to do the work!
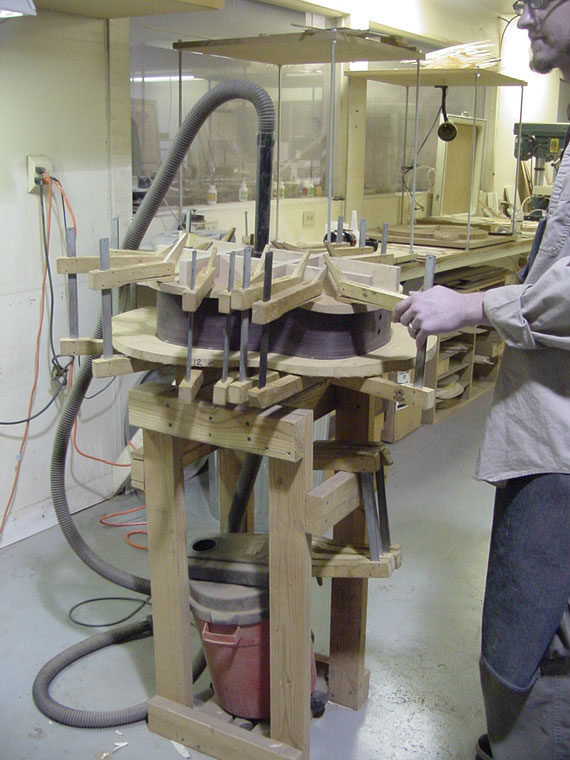
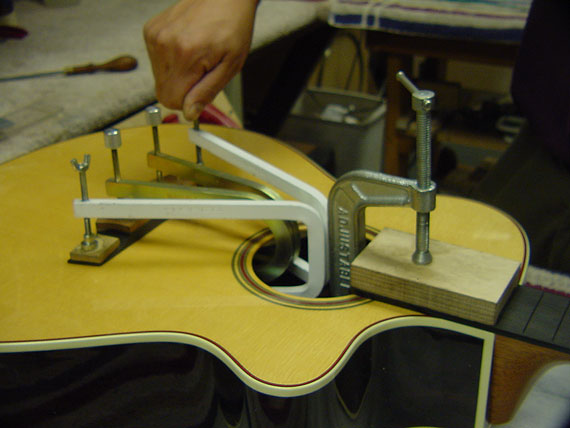
Now, here's another favorite of mine. This peculiar rig is a clamping station for gluing the back and top to the rim. Those jobs are done separately, so the inside of the back can be cleaned up before gluing on the top. Here, the top is being glued.
Notice the shop vacuum underneath the table. It's connected to a concave form against which it draws the top upward to maintain the proper slightly domed shape of the top as it is glued to the rim.
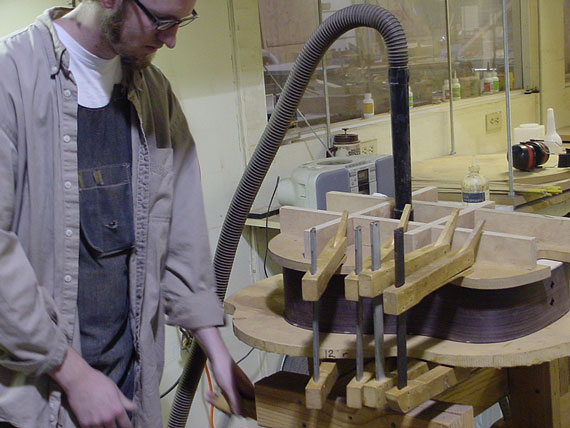
Here you can see the underside of the clamping form, with its pattern of rubber gasket strips to contain the vacuum.
As it comes off the clamping rig, the top is sure to maintain the ideal shape.
Beneath, the table has a concave bottom where vacuum is applied when the back is glued to the sides. A shop vac is the ideal vacuum source since it draws a lot of volume, compensating for small leaks.
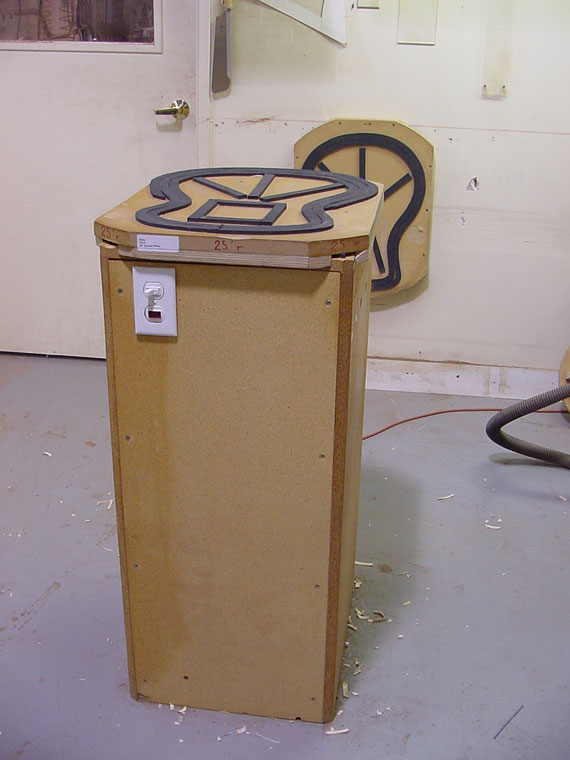
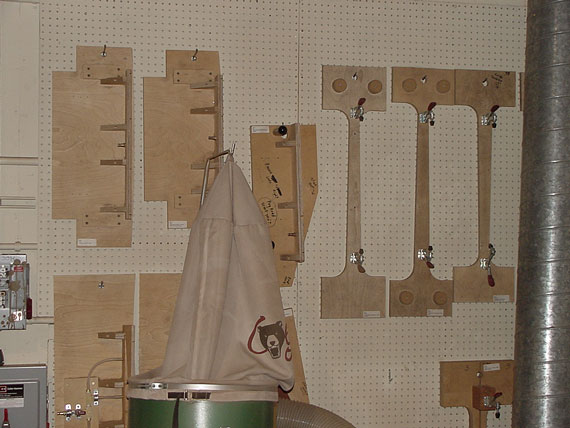
Vacuum clamping is certainly the order of the day in the assembly area, and here's yet another simple clamping setup. It's a work station, with a shop vacuum enclosed in its base, and a gasketed surface which is contoured to hold a guitar body.
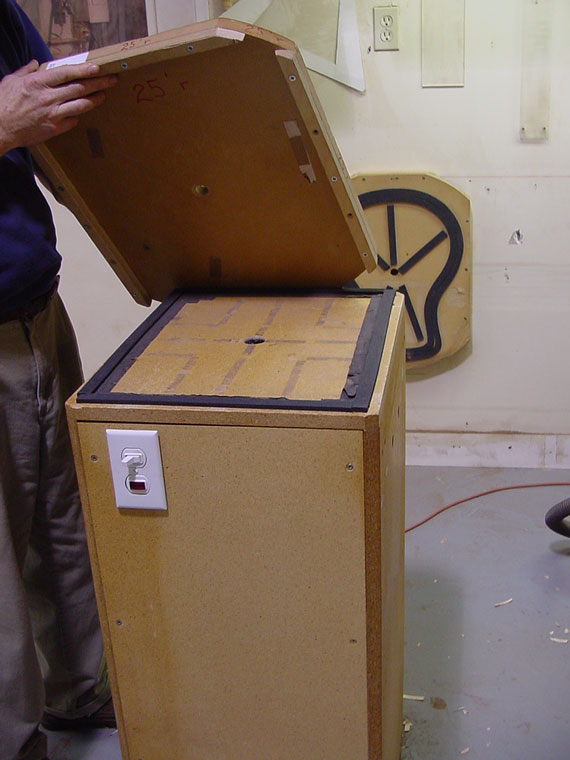
To add versatility, there are actually two gasket systems. One underneath which allows for the removal of the instrument template, and replacement with a variety of different shapes. That's another one back there on the wall.
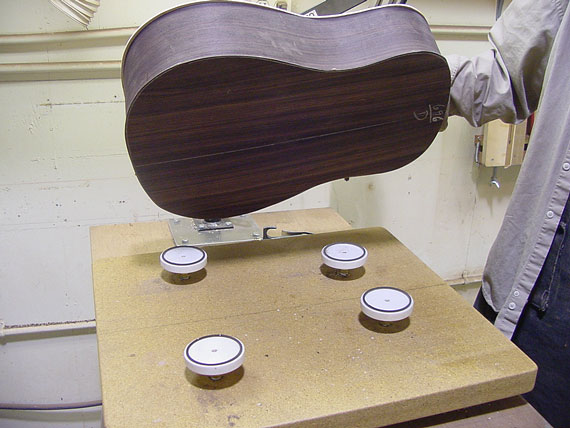
And, here's another one. A series of four suction cups to hold a body in position for routing binding ledges.
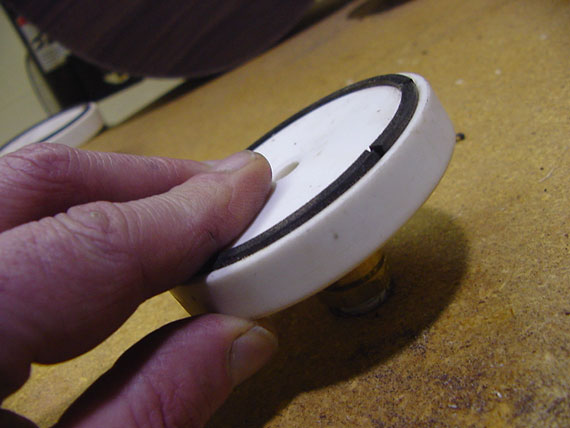
Each suction cup swivels so alignment is quick and easy. This rig is connected to the central vacuum pump that serves other work stations and clamping devices .
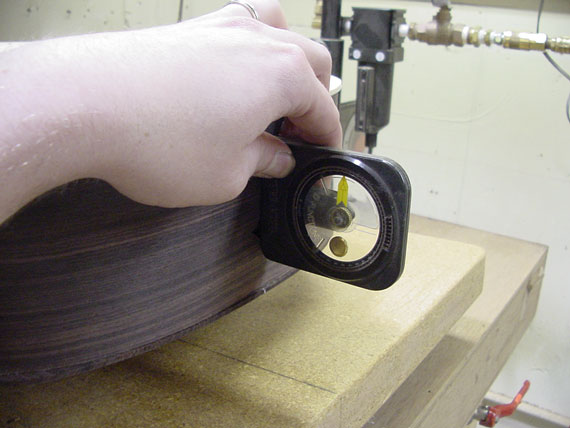
A guitar body gets clamped on the stand, and is adjusted so the sides are plumb.
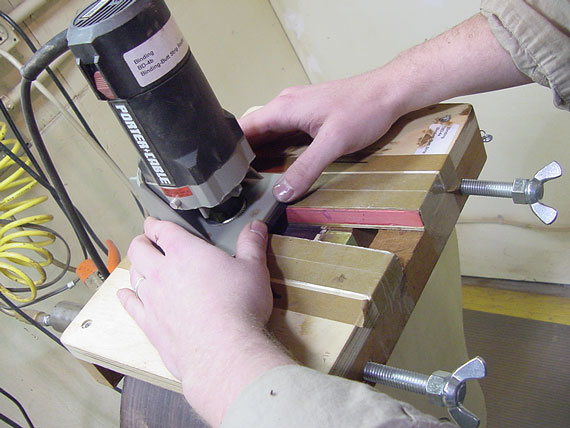
Then, an air turbine router is guided on an articulated arm along the perimeter, neatly trimming the top flush with the sides.
The cutting guide is another shop built fixture, made of laminated wood. The convex bottom guide allows the cutter to ride around either a top or a back and cut cleanly to the edge.
This one really screams and spits chips as it goes!
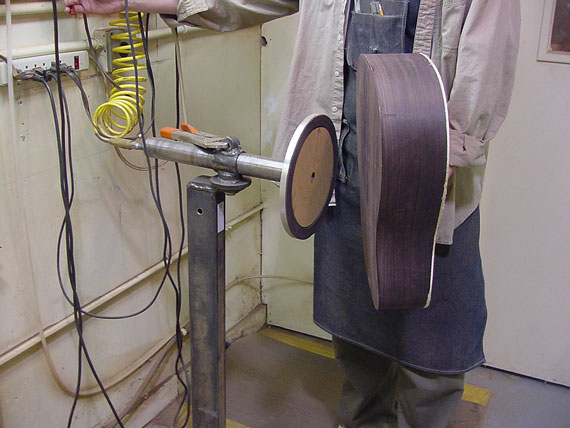
A vertical vacuum chuck holds the guitar body for the next operation.
After clamping on a template, and aligning it on center, the guitar is readied to meet another router.
This one makes the little wedge cut for the decorative end piece.
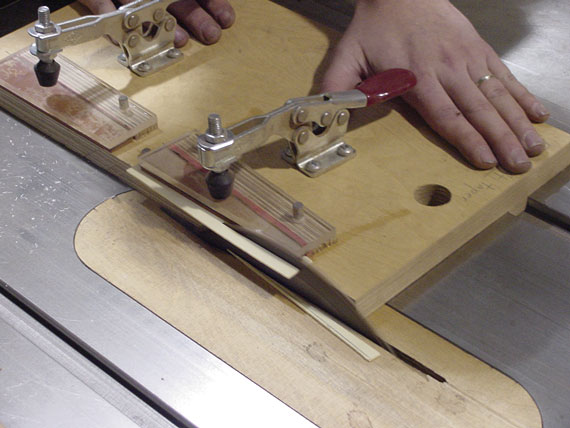
The celluloid end piece comes from the mill room, where it its cut on the table saw using a template and toggle clamps.
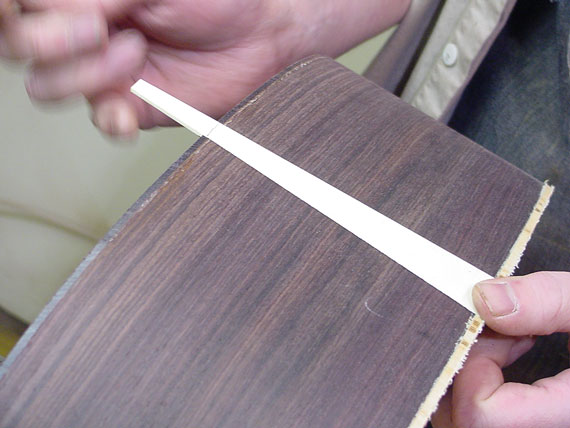
Made oversize, the end wedge slides right into position, where it's marked and cut to length.
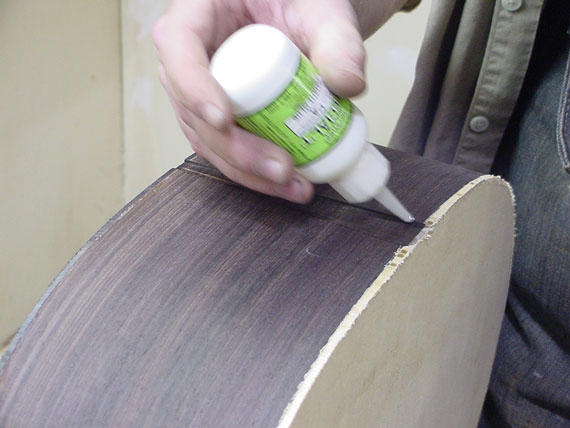
Some cyanoacrylate glue goes into the slot, followed by the end piece.
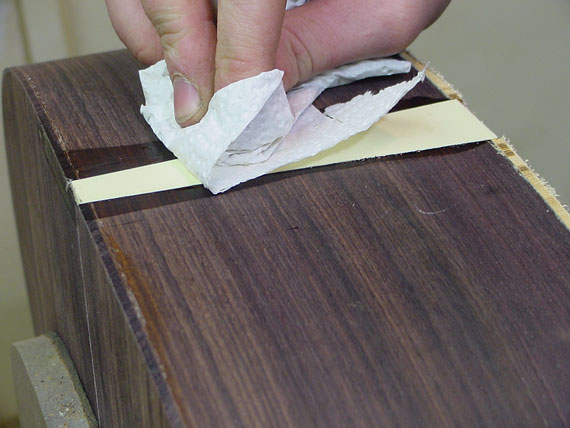
The glue gets a quick wipe, and almost instantly, it's dry enough to handle.
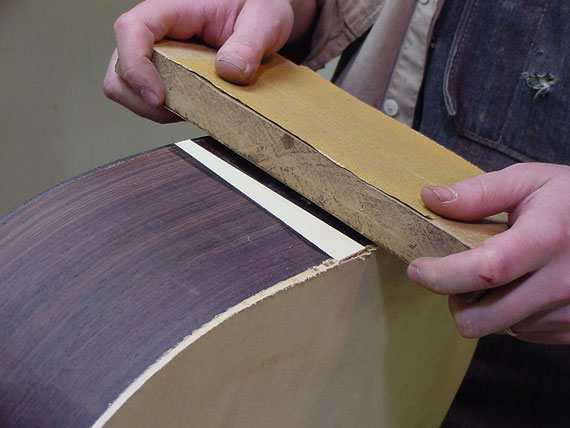
After sanding the end wedge level there is one last step before cutting the binding and purfling ledges around the body.
To make sure the fingerboard projects as straight as possible over the body, the angle of the top is gauged precisely using a series of templates.
Just to make sure everything is in correct alignment, a few pencil lines are drawn on the top as "witness marks."
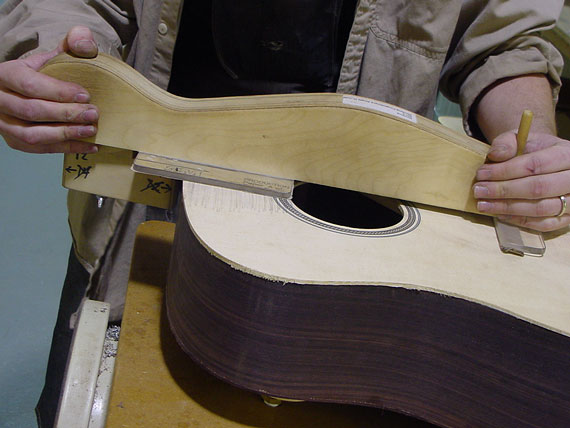
Then, a special sanding block is used to true up the surface. The bridge end of the block is held at a precise height to make sure that the fingerboard and neck will align along the top from the neck block to the soundhole.
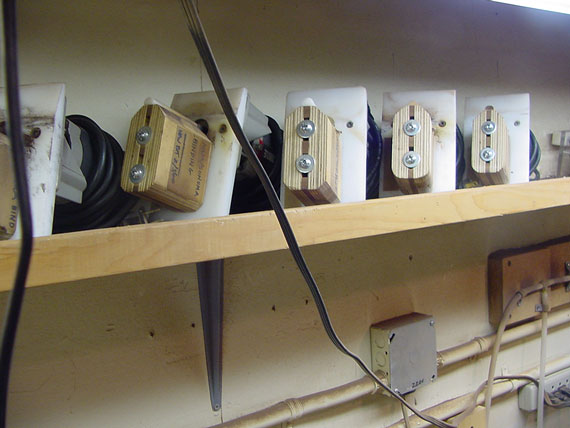
On a shelf above is a battery of small routers, each fitted with a dedicated cutter and guide.
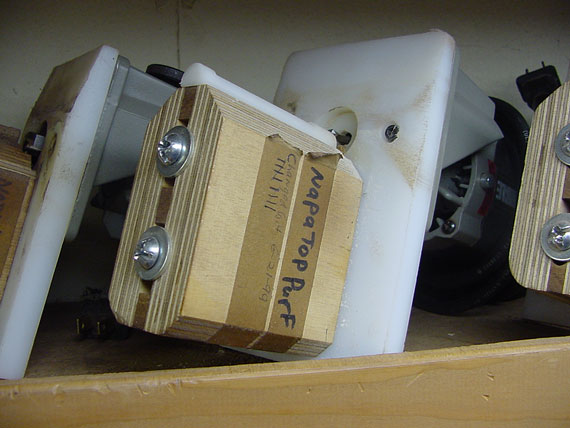
The guides are all shop made, and ride along the sides of the guitar as each router cuts its unique rabbet ledge for a specific binding or purfling. It's far more efficient to have a lot of dedicated routers than to reset an adjustable machine for each cut.
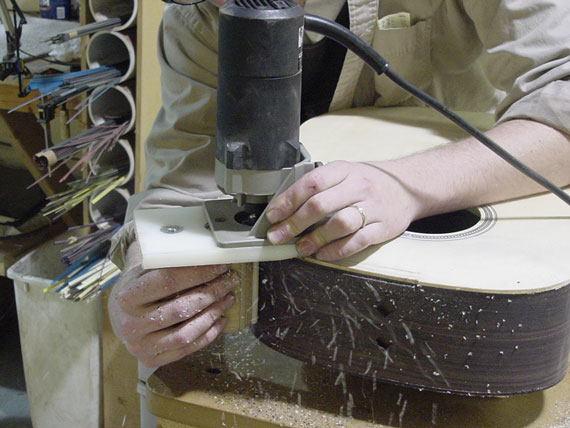
As the router is moved along the top, the guide is held firmly to the sides of the guitar, keeping the cut straight and level.
A quick touch with a sharp file makes the cut extra clean and crisp.
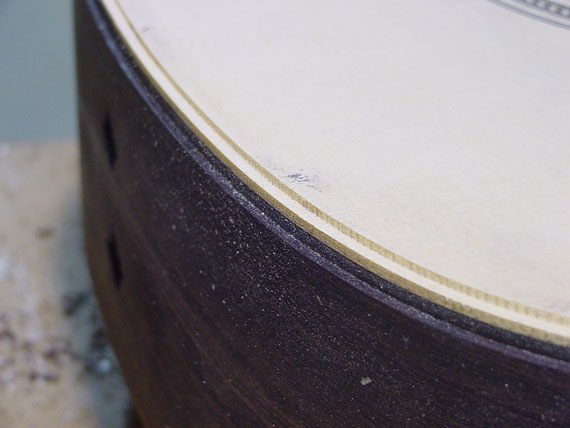
Here it is, neat and clean with no tearout.
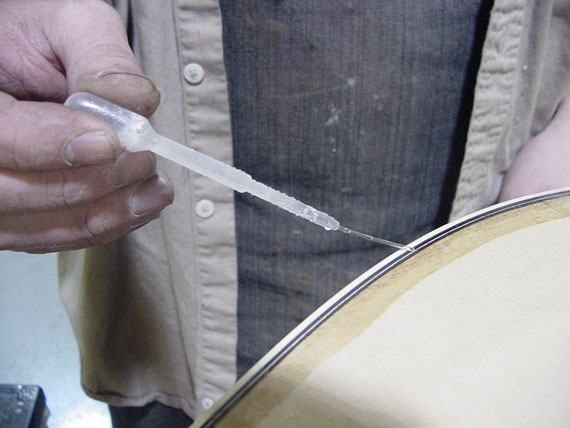
To keep glue from running into the grain of the top and creating little stains, the purfling channel is sealed with an application of vinyl lacquer sealer.
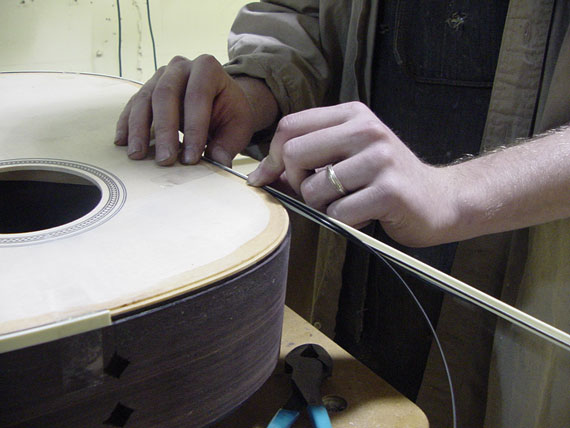
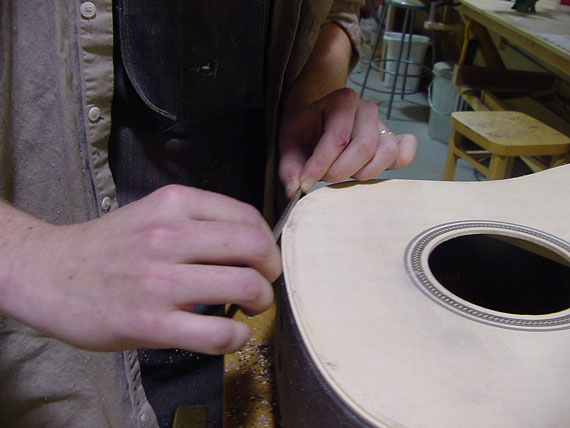
Now, for another tricky bit. All the purfling and bindings are applied and taped in position dry, without any glue.
Then, thin cyanoacrylate is run into the crevices all along. Plenty of the low viscosity glue seeps into the joints. Unlike regular solvent based plastic cements, this glue does not cause the celluloid binding to swell, which might result in a sunken appearance after it was sanded and finished.
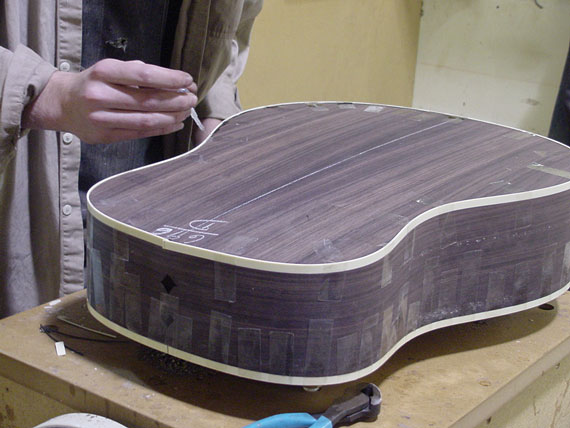
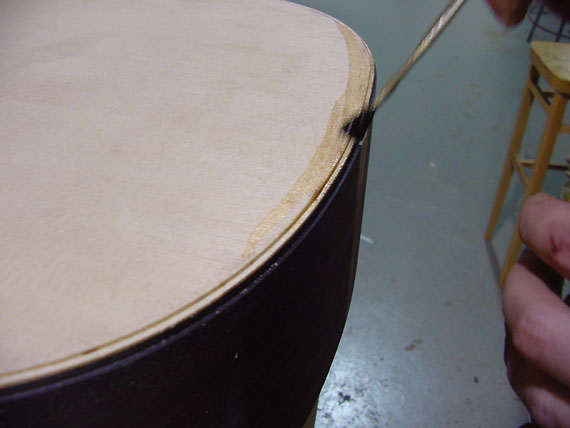
Top and back binding are done at the same time.
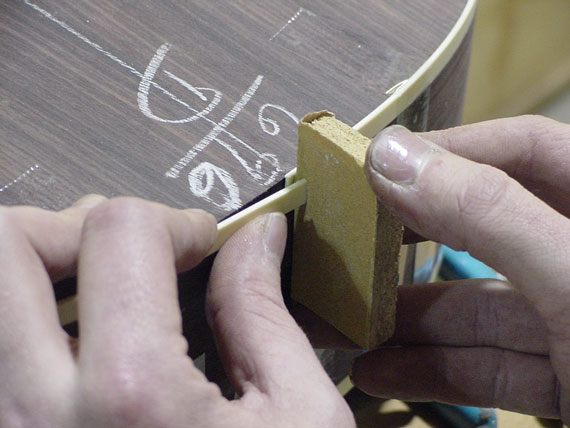
At the end joint, the binding is carefully trimmed for a seamless appearance.
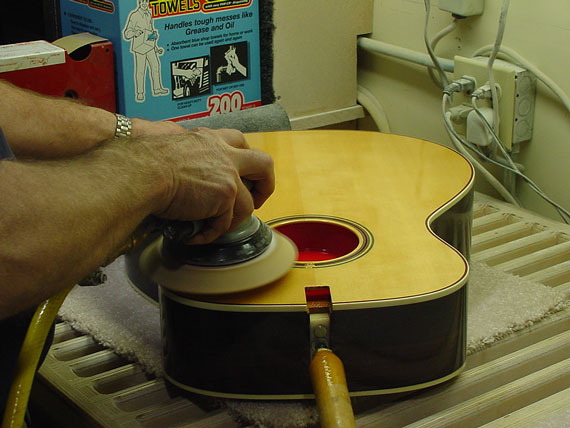
A little while later, after a visit with Mr. Orbital Sander, the guitar body is ready to march over to the finishing room.
Before application of paste wood filler, the guitar gets a good dusting with compressed air.
And, after the open grain is filled, the body is wiped down with naphtha to make sure it is perfectly clean for the first coats of finish.
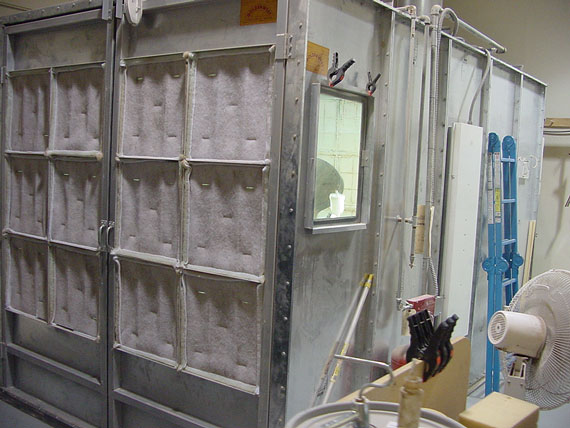
This is the spray booth, where the first coats of catalyzed undercoat are applied.
After the undercoat is catalyzed by radiation with high intensity ultraviolet light, the guitar body is "scuff" sanded in preparation for the subsequent finish coats.
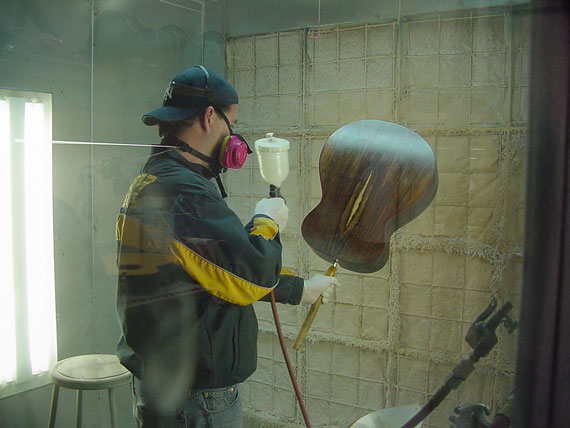
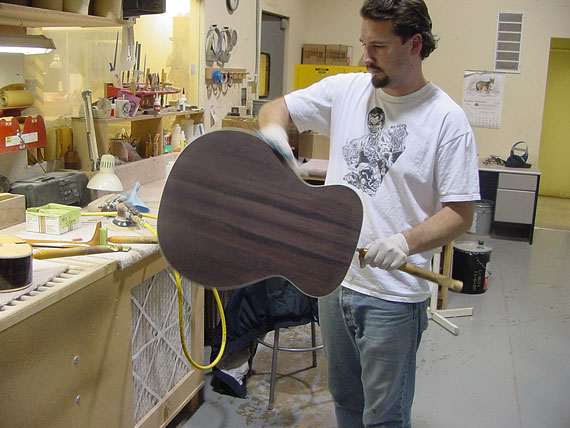
Back in the spray booth, traditional nitrocellulose lacquer is sprayed in successive coats to build the gloss finish. By the way, that's some fine Brazilian rosewood, isn't it?
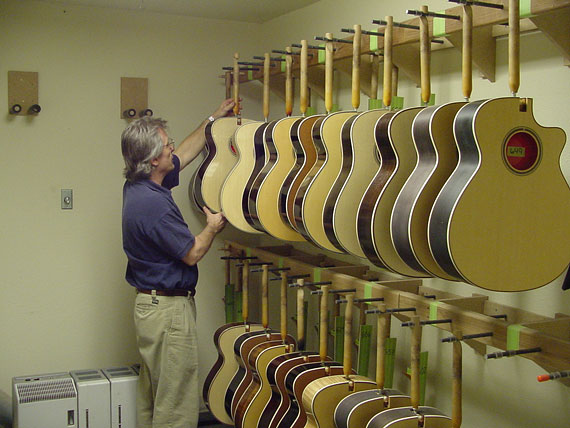
Nearby, there's a special heated drying room, where the guitar bodies and necks spend a couple of weeks drying. In fact, it is the extended drying time that's partly responsible for Fox guitars having as fine a finish as any in the business.
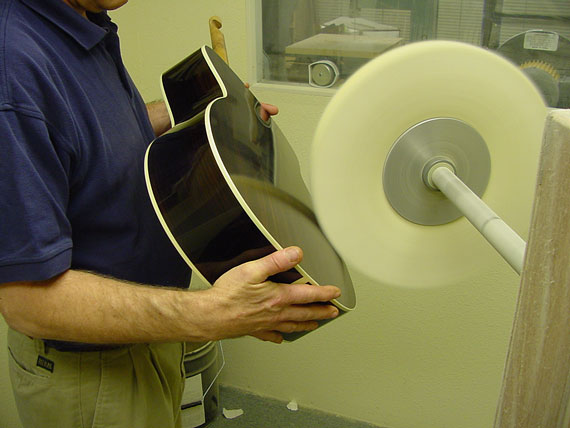
When the finish is fully cured, it gets a final buffing with ultra fine polishing compound.
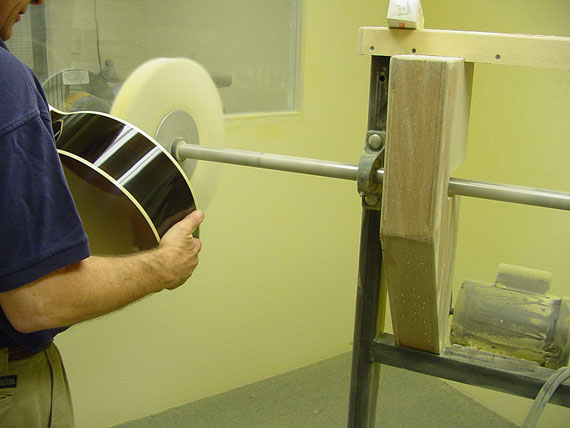
The buffing rig is another Fox shop-built setup, and it is housed in its own clean room with plenty of light and room to maneuver.
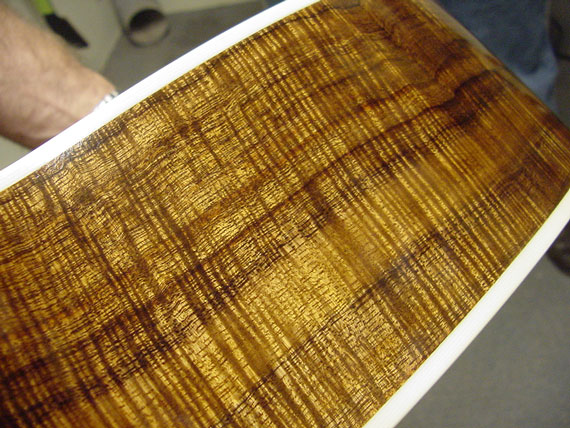
Look at the depth of shine on this koa guitar side!
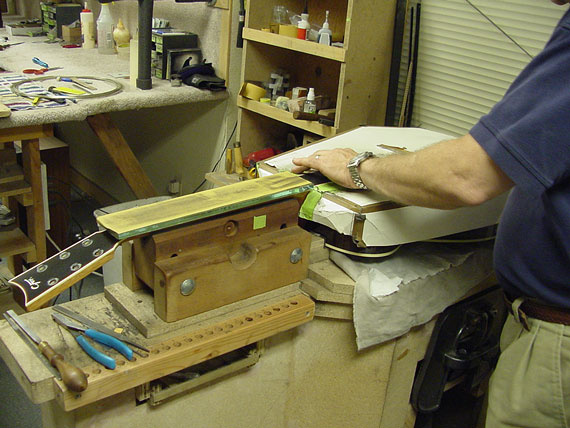
Well, we've made it to the final room and workstation in the assembly process, where frets get installed and neck meets body. That guy with his back to us is Todd Taggart again, taking another photo. Apparently I wasn't the only spy in the factory that day!
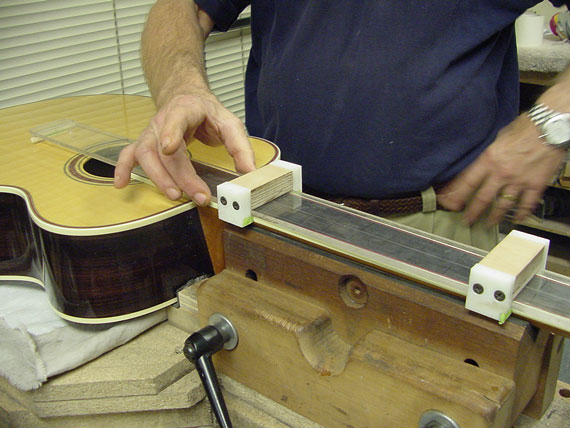
In case you're wondering about the acrylic jig on the fingerboard, stay tuned, because I made one for myself, and I'll be posting an article about it.
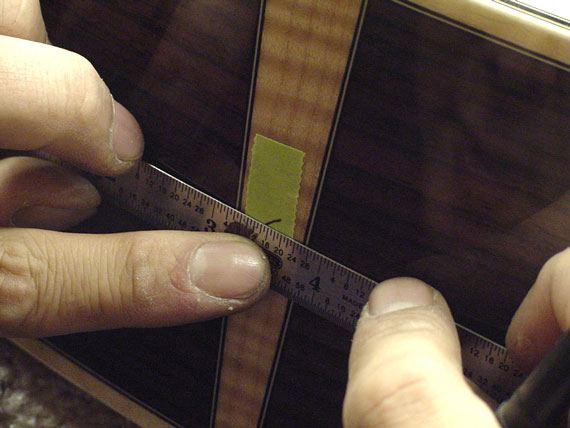
It's a neck alignment gauge, and has a mock saddle at the bridge end. With this gauge, the precise location of the bridge is set easily.
In fact, after the neck is bolted in place, the end of the fingerboard and bridge are glued at the same time.
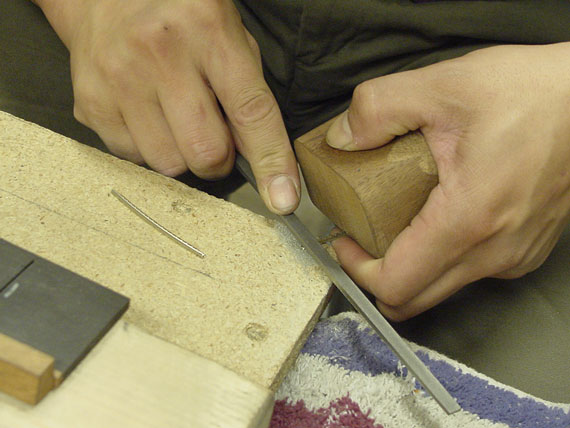
To overhang the binding on the edge of the fingerboard, each end of each fret is cut and filed by hand.
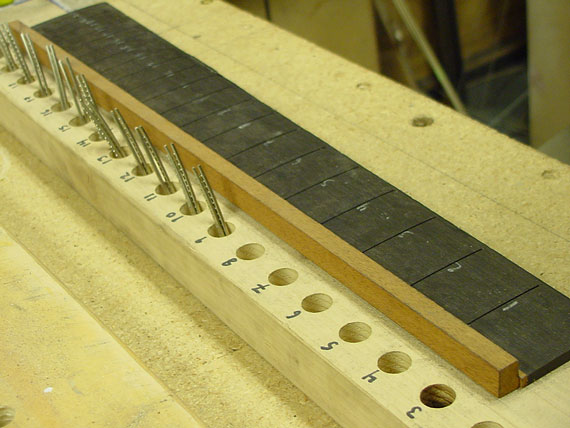
This is a mock fingerboard, used to judge the length of each fret. As the frets are trimmed, they are stored in marked holes.
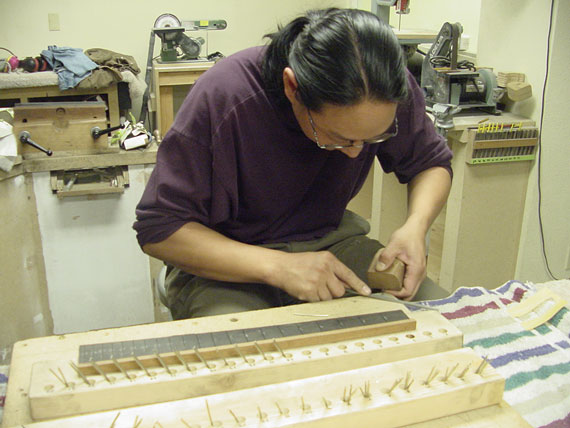
Sets of frets for about a dozen guitars are cut and trimmed in one session.

I think I'll be making up a rig like this one. It's a fixture for resting the neck while installing frets. Unlike most of the fixturing in a guitar factory, this one looks ideal for repair work, too.
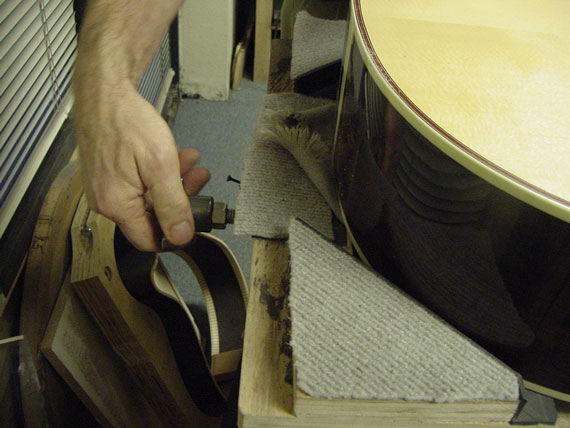
The guitar body sits against a padded rest at one end.
And the neck rest is raised and adjusted top provide support along the entire length of the neck. It takes only a couple of seconds to get a perfect alignment on the neck rest.
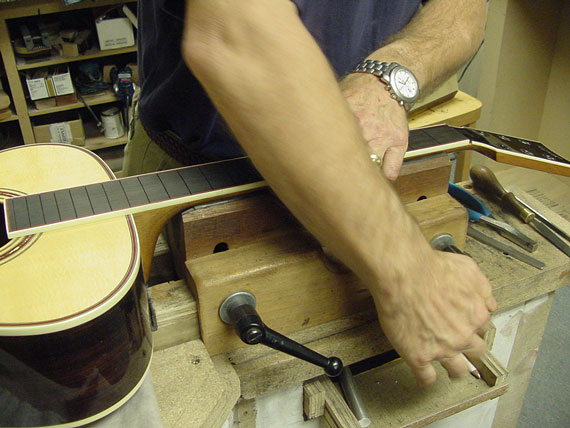
Then, with a protective cover on the guitar body, we're all ready for the fretting operation.
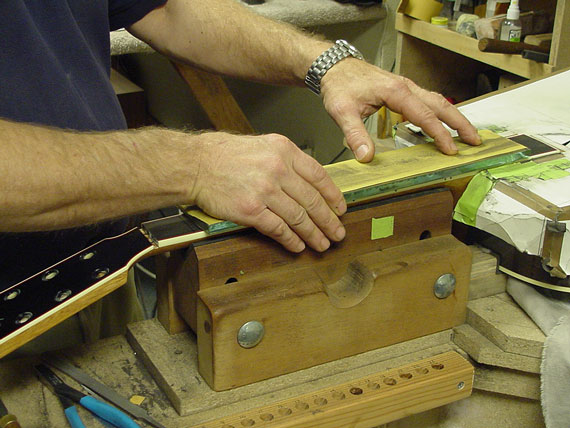
Just as in repair, now is the last opportunity to achieve a perfectly level fingerboard. Sandpaper stuck onto a piece of heavy plate glass makes a fine sanding block for this operation.
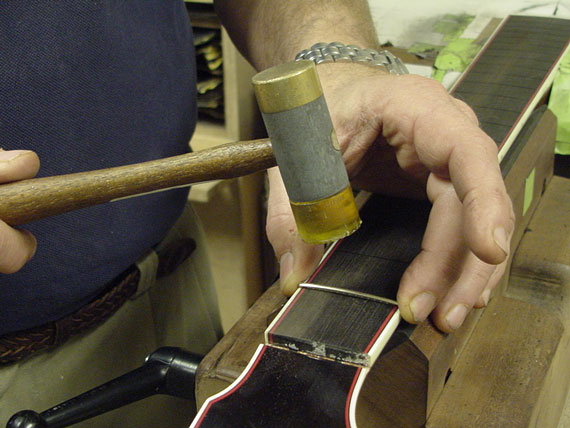
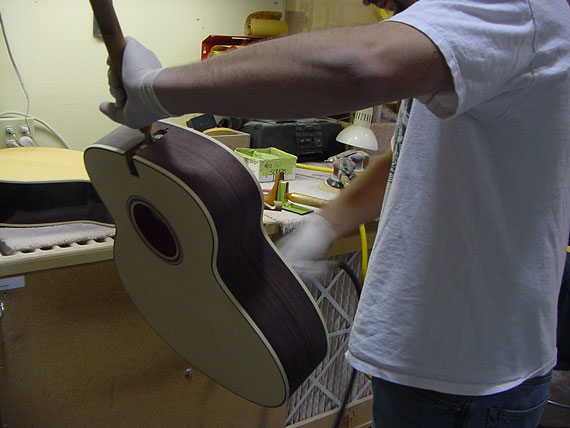
A plastic hammer leaves no marks in the frets as they are tapped in position.
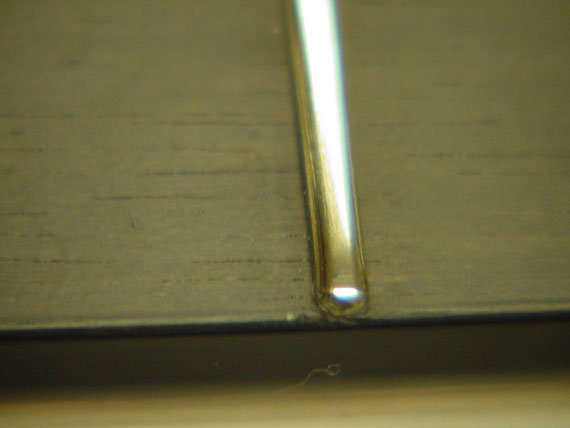
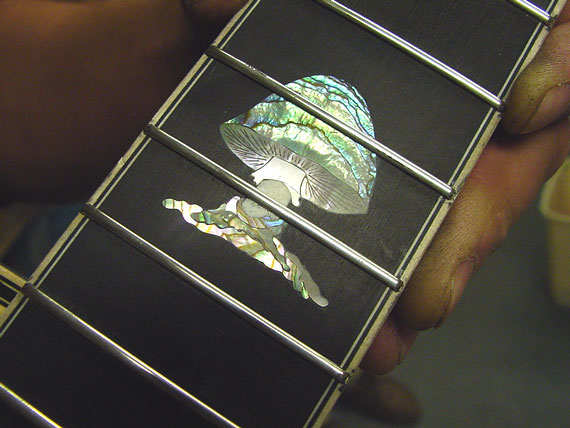
And, after painstakingly leveling and rounding each fret, the fingerboard is complete. This fret shows the trademark hemispherical end treatment.
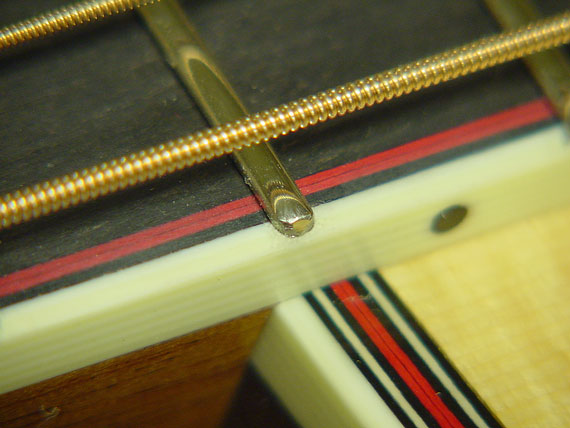
Look as closely as you may, you'll find the attention to detail that marks a fine handmade guitar.
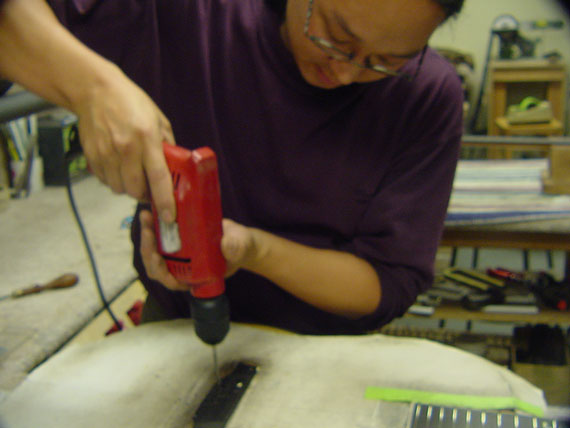
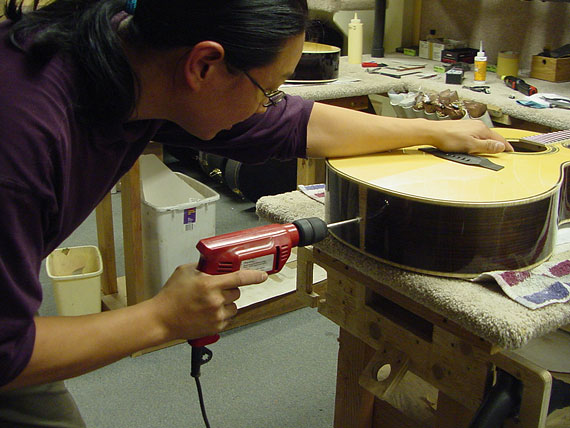
Bridge pin holes are drilled, and chamfered with a modest hand drill.
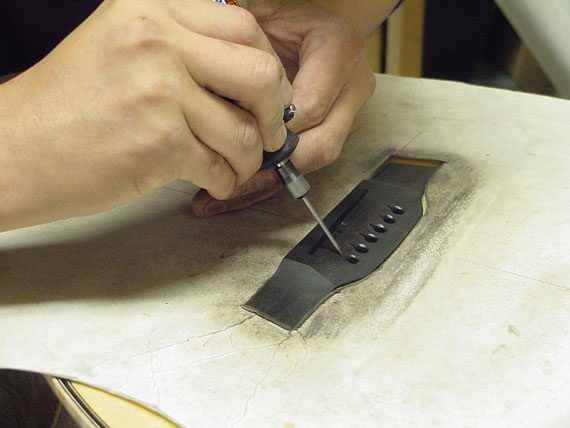
Little string ramps are buzzed into the bridge with a Dremel tool.
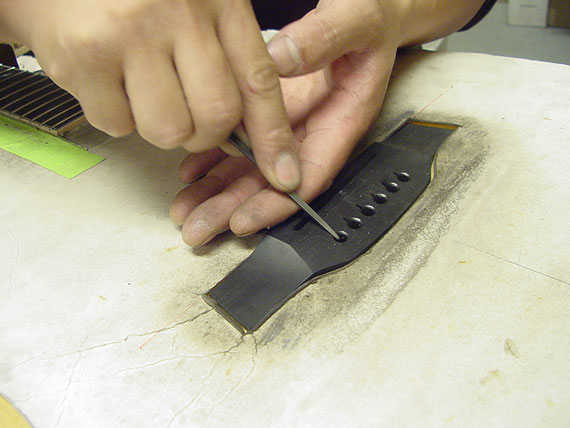
Just to dress up the bridge a bit, each string ramp is chamfered, too.
At the south end of the guitar, the center of the end wedge is located,
drilled, and followed by

a touch with a hand reamer
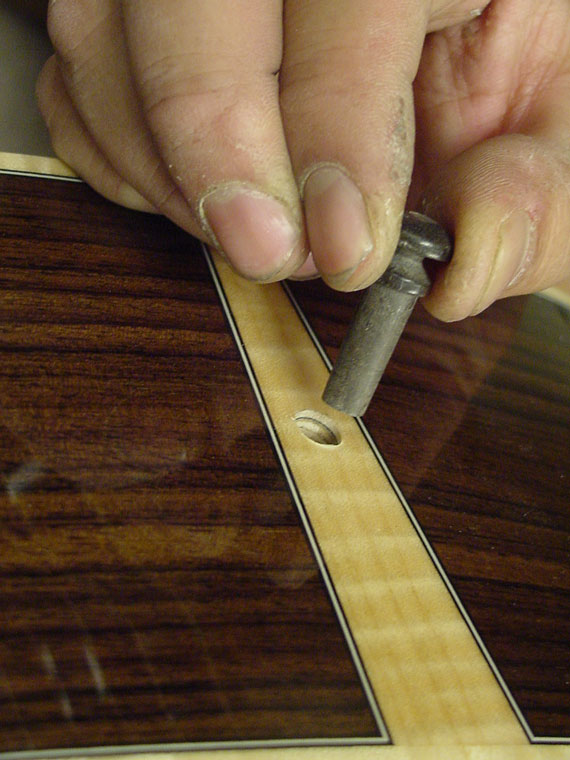
to fit the traditional tapered end pin.
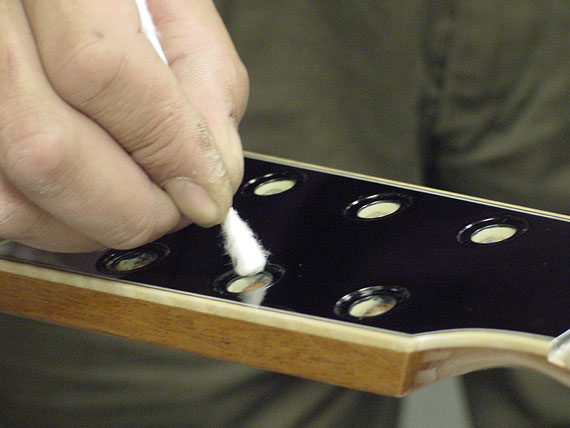
Remember those countersunk tuner holes? Well, the buffing compound tends to build up in them, and is cleaned out with cotton swab.
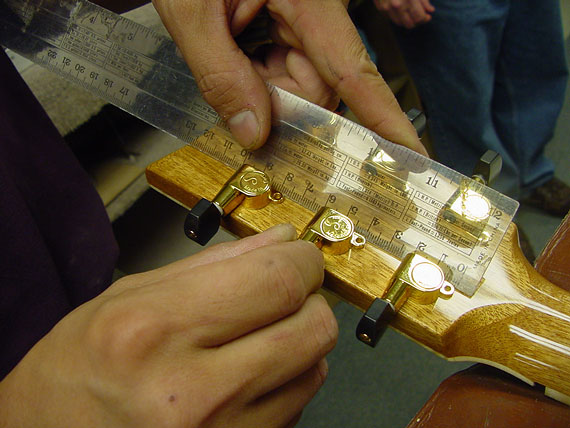
Each tuner is lined up for the best symmetrical appearance.
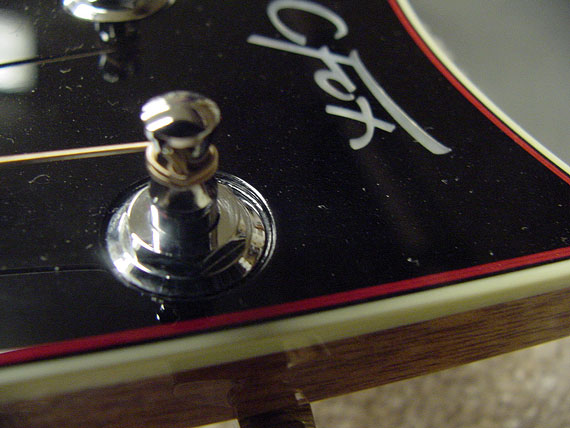
Once the tuners are installed, the peghead achieves its unique look.
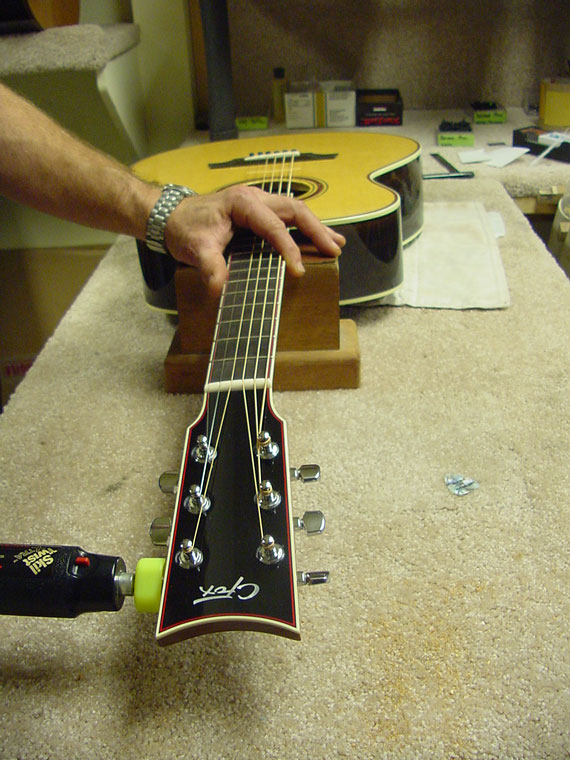
The moment approaches. The last operation is stringing and tuning.
And, here we are, right where we started, as Charles checks out the newest Fox guitar.
As I was packing up, I caught sight of this one, headed for Greg Allman. . .