
Dots What I Mean
Can't resist a little pun, so here goes:
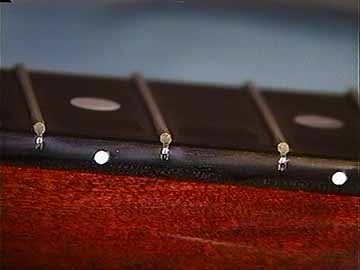
Most players of fretted instruments rely on fingerboard inlay markers to find their way around. For many of us, the little dots on the edge of a fingerboard can be the most important of all.
Classical guitars and older instruments of all types are frequently made without these edge markers. For these, I'm called on to inlay edge dots into a fingerboard edge without disturbing the neck's finish.
Here's how I go about it.

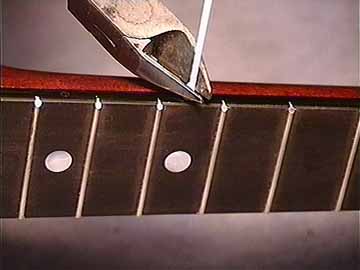
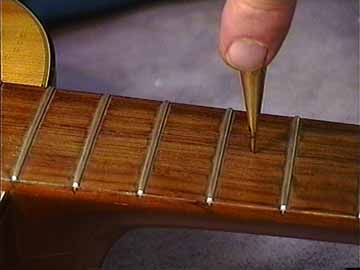
First, I'll mark the location with a very sharp awl:
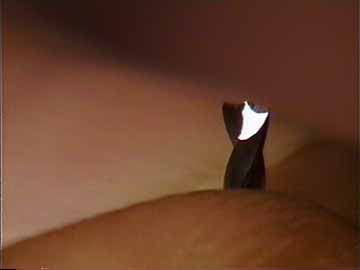
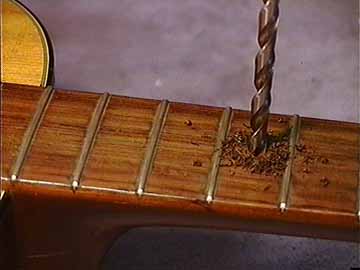
Next, I'll be drilling a 1/16" hole for the edge dot. This is my secret weapon:
It's a 1/16" brad point drill bit which centers easily on my mark and cuts with a minimum of chipping out of finish or wood.
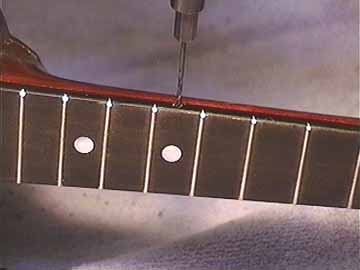
This particular bit has a hex shank and fits my electric screwdriver, so I have really good clearance and control:
I'll drill the holes at least 1/8" deep.
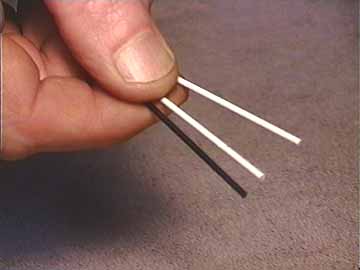
Here's the inlay material:
1/16" diameter plastic rods I get from Stewart-MacDonald. There are black ones for inlaying into white fingerboard binding.
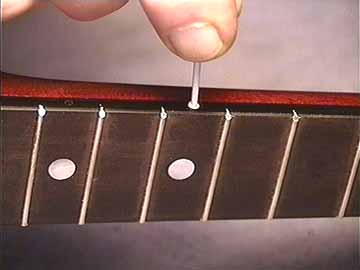
A little white or yellow glue is plenty strong enough to hold the inlay in place:
I put glue in the hole, and push the rod in just a little to start. Excess glue won't damage the finish, and I'll just wipe it off with a damp rag.
Then, I'll snip the end off, leaving about 1/8" of the rod exposed:
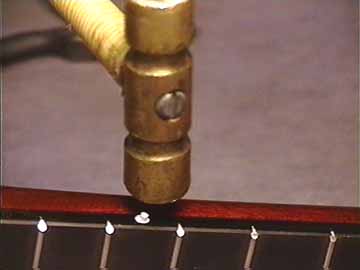
A quick tap with my tiny brass hammer drives the rod in very nicely.
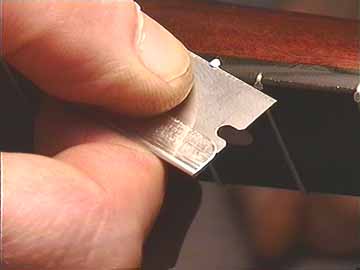
Now, I'll carefully slice off the excess with a razor blade, taking multiple shavings until the rod is just flush with the surface:
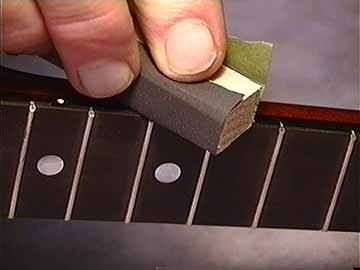
A quick sanding with 1000-grit waterproof paper and a hardwood block will level my inlay and the surrounding finish:
After a quick buffing or hand polishing, it's really difficult to tell that the inlay was done after the instrument was finished:
If I chip the finish when drilling, I'll use cyanoacrylate glue to seat the inlay instead of white or yellow glue. The next day, I can trim, level and buff just as normal, and the cyanoacrylate will appear to be part of the original finish.
Many players want to add inlay markers to the face of fingerboards as well. Although the face of the fingerboard is often home for decorative fancy inlay, the majority of my work is with simple dots. There are special difficulties in working with inlay between frets to avoid scarring the fingerboard or leaving other signs that the work was done after the fact.
Fingerboard inlay material is almost always mother of pearl or abalone, which is much more difficult to level than plastic. I have a simple technique that saves me a lot of grief when I do this job.
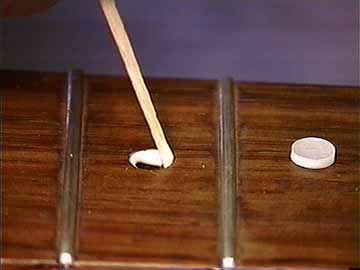
Here again, I'll reach for my sharp scriber to mark the center of the dot.
And again, I'll drill with my brad point drill.
I spend a little time making sure that my inlay dots (also available from the usual luthier supply sources) will fit very tightly into the holes I drill.
Inlay dots are customarily available in metric sizes and a very few fractional sizes. Nothing like metric size brad point drills for this job!
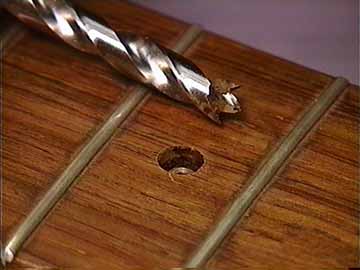
Here's a shot of the drill bit with the nice flat bottom hole it produces.
I drill the hole considerably deeper than the thickness of the inlay dot.
Here, I'm coating the sides of the hole with yellow glue:
I don't fill the hole with glue because of the hydraulic pressure that might be generated when I jam in the dot
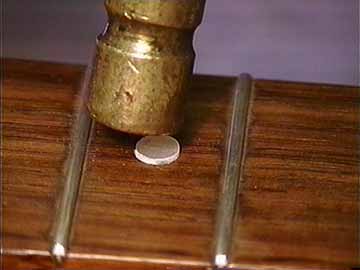
I'll place the dot in the hole, and tap gently to start it down in:
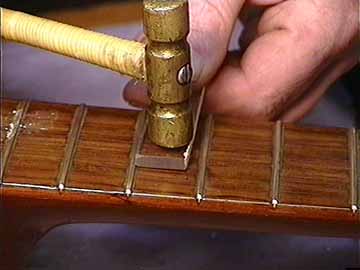
With an acrylic caul as big as possible to fit between the frets, I'll tap the inlay until it's set flush with the surface:

If all goes well, the inlay will sit so perfectly in the hole that no leveling will be necessary:
If I do need to sand, I'll always use a hard block and sand with the grain using very fine silicon carbide paper. Even the slightest scratch across the grain is noticeable and requires a lot of effort to clean up.