
Banjo Coordinating Rods
How to deal with
Here's a topic that needs a lot of preparation. Coordinating rods are a bit confusing at first, but they are really a very straightforward means of adjusting and maintaining a banjo's neck angle.
First, it's important to understand that the truss rod and coordinating rods are not related in any way. The truss rod's job is to control the shape of the neck: to adjust the "relief" or curvature and to keep the neck from warping.

Before even looking at the coordinating rods, I always check the truss rod adjustment by mashing the strings down (while tuned to pitch) at the first fret and at the 19th or so:
I want to see about 0.010" or a little more clearance between the string and the middle frets. This "relief" is necessary to avoid buzzing, and may need to be increased for a heavy handed player. If I'm making any adjustment to the truss rod, I'll back the nut way off and lubricate the threads. That way I'm not fighting excess friction when adjusting the nut.
Some banjos have "two way" adjustable rods with non-removable nuts. These usually can't be lubricated, so I just accept them the way they are! When checking truss rod adjustments, I try to hold the banjo in a reasonable semblance of playing position, so I don't flex the neck unnaturally.
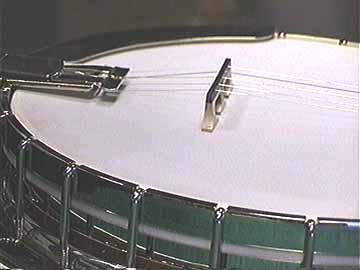
With the truss rod properly adjusted, I turn my attention to the head and bridge. Before messing with the coordinating rods, I make sure that I have the desired height bridge in the right location:
Head tension really affects action, so I'm sure to check that while I'm at it:
Just a couple more items.
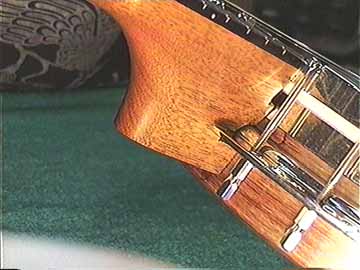
First, look at the complex joint where the neck fits the banjo shell:
The neck contacts the shell at three different "levels" on this Gibson Mastertone. It's important that the neck fits tightly and can't be shifted while the banjo is in use.
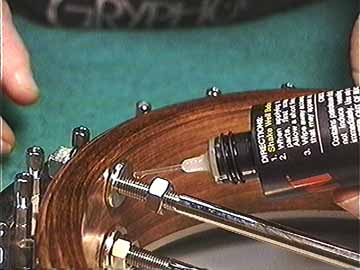
I'll mention oil one more time and then shut up:
Banjos are bolted together everywhere. Generally, the threads on banjo parts are not the highest quality machine work, and they're often a bit clogged with heavy plating. Older instruments may have a bit of rust or corrosion on the threads.
I OIL ALL SCREW TREADS ON BANJOS. That means all fittings, including all 24 head tensioning hooks, resonator mounting thumbscrews, etc.
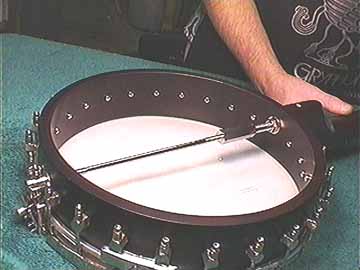
Speaking of resonator screws, let's take the resonator off and look at some coordinating rods. . .
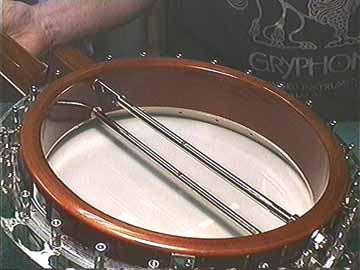
Most high quality modern banjos have two coordinating rods to adjust the neck angle (and as a result, the action.)
They work in a simple push-pull arrangement:
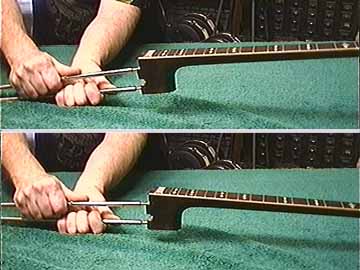
If I push on the upper rod and pull on the lower rod, the neck tilts downward, and the action will become lower.
By the way, we always describe rod closest to the head as the upper rod, even if the banjo is upside down.
When the banjo is fully assembled, the rods work in exactly this same way, actually deforming the shell to tilt the neck.
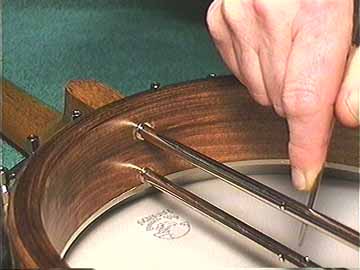
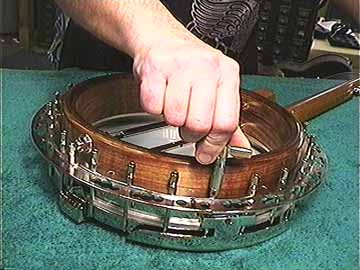
Before adjusting the neck angle, it's important to make sure the neck is tightly mounted to the shell. Here I'm tightening the lower rod to draw the heel of the neck tight against the shell:
I just stick a 1/8" Phillips screwdriver through the hole in the rod, and tighten the neck securely. I always check both rods and tighten if necessary.
Some banjos have a long nut on the lower rod to tighten the neck to the shell.
Wow, here we are all this way, and still no rod adjustment. All this preliminary stuff is important, so I wanted to cover it as well as I could.
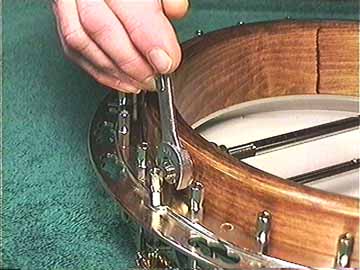
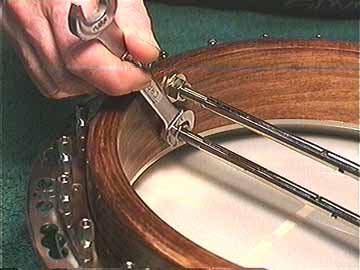
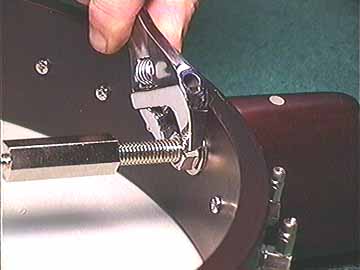
Another caution: Please don't use pliers on any part of a banjo. It really messes up the nice plated nuts, and makes it look like you don't care about your banjo. An adjustable wrench is fine for most coordinating rod adjustments.
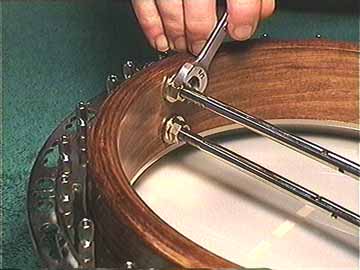
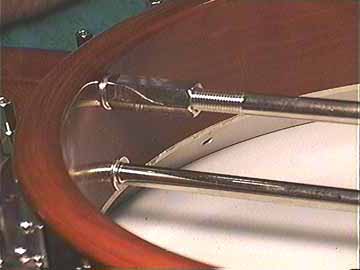
To operate the push-pull mechanism of the rods, you need to loosen the inner nut of the lower rod:
Then tighten the outer nut. That will pull the neck backward to lower the action.
Obviously, you can work the nuts in the opposite manner to raise the action by pushing it with the lower rod.
The upper rod is a different matter. It can only push, because it has no outer nut. Tighten the inner nut to push the upper rod and lower the action.
The upper rod serves to hold the diameter of the head against the pulling action of the lower rod, and is very
powerful in its ability to push the neck to lower the action.
That's about it. All you have to do is push and pull with the rods to make action adjustments. Well, there is more.

Some banjos have only one coordinating rod:
These instruments have a more limited range of adjustment because they count on the shell's natural rigidity to take the place of the upper rod.
Many inexpensive banjos have a coordinating rod that looks more like a turnbuckle:
The sad reality is that these rods are extremely limited. In fact, most of them simply don't work. They do serve to maintain the neck angle, but they can't really control it well enough to make a real action change. Pull hard with this rod, and you compress the entire shell into an oval shape. Push hard, and the rod simply buckles and bends.
To adjust the neck angle of these banjos, I simply loosen the neck attaching nut:
In fact, I back it way off. Then I insert a shim between the neck and the shell to improve the neck angle and the action. I find this is far superior to trying to make the flimsy rod do a job that out of its league.
Shims are useful on better banjos, too. If the rods don't adjust the neck easily enough, or if I sense the shell is straining when I crank on the rod nuts, I may use shims to get the neck fitted a bit more closely to the desired angle:
This shim is a piece of heavy card stock, cut to clear the bolt, and trimmed so it won't be too ugly.
The ideal fix for a bad neck angle is to recut the joint and refit the neck, but that may not always be the best choice. Lots of players like to mess around with different bridge heights, for example. It's also reasonable to shim a neck to try out a new setup before making a permanent change. I personally don't get into the discussion of whether the shim may influence the tone.
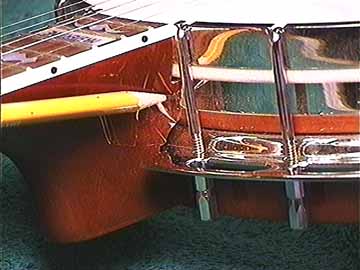
It's possible to shim the neck angle backward by cutting and fitting veneer or card stock shims here:
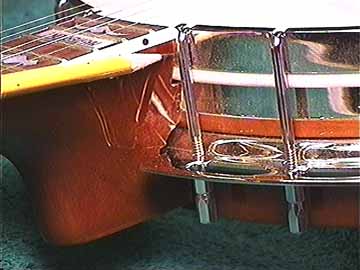
or here:
or both.
Shimming the heel to force the neck backward will bring the action lower, and is frequently a good choice when changing to a bridge higher than the standard 5/8" that was stock with this Mastertone.
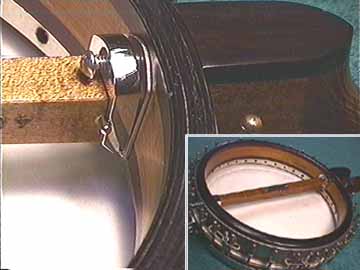
All early banjos, and some high grade modern "old time" instruments have their necks attached by a heavy "dowel stick" This 75 year old Vega has no neck angle adjustment at all:
That heavy nickel plated yoke screws against the shell, pulling hard on the pin in the dowel stick. That brings the neck up tight against the shell and makes it rigid indeed. It is often possible to make slight neck angle adjustments by loosening the clamp and inserting a shim at the end of the fingerboard. When the clamp is tightened, the dowel will bend very slightly and the neck will be forced backward a bit.
The bitter fact is that to reset the neck angle on one of these old timers, it's necessary to remove the dowel from the neck and rebuild the joint entirely. A big expensive job to say the least.
That's why I really LIKE banjo coordinating rods. I wish guitars could have 'em!