
When Frets Go Wrong
Classic problems, with some old and new solutions
Sometimes things go along perfectly, but refretting any instrument has the potential to be tricky work. At all times, I presume that the goal is to remove the frets, level the fingerboard, and install new frets in the "conventional" manner, by tapping them in place. Pressing would be just as effective, of course, but that's a technique I haven't used so far. I try never to alter the instrument any more than necessary. Widening fret slots, for example, would be a matter of last resort in most cases.
There are lots of fret problems that come as a matter of wear, age and various kinds of damage. Here, I'm presenting some techniques for recovering from some of the things that happen during the process of repair.
Please click the photos to go to the relevant articles.
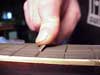
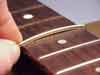
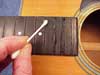
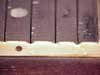
A slight bevel at the top edges of the fret slots may help the frets go in a bit more easily, and may help them seat a bit better. It will also reduce chipping of the fingerboard when frets are removed in the future.
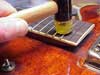
Cantilevered and other unsupported fingerboards make it difficult to tap frets in place and seat them well. Here's a way to make frets go in much more smoothly.
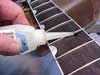
A bit of cyanoacrylate can be good insurance against future fret looseness. Here's my method for gluing frets in place.
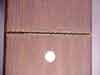
Often, old fret slots are not uniform. They may have been damaged by previous repair. Fit the new fret to a damaged slot.
A loose fret end can be tacked down with cyanoacrylate, but there are some cautions.
It's far better to avoid loose fret ends. "Over-radius" the frets for some security.
It's best not to undercut the fret too far to overhang the fingerboard binding.
Fingerboards chip easily when frets are removed, but tight fitting frets can chip a very old brittle fingerboard when they're tapped in place.

Watch out for loose fingerboards and cracked necks.
Widening fret slots should generally be a last resort if you can make the fret wire a bit thinner.
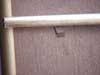
Frets often chip the fingerboard as they are removed. If the chip is missing, it's best to fill before sanding.
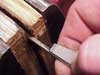
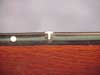
Hit the fret too hard, and you might kink it.
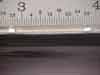
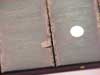
Or, you might actually drive it too deeply into the fingerboard.
A dry, brittle, or chipped fingerboard can be "revived" and strengthened.
Tapping an off-center or overly long fret can push the binding right off the edge.
Leaving the end too long can make it hard to avoid bending the fret when tapping it in.
Fingerboard chips should be glued down as soon as possible. Here's a method that's fast and sure.
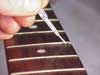
Sometimes, frets just won't go in straight. Tame those leaners!
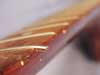
Yes, it pays to "over radius" a fret before tapping it in place. But, too much over bending, or an extra brittle fingerboard, may cause unnecessary chips at the ends of the frets.
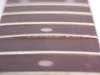
If the fret fits too loosely, it can spring up in the middle.
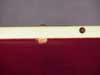
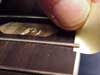
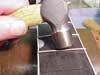
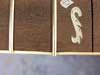
Here's one you really don't want! Hit a fret end too hard and it can shock the binding, causing a chip in the finish below. A nasty piece of business.
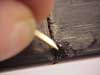
Really old celluloid binding is especially vulnerable to heat. Get the fret too hot when pulling it out, and you can burn the binding.