
Special & Modified Clamps
Work over those old tools, or make the new ones you need.
OK, so your deep throat clamp won't quite reach. Well, then, just cut it to fit:
I thought this clamp would fail when Richard cut the throat out this deeply, some 25 years ago! Guess I missed that one! It has turned out to be one of the most used clamps in our shop, and it spawned a whole generation of beat-up, chawed-out, and dang nigh murdered C-clamps.
OK, so sometimes we actually kill one. Big deal. If it gets the job done then the cost of replacing a C-clamp is a very minor issue compared to the value of the repair job.
See, I've cut the back of this one to half its original thickness and I can even get it into F-holes:
I can guarantee you that this clamp is a hell of a lot stronger than the bent steel clamps sold by the luthier supply guys. It also cost less.
Don't get me wrong -- I like the bent steel clamps, too. I use every kind of clamp I can get and/or make.
Speaking of the bent steel clamps, here's a minor adaptation that means a lot to me.
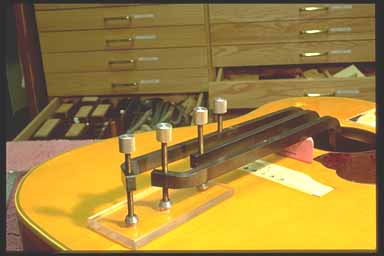
Need to clamp several cleats in a line on a crack repair? Easy, if you make a couple of bent clamps:
I just heated them with my propane torch and bent the tops and bottoms to match. They line right up on the crack and make the job go much easier. Nothing like being able to align the entire length of the crack at once.
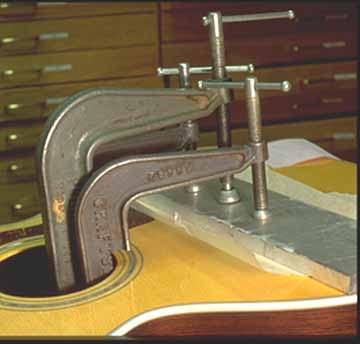
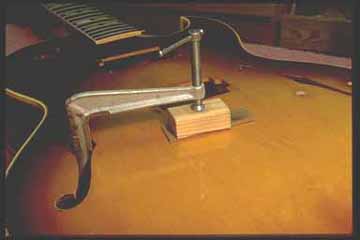
For bridge and bridge plate clamping, I've just tapped the "foot" of a giant deep throat clamp and made aluminum cauls to fit:
The caul pivots to go through the soundhole, and the entire rig is a one-handed affair. No cauls to leave taped under the bridge plate. (Been there, done that!)
But the best part is that I can heat the caul to 400 degrees, screw it on, and clamp it in place to heat a bridge plate for removal.
Remember that aluminum cuts at the same speed as wood, so you can use your bandsaw to make aluminum fixtures.
So, here's a clamp system I worked out for one of those impossible reaches.
There was a cross-grain fracture right ahead of the end block where the top buckled in a direct fall on the end pin. I needed to get a thin cross-grain reinforcement laminated under pressure strong enough to flatten the area. That's a l-o-n-g reach from the soundhole.
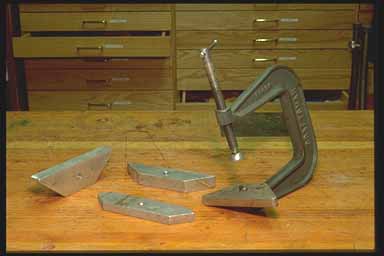
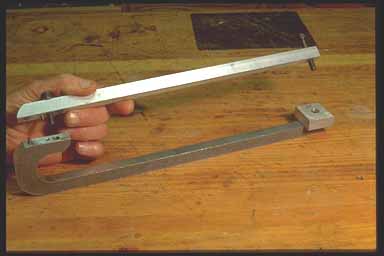
I took a plate of 1/2 thick aluminum and bandsawed out a super deep C-clamp with a removable top section. The top section indexes onto the back end of the bottom section with a couple of pins, so the top and bottom are in alignment when I screw them together:
Some folks see this clamp and say, "Why not just make the clamp real tall so it'll slip in through the soundhole.
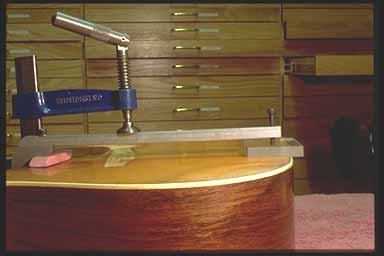
Well, here's why not:
A really long clamp like this one is pretty flimsy, so once it's in place, I clamp over it with the longest throat heavy clamp I can find. That brings the point of leverage way out over the bridge position so I get some heavy down pressure way out at the end. Notice my ubiquitous "Pink Pearl" eraser blocking up the back end of the clamp. I've been using these guys for so long I forget to use the leveling screws on the Waverly clamps.