
Restring Your Mandolin
Restring Your Mandolin
Virtually all mandolin strings come with loops on their ends to attach to the mandolin tailpiece. Tailpieces come in a wide range of styles, but I think of them as two basic types: the ones where the strings just hook right on, and the ones where you need three hands to do the job. Stringing a mandolin is enough of a three-handed job if you ask me.
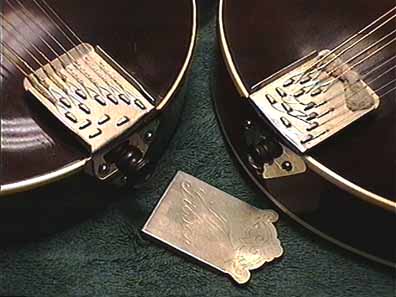
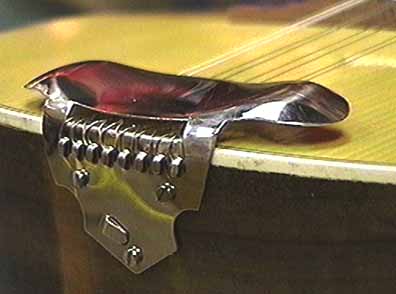
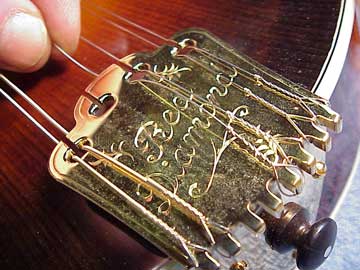
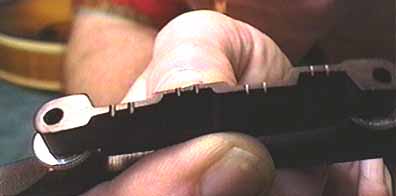
Here is the classic tailpiece designed by Gibson, which is now the most commonly seen style of tailpiece. There is a cover which slides over the top to protect you forearm, and there are twelve little hooks for the strings. Of course, you only have eight strings.
The one on the right was strung in the "correct" manner. Each unwound treble string hooks on and bends around the corner in a second hook on its way to the bridge. In the early 1900s the unwound strings had loops that were prone to slip, or came straight, with the player having to make his own loop. This tailpiece hook arrangement was a patented and cool device to eliminate the loose loop problem.
So, almost a century later, we have tight loops. Is it OK to string the Gibson style tailpiece like the one on the left. Sure, go ahead if you want to, but you'll be missing just a little of the old-time flavor.
By the way, the tailpiece has a little piece of felt jammed under the strings to keep them from rattling. This is a good idea. These tailpieces are notorious for little rattles, and for loose covers. You can bend the small flanges on the base of the tailpiece to adjust the fit of the sliding cover. Just take an adjustable wrench and "bite" the flange, then bend it just a teeny bit:
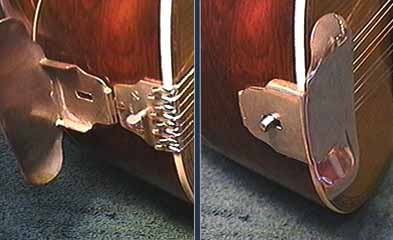
Some tailpieces, such as the one on this 100 year old Washburn "bowl back" mandolin, have cool hinged covers or other patent devices:
Some mandolins have tailpieces that are just plain difficult to string.
In fact, this one is a real nightmare unless you bend the loop to fit the tailpiece before you put it on. With a bend at the loop, stringing this tailpiece becomes the easy job it should be.
Let's talk about bending loops.
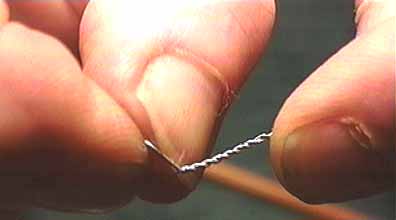
Don't be tempted to just grab the loop and bend:
If you're lucky, you'll get a loop that looks like this:
But it's weakened at the first twist, because the wire had already been bent there. You may get a big surprise when you tune up!
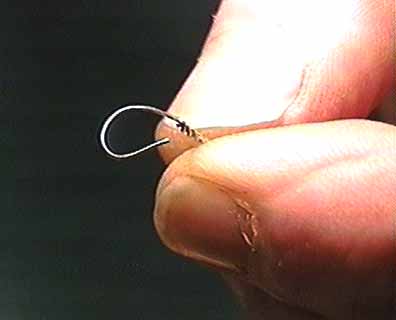
If you're not lucky, the loop will look like this:
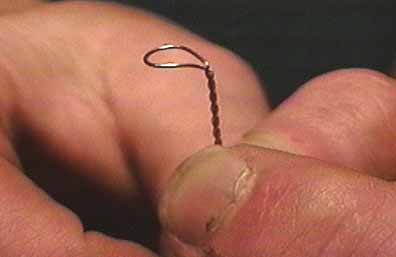
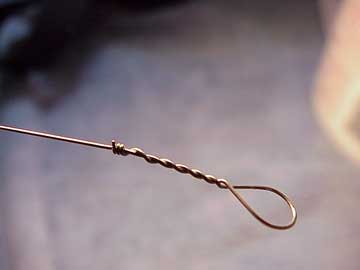
A better method of bending just the loop is to grab a pencil, and use the pointy end as a mandrel. You'll have a choice of diameters, and you can bend the loop easily by holding down the very end of the loop with your fingernail, and bending just the loop section.
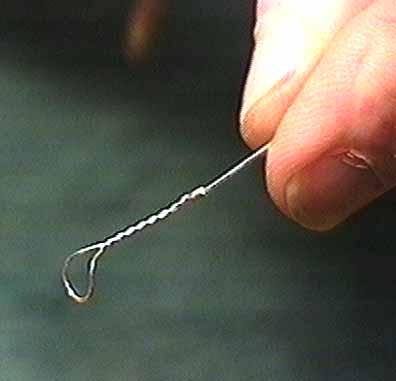
Your loop should look something like this:
For any loop end string, this method gives you a hooked loop that will seat easily on those weird tailpieces. Mandolin players are not singled out for punishment; lots of banjo players have to deal with bending strings to fit tailpieces, too.
Don't forget that there is no real difference between ball-end strings (as on guitars) and the loop end strings. With some practice you can cut the brass ball out of a string to make it a loop end string. The loop is smaller, but usually works fine. So you can use appropriate gauge ball end strings in a pinch.
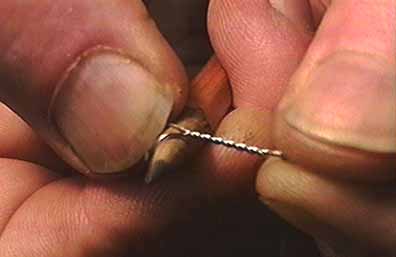
Don MacRostie, builder of the famous Red Diamond mandolins, reminded me to mention that the twisted loop end usually has a little sharpie sticking out at the end of the twist:
So don't forget to orient that little sharp point downward if the string goes over the top of your tailpiece, like this:
That way it won't catch on your arm or sleeve.
The tailpiece isn't the only nasty piece of business in restringing mandolins.
All mandolins have tailpieces and moveable bridges. That means that the bridge will fall off if you take all the strings off at once. Some people say that it is not healthy for an instrument to have all the strings taken off because the instrument is built for high tension and will suffer if the tension is released.
These people are wrong! All stringed instruments would be likely to last longer if they never had any strings on them. It's a good idea to release the tension if an instrument is going to be stored, shipped or exposed to high temperature.
It's not a bad idea to take off all the strings if you're going to clean up the instrument. We always restring instruments in the shop by taking off all the strings and at least wiping the dust off underneath.
Personally, I change my own mandolin strings a few at a time because I hate readjusting bridge position. At least once a year, though I like to clean things up a bit, so I take them all off to make the cleanup easier.
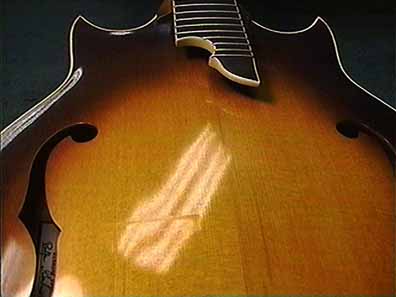
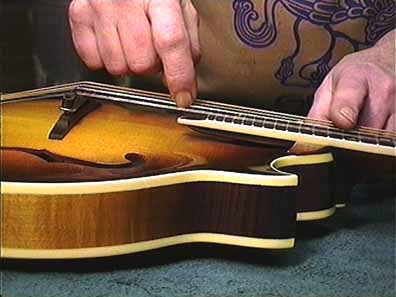
When the strings come off, the bridge does too, but it leaves some sign of where it was, so you can use that as a starting point for relocating it. This new Phoenix bluegrass mandolin has a little pressure mark you can see with the reflected light from my overhead fluorescents:
It's easy to spot which way to orient the bridge on the top. Just notice the size of the notches: big ones for bass strings, little ones for treble:
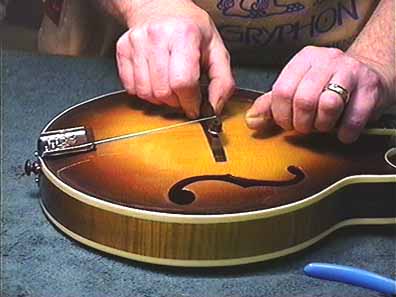
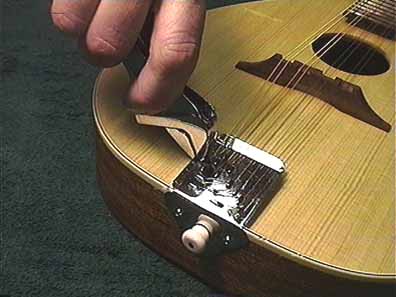
When replacing the strings on a mandolin, I like to install the first string with the bridge off, leaving it a low tension. Then I can lift the string up, and stick the bridge under it, right on the impression in the top.:
Before I go on to the peghead, I'll digress to talk about placing the bridge.
The method we all use to locate the bridge correctly is to play the harmonic at the twelfth fret and compare it to the fretted note at the twelfth. Here's how it's done:
When you just barely touch the string exactly over the twelfth fret and pluck it with your other hand, you force the string to vibrate exactly in half, producing a note an octave above that to which the string is tuned.
Pressing down at the twelfth fret should give exactly the same note. If the fretted note is sharp, then the string must be lengthened by moving the bridge toward the tailpiece.
By testing the highest and lowest strings this way, you can get the bridge into just about the right place. If you have a critical ear, you might spend quite a bit of time getting the bridge where you want it. As the strings age, or if you change gauge, you might find you'll need to readjust the bridge position.
Don't forget to check out the article on maintaining your gears. Mandolins usually have open gears which need just a bit of care and feeding.
Let's finish this job.
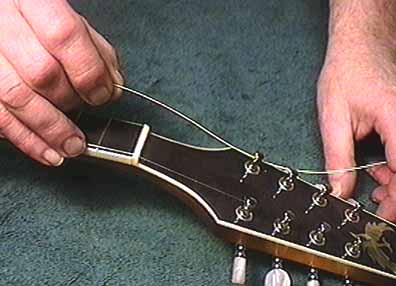
I pass the string through the hole in the tuner post, leaving a bit of slack over the neck:
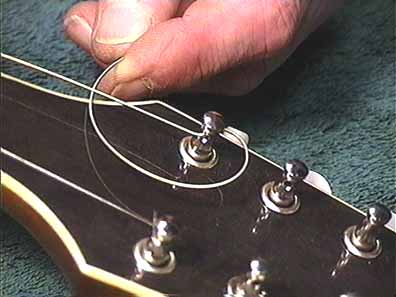
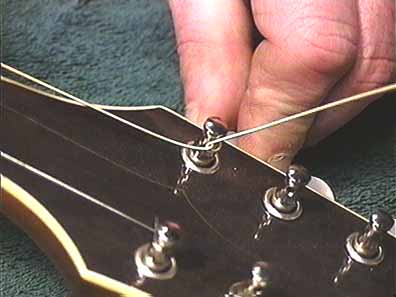
Then I bring the free end around opposite the direction the post will turn when I tune it up. I bring the string down the center of the peghead and around under itself:
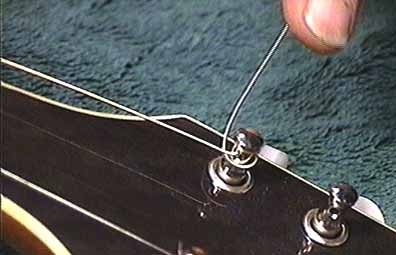
Lifting up on the free end of the string
I bend it over itself, and press downward:
Notice how my right hand holds the tension on the string as I work around the post with my left:
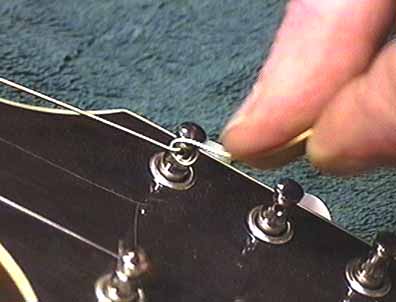
After I've bent the string down, it stays in position as I simply wind it up.
I make sure the successive turns go under, rather than over the string.
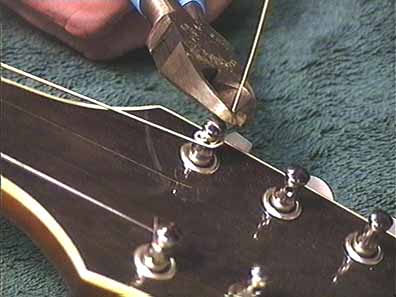
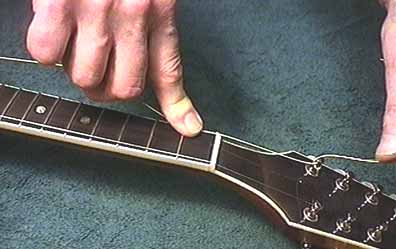
Tuned to pitch, I'll cut off the end. I like to cut the string close so I don't puncture my finger later:
The string does not need to loop around the peghead more than about half a turn in order to work smoothly. It is locked firmly in place and will be easy to remove when restringing time comes around again
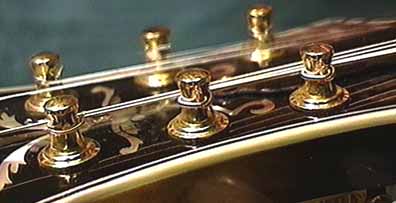
Here's a fine looking job:
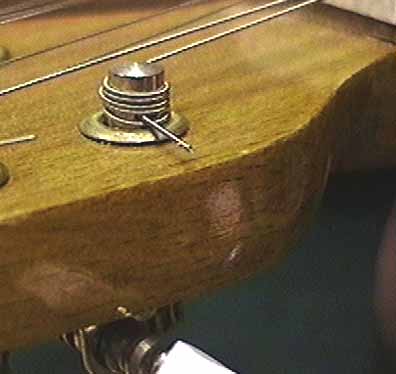
Here's a not-so-fine looking job:
One more turn and the string might just pop off! You can put strings on this way, but it requires many more turns, and the string is a more likely to slip out of tune. This particular string works all right, but I think it looks a bit messy.