
Bridge Plate Replacement
It's a lifesaver
This is a classic repair. The bridge had become loose while this 1964 Martin 0-16NY sat in its case, unnoticed by its owner. Months or years of relentless pull by the strings slowly deformed the top, which was no longer supported by the strength of the bridge.
The bridge plate bent under the load, and began to crack through the bridge pin holes, and the top developed cross grain cracks in the same area.
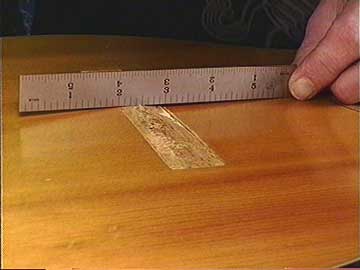
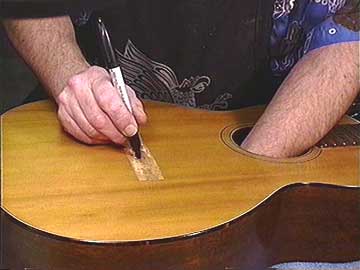
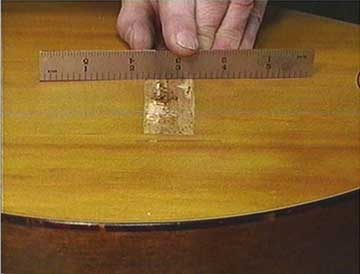
Here you can see the extent of the deformation:
The area was so badly warped there was no hope of gluing the bridge back on without flattening and reinforcing the top.
While it would be possible to heat and flatten the bridge area of the top, the broken bridge plate and spruce would not be nearly as strong as they were when the instrument was made. I decided it was time to replace the bridge plate.
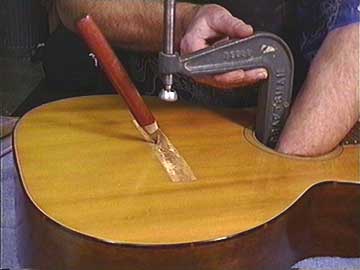
In order to remove the bridge plate safely, I needed to heat it up in order to weaken the glue bond while I pried it off.
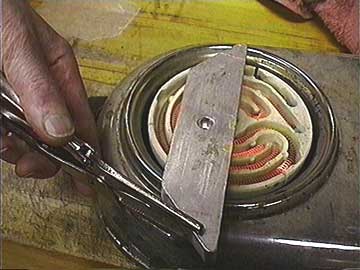
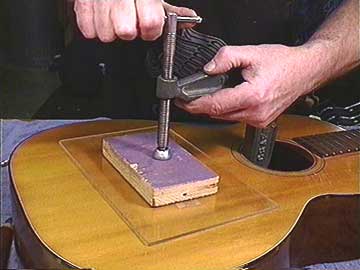
I have a 1/2" thick aluminum block the size and shape of the bridge plate, and I heated it on my hotplate:
I'd estimate the temperature at around 350 degrees Fahrenheit.
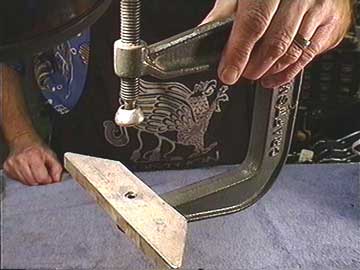
My aluminum block screws onto the foot of my big deep throat clamp:
I use this kind of setup for most bridge gluing as well as bridge plate removal.
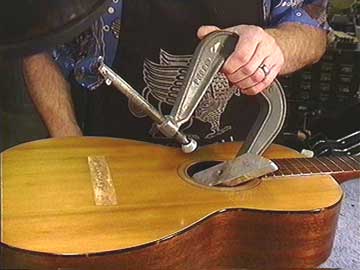
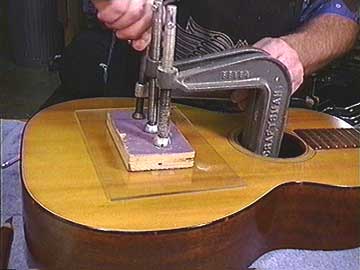
The aluminum block pivots so I can slip it into the guitar body without damaging the finish around the soundhole:
Because the top was so deformed, it was necessary for me to clamp the block tightly to flatten the bridge plate to get good heat transfer:
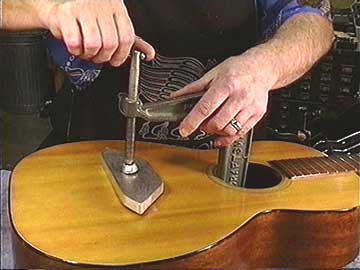
Notice the aluminum caul on top. It helps keep the finished surface cool while I apply heat from the inside. This is tricky work, and I moved quickly to release the clamp and feel the temperature of the finish to avoid blistering or other heat damage.

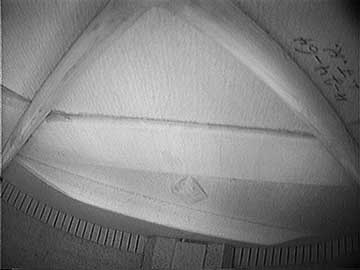
Here's a view from the inside with my black & white inspection camera:
I used my big flat bent chisel to catch the back edge of the bridge plate and pry it loose. Actually, I didn't pry so much as pull straight downward toward the back of the guitar. I had to work fast before the bridge plate cooled off, so I wasn't able to take progress photos of this operation.
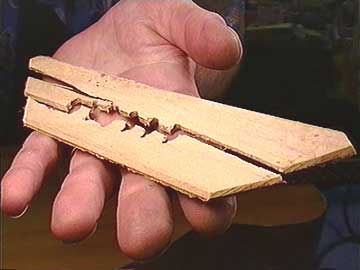
The bridge plate came out well, in only three pieces:
I glued the pieces back together to make a pattern for my replacement bridge plate.
Inside, the top looks pretty clean where the old plate came off:
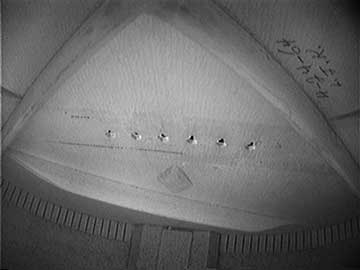
Notice the date and initials on the inside of the top near the bass cross brace. For a short while in the 60s, they were signed in this way. (The only other period I know when this was the custom was from about 1880 to 1900.)
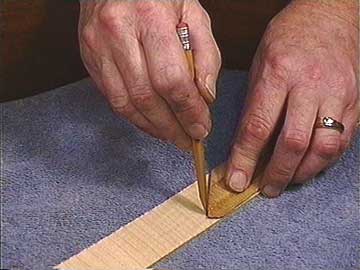
I used a piece of maple the same thickness as the original (.100") and traced the outline of the old bridge plate:
I cut it to shape and beveled all the edges just as the original.

Notice the grain direction of my new bridge plate:
Because the string tension is in a straight line with the grain of the top, I like to orient the grain of the bridge plate the same way, to avoid cupping and deformation. In this case, it's doubly important, what with the cross grain breaks in the top between the bridge pin holes.
For an "important" restoration on a vintage instrument, I'd restore the spruce separately and use an original style bridge plate. I've just written an article on this sophisticated technique for Acoustic Guitar Magazine, and it should appear around April, 1999. I'll post that material on FRETS.COM shortly afterward.
Holding the new bridge plate in place, I marked the location of some of the bridge pin holes:
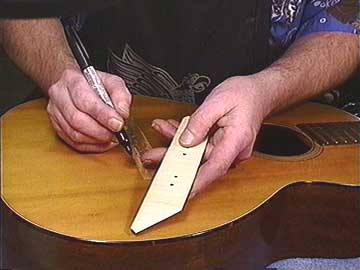
And checked to see that the holes and plate were lined up correctly:
Time to glue. Hide glue is my choice, because it dries hard and becomes very rigid, with literally no tendency for "creep," even at elevated temperatures.
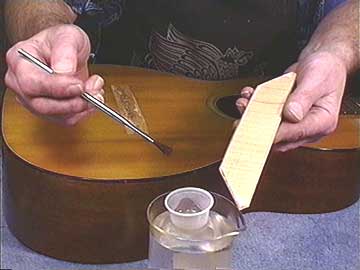
Any water based glue would cause my bridge plate to cup and become difficult to handle as I worked with it, so I brushed the back side with water to balance the forces of absorption:
Working quickly, I brushed on hot hide glue to the upper surface:
Hot hide glue is usually dispensed from a glue pot, which is typically a lot more work to maintain than a bottle of carpenter's wood glue. I think the advantages of hide glue outweigh the trouble and shortcomings, but I really don't like to deal with a glue pot, so I use these little plastic cups and float them in a beaker of hot water.
Click here for a description of how I use hide glue without a glue pot.

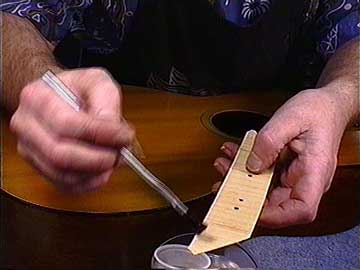
I placed the new bridge plate in position and lined up the dots with the bridge pin holes:
Then, using my pointy knife, I stabbed the plate to hold it in place:
I was able to work quickly with both hands, getting the aluminum caul right on top of the new bridge plate:
Then, removing the knife, I laid on a sheet of clear acrylic topped by a 3/4" plywood caul:
Quick! Two more clamps and the job was done:
The next day, I had a fine result:
The top was flat and strong as the day the guitar was built.
Inside, the new bridge plate was ready for service:
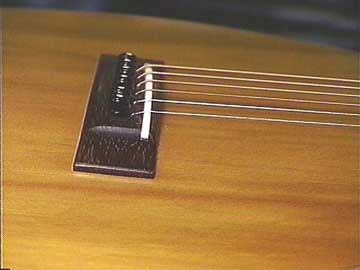
All I had left to do was to reglue the original bridge, drill the bridge pin holes and set up the guitar, with the confidence that it was as solid and durable as a new instrument: