
All about Truss Rods
Not everything, but a helluva lot about
Topics:
Nonadjustable Rods
Compression Rods
Bending Rods
Adjusting Truss Rods
Maintaining Adjustable Rods
Truss Rod Nuts, Fittings and Locations
Nonadjustable Neck Reinforcement Rods
Virtually all steel strung fretted instruments have some sort of neck reinforcement to keep the neck straight under the load of string tension. A hundred years ago, that usually meant hardwood laminations. Martin guitars had square ebony reinforcement inlaid under the fingerboard. Gibson used a triangular cross section insert of maple in the same postion.
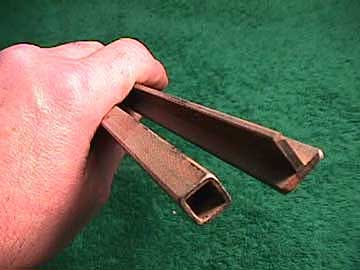
When Martin lengthened their necks to 14 frets clear of the body, they started using a steel reinforcing rod. First a T-section rod, later a square tube help keep the neck stable under a variety of conditions:
In 1985 Martin started using adjustable truss rods.
Click here for more information about Martin neck reinforcement.
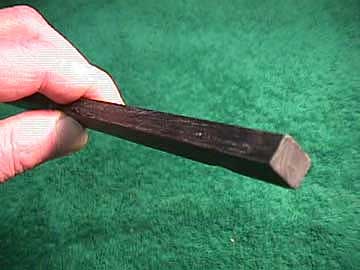
This is the modern equivalent of the steel reinforcing rod:
It's a graphite fiber epoxy composite, which is unbelievably strong and stiff, and very light. Some modern makers use this kind of neck reinforcement, which works quite well, but does not afford adjustment of neck relief.
Nonadjustable neck reinforcement is really quite simple. It simply makes the neck stiff so that it doesn't change with age or under the load of the string tension. Adjustable truss rods are much more complex in their action, but they allow a range of control over neck relief, and make it possible to make thin necks very stable and strong.
The adjustable truss rod was patented by a Gibson employee, and was a standard feature on Gibson instruments starting in 1922. Adjustable rods of this same design are still in use today because they are very effective, light and simple.
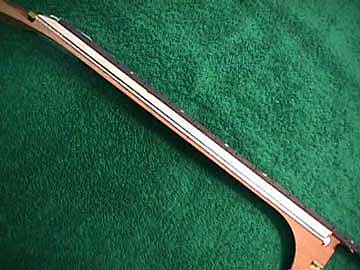
Let's take a look at the "standard" adjustable truss rod, as used in Taylor guitars:
Here's a longitudinal section of a Taylor guitar neck, showing the truss rod, installed in a groove under the fingerboard:
That white stuff over the rod is a maple "filler strip" that lays in the groove on top of the rod to fill the cavity.
This is the adjusting nut at the peghead end:
At the other end, the rod is anchored solidly in the neck heel:
In order to describe the action of the rod, I'll use a cross sectional view of the same system:
Notice how deeply the rod is buried in the neck.
The basic action of the standard adjustable truss rod is by compression of the back of the neck. When the nut is tightened, the back of the neck is compressed and causes the neck to bend backward. It is really quite predictable because the back of the neck has a much smaller cross-sectional area, so it compresses much more easily than the front. If the truss rod were mounted closer to the fingerboard it would have to pull harder to compress the back of the neck, but it could still do the job, because the fingerboard is very dense material and really resists compression.
I hope that makes sense. All adjustable rods work on the same principle. Compress one side, and something is bound to bend.
Here's a variation on the same theme:
This rod works in exactly the same way, by compressing the back of the neck.
It mounts in a different way, though:
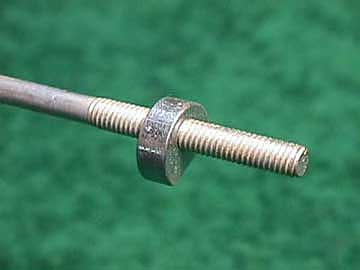
This rod has a threaded "slug" at each end, one with right hand threads and one with left hand threads:
Turning the nut to the right draws the slugs together, compressing the neck and bending it backward, decreasing neck relief.
Turning the nut to the left forces the slugs apart, effectively stretching the back side of the neck, causing the neck to bend forward, increasing neck relief.
This two-way adjustable truss rod is very effective, but slightly more fragile than the standard rod.

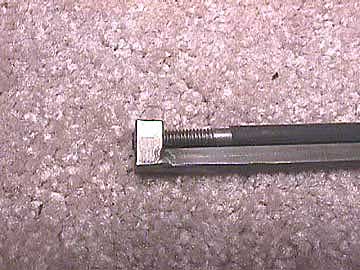
Look at this one
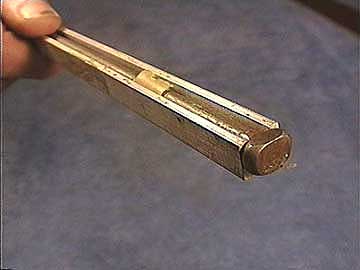
This is really the same mechanical system as the standard compression rod. The rod is embedded in an aluminum channel, with a nut at one end. I've taken the nut and washer off so you can see the channel better.
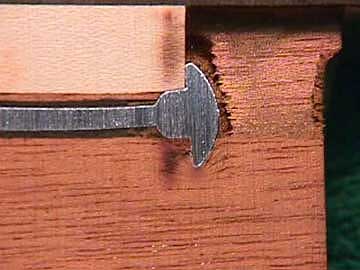
A heavy anchor forms the other end of the rod:
When the nut is tightened, the rod pulls hard against the channel. The open side of the channel compresses easily, while the opposite side resists the pull. As a result, the whole business bends toward the open side of the channel. This style rod is installed with the open side of channel facing the back of the neck, so that under tension the neck bends backward along with the rod.
The operative difference here is that the rod system itself actually bends, taking the neck with it.
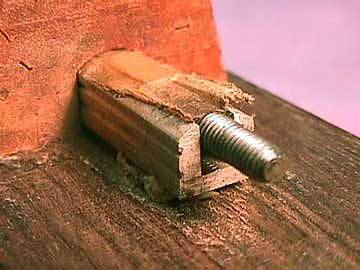
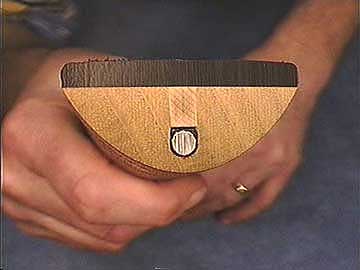
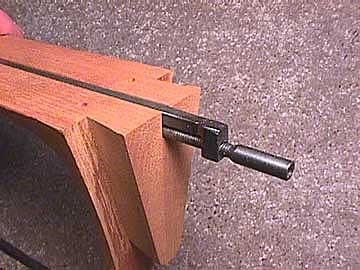
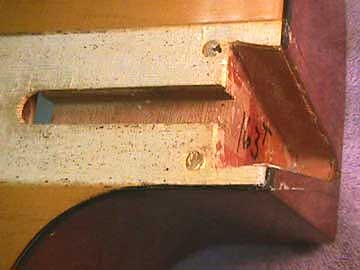
Here's the channel system in its natural habitat:
This is the end of Martin neck removed from the body, shown upside down. The nut is accessible from the inside of guitar body, through the soundhole.
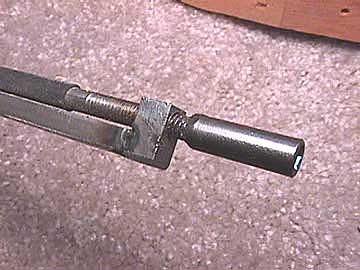
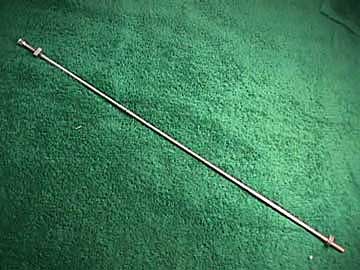
This is a two-way bending rod:
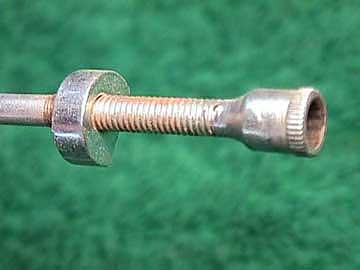
Instead of a channel, this rod has a second rod with threaded ends welded to it. One end with right hand thread and one with left hand thread allows a push-pull action just like the two way compression rod.
As the threaded rod is turned it bends the other rod forward or back, and because it's trapped in a tight channel in the neck, both rods bend together, taking the neck with them:
These rods may be mounted either way, but conventionally, the fixed rod is placed up against the fingerboard. That way when it's turned to the right, the neck bends backward, just as in the compression system.
Like the other two-way rods, these are a bit more fragile than the single action ones, chiefly because of the welded sections and double threading, which is difficult if not impossible to lubricate. Additionally, because the entire rod turns when you adjust, there's a lot of friction through the length of the tight fitting channel.
These two way bending rods have a very interesting advantage in that it is possible to install them in such a manner that they may be extracted easily and replaced without major surgery.
It's extremely important to remember that truss rods are for adjusting neck relief only.
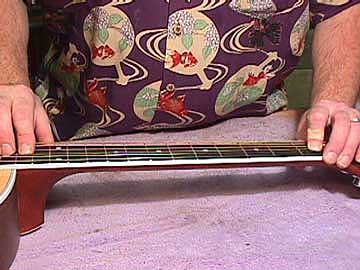
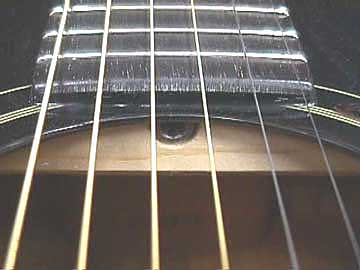
Sighting down the fingerboard looking at the corners of the frets, you can get an idea of the general "shape" of the neck. A severe backbow or forward bend will be quite obvious. A better way to judge relief is to hold a string down near the nut and at the body:
Looking closely under the string, you can see how much clearance there is between the string and the frets in the middle of the neck. If the string touches the frets, then the neck needs a bit of relief. If there's a lot of clearance, then it's likely the neck has too much relief, and the truss rod should be tightened. Check out this article in the buzz diagnosis section for more info on this business.
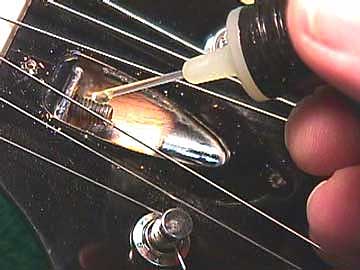
Just about the nicest thing you can do for your adjustable rod is to oil him up:
Where it's possible to remove the adjusting nut, you should do so, and lube the threads. You only do this once, not each time you adjust things. It's just that the factories hardly ever lube the threads, so if you don't, then you may not get a good "feel" of the amount of tension you're applying. You might be fighting friction on the threads. I've seen a few old instruments where the threads were severely rusted and tightening the nut would risk breaking the rod by twisting it.
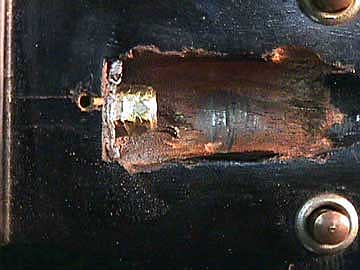
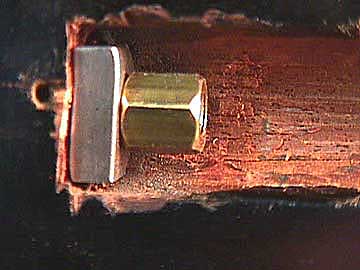
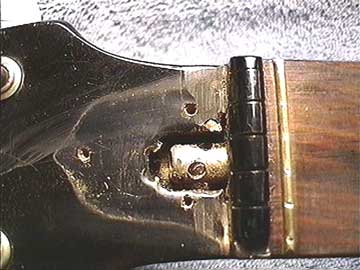
This old Gibson truss rod has been adjusted so many times, and tightened so tight, that the nut is a real wreck:
Not only that, but the washer is bent and buried its full thickness into the end of the truss rod pocket.
When I see a truss rod nut as messed up as this one, I try to replace it right away, and, if possible, correct the damage to the washer and/or wood.
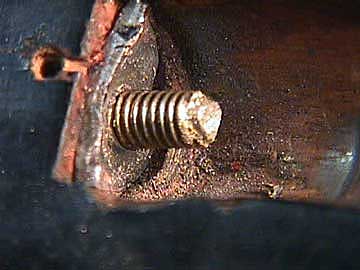
With the nut off, I can see the damage a bit better:
Notice how deeply the washer was mashed into the neck wood. Looks like the end of the rod has been broken off, but it may just have been scarred by an inept tool using animal.
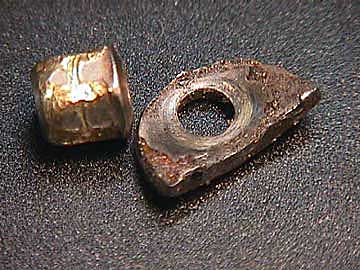
Here are the damaged parts:
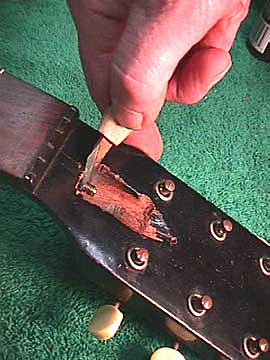
I took my stout violin maker knife and cut the wood back all around the rod to provide a flat surface for the new washer to bed down against:
I made a new thick washer from a square nut, and replaced the truss rod adjusting nut with a nice new one:
With good lubrication, this system tightens up very nicely. My extra thick washer doesn't deform under the load, and the rod can be tightened without further damage to the truss rod, nut, or pocket.
This is the original Gibson truss rod cover:
Well, not THE original, but this one does date from 1925. Gibson continues with exactly the same single rod compression system as they used in the old days, and still has the adjustment nut at the peghead, covered by this little plastic plate.
Gibson uses either 5/16" or 1/4" adjustment nuts, depending on the instrument. The nuts are easy to reach with a socket wrench or nut driver, and adjustments can be made while the instrument is tuned to pitch.
Taylor also makes it easy for us:
Lots of nice clearance around the 1/4" nut here:
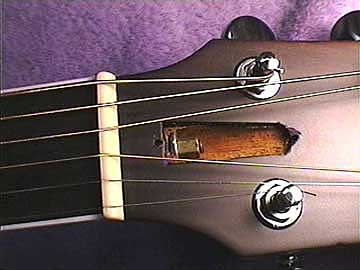
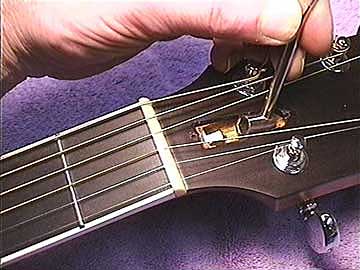
This 30 year old Italian-made Eko guitar has a really cheesy little round nut with holes in which you can stick a tool to adjust it:
The nut won't clear the end of the cavity if you try to take it all the way off to lubricate it.
Most Asian made instruments have a hex key ("Allen") adjustment nut.
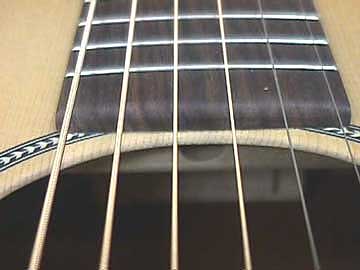
On acoustic guitars, it's frequently found just inside the soundhole:
Easy to see, easy to reach with a wrench, and all you have to do is spread the strings apart to adjust the rod while the instrument is tuned up.
Here's a Martin guitar:
Martin buys their channel rod systems from Asian manufacturers, but the nut is placed further back under the fingerboard, so you can't actually see it. There is a convenient access hole drilled through the brace, so it's easy to feel the truss rod nut with the end of a 5mm hex key wrench.
Here's the channel where the truss rod lives underneath the fingerboard.
Most all Asian made adjustable rods use a 5mm hex key nut.
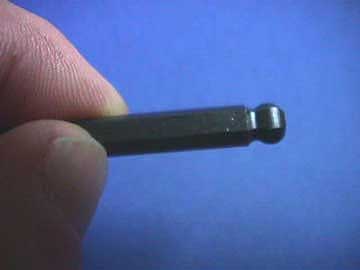
If you adjust a lot of these instruments you'd be doing yourself a favor to hit the hardware store and get a "ball end" hex key, like this one:

With this kind of wrench, it's easy to locate and adjust those nasty little nuts, which can sometimes be just a little out of alignment with the holes in the brace under the fingerboard. The ball end allows 10 or 15 degrees of misalignment, and brother does that make a difference!
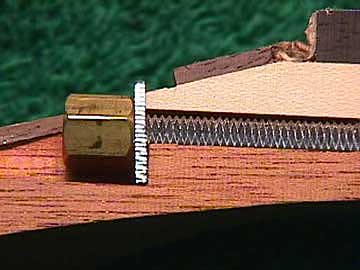
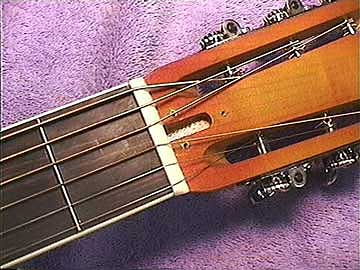
Here's a Collings guitar neck, showing the neck attachment bolts, and the long brass truss rod adjusting nut:
This long brass nut has a 5/32" hex key socket, and is really difficult to find unless you know where to look inside the guitar. It's way up inside under the fingerboard, and you MUST have a ball end hex key to get it to work. Once you've adjusted a few of these, they are also very easy to handle, by the way.
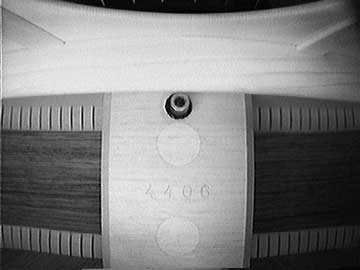
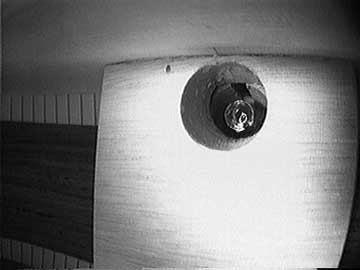
Using the Insight inspection video camera, we can see the truss rod poking out from the neck block:
It sticks out about 1/4" so you can feel around for it with the end of the 5/32" hex wrench, but it lines up directly with the backside of that brace at the end of the fingerboard, so you can't get a straight wrench in. No problem, though if you have the ball end wrench.
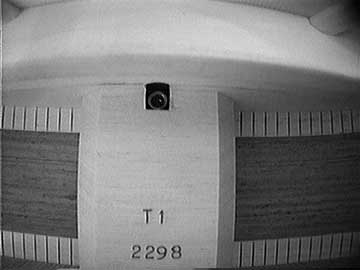
This Thompson guitar has the 5mm hex key socket truss rod nut mounted in the same position, but just behind the surface of the neck block:
That makes it a little easier to find while probing around with the end of a wrench.
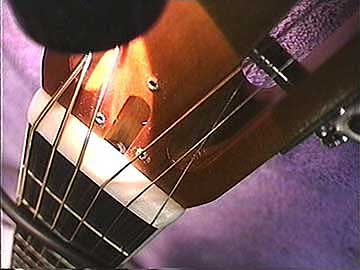
This Santa Cruz Guitar has a countersunk truss rod:
Yes, I'm sure it's down in there somewhere!
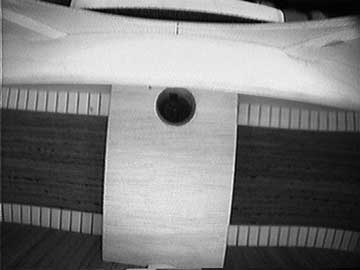
Found it! The truss rod nut is actually countersunk into the end of the neck itself, and lies way back up in there:
It looks lumpy because it's actually a 3/8" nut brazed to the end of a double acting truss rod. The deep hole actually makes it very easy to locate working "blind" with a 3/8" nut driver or socket wrench. The double action works very well, by the way.
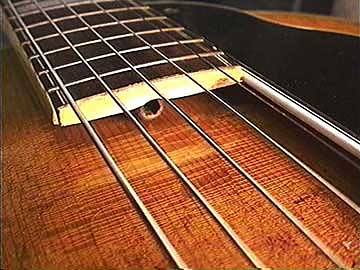
Now, speaking of truss rods that are hard to find, check out this National Resophonic:
The truss rod pocket looks empty, doesn't it?
Oh, THERE you are!
This guy really hides deep in his hole.

But, that old ball end hex key will get him:
Well, I just didn't know where to put this one:
This is an early Epiphone archtop guitar with an adjustable truss rod which has access right at the end of the cantilevered fingerboard. I'm sure it's the first use of the hex key truss rod with the nut at this end, but that's not why I'm showing it.
This Epiphone is just about the worst design ever for an adjustable truss rod. It really does work backwards. Mounted right under the fingerboard, it works by PUSHING only. The rod is threaded through its length, and screws through a heavy steel slug buried below the 13th fret. Up by the nut there's another steel anvil against which the truss rod pushes when tightened. It's actually trying to bend the neck backward by stretching the fingerboard side.
If you remember that cross section, you can see what a job that is! In order to have any affect at all, the rod must be tightened with incredible force. It does work. Not well, and only weakly, but it does bend the neck a little.
Now, as if you haven't had enough, click here to see how I use the compression style truss rod in my bathroom.