
C. F. Martin & Co.
Richard Johnston visits C. F. Martin & Co.
photos by Richard Johnston
In April of this year, Richard Johnston spent a week delving into the Martin archives, researching material for the soon to be released update of Mike Longworth's Martin History. While he was at the factory, he took the opportunity to wander around and shoot a lot of photos - more than 400 of 'em. I've narrowed them down to 164 interesting pictures that tell a pretty good story of what's currently happening at this most venerable guitar factory. At a thousand words each, that's a fair sized novel in itself. So, I'll let the pictures do the talking.
The first page contains pictures of the shop layout, tools, and work in progress. The next three pages have detailed photos of the building process, and the last page shows various display boards in both the public and work areas.
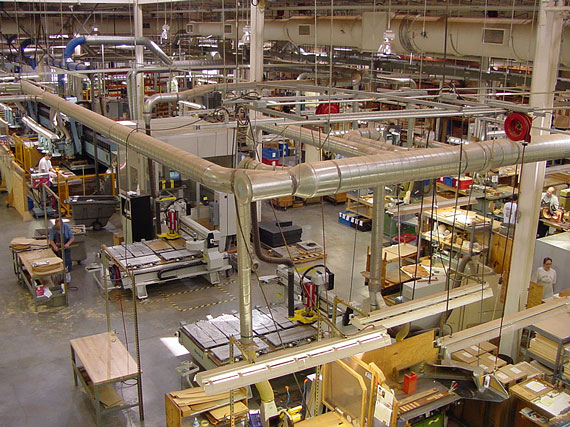
It's a big modern shop, with an elaborate network of dust collection ducts that snake all around the building.
In the foreground, a large white "Timesaver" sander for thicknessing top, back, and side material.
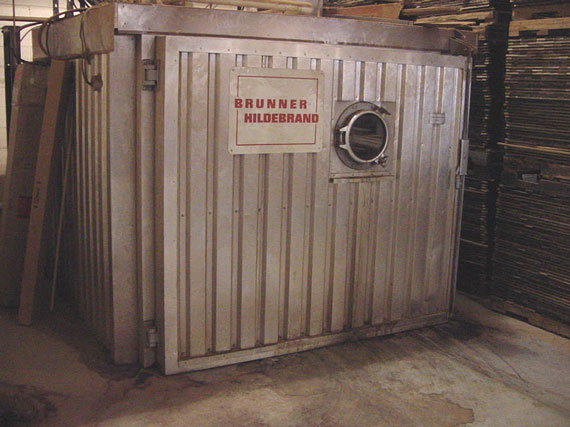
Martin operates a sophisticated kiln for wood treatment to assure consistent moisture content.
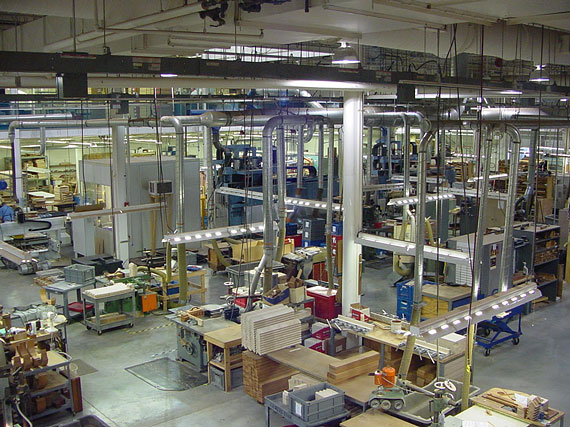
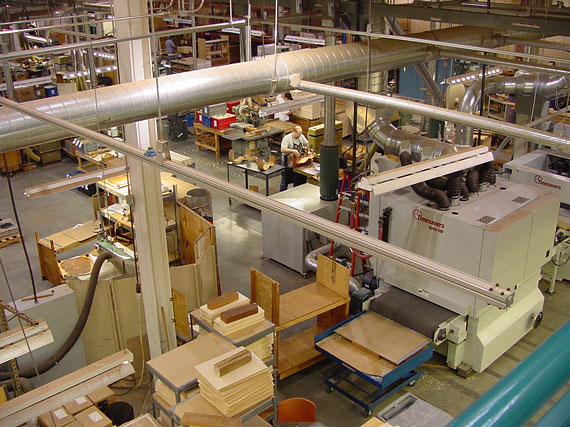
More shop.
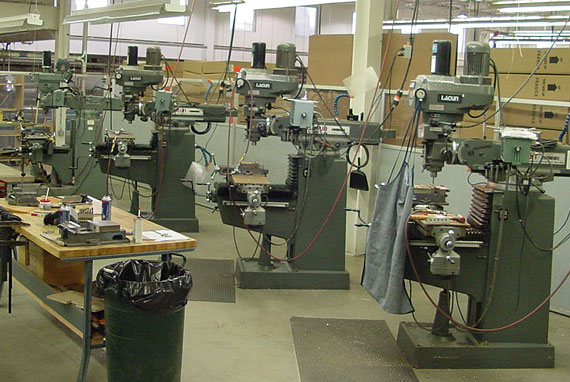
These milling machines stand ready to make tooling for the CNC mills, and for various hand operations.
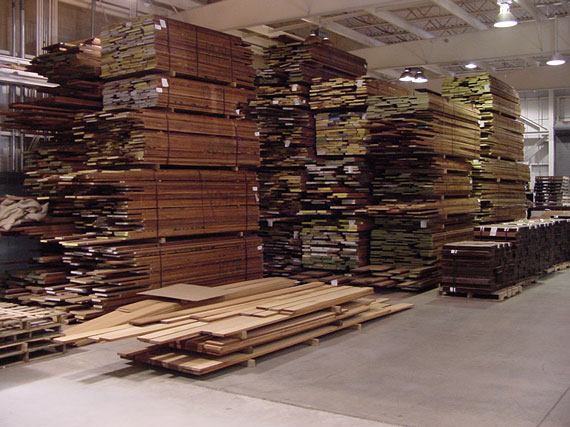
It takes a lot of lumber to make 200 guitars a day.
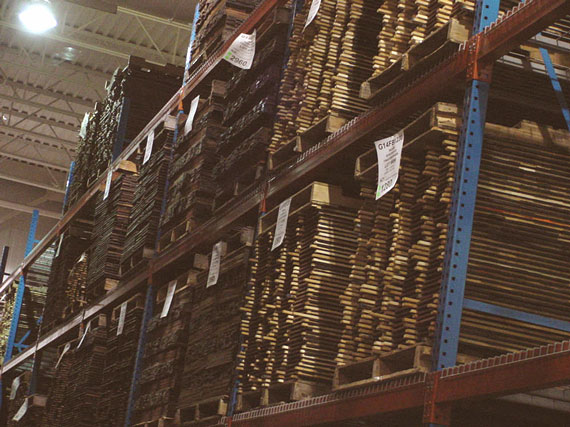
Wood "stickered" for acclimating, stacked almost to the ceiling.
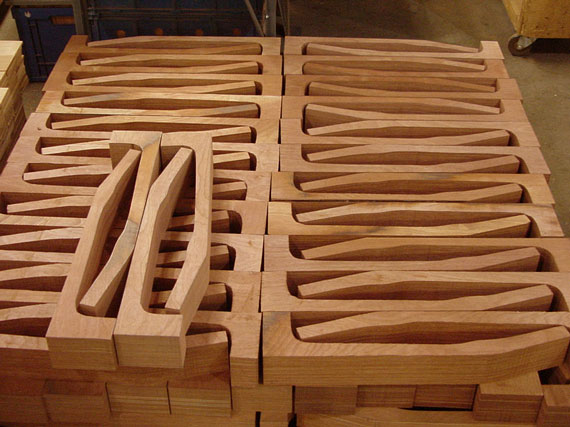
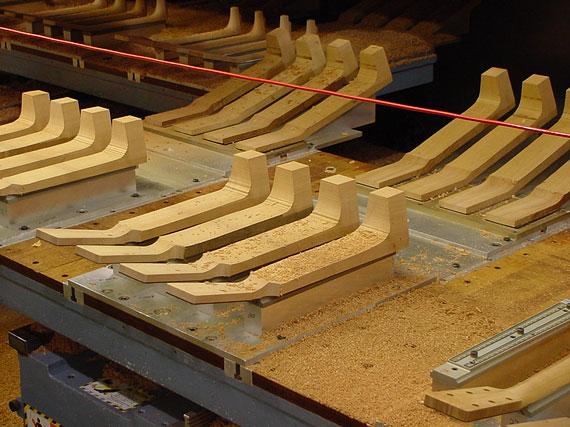
Rough cut neck blanks

Necks ready for shaping
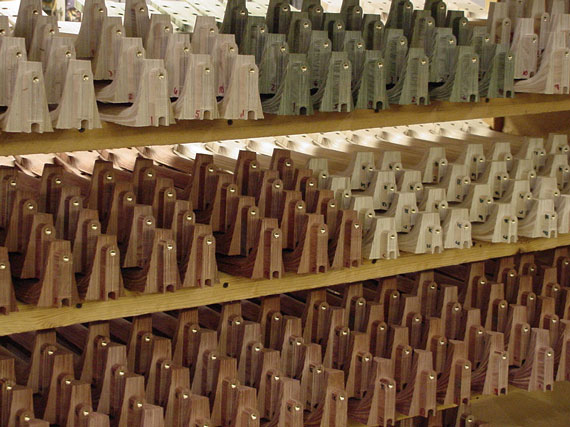
A rack of necks right off the CNC shaper.
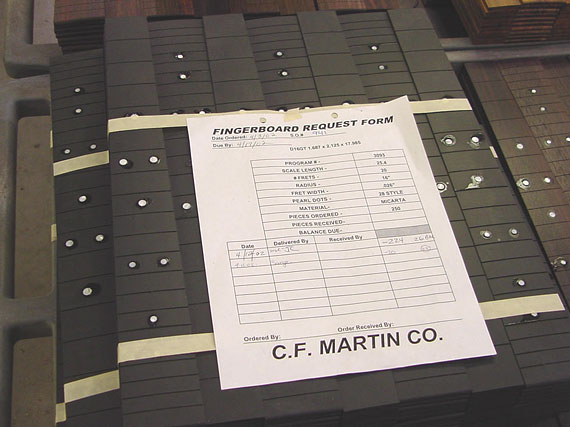
Some fingerboards, along with some of the ubiquitous paperwork that follows things around the factory
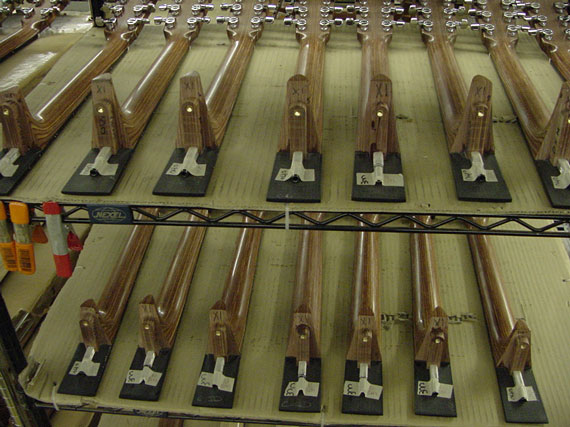
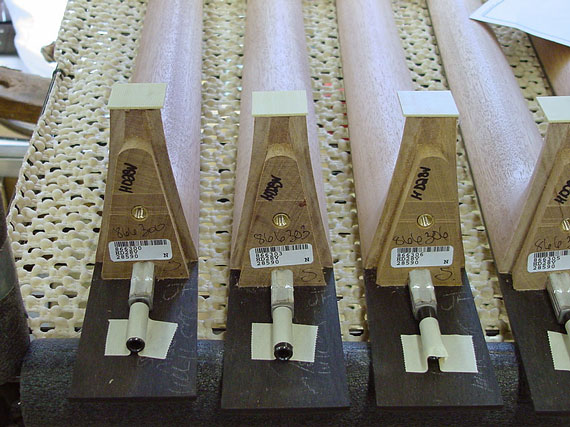
"X" model necks, ready for installation.
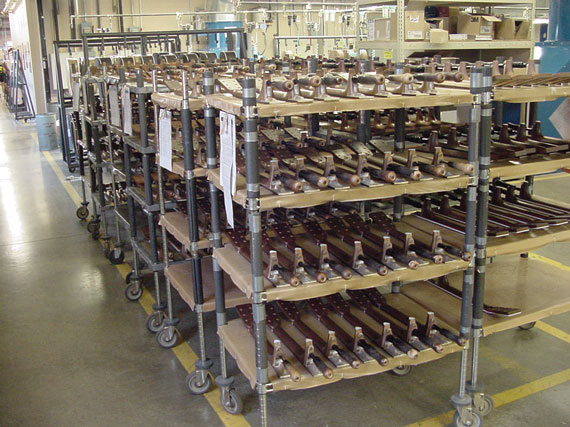
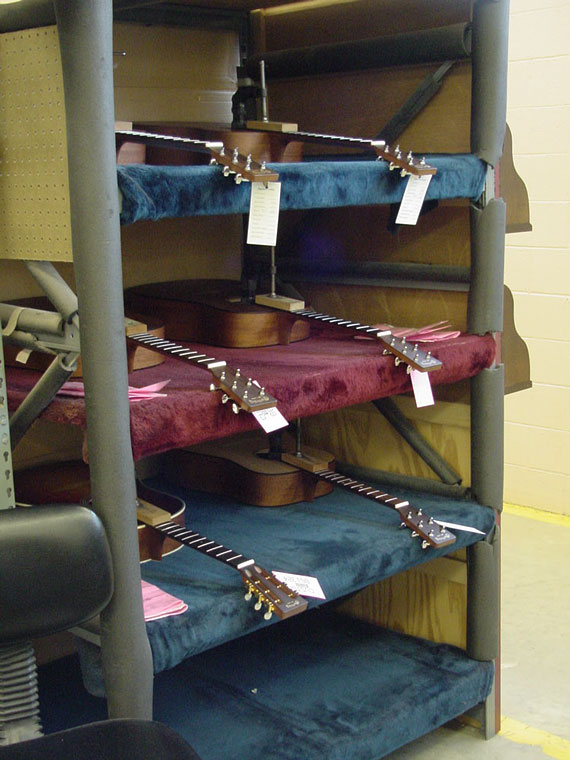
Necks in the finish curing area.
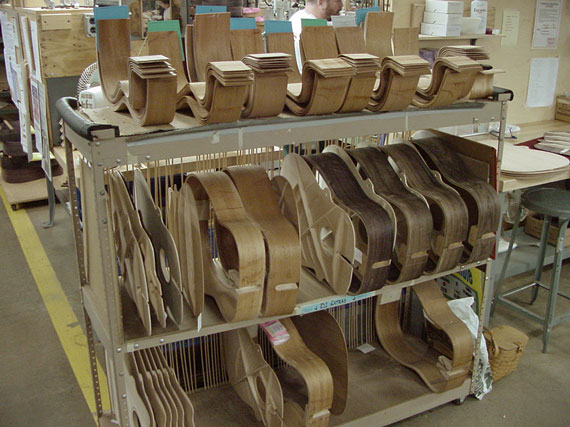
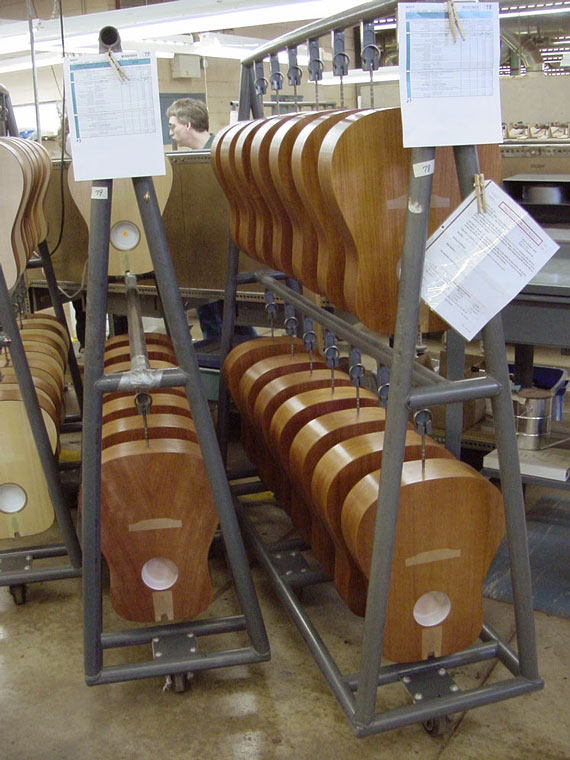
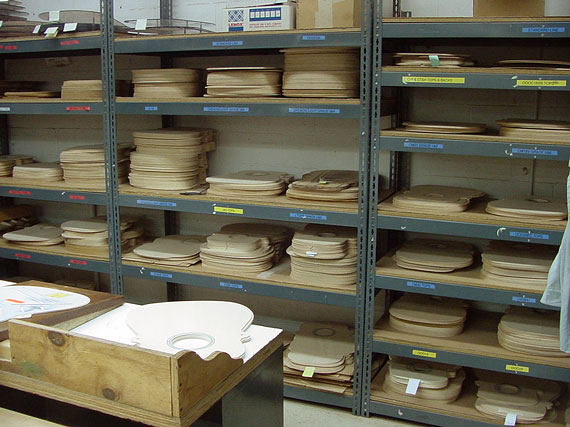
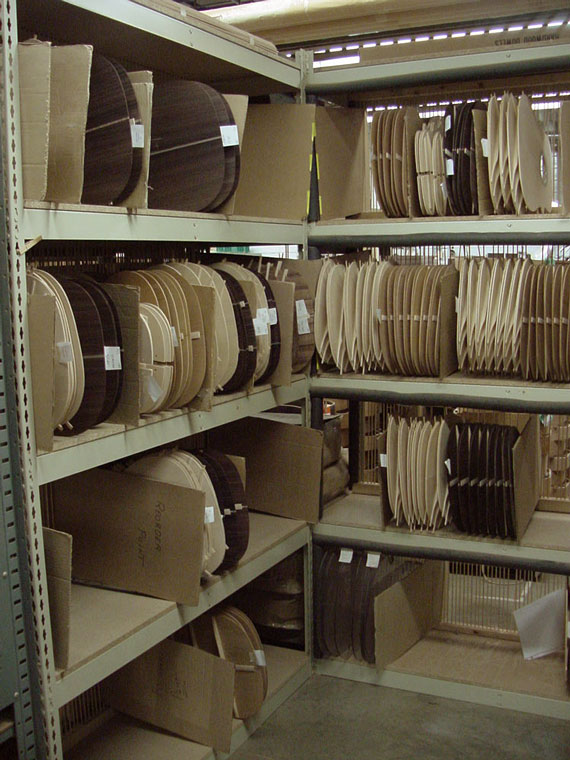
A rack of body parts.
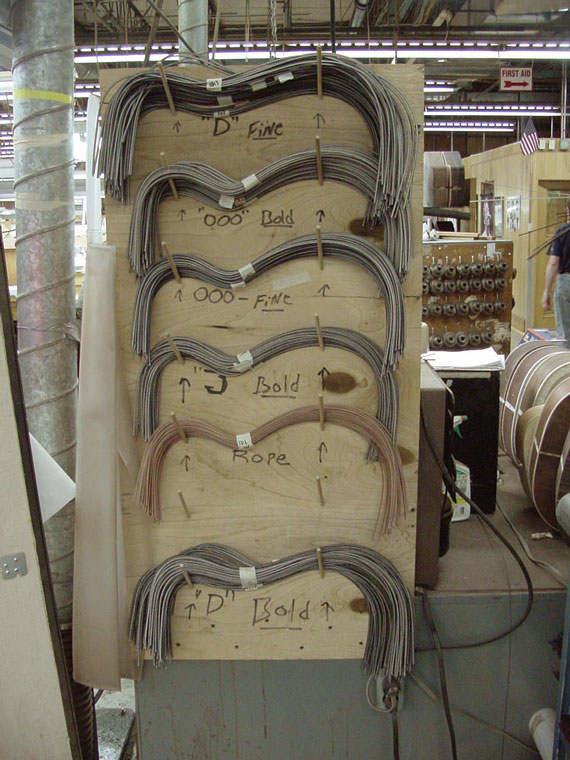
Pre-bent herringbone purfling.
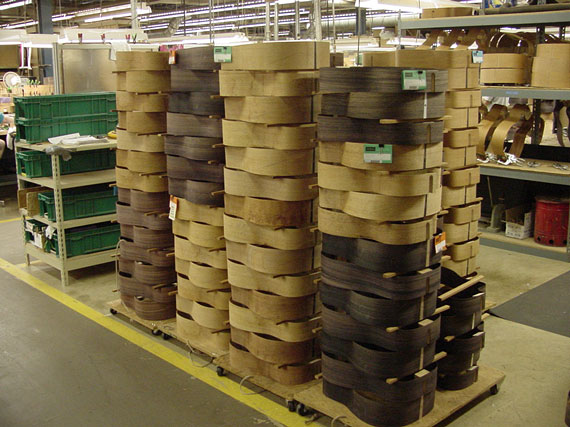
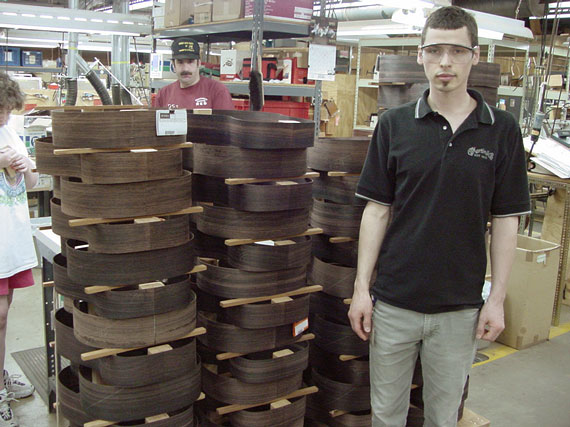
Stacks of side assemblies.
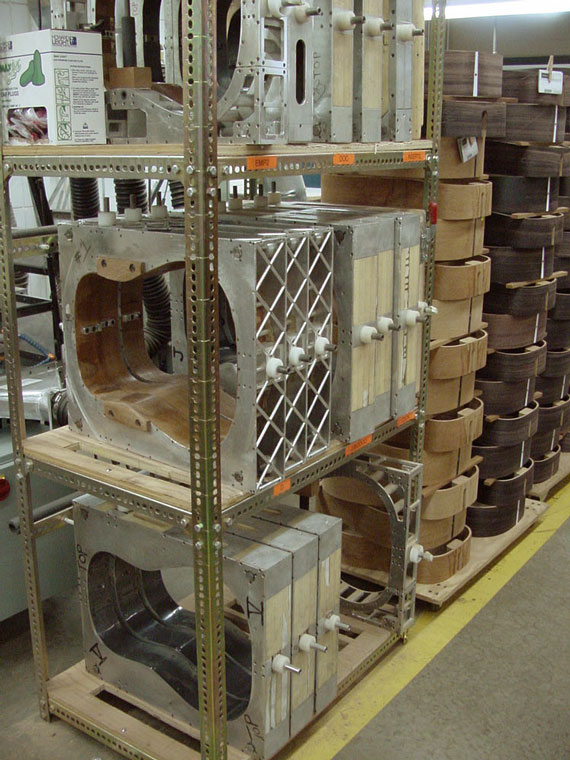
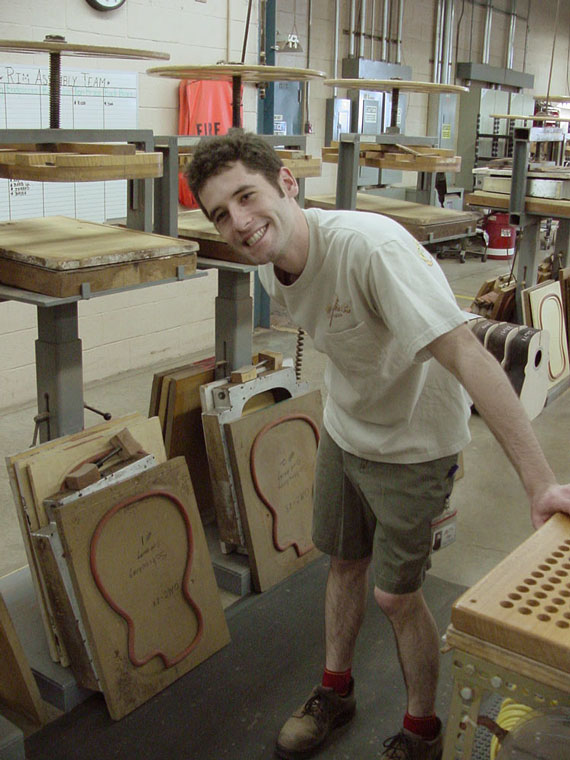
Aluminum molds. You'll see these in action in the building section.
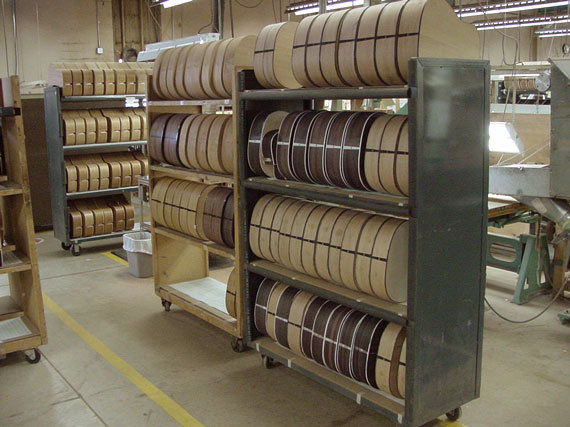
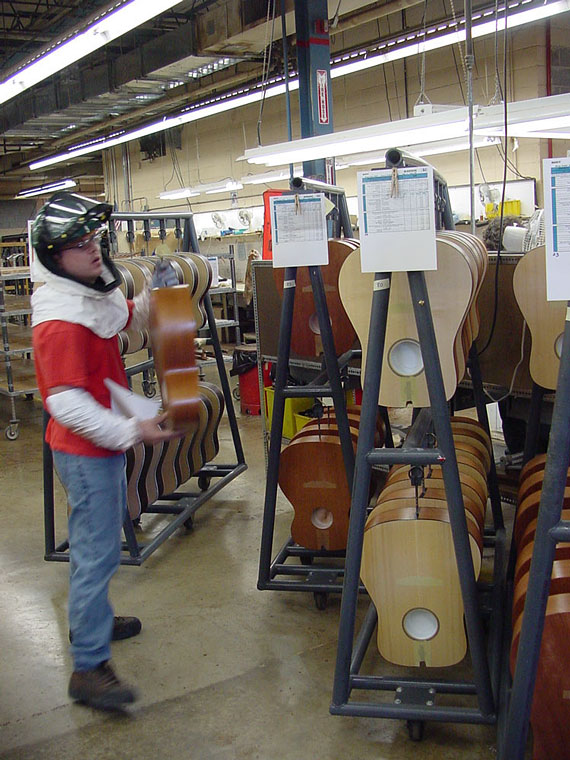
Bodies travel around the shop in carts
Style 15 bodies right from the spray area.
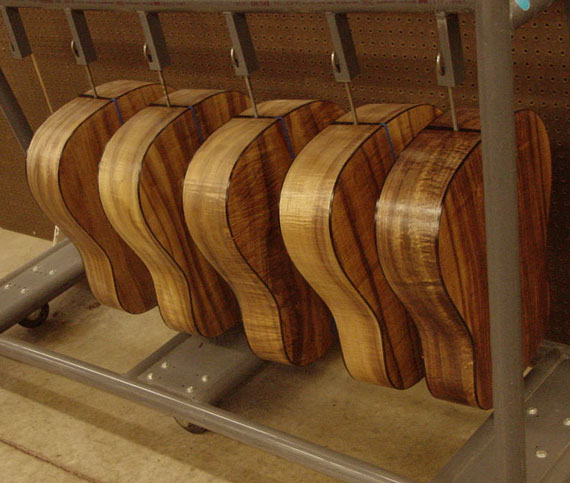
Some very nice koa dreadnoughts drying.
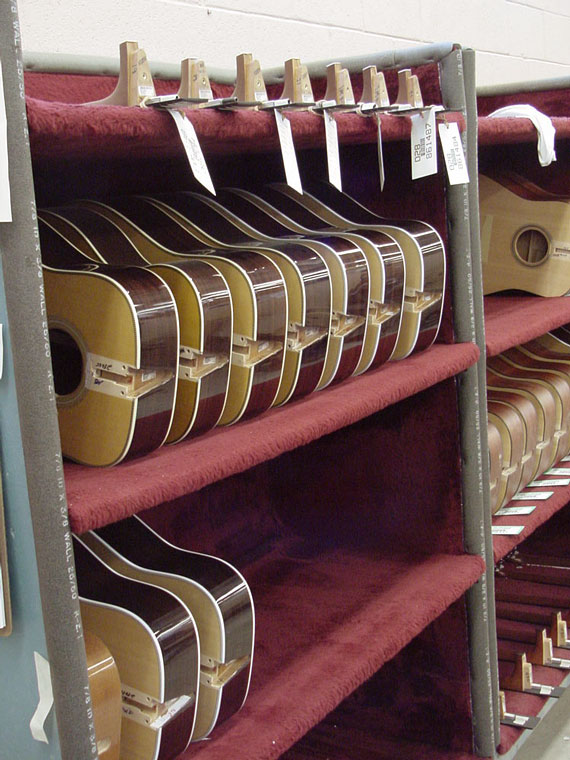
Herringbone dreadnought bodies.
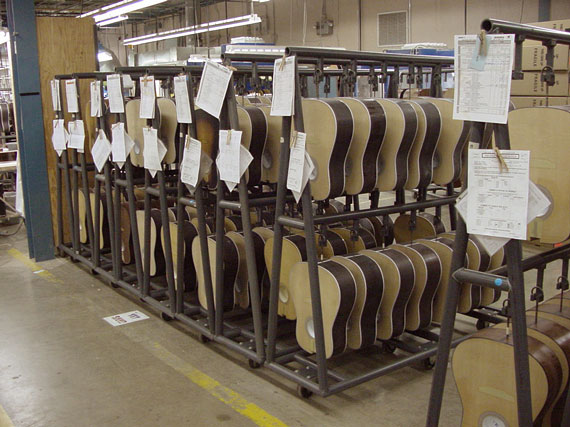
More finish curing.
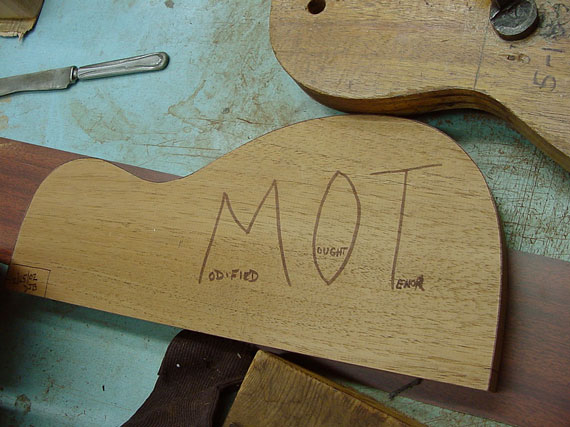
I had to include this one. It's a template for a special model M.O.T.
Back to the drawing board. . .
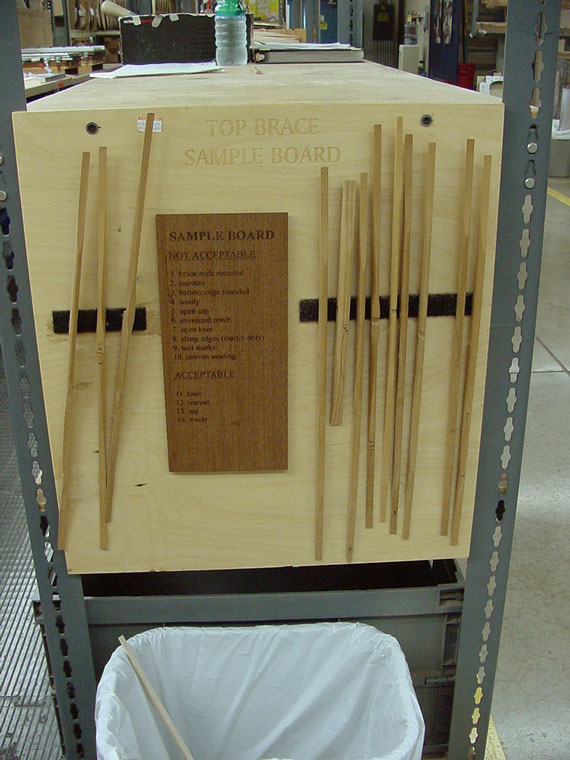
A little guidance for the brace shaping operations.
More sides.
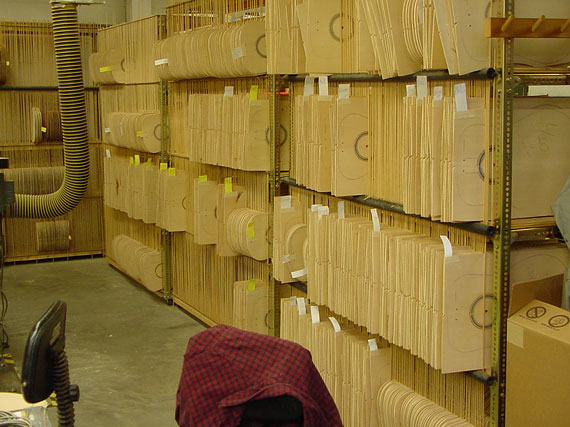
A room full of tops.
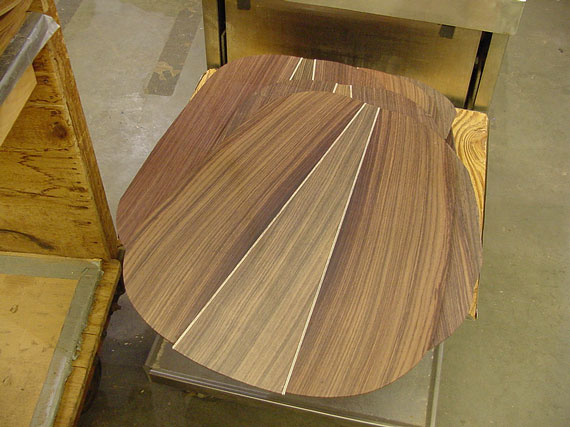
Glued up 3-piece backs.
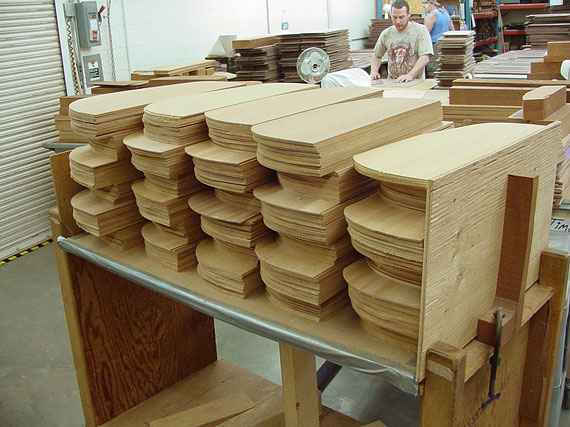
Stacks of backs.
Tops.
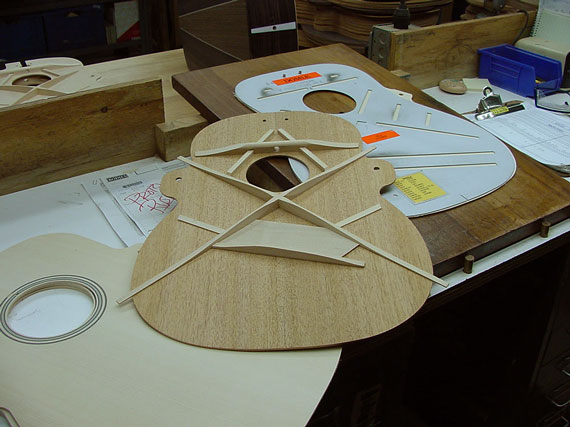
Racks of braced tops and backs.
One of the first operations after the two halves of the top are joined is the application of the soundhole rings.
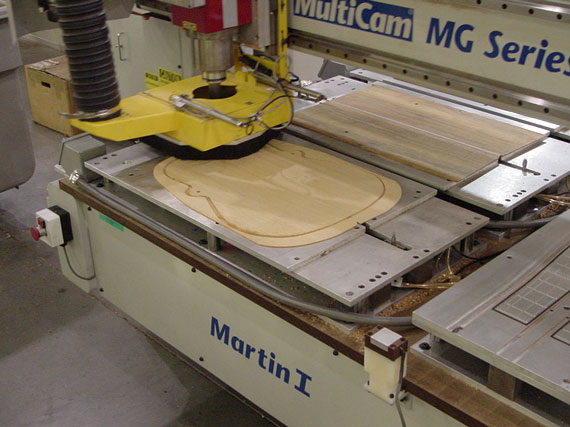
A large CNC machine cuts the tops to an oversize contour
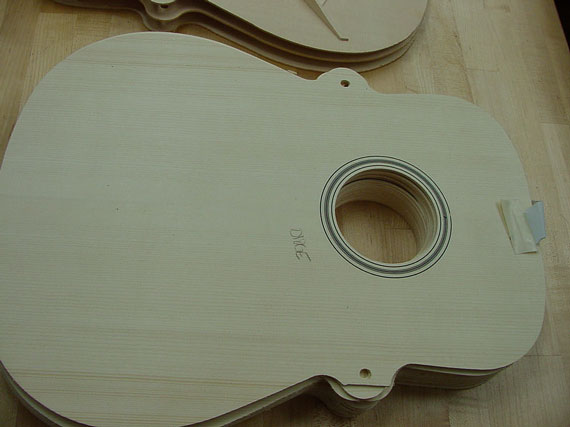
Those tabs at the waist have index holes so the tops can fit precisely into various fixtures during the assembly process
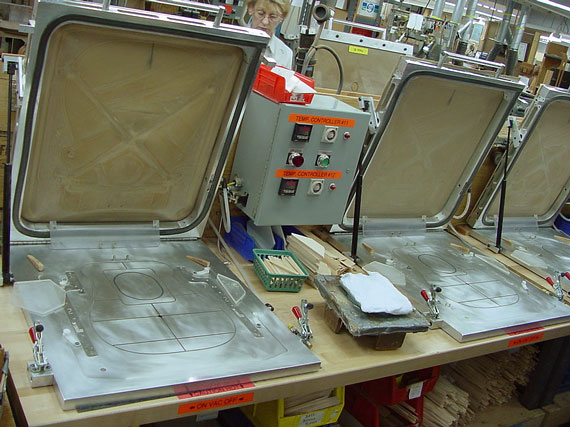
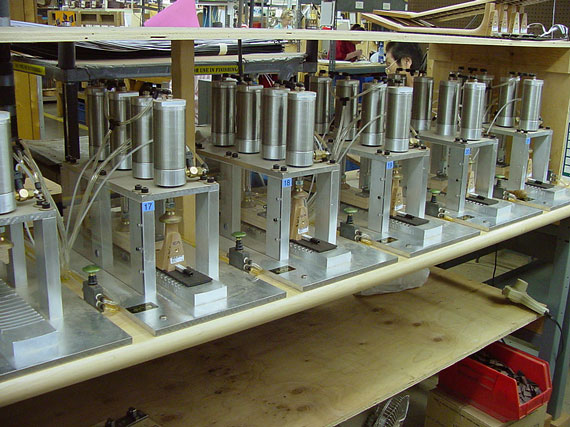
Top braces are glued in vacuum presses.
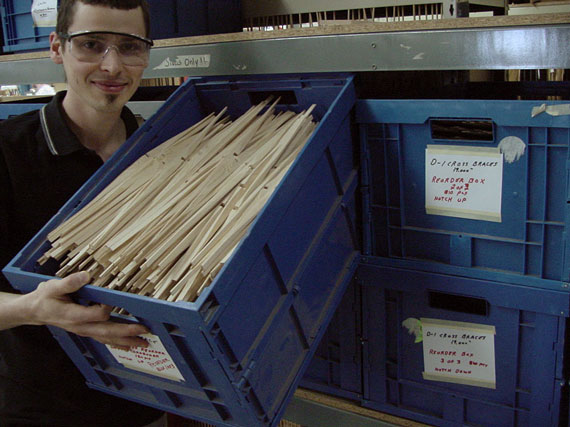
Bins of CNC machined top braces at the ready.

A full set of top braces, laid up on the press, ready for the lid to come down with its rubber diaphragm under which the vacuum will applied.
The same big CNC machine cuts the outline of both the tops and backs
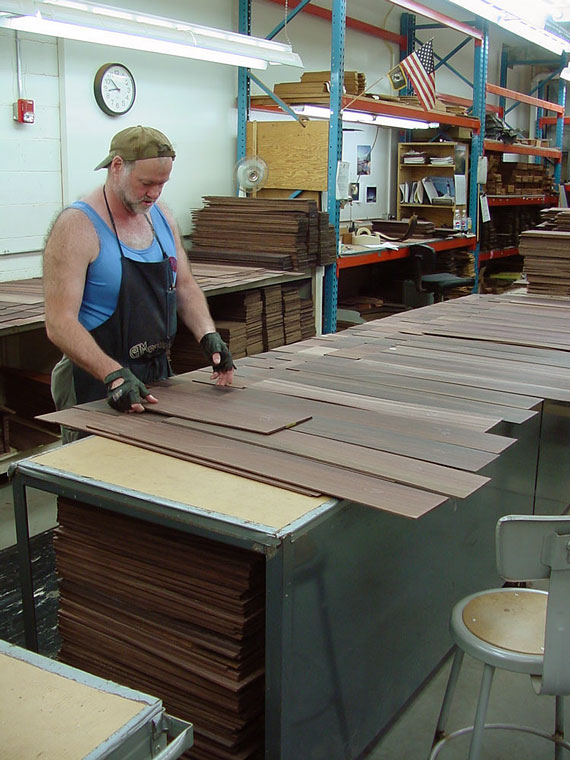
Here, wood is being graded and matched for backs and sides.
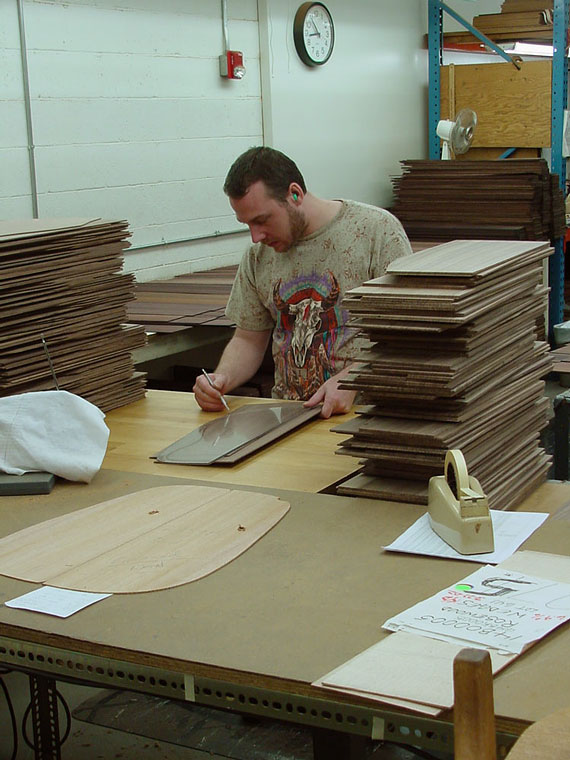
Laying out the back pieces.
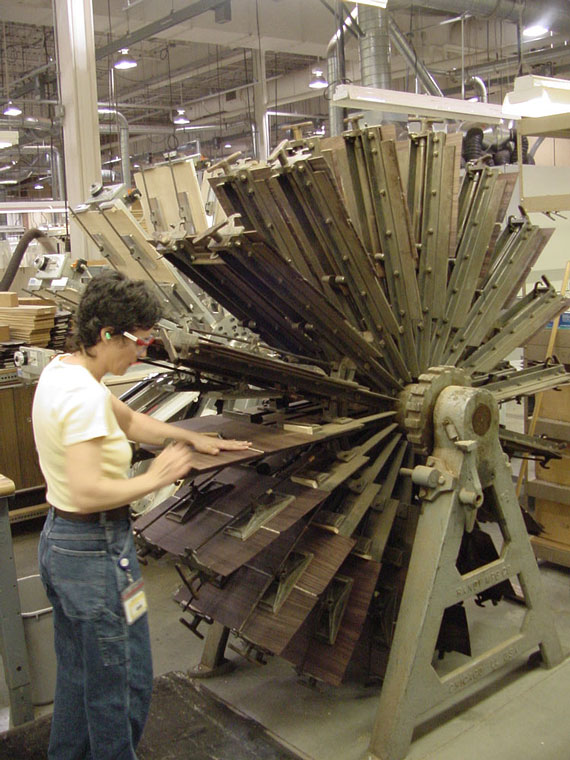
Tops and backs are joined on this "windmill" clamping rig.
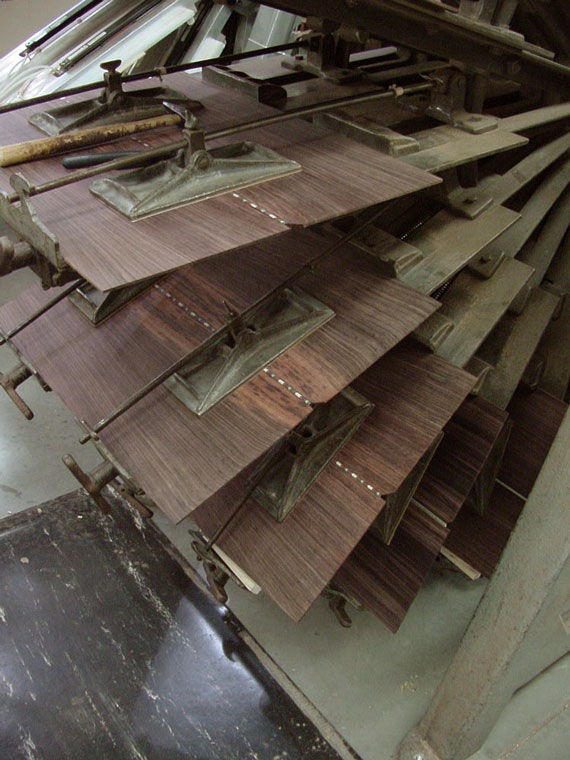
By the time the last back is glued and clamped, the first one is ready to remove, so this fixture is capable of continuous output.
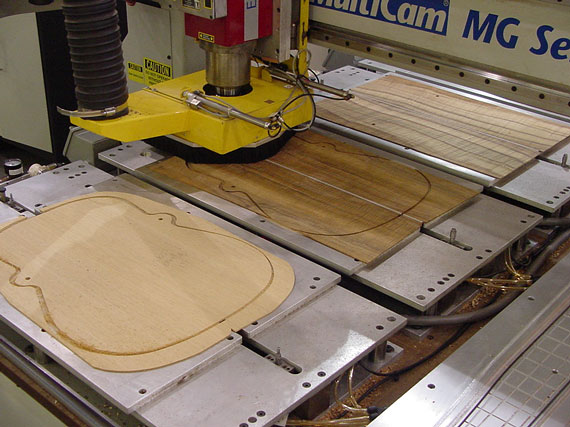
The CNC in action.

This back has had the center strip reinforcement applied and notched to receive the back braces.
Back braces are clamped using similar vacuum fixtures.

A back, right out of the press.
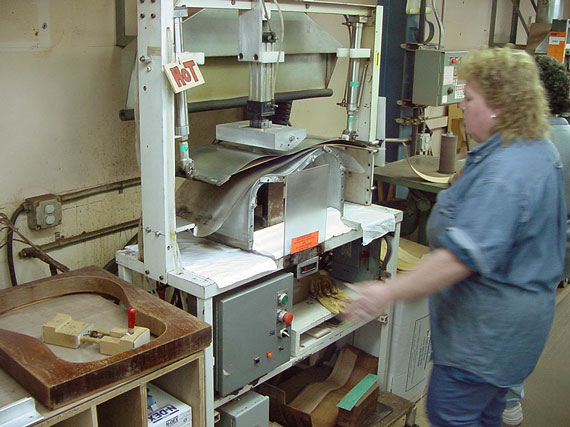
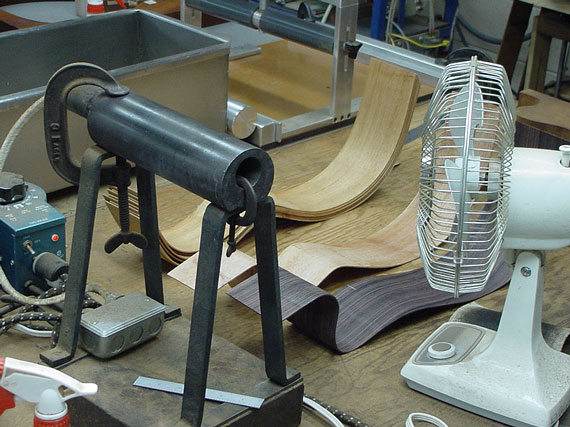
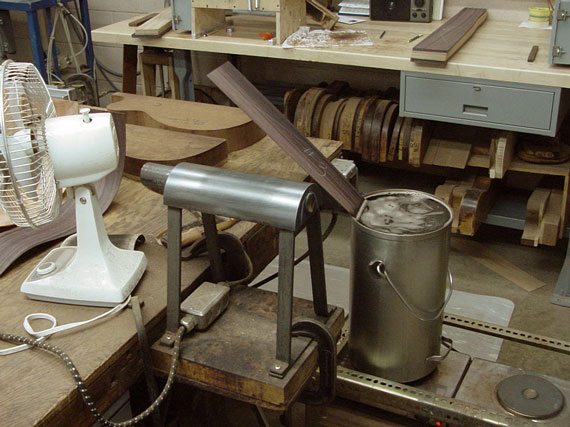
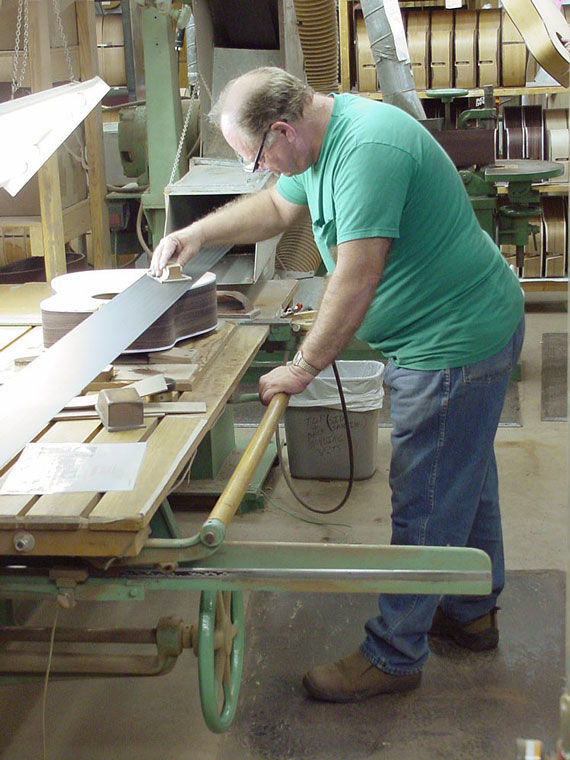
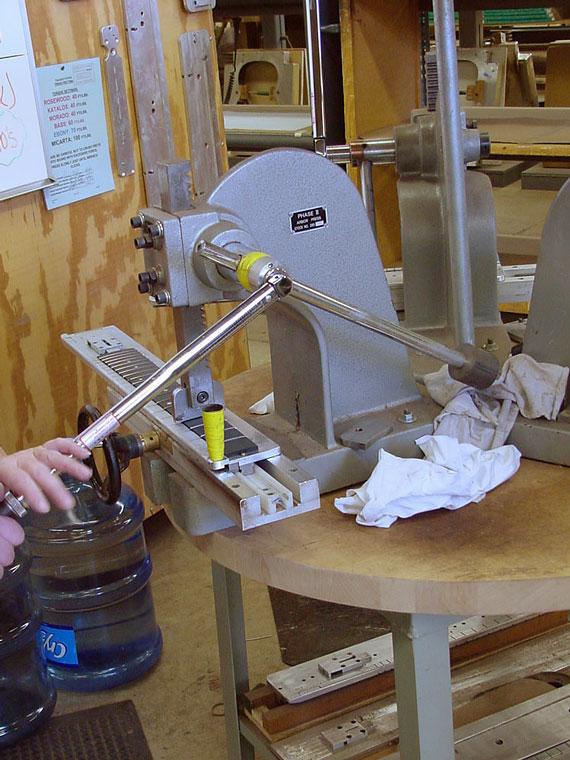
It takes quite a bit of moist heat to make the side pliable enough to bend, and this press is just the thing to do that job.
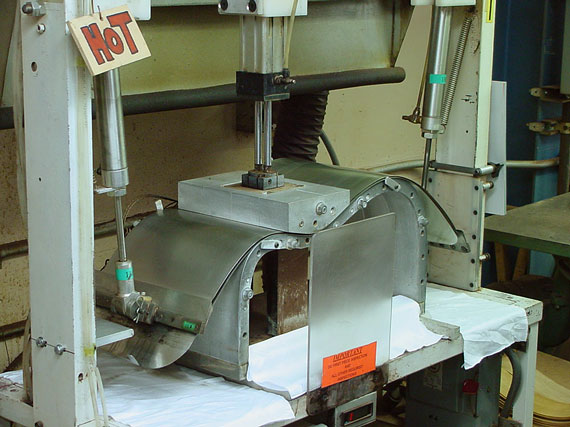
It's not a matter of heavy pressure, but a slow controlled bending process, that gets the job done right.
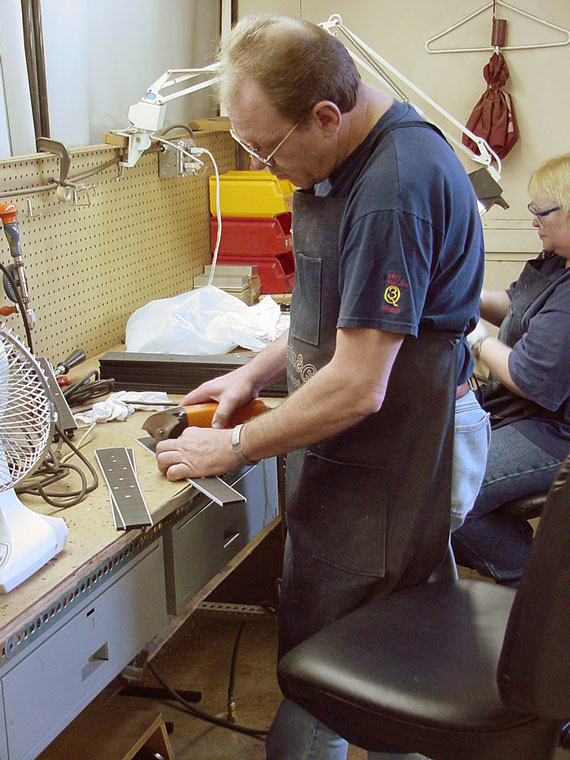
Many of the tighter bends, cutaways, and special models are still done by hand on classic old time heated "bending irons."
Another venerable bender.
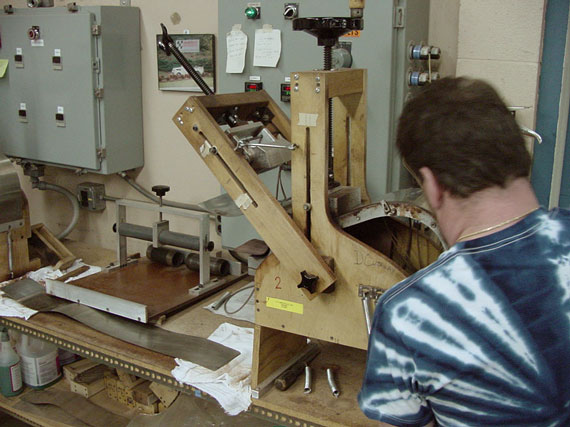
Here, a cutaway side is bent on a modified version of a machine designed by Charles Fox.
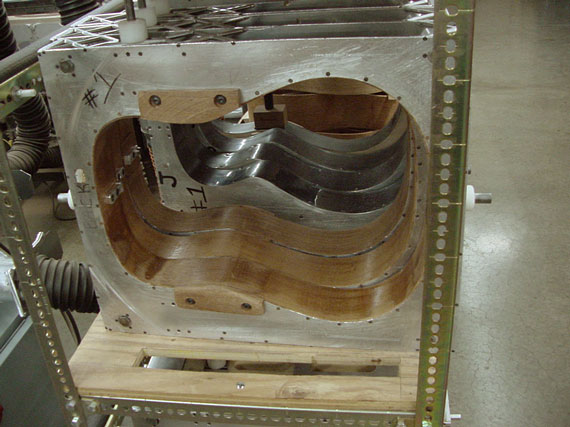
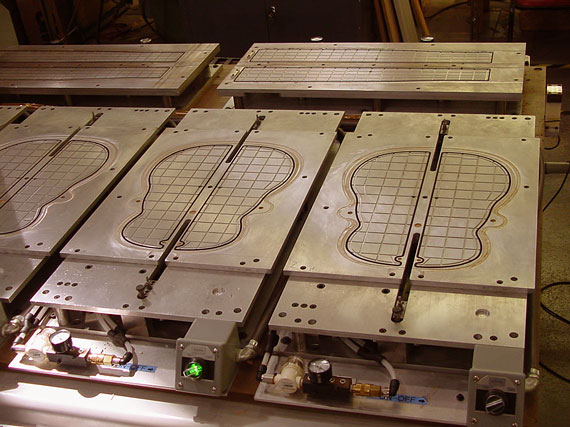
Bent sides, sitting in precision aluminum molds which are indexed for precise positioning of neck and end blocks.
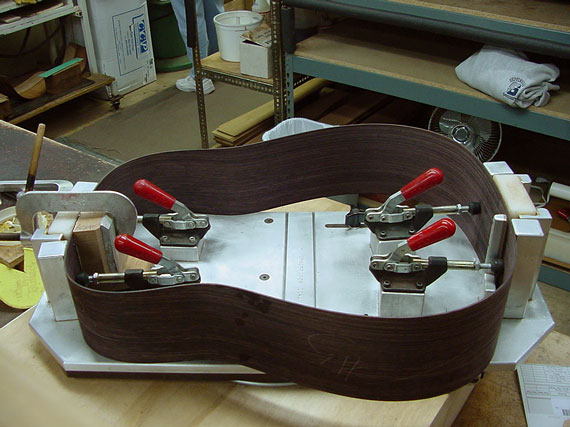
Once the blocks are glued and clamped, and the assembly can be removed from the mold.
Just drying.
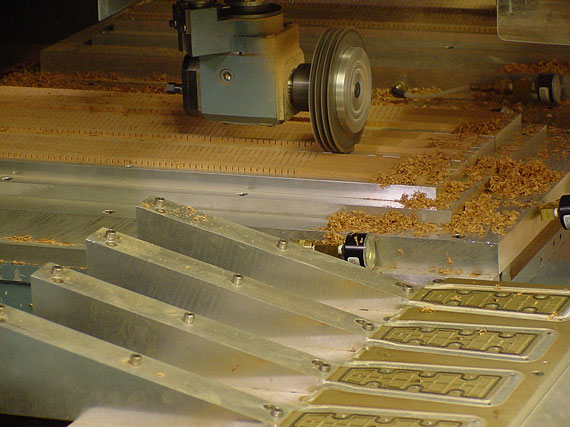
Back at the CNC machining center, "kerfed" linings are cut automatically with a small gang of saw blades.
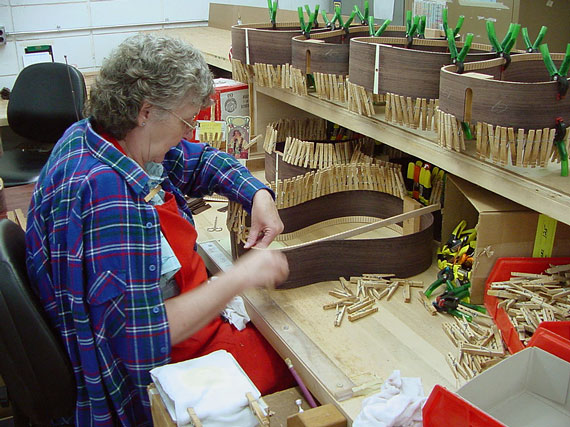
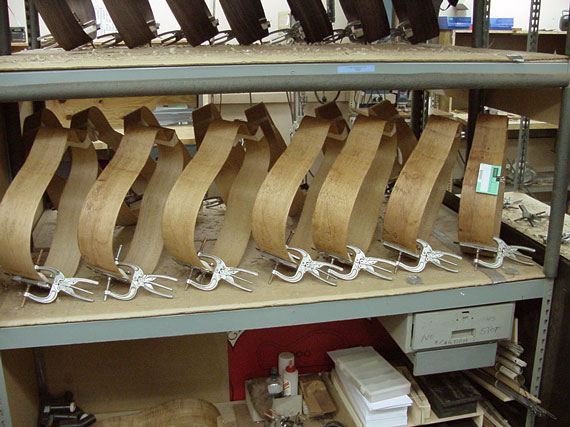
Linings are glued in place the same way they have been for generations, using those classic wooden spring clothes pins.
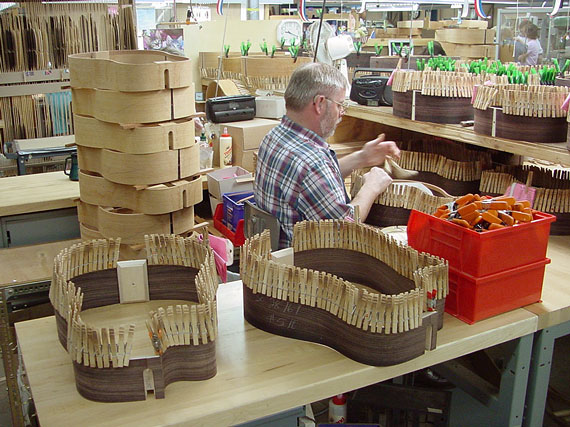
Lots of clothes pins!
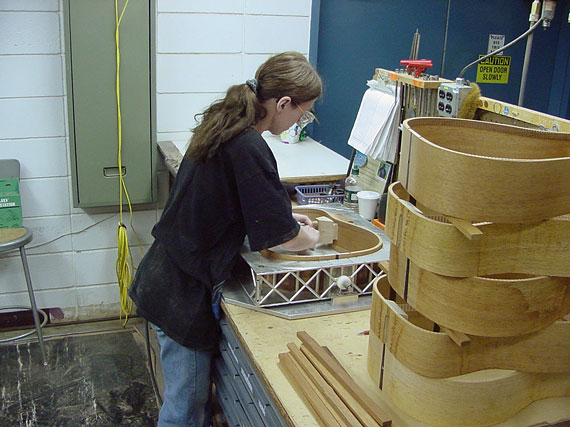
After linings are glued in, the sides go back into an aluminum mold, so they can be held rigidly while the contour of the top and back radius is sanded.
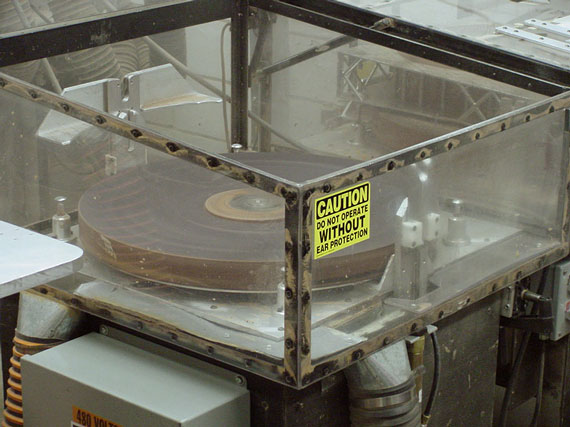
This horizontal disc sander has the same concave radius as the top or back.
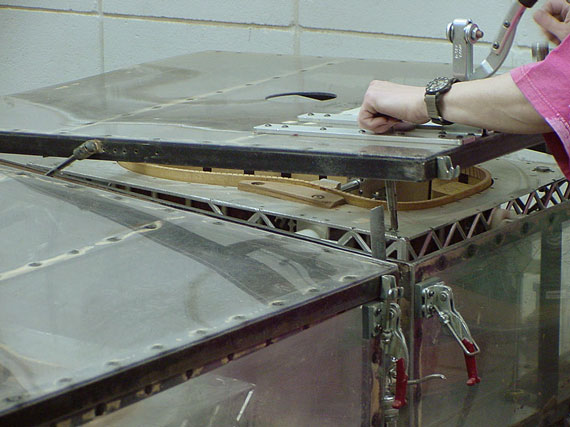
The aluminum mold fits right into the cabinet, which is connected to the vacuum dust collection system.
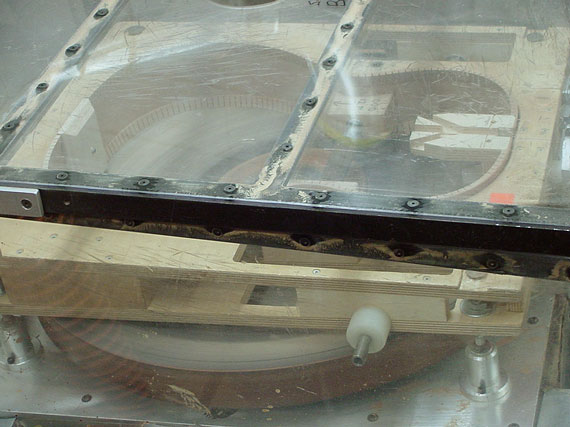
Once in the machine, the mold simply settles down onto indexing stops to limit the sanding, perfectly defining the contour and depth of the sides, neck and end blocks where they will contact the top and back.
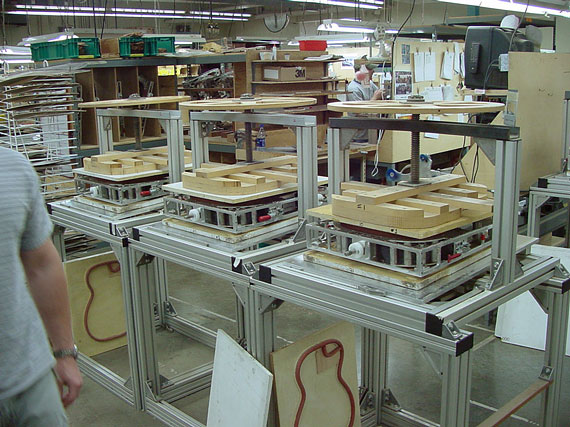
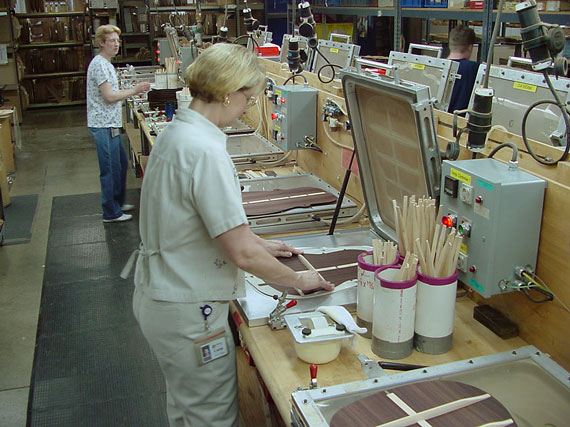
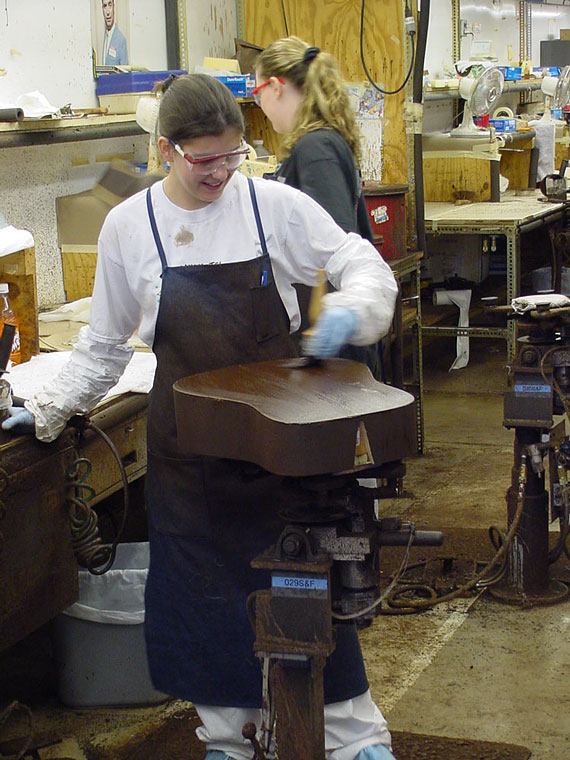
Presses for clamping tops and backs.
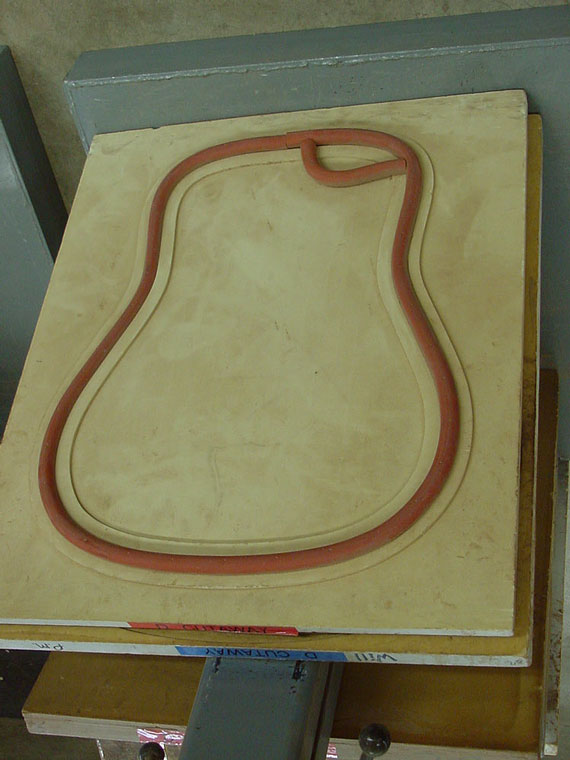
Each top and bottom plate has a rubber gasket in the outline shape of the top or back to apply pressure evenly across the joint.
It's fun squishing these bodies up!
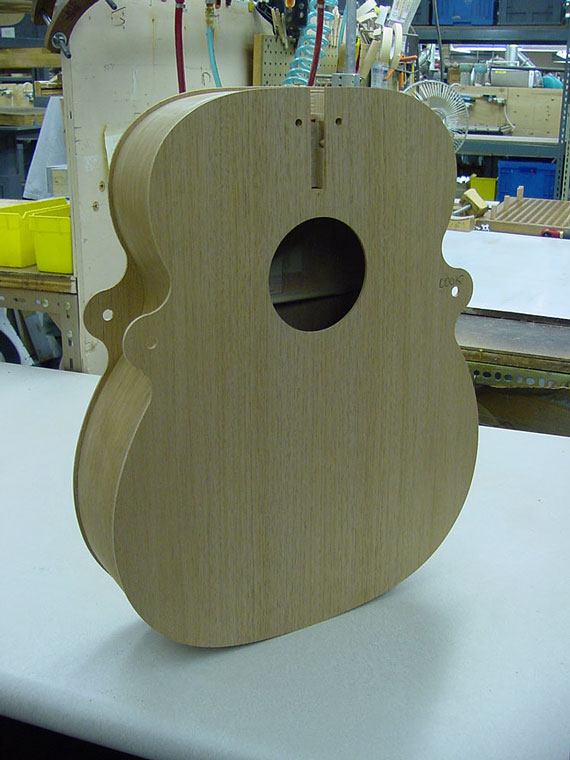
A completed body, with its love handles still attached.
After trimming the back and sides, it's time to cut the channels for the purfling and binding around the body, on a horizontal shaper.

It takes a lot of different cutter assemblies to accommodate a wide variety of styles, from the simple "16" to the elaborate "45."
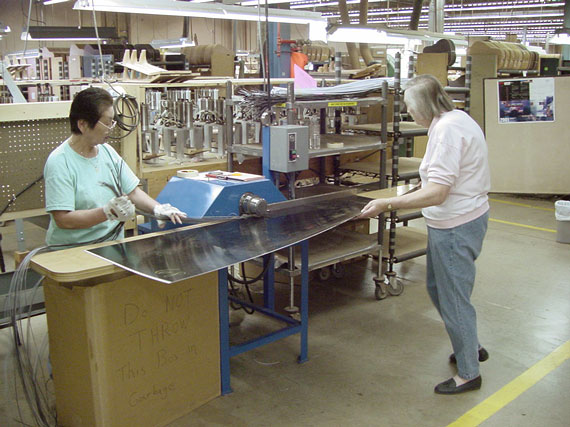
Laminated plastic sheets are cut into strips to become the black and white decorative purfling.
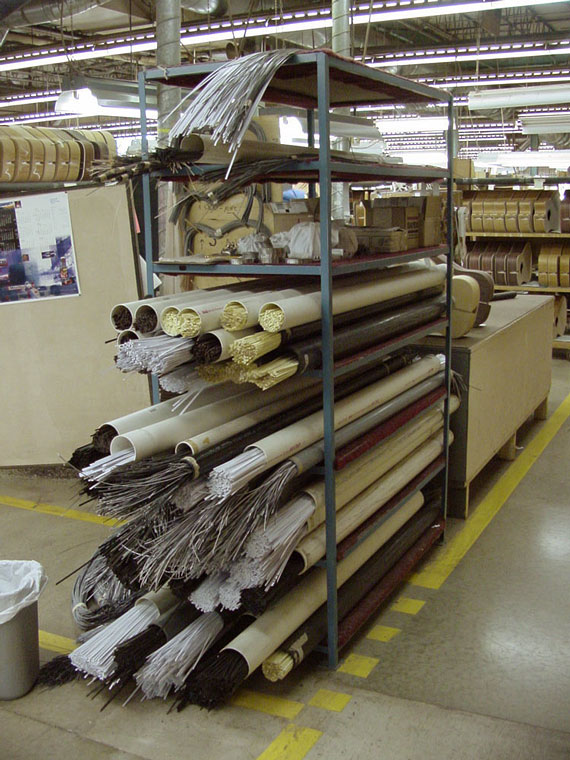
A rack holds a confusing array of laminated and plain binding and purfling.
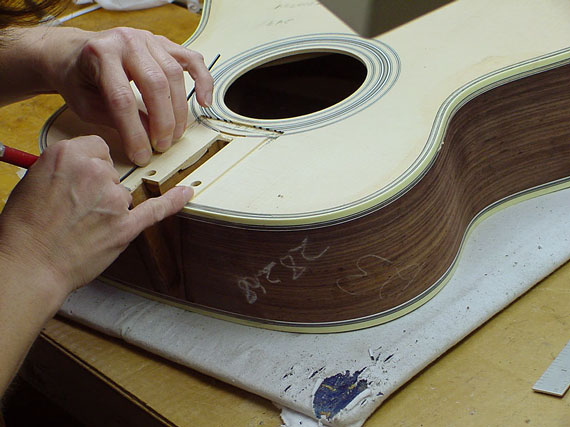
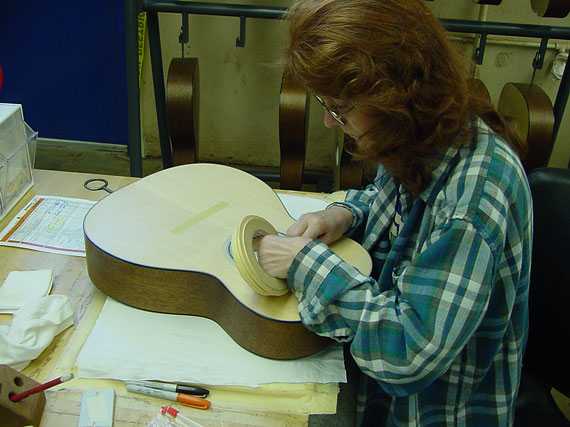
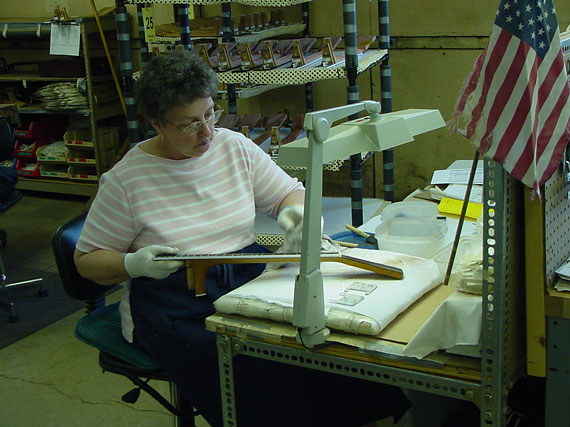
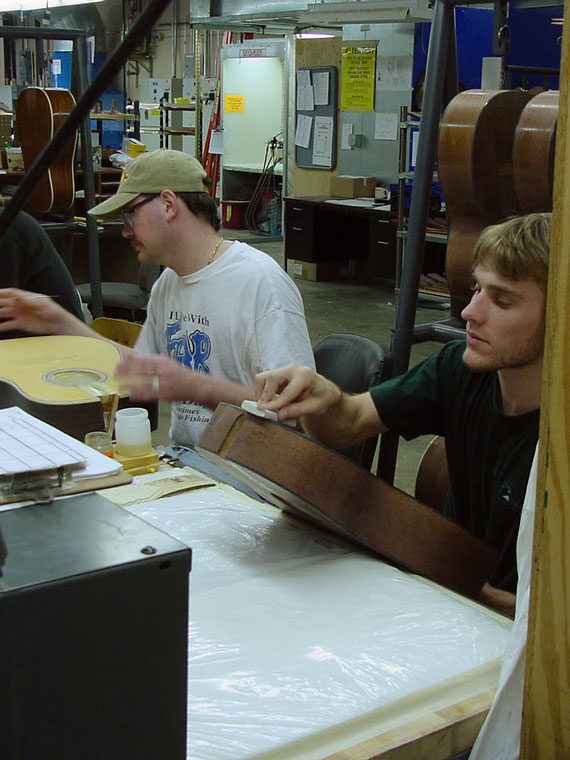
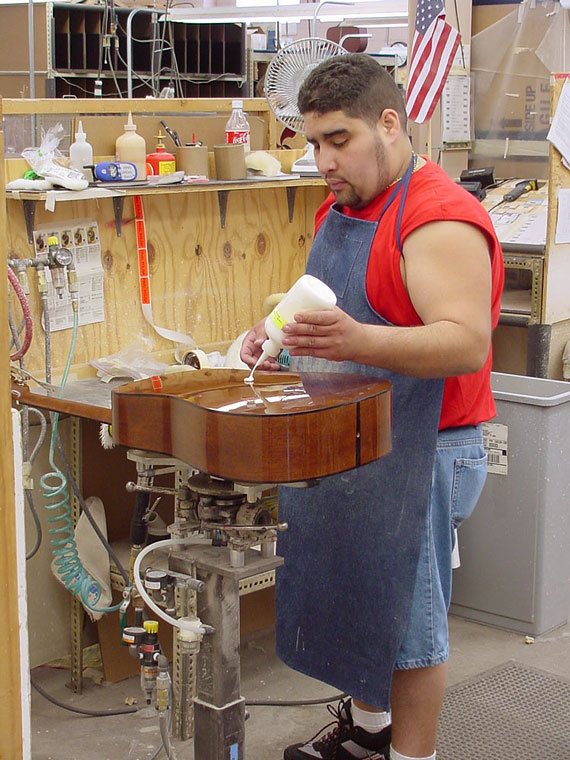
The slow work begins with gluing and taping the purfling and binding in place.
Masking tape holds the binding on the edge as it is glued with a solvent based adhesive.
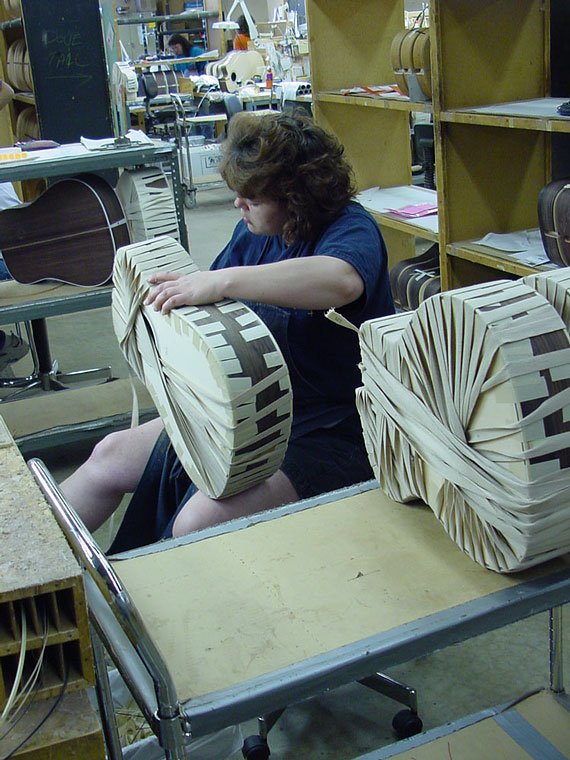
For increased clamping pressure, the entire body is overwrapped with a heavy cotton cord material.
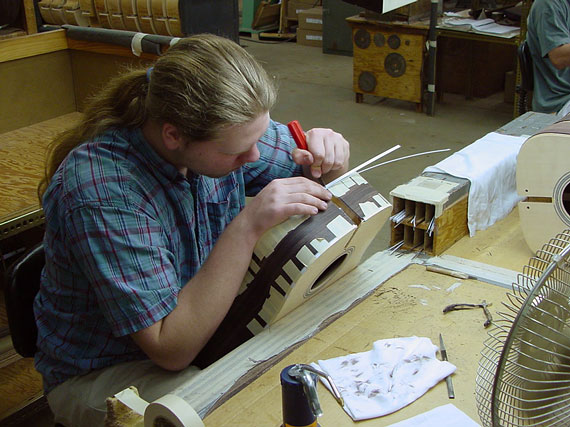
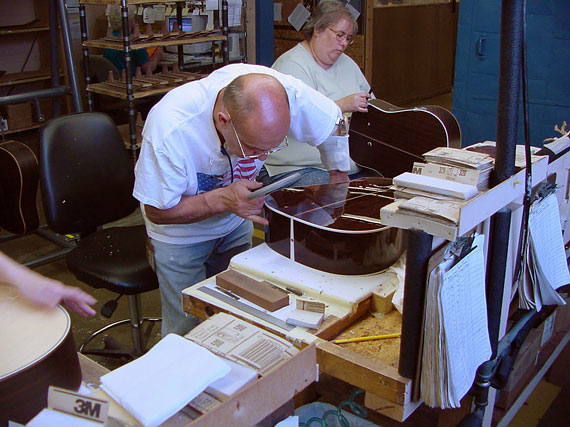
Fancy guitars require more hand inlaid purfling. This one is getting ready for the pearl bordering around the end of the fingerboard
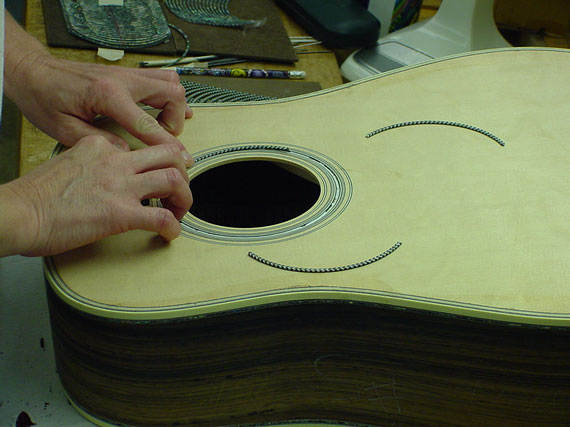
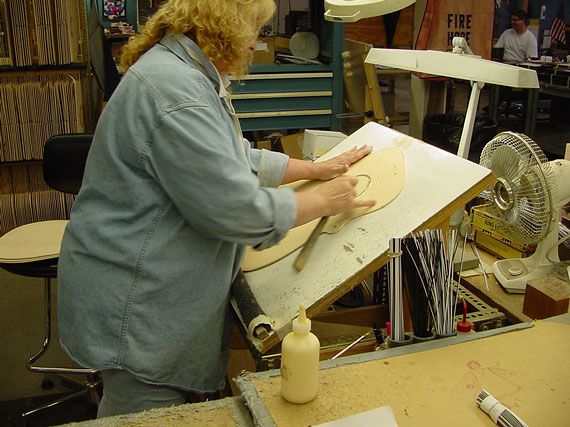
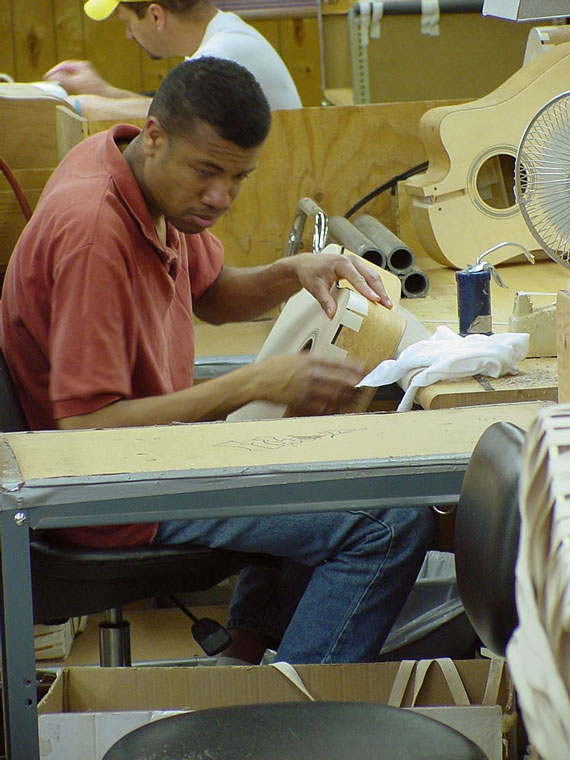
Temporary plastic spacing material is removed from the soundhole rings so abalone sections can be inlaid.
It's close work.
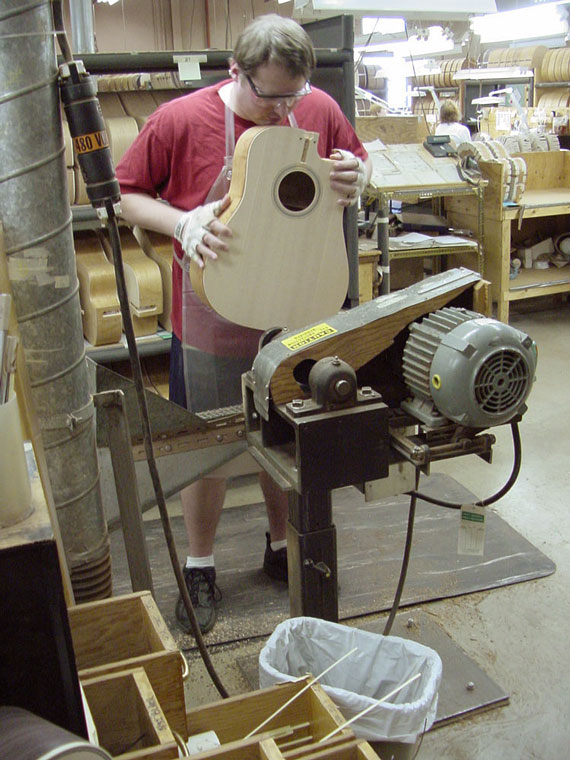
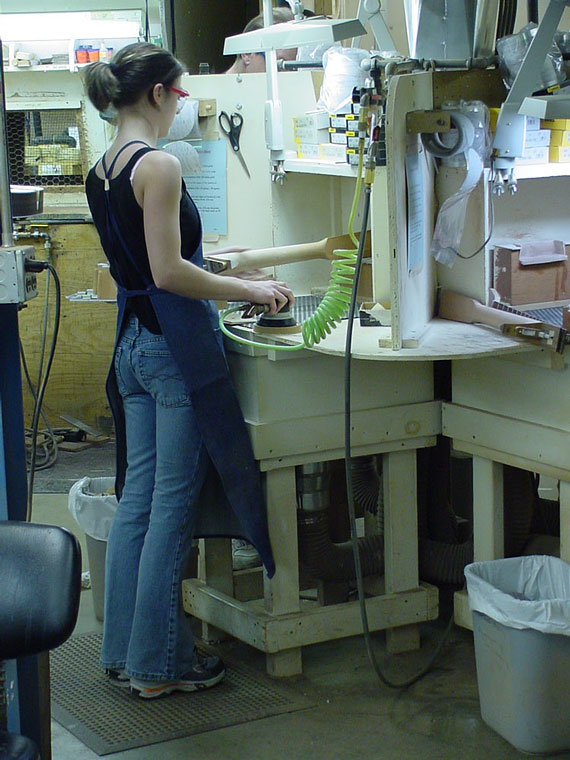
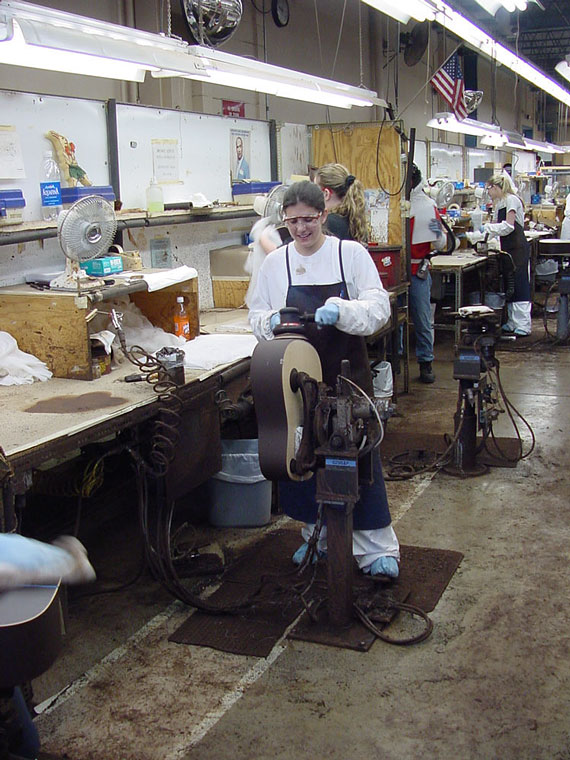
After all binding and purfling is applied and leveled, bodies get a leveling on a large "stroke" sander.

Final sanding before finishing.
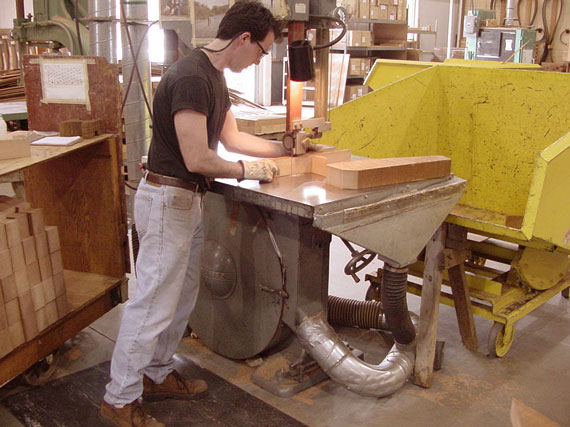
Rough cutting neck billets.
Necks are carved with precision on this CNC machine.
Fingerboards are cut on CNC equipment, too, but require a bit of hand cleanup.
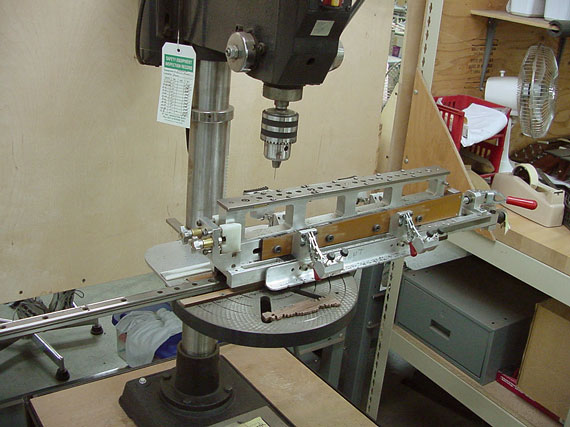
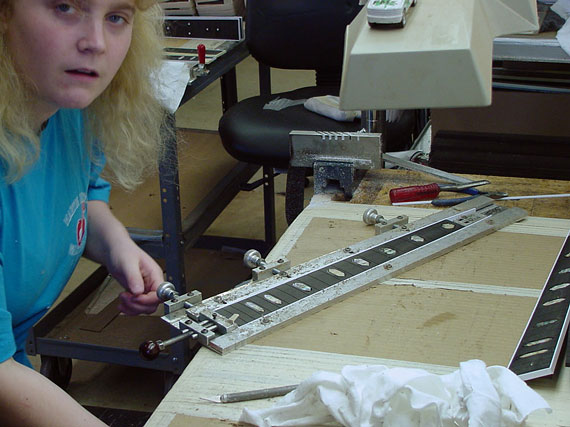
This is the fixture for drilling and inlaying the edge position inlay dots.
Binding the edges of the fingerboard.
Cleaning out the excess glue and dust from fret slots, using a high speed reciprocating saw similar to an orthopedist's cast removal saw.
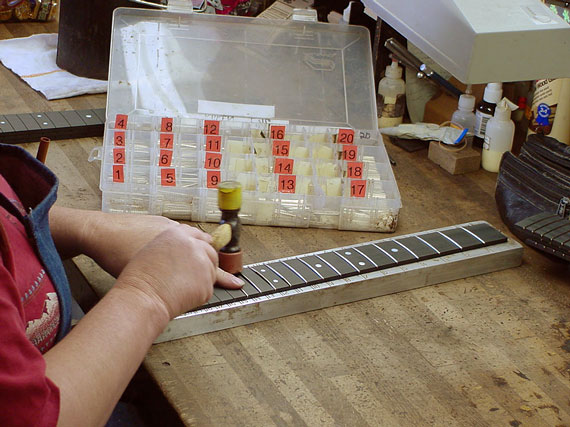
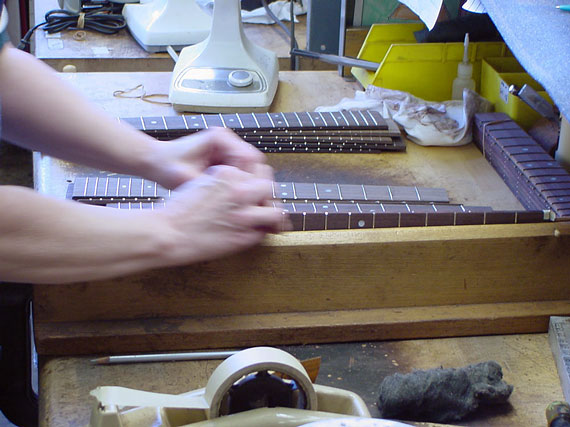
Frets are placed and tapped into position by hand.
Final "seating" of the frets using an arbor press.
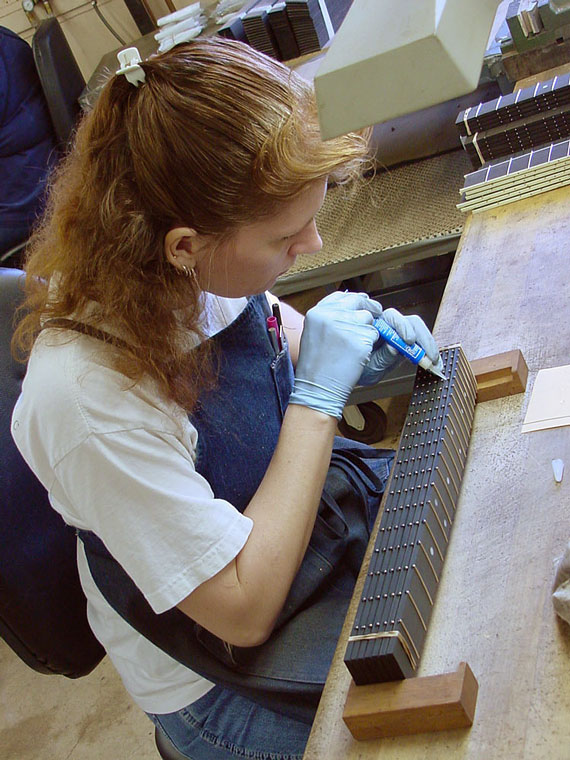
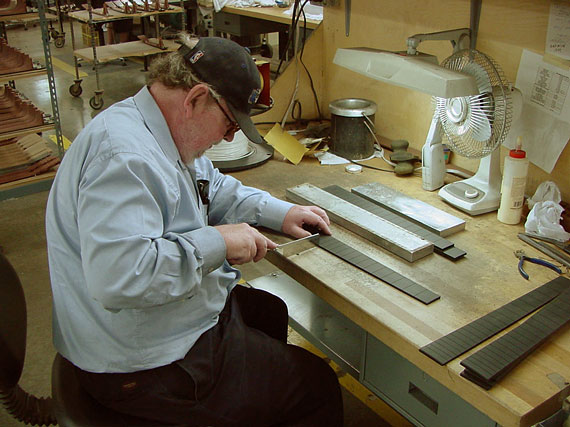
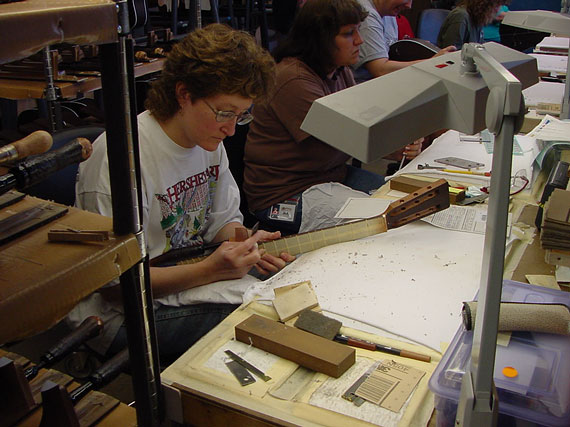
Fingerboards without edge binding need to have their fret slot ends sealed.
Leveling the sealed slot ends.
Peghead veneering.
Installing adjustable truss rods.
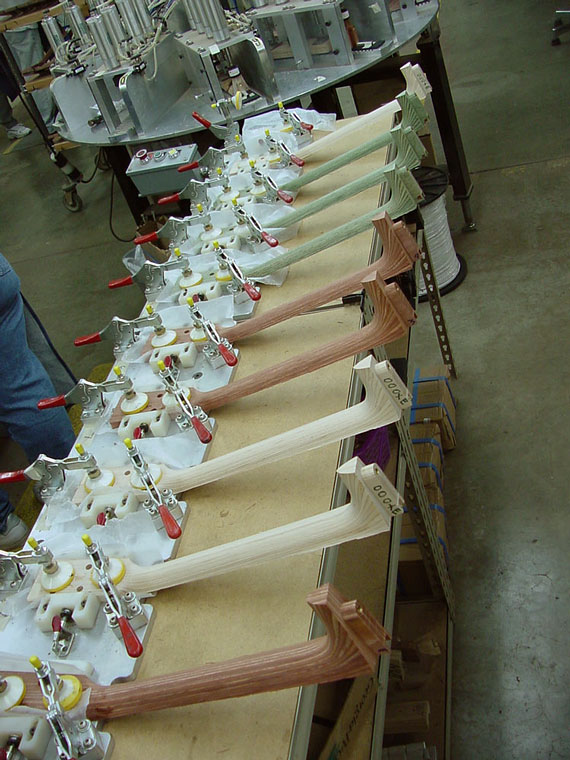
A row of modern pneumatic clamps make quick work of gluing fingerboards to necks.
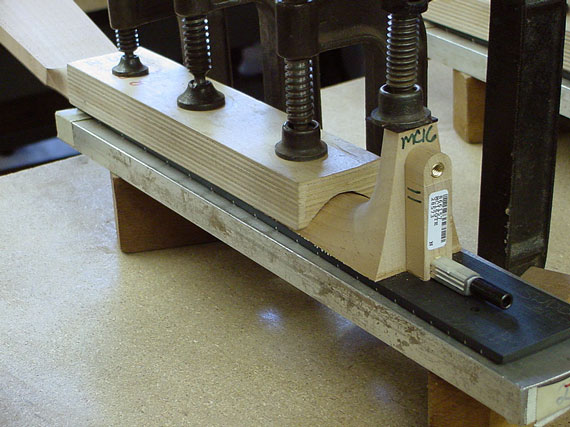
As in most factories, fixture and process development is an ongoing affair. Here, the same job is done with screw clamps.
A batch of HD-28V necks.
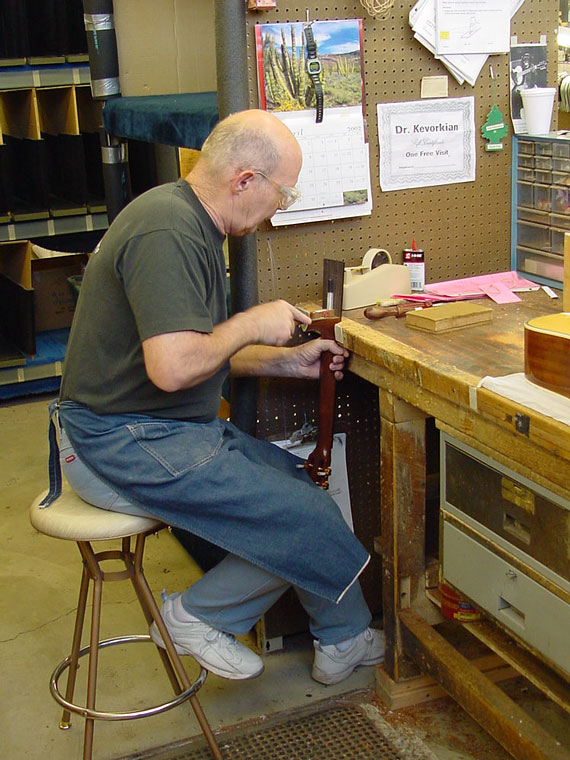
For special contours, shaping and detail work, there are work stations for hand operations.
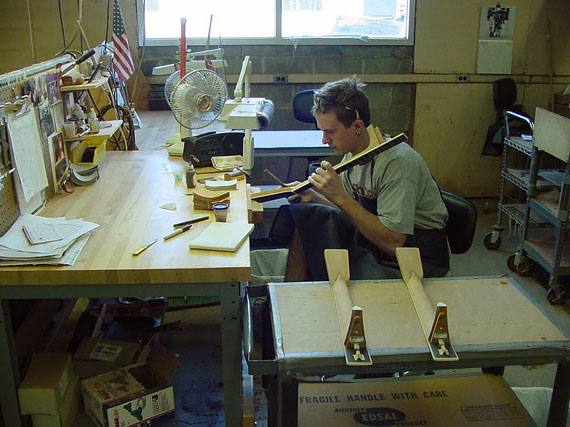
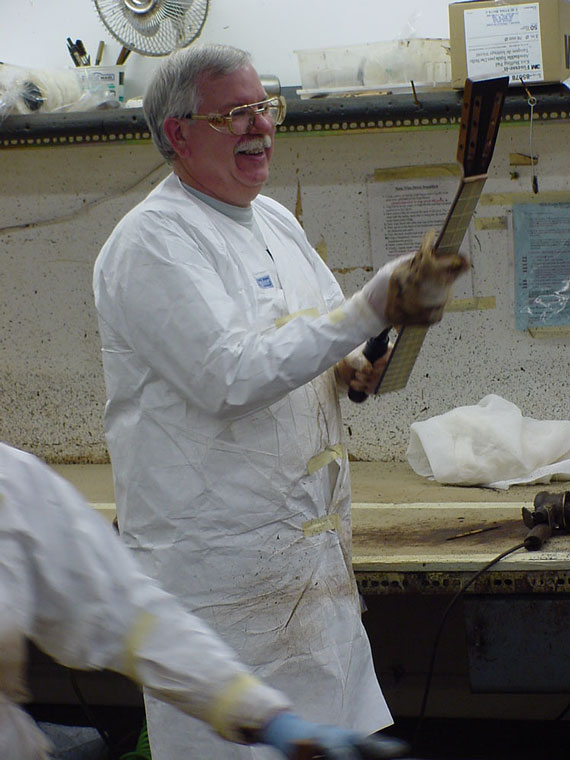
"Detailing" the peghead.
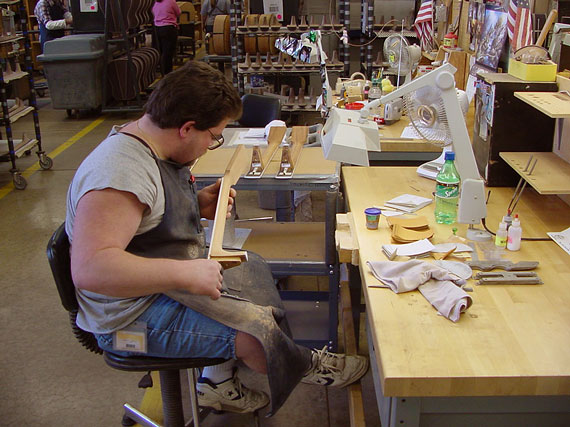
I'm not sure, but I think he's getting ready to play a little "air guitar."

Slotted pegheads require special attention.
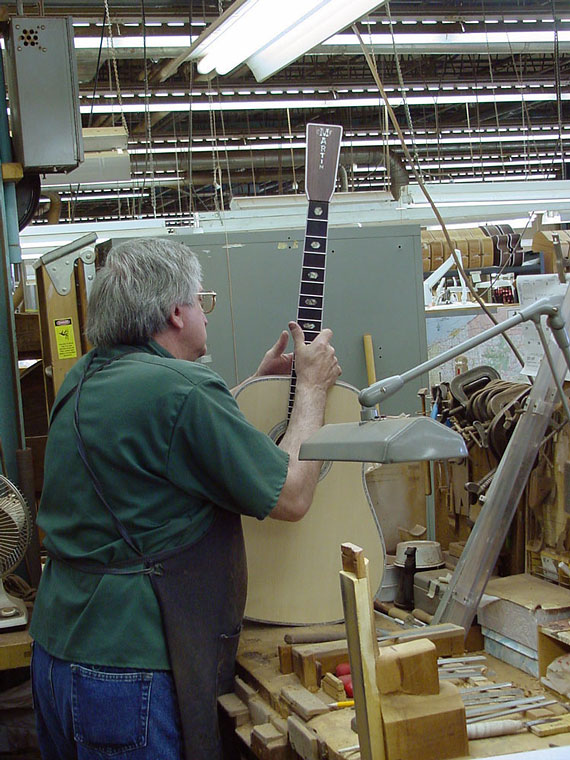
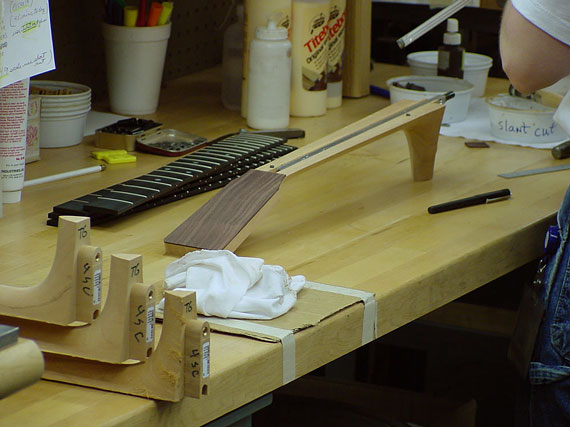
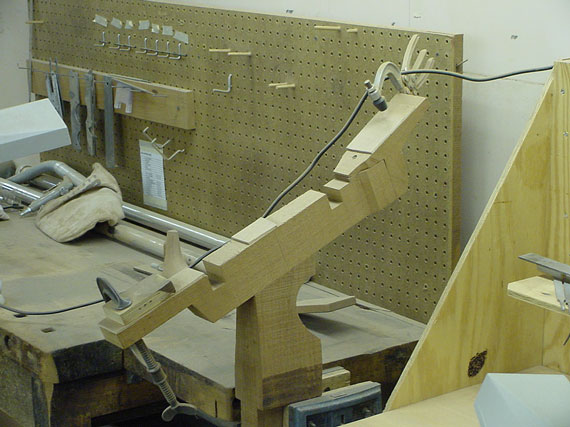
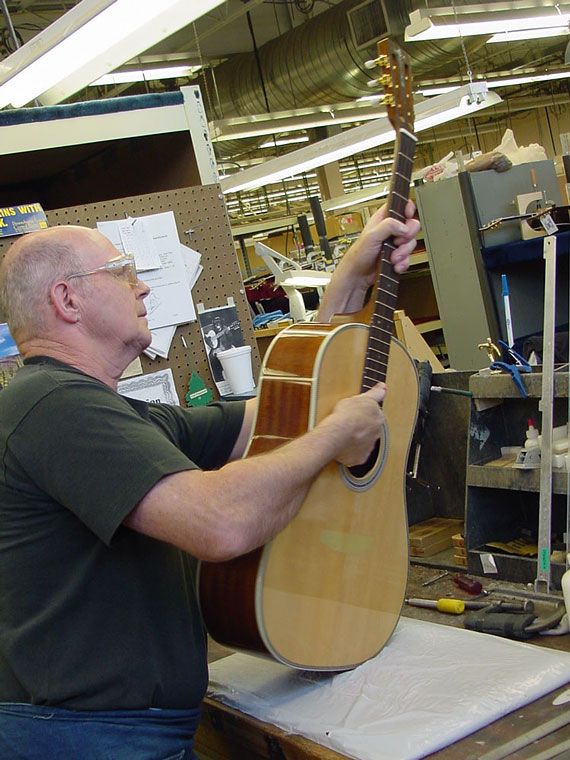
The body and neck are completed now, and ready to get their first "fitting."
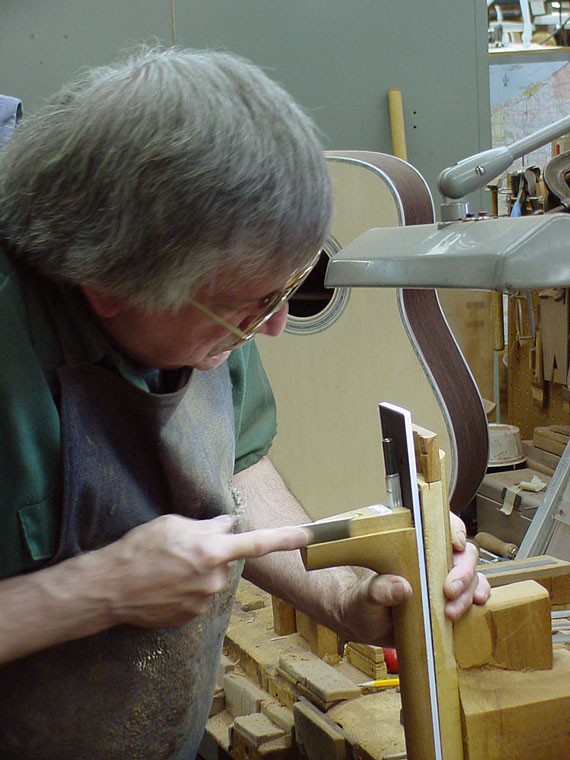
Adjusting the fit of a dovetail.
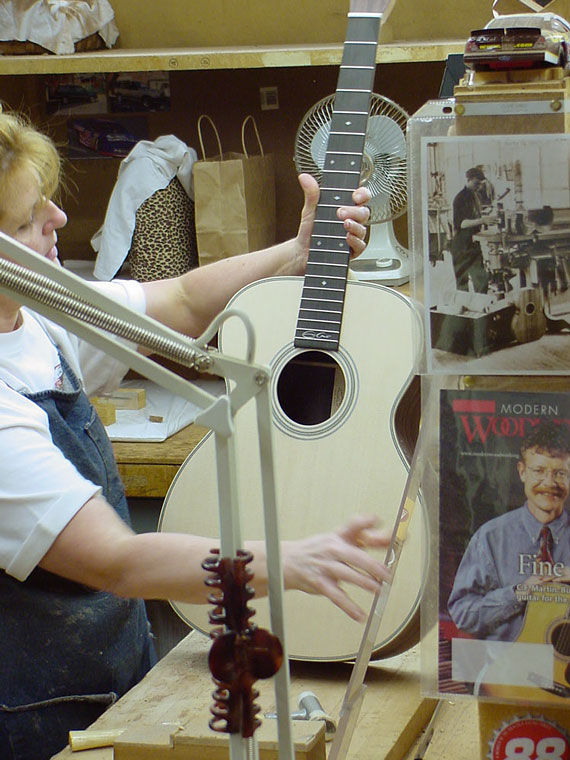
Checking.
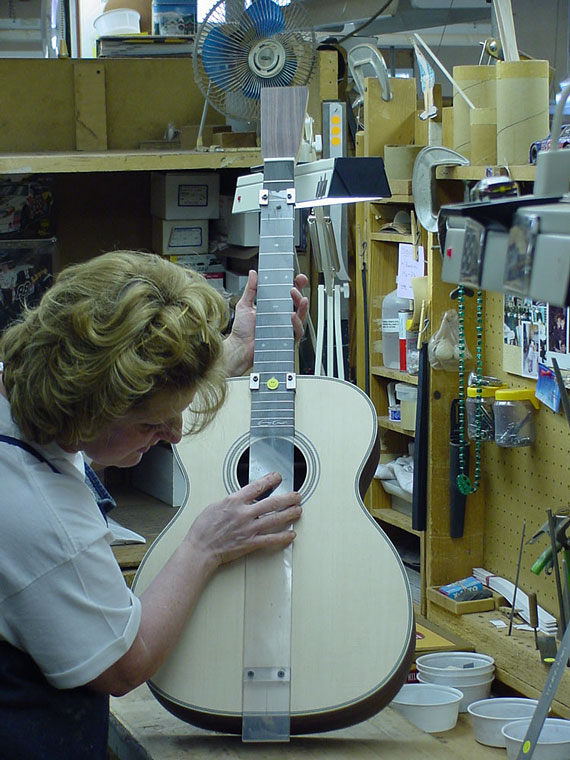
And, rechecking. That's how it gets done right.
Final sanding of the neck before staining and filling.
More sanding. Here, a "downdraft" table draws the dust down and away. Even with all this sawing, routing, milling and sanding, the Martin factory has remarkably clean fresh air.
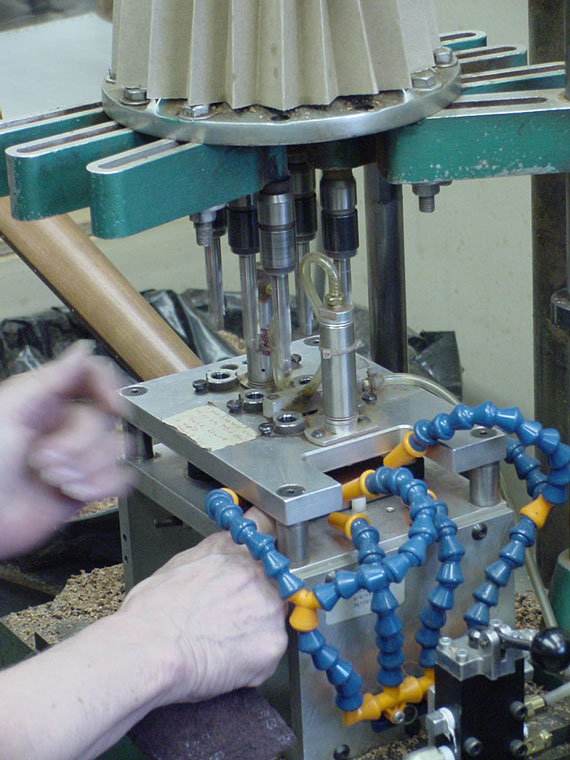
Tuner holes are drilled all at once on a six spindle drill press.
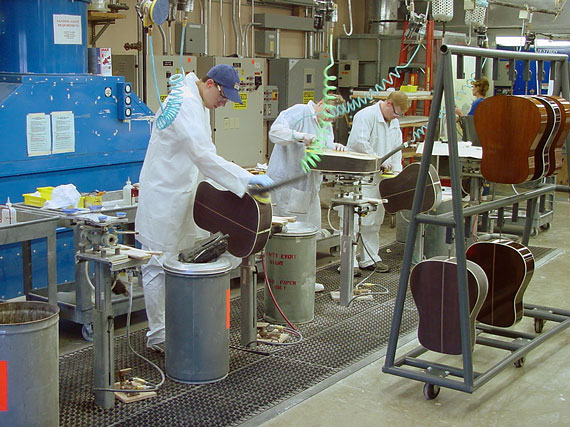
Somebody recently told me that because lacquer detail work was the hardest part of guitar building, it shouldn't be called "finishing." It should be called "beginning" because that's where the real trouble begins. Here, it begins by masking off.
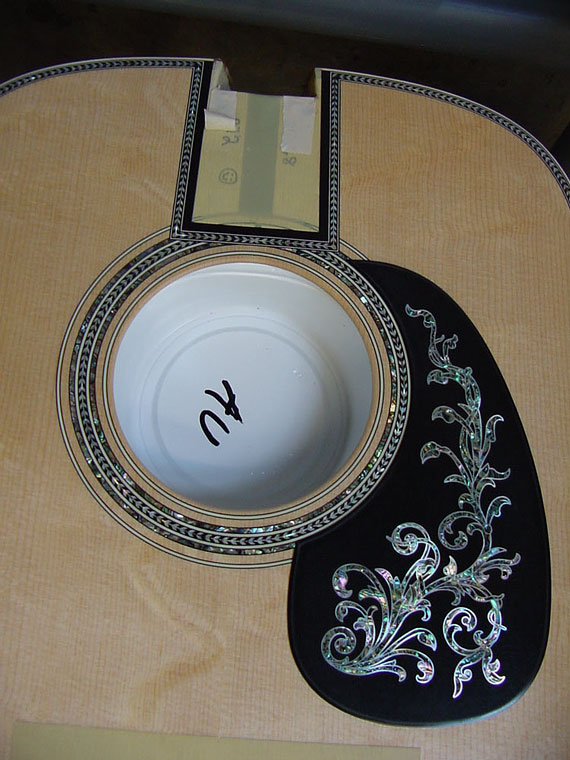
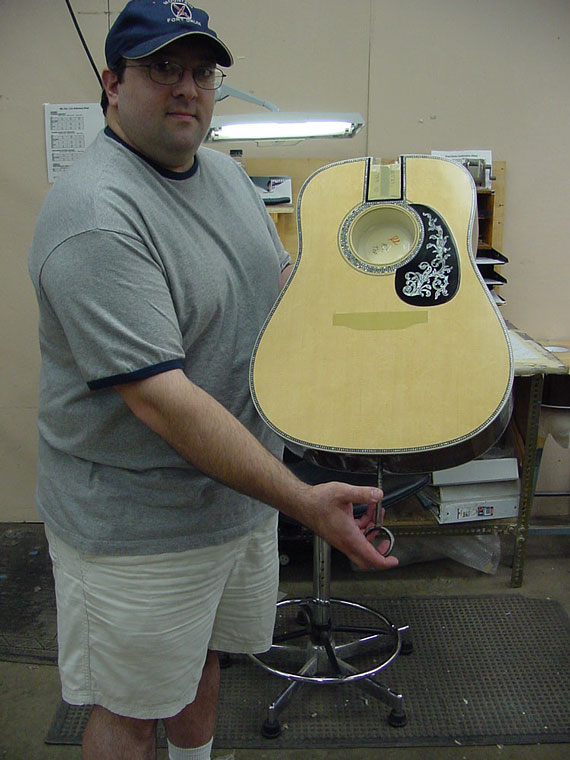
A super fancy D-50 has a plastic cup mounted inside the soundhole so no overspray lacquer will get inside the guitar.
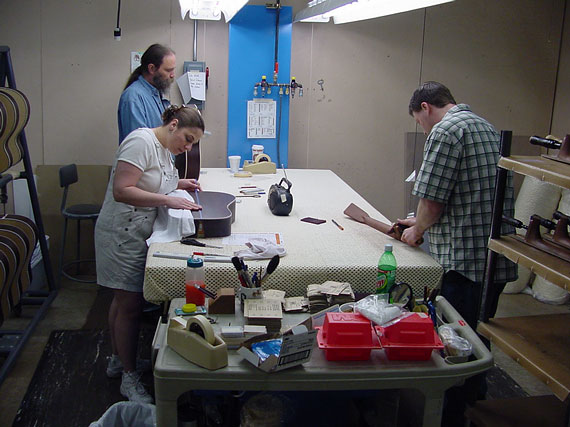
Paste filler is applied to the back and sides
And, neck.
A bit of fingerboard cleanup.
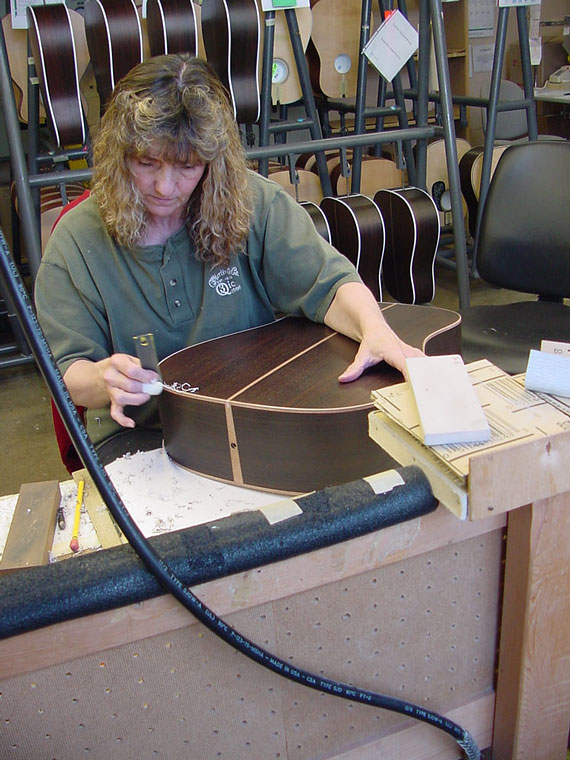
That darlk paste filler gets all over the binding and everwhere, so the binding must be scraped clean before any finish is applied.
It takes a steady hand and a good eye to make the grade in this job.
Even the edges of a black ebony fingerboard get scraped clean.
This intergalactic visitor has just emerged from the spray rooms with another rack of freshly lacquered guitar bodies.
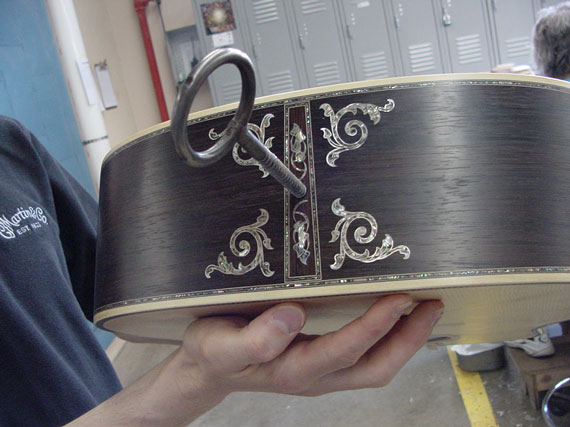
A great big key thing gets screwed into the end pin hole to act as a handle during the spraying and drying operations.
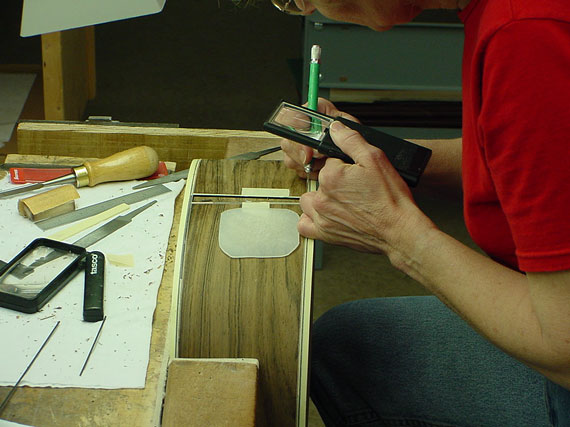
Clearly, the folks at Martin take a lot of pride in their work.
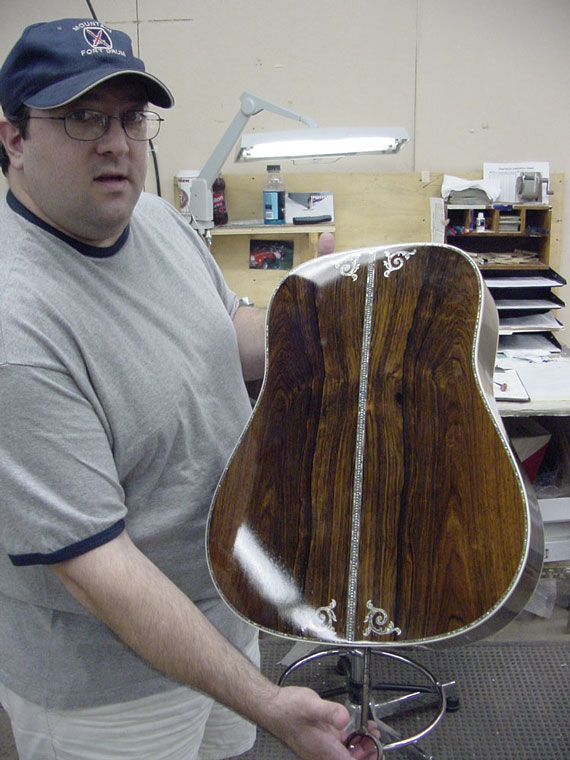
And, they should. Just look at this D-50. It will dry for a while, then the finish will get leveled and buffed.
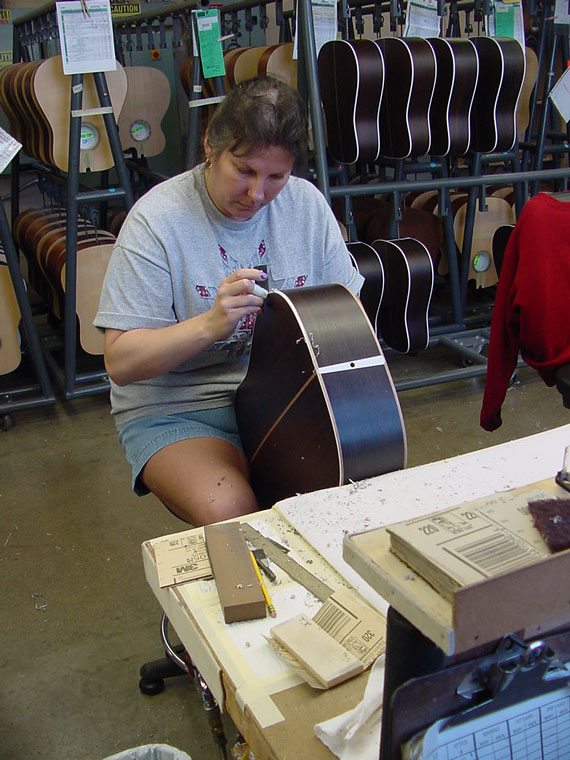
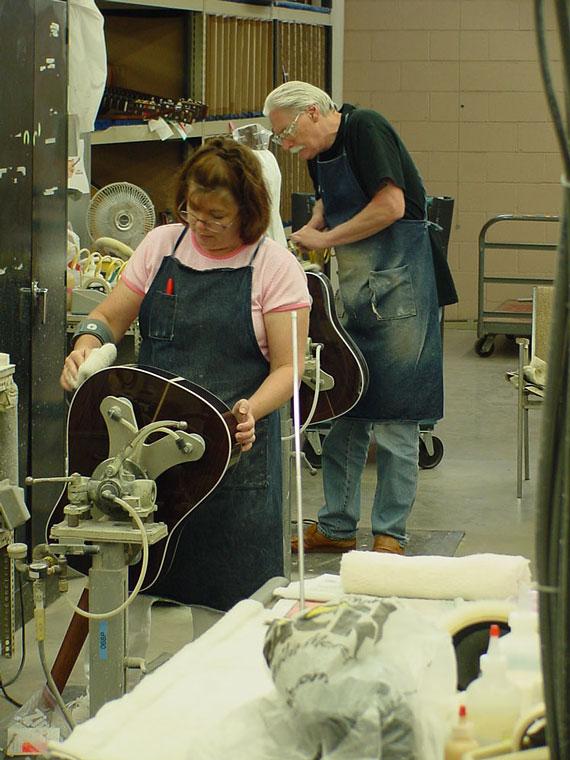
More close work. No doubt about it, if you're going to get a flawless finish, you have to check it and fix any little blemishes!
Sanding between coats. Did I mention that these folks do a lot of sanding?
More detail work.
If the devil is in the details, I suppose this is his office.
Vacuum chucks allow guitar bodies to be held firmly in a variety of positions.
Final fitting of the neck is done after both the neck and body are finished
A little off the end. . .
And then the neck gets glued in place.

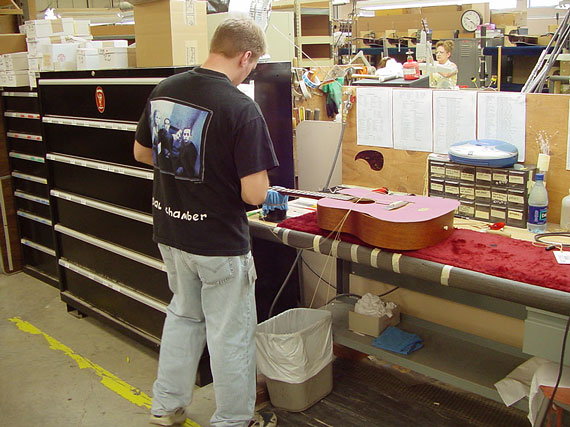
After the neck is attached, it's time to complete the "setup."
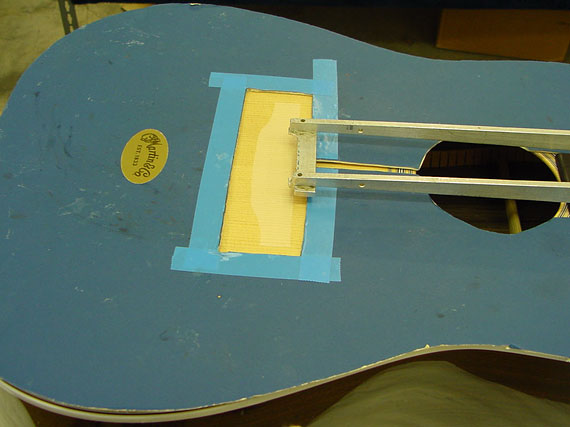
A special fixture locates the bridge position. Its end fits into the saddle slot.
A bridge, set in position.
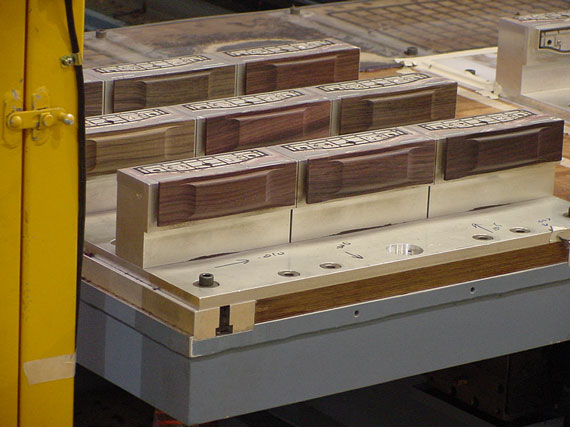
Bridges are roughed out on the CNC carving machine,
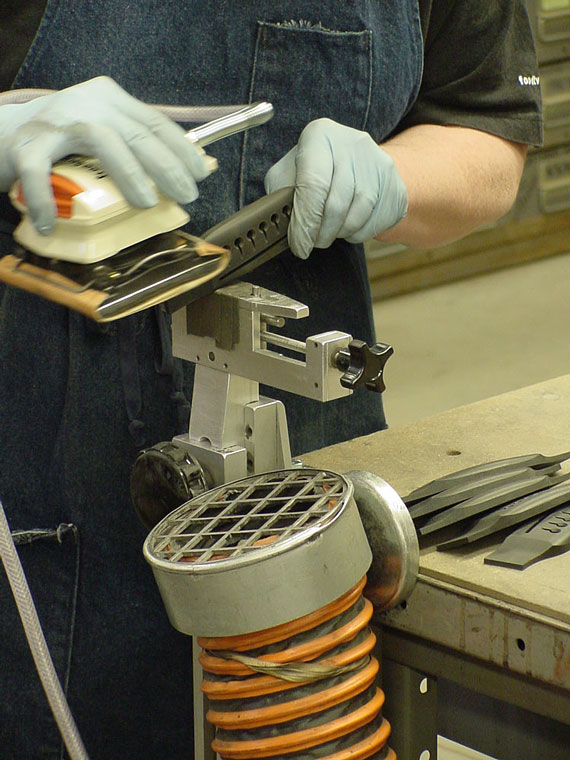
and finished by hand.
Gluing and clamping the bridge.
More of the same.
Drilling the bridge pin holes through the top and bridge plate.
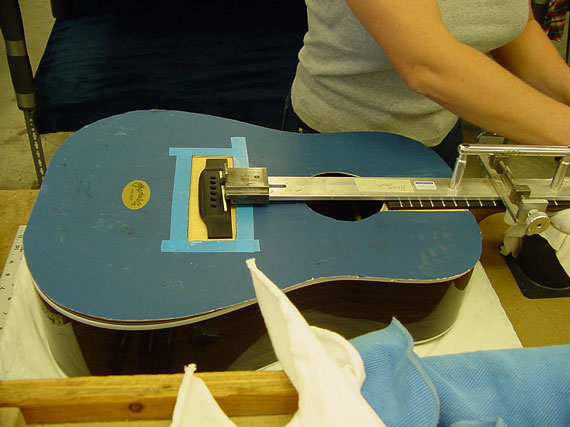
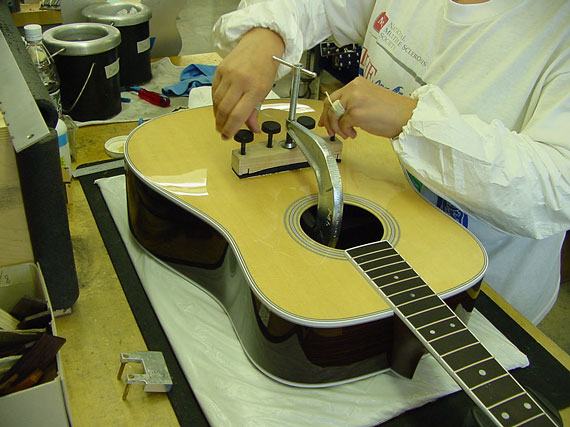
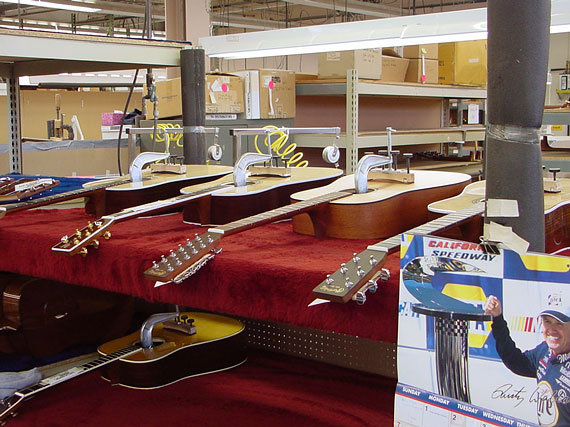
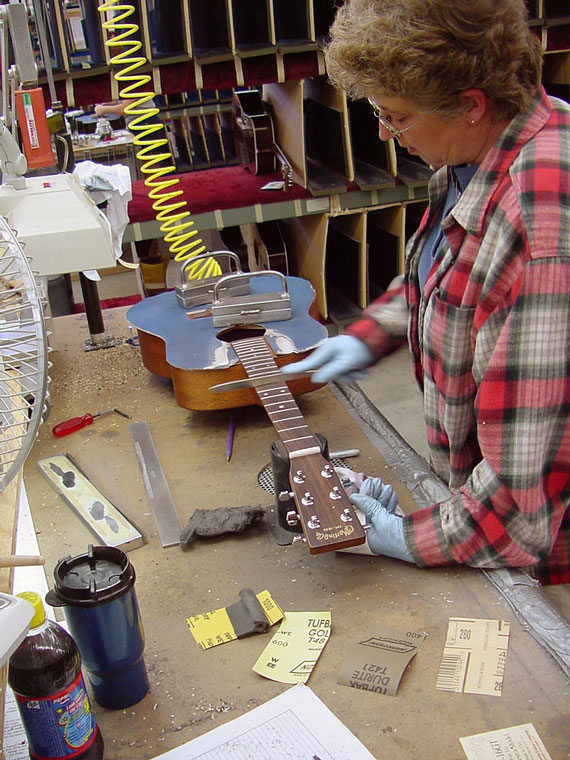
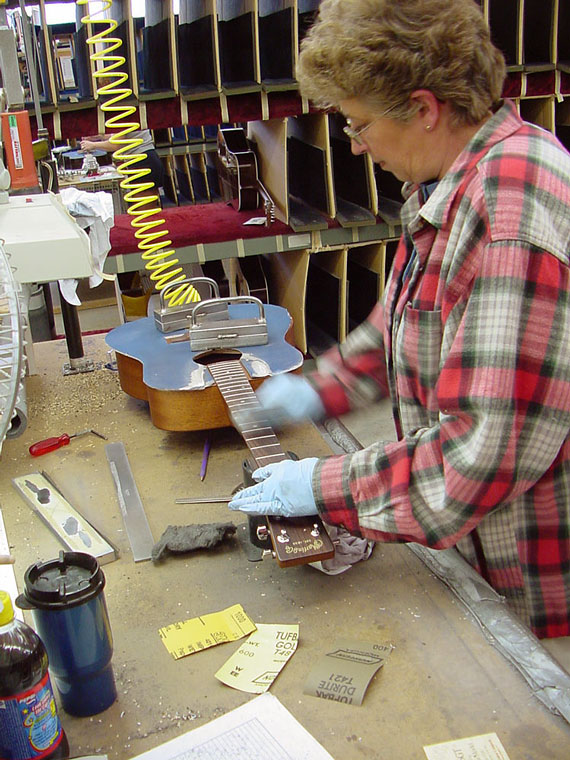
A couple of heavy weights are placed on the guitar top to similate the effects of string tension, as the neckrests on a support.
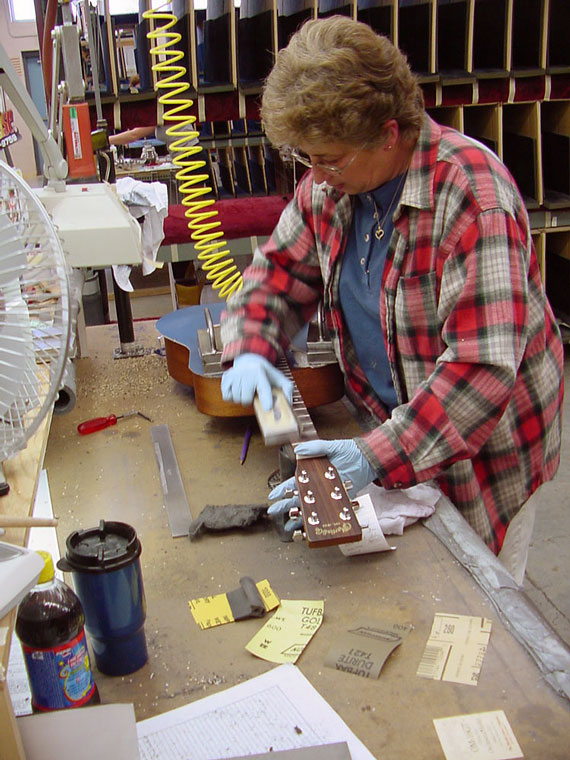
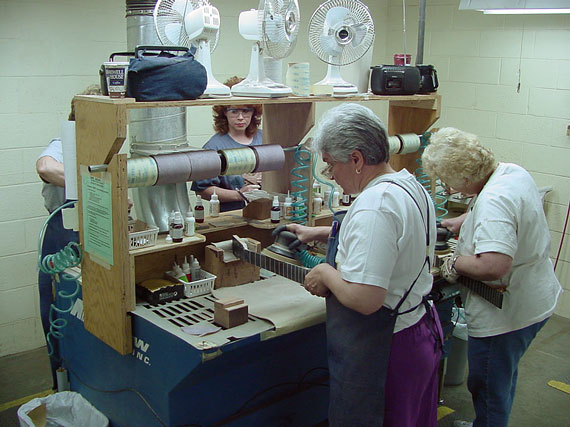
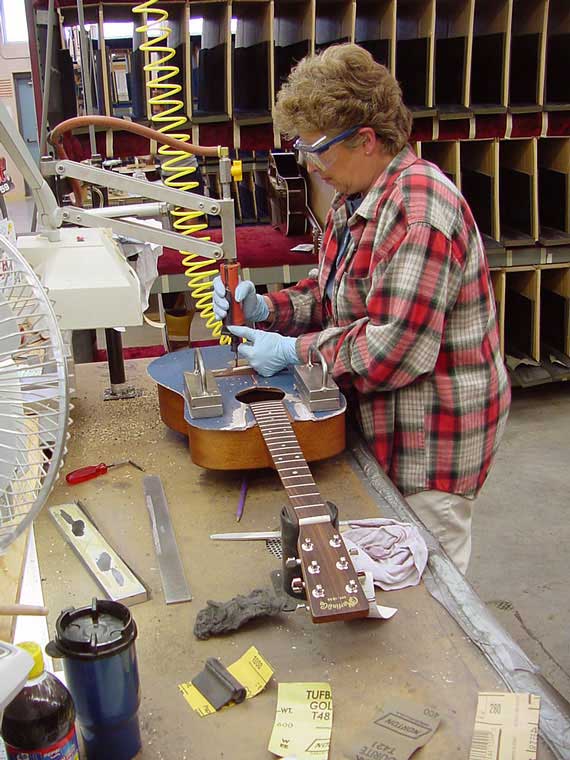
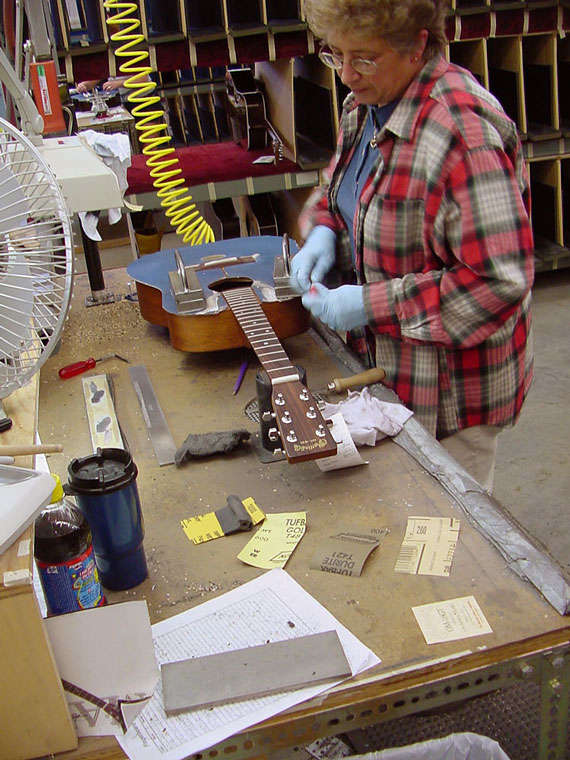
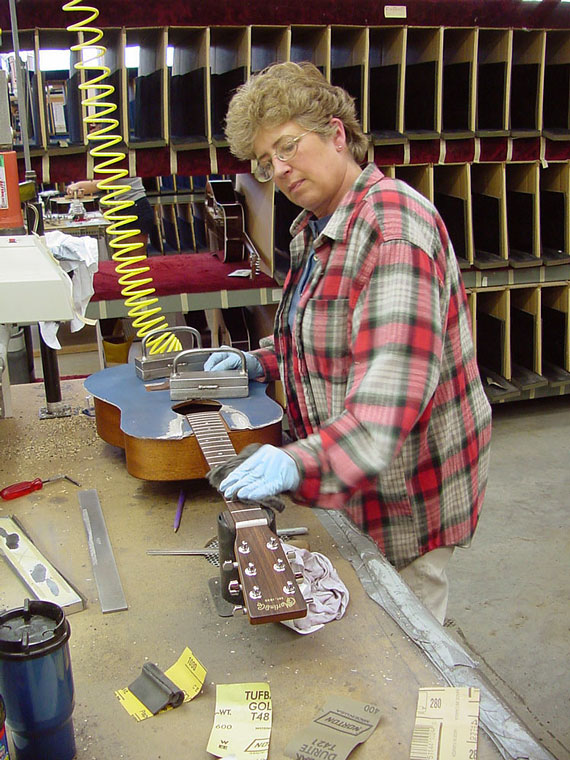
Then, frets get a final leveling.
Rounding the fret ends.
Final fret rounding and smoothing.
A bit of fingerboard cleanup.
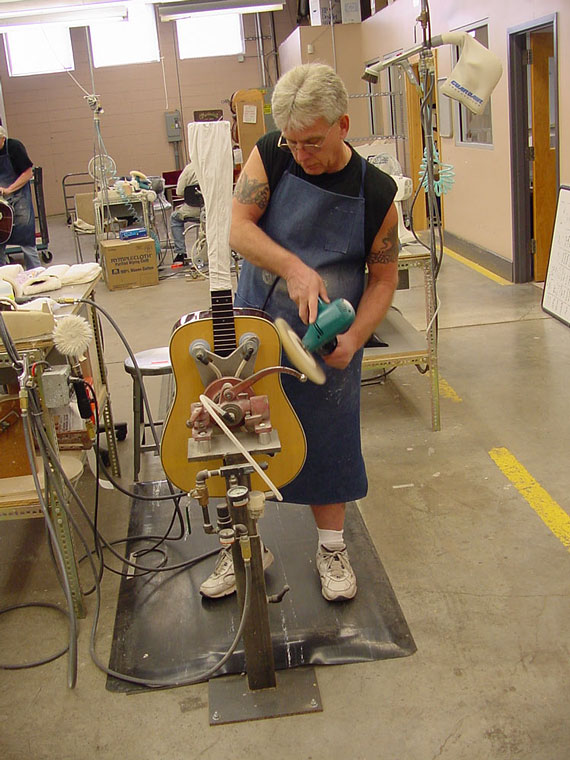
Final buffing.
Final hand polishing
Well, just a bit more here.
Stringing, tuning, inspecting, and it's on its way.
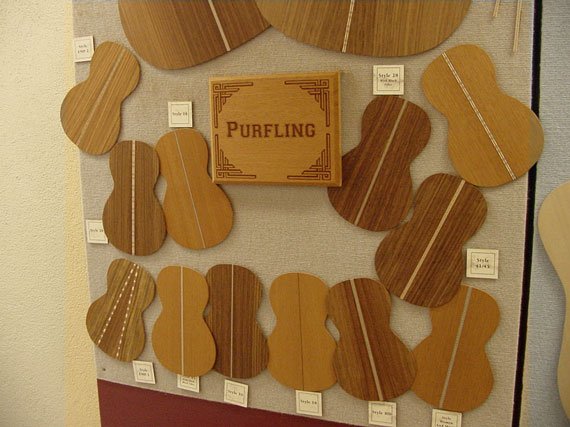
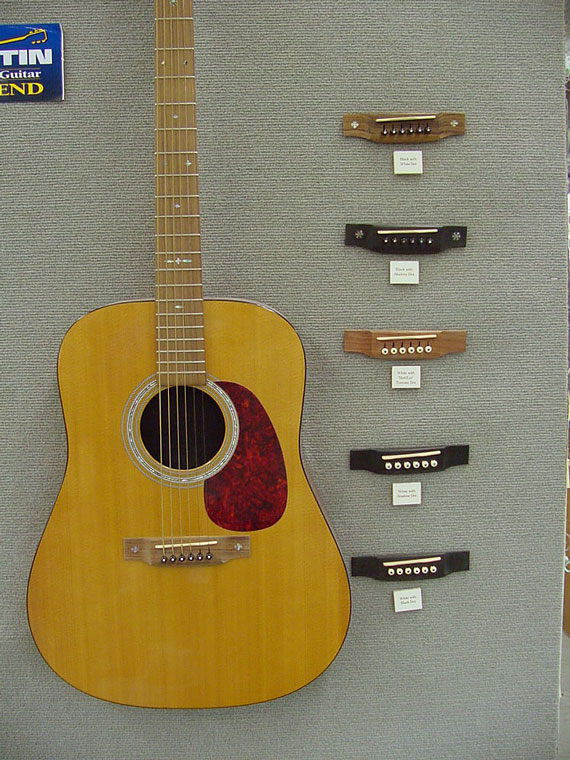
These display boards help give an idea of the wide variety of styles Martin offers.
Some of the many styles of purfling.
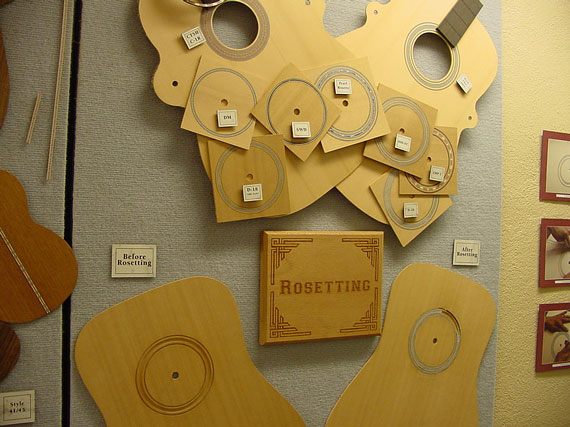
Rosettes

Bridges
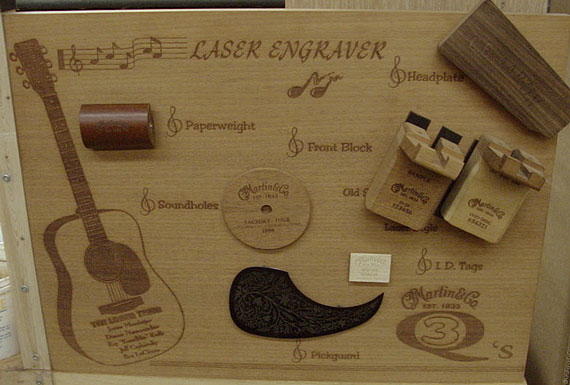
The laser engraver is used for a variety of labeling and decorative tasks.
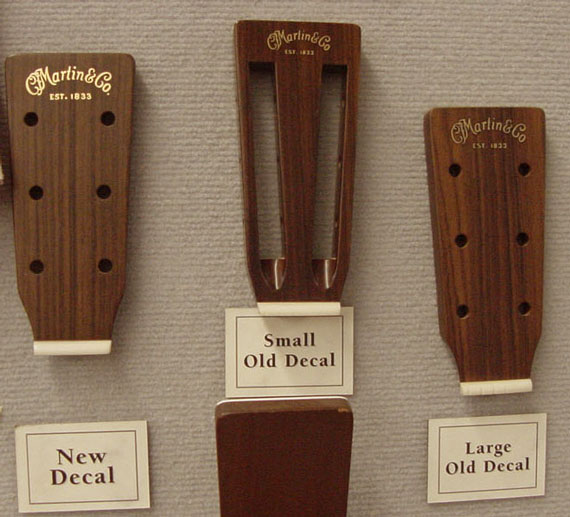
Peghead and decal styles
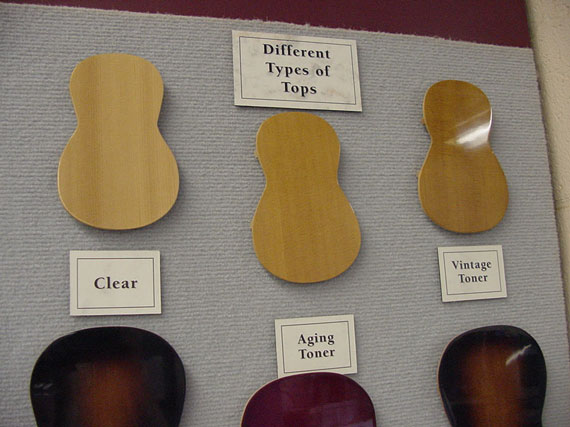
Finish options.
Bridge materials.
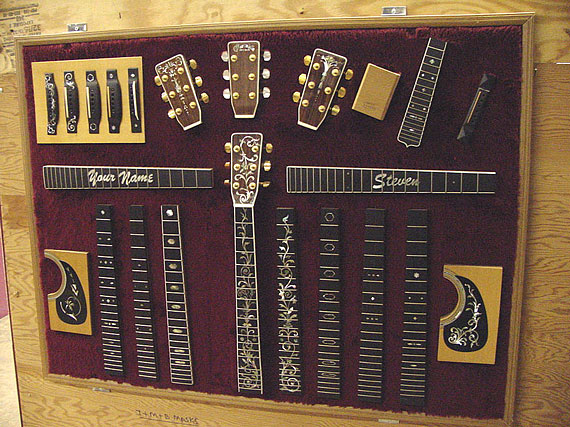
The custom shop offers a lot of inlay styles.
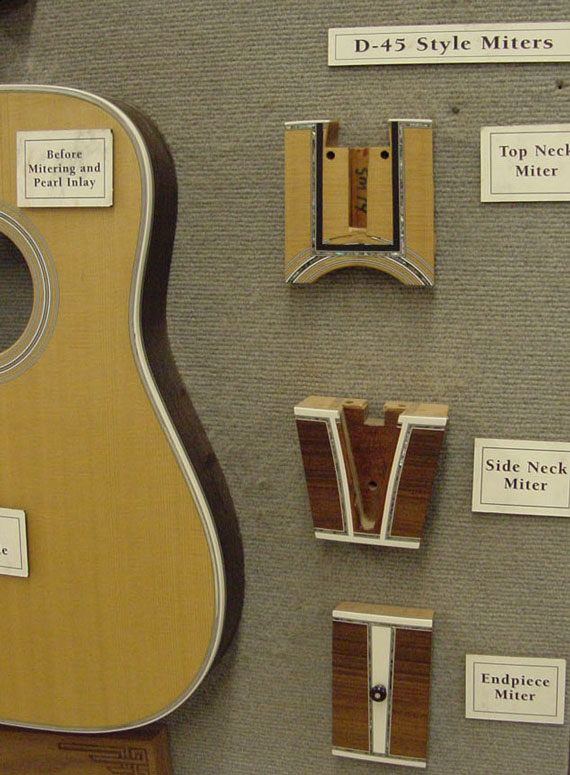
Style "45" details.
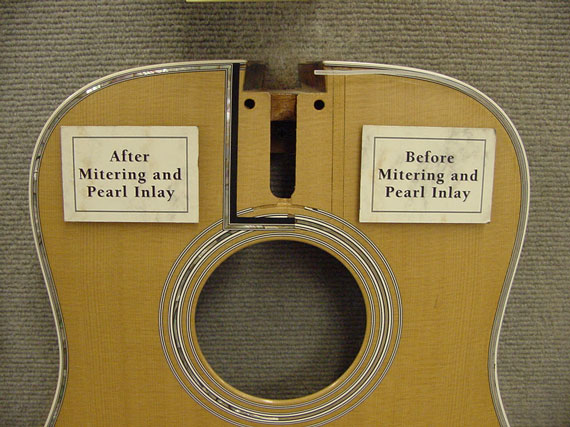
More detail of the pearl top bordering process.
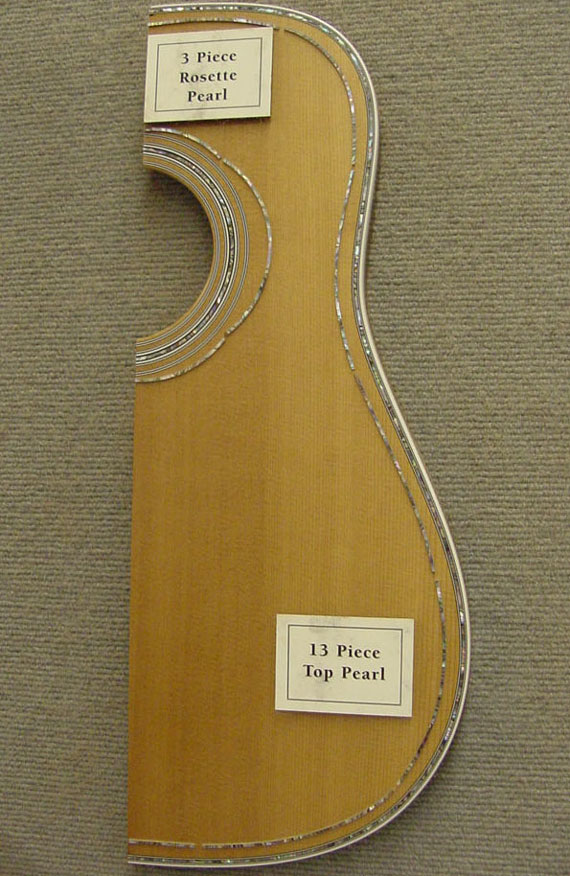
Ditto.
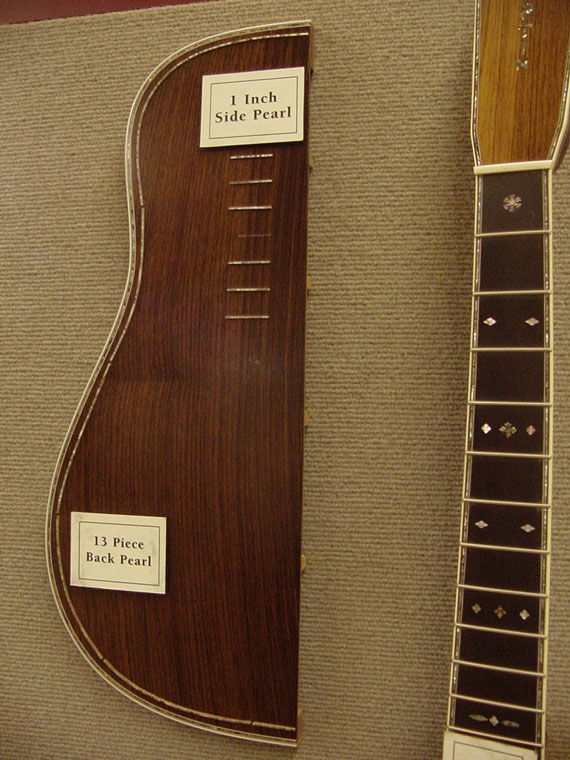
Back and neck pearl border detail.
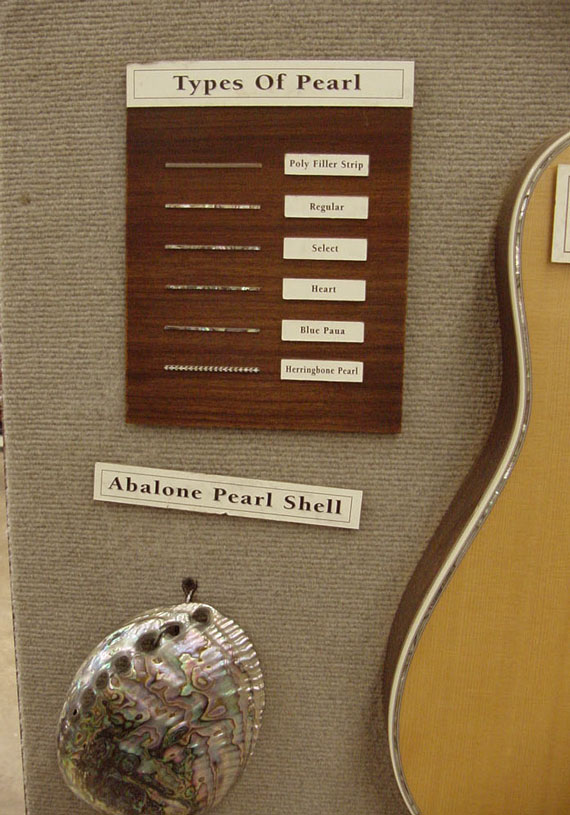
Pearl varieties
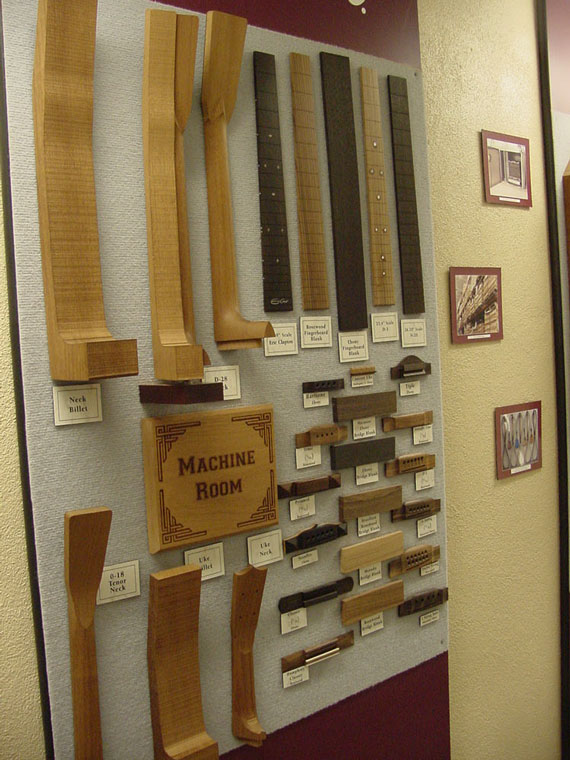
Samples of CNC machine work.
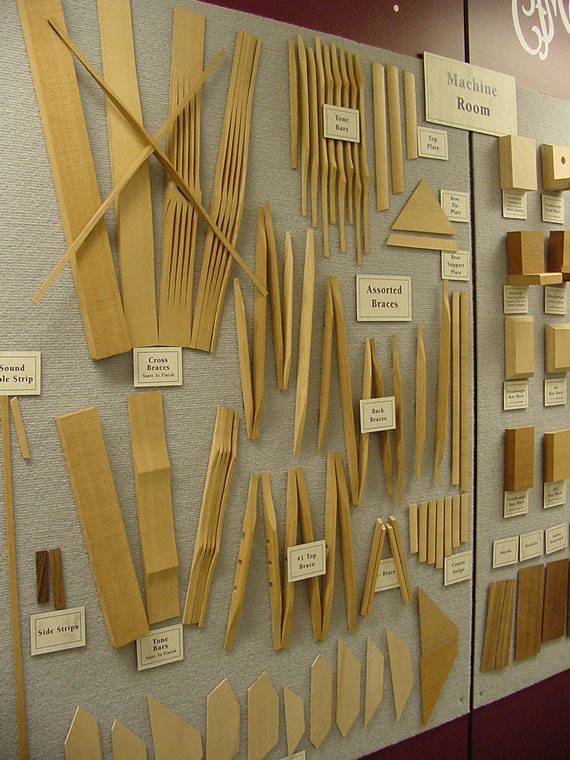
Braces and small parts made on CNC equipment.
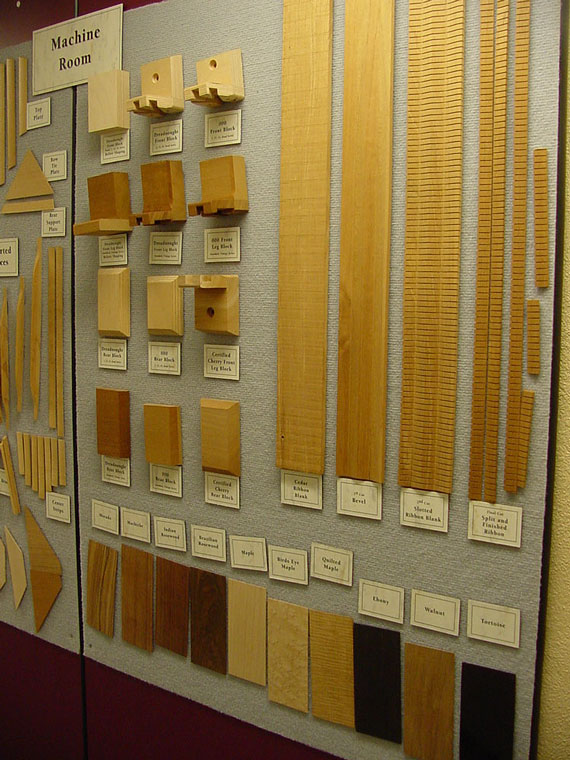
Linings and wood species.
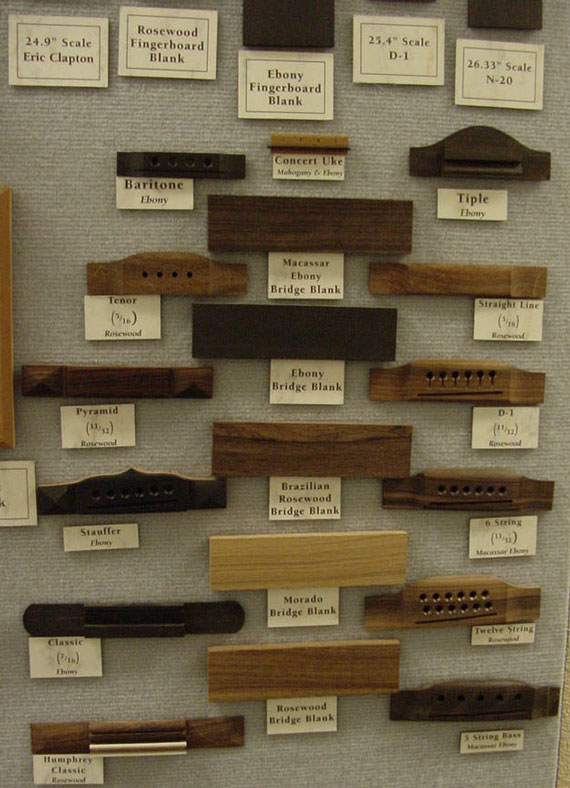
Myriad bridge styles, new and old.
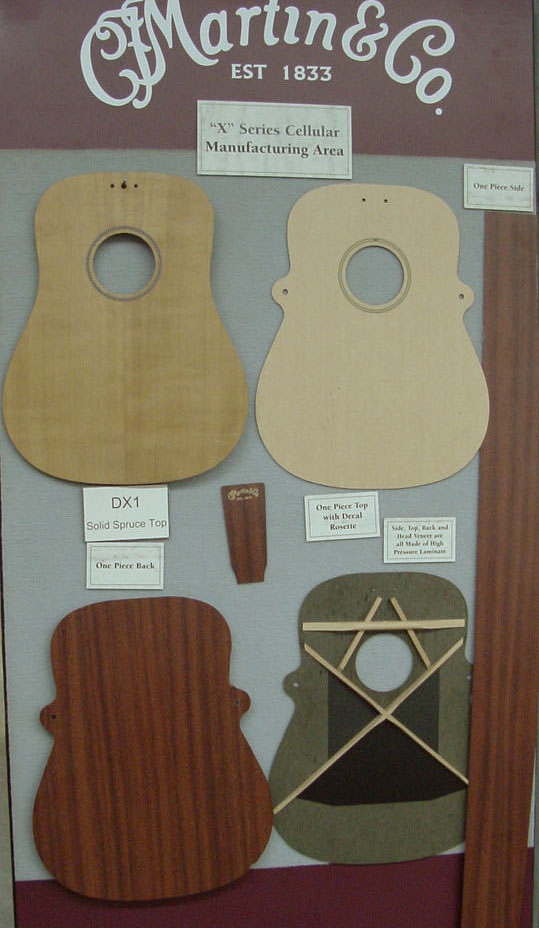
"X" series modular parts.
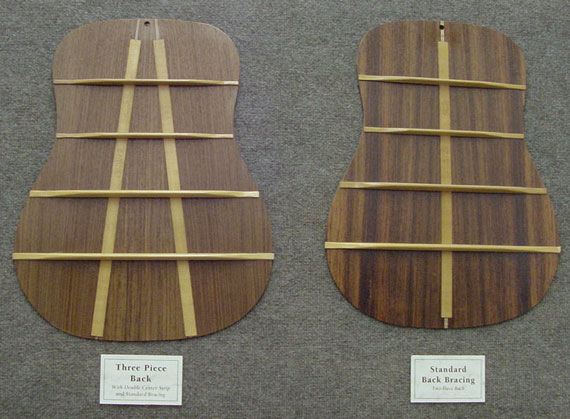
Back bracing styles.
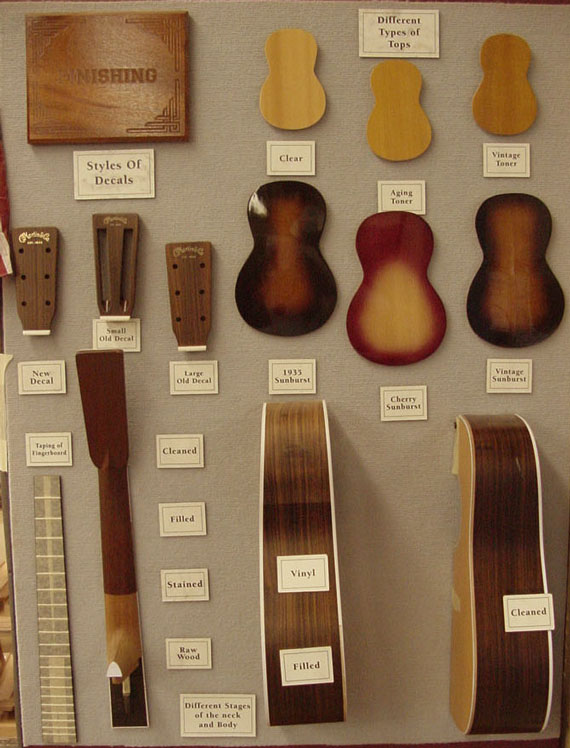
Finishing.
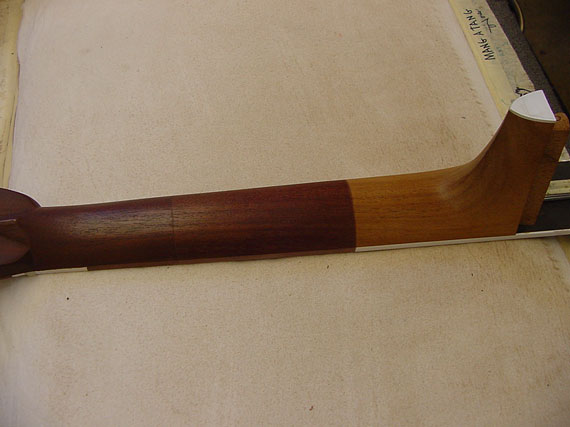
A neck, showing the stages of finishing, including bare wood, stain and filler, and final clear coat
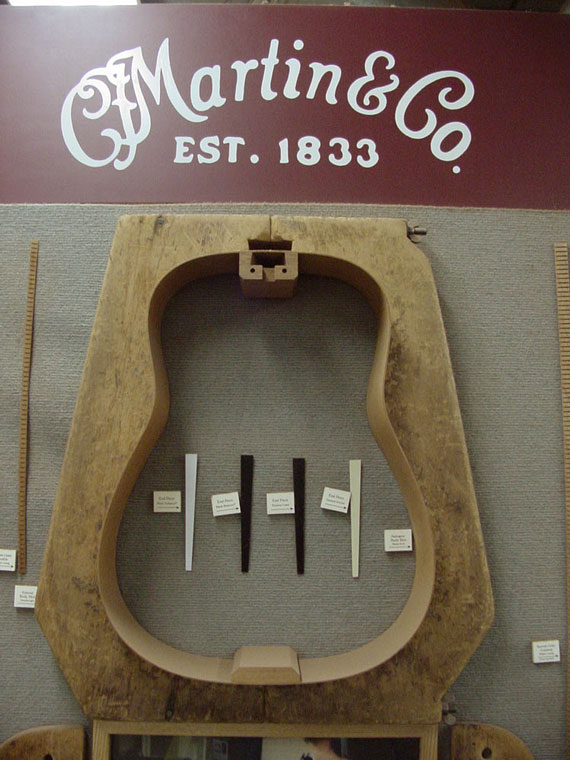
A vintage mold, and some end wedges.
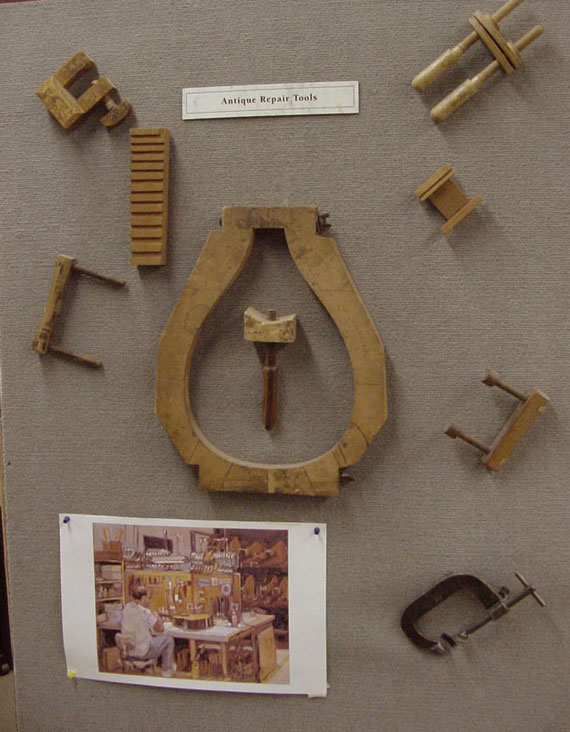
Vintage repair tools.
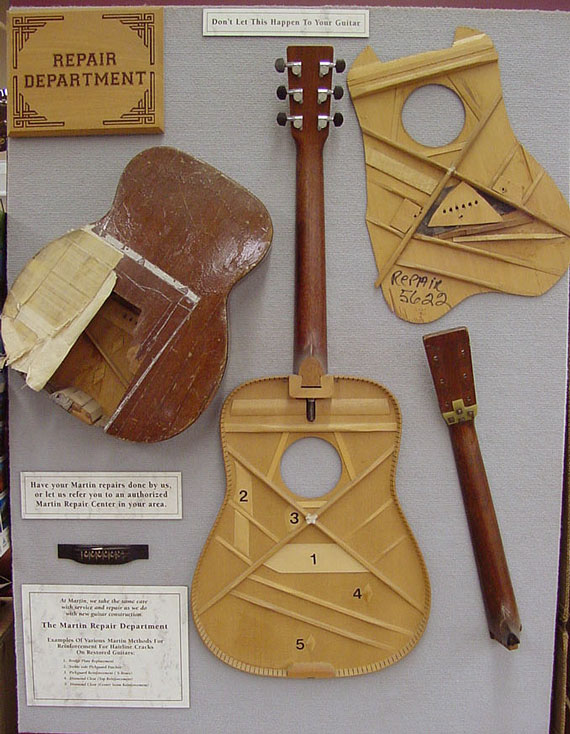
The gallery of repair horrors.