
Gibson's Factory at the Mall
Lutherie in a Fishbowl, or "What's beyond Bed, Bath & Beyond?"
Gibson's Factory at the Mall
Not long ago, Gibson consolidated the Gibson and Flatiron mandolin, Gibson banjo and Dobro resonator guitar operations into a division called "Original Acoustic Instruments." Since then the folks who work in the OAI section have been moved around from one factory location to another. Now they have a home that can only be described as unique in the musical manufacturing industry, if not the entire field of manufacturing.
On the former site of the Opryland Theme Park, there stands a huge indoor shopping mall called Opry Mills. Gibson's OAI division occupies about 30,000 square feet at the end of the complex right next Bed Bath and Beyond. Here, all the instrument manufacturing takes place right in front of the public, in a sharp contrast to Gibson's very closed shops in Nashville and elsewhere.
Part One: Opry Mills - Public Area
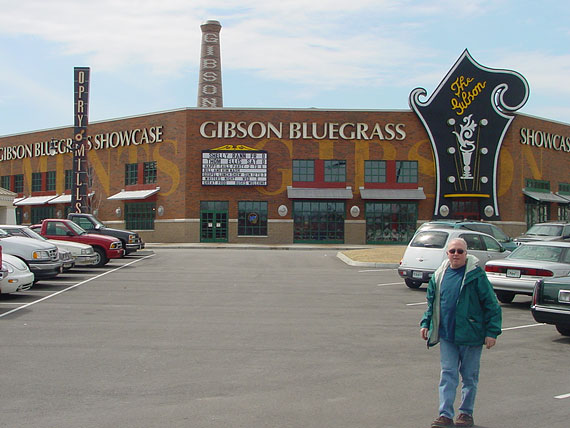
That's Dan Erlewine standing in out beyond the parking lot entrance to the factory. The giant sign is in keeping with the decor on the outside of other businesses here. Notice the big fake smokestack. It's a replica of the stack on Gibson's original building in Kalamazoo, now occupied by the Heritage Guitar Company.
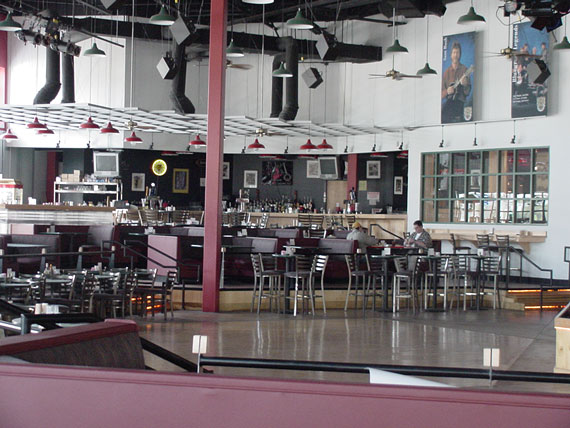
Walking inside, the first thing I saw was about 1,000 square feet of empty space with some display cabinets, which have been standing empty for about a year, waiting someday to become a museum or some such. Gibson's performance venue, closed during the daytime was off to the left. Looks like they have a bar there and could accommodate quite a crowd.

Following around inside to the mall's common area, you can see the interior presentation is even more flashy than the exterior. Not a typical manufacturing plant, that's for sure.

The mall itself has the typical high tech looking shopping experience.

The bass fishing store may be the biggest shop in the mall. Here, I came close to buying a really cool pillow in the shape of a dead fish!
OK, back to Gibson.

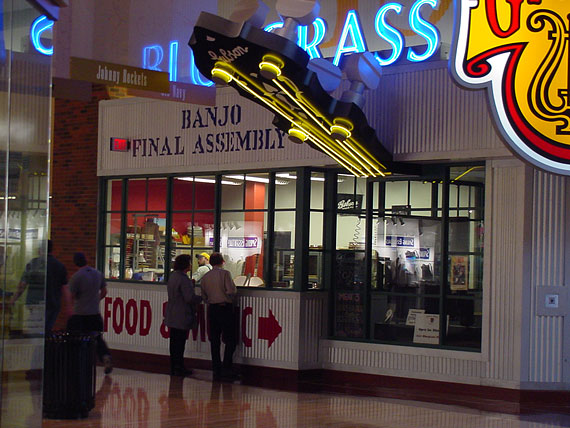
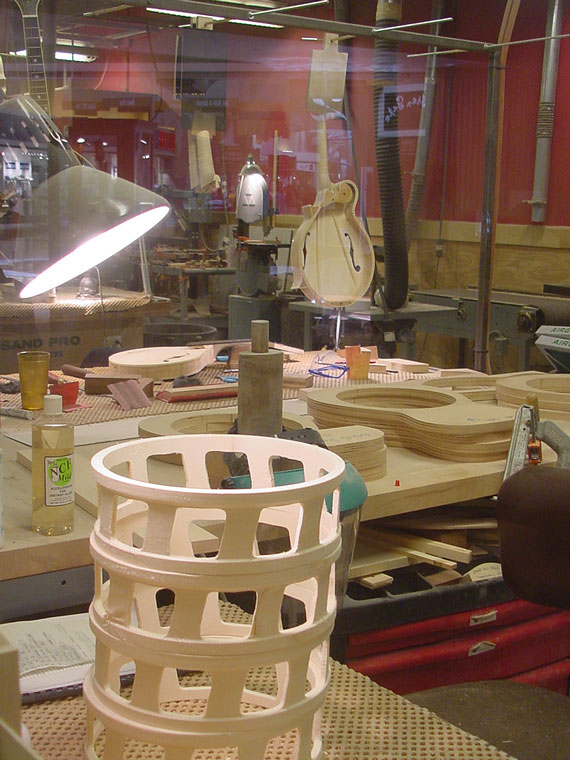
On the mall side, all the manufacturing rooms have full windows so the public can step right up and see what's going on.

Each area is neatly labeled. I wonder what the "danger" is to the public watching the buffing area. Maybe they mean that if you tap on the glass, somebody will drop a Dobro!
Outside the manufacturing rooms, right in the main walkway of the mall, are three "kiosks" fitted with workbenches and tools. Additionally, there's this kiosk fitted with a cash register.
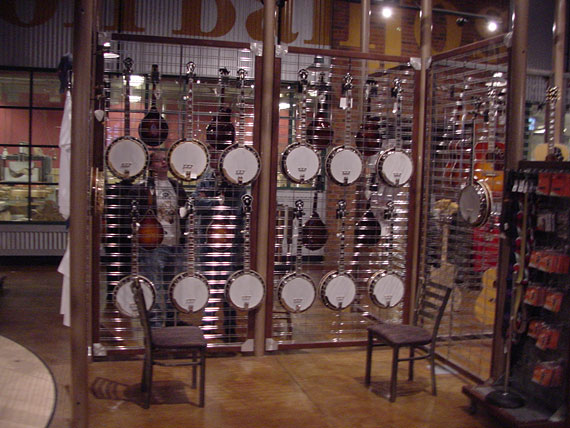
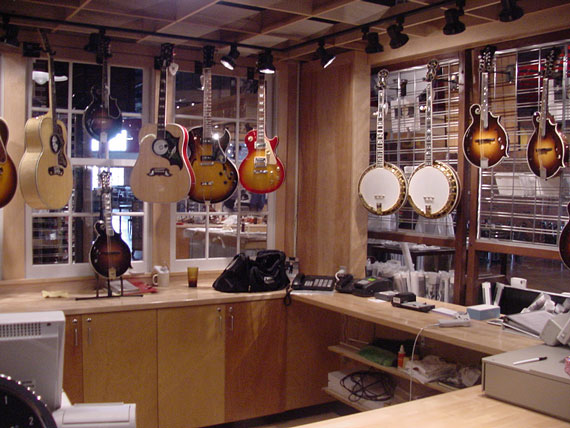
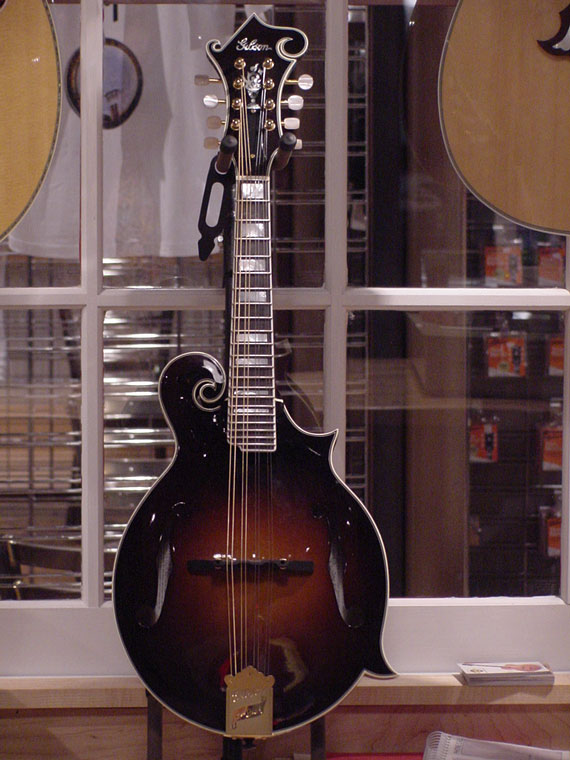
You can play (and buy) every model instrument made here, except for the Master Model F-5 mandolin, which is in extremely limited production.
Here's a Sam Bush model, right on the counter, ready to go.

You can also buy a variety of Gibson imprinted novelty items, T-shirts, and such.

Above each kiosk is a giant replica of one of the instruments made here at Opry Mills.
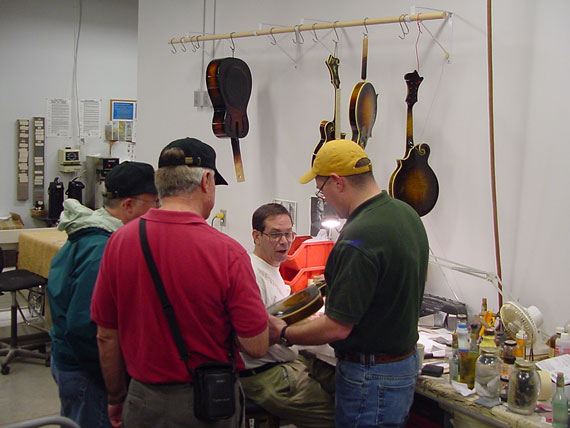
The technicians working in the kiosks are glad to pass the time talking to the public as they work.

They're a friendly lot, and they work with the ease and confidence that only comes from experience
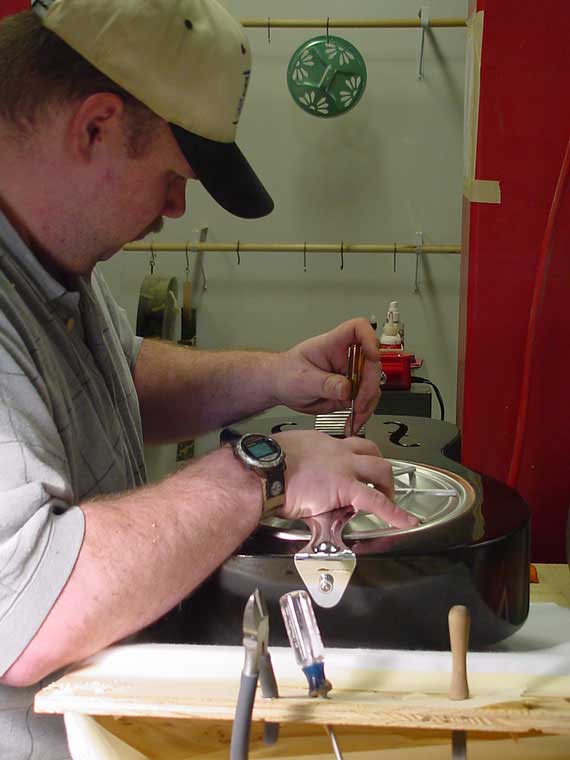
They do the final assembly and setup right here. Occasionally, they have to slap the hand of a picker who reaches in too far to touch an instrument in progress. . .
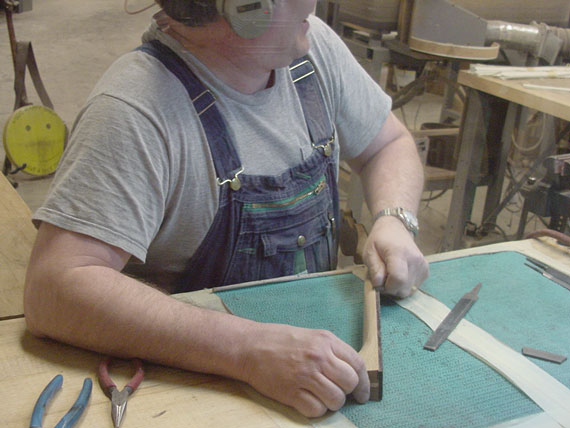
Skilled hand work, not elaborate fixtures, are the tools of the trade here.
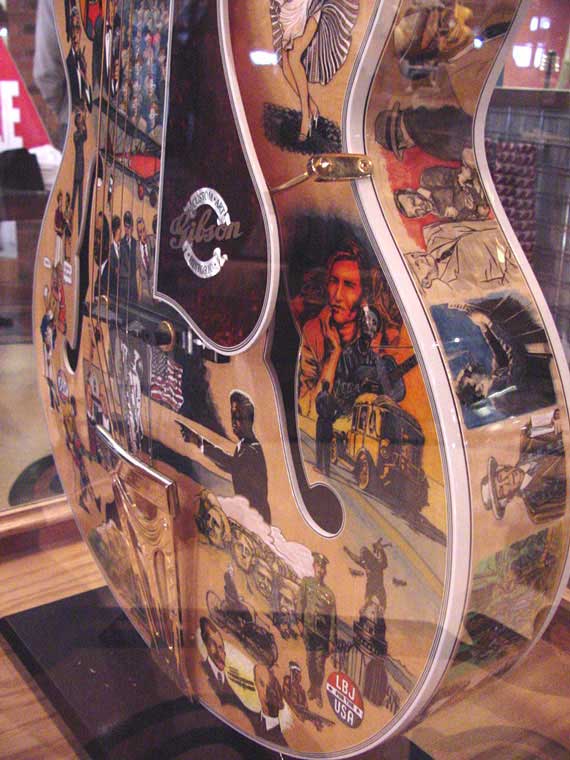
In a few display cases there are examples of some of the wild custom work that has been a hallmark of Gibson's style for 100 years.
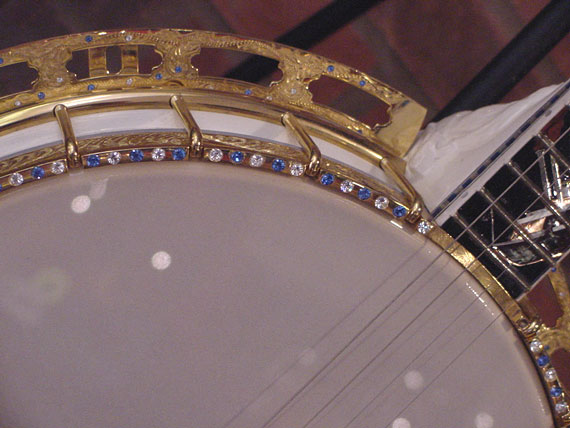
Fancy carving, pearl, gold, engraving, exotic woods - how can that be enough when there's room for some rhinestones?
Just look at this banjo resonator.
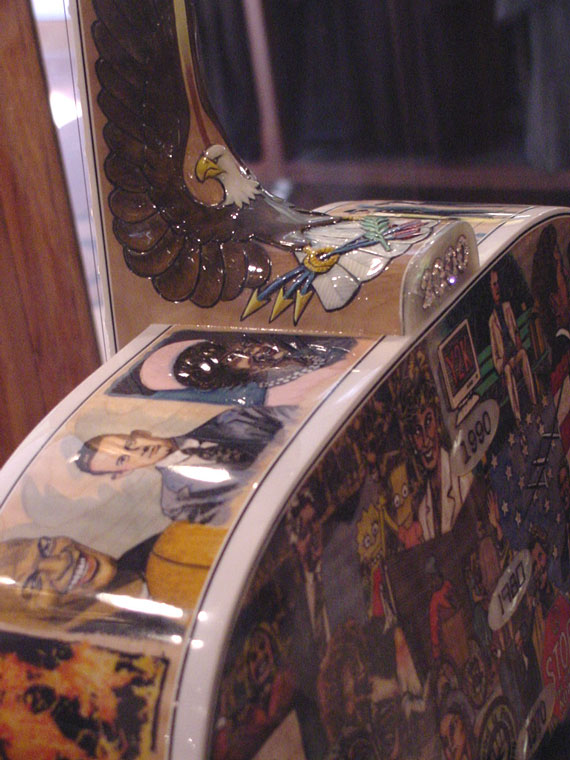
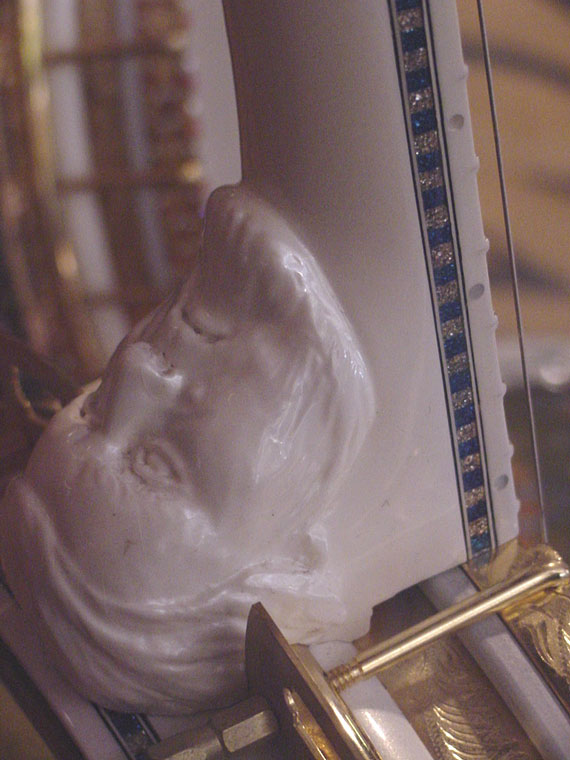
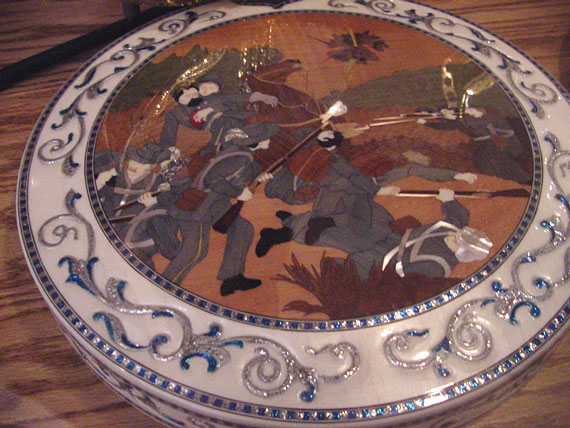
I couldn't bring myself to photograph the Jesus Christ celebrity model But just look at this fancy number.
Mighty cool illustrations and all.
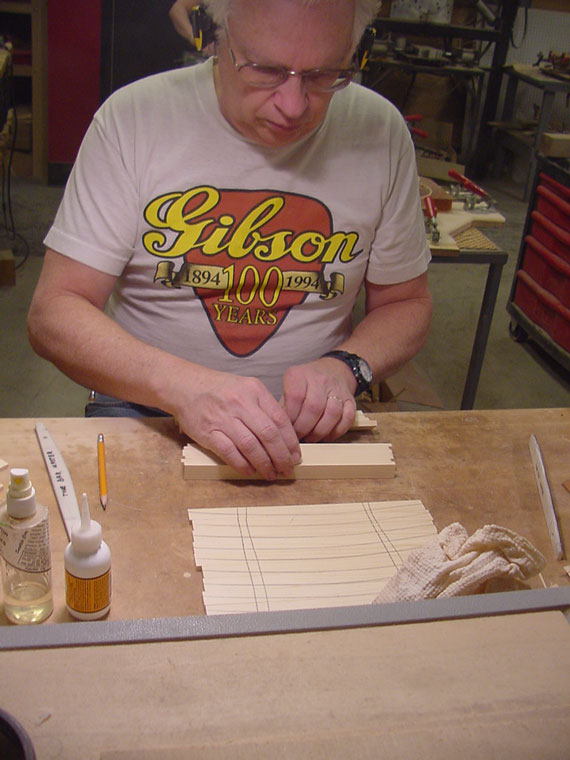
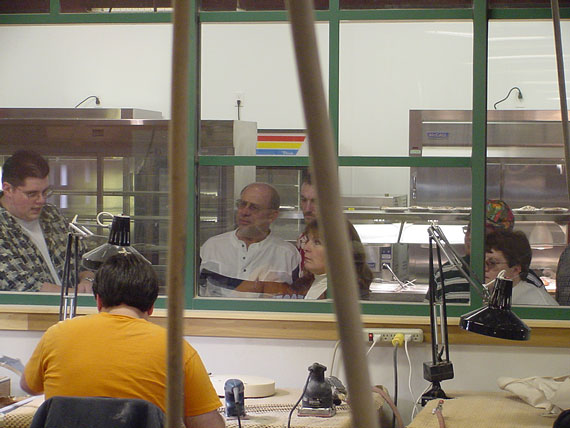
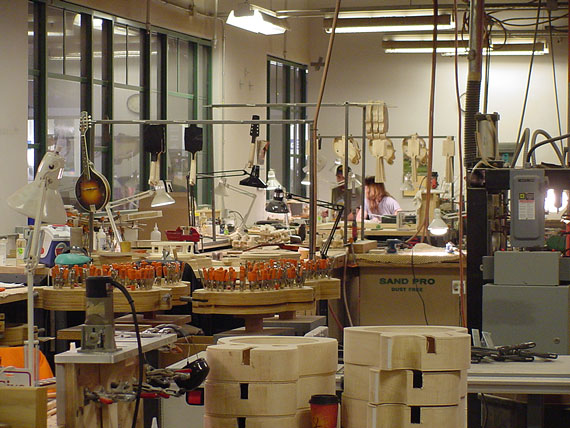
I took this next bunch of photos right through the glass, just as so many tourists do as they pass by. He's sorting top braces for mandolins, by the way.
Believe it or not, all areas of the shop are completely visible to the public.
A shot of the Dobro area and a stack of resonator "sound wells," the structures that support the vibrating resonator cone.
The workers tell me that they are never distracted by the public looking in.
Well, hardly ever.
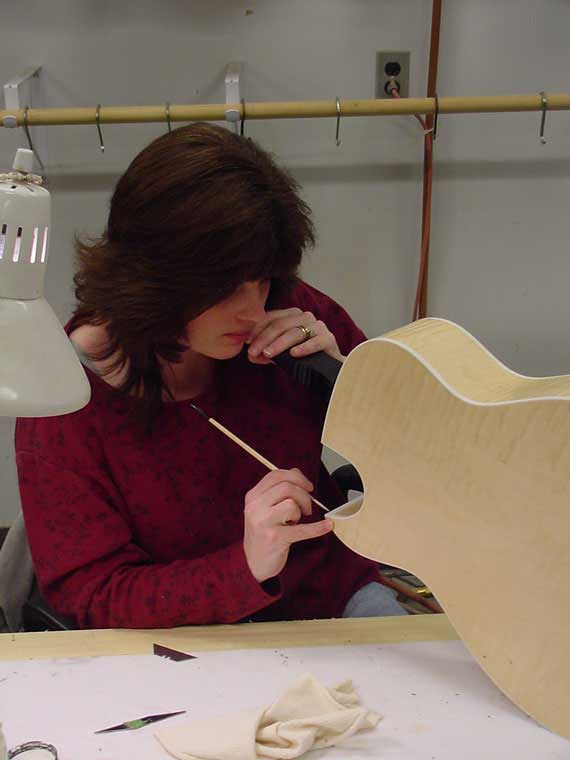
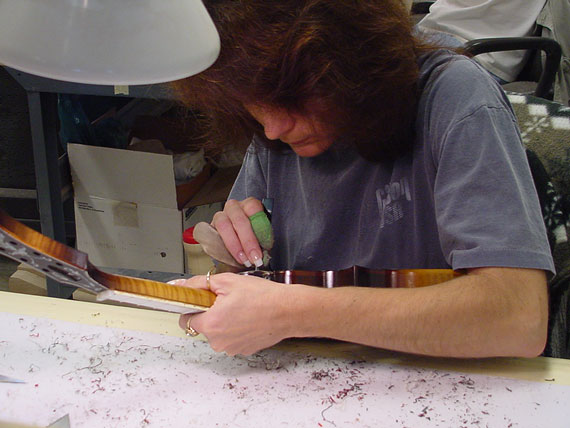
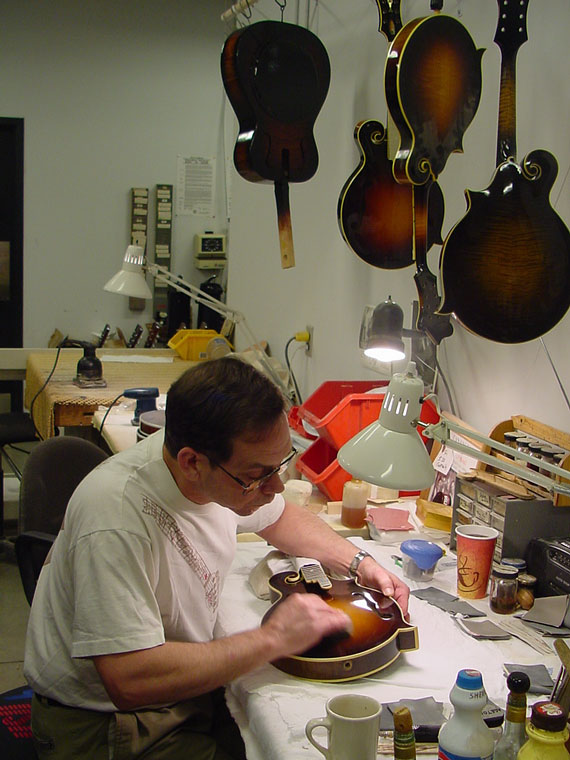
A mandolin body gets a bit of detail work.
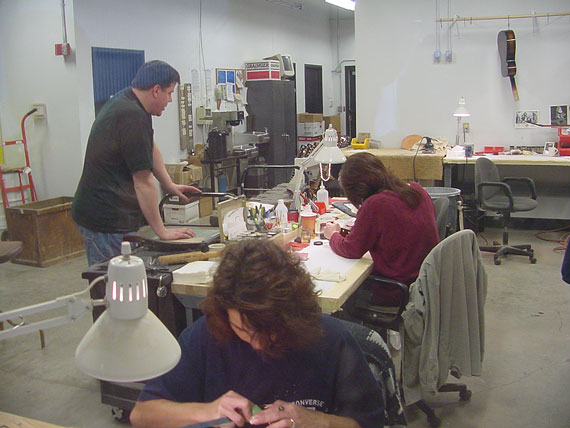
These are busy people with lots of work to do.
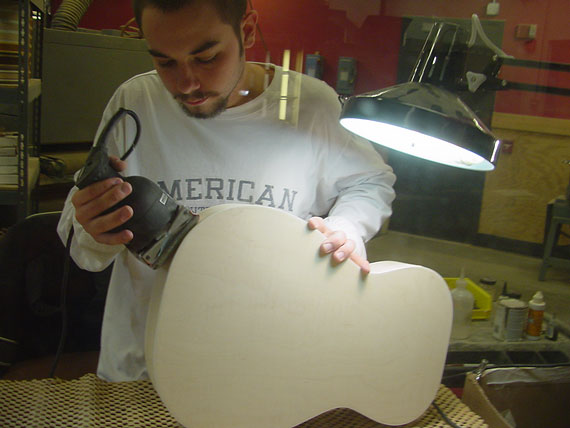
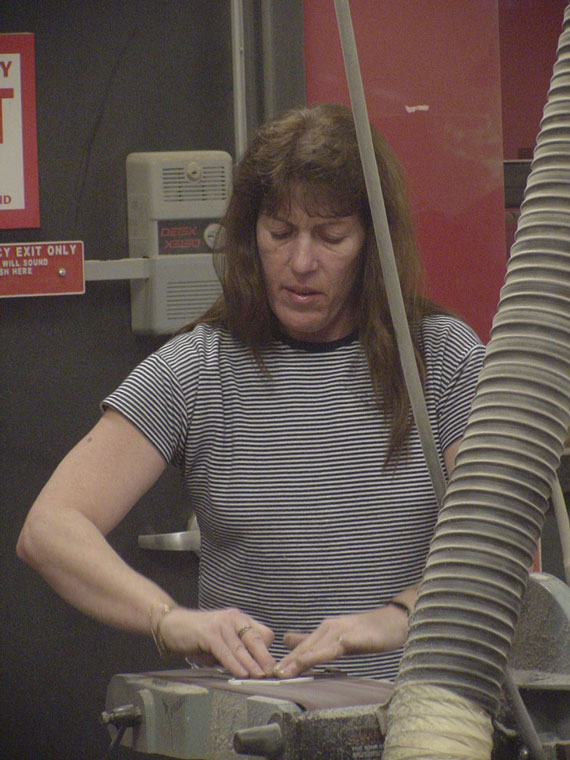
Some body sanding.
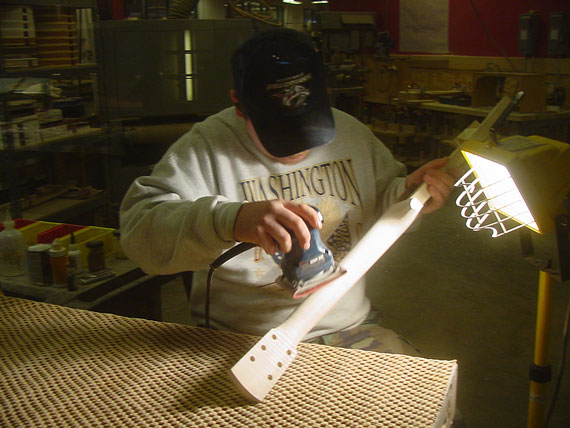
Final sanding a Dobro neck.
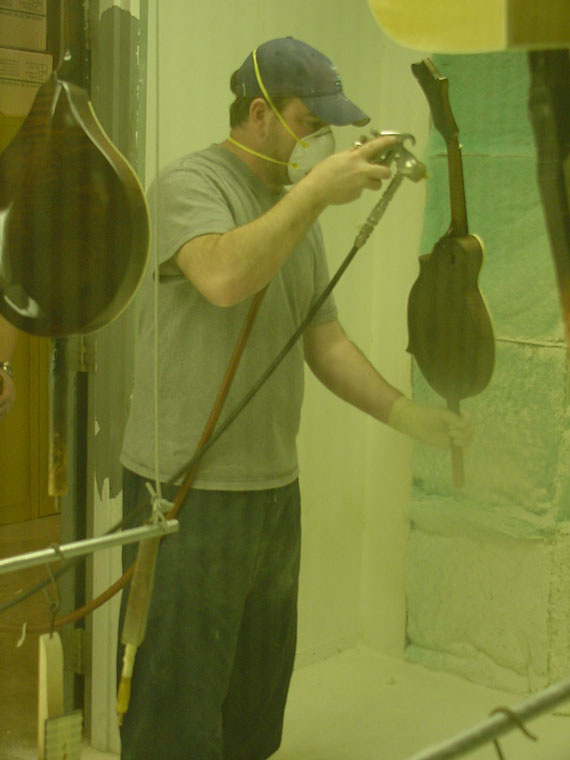
Even the spray booths have full glass walls so you can watch all the action. The glass is cloudy because of overspray, of course.
A batch drying.
The buffing area is spacious so there's little chance of workers bumping each other.
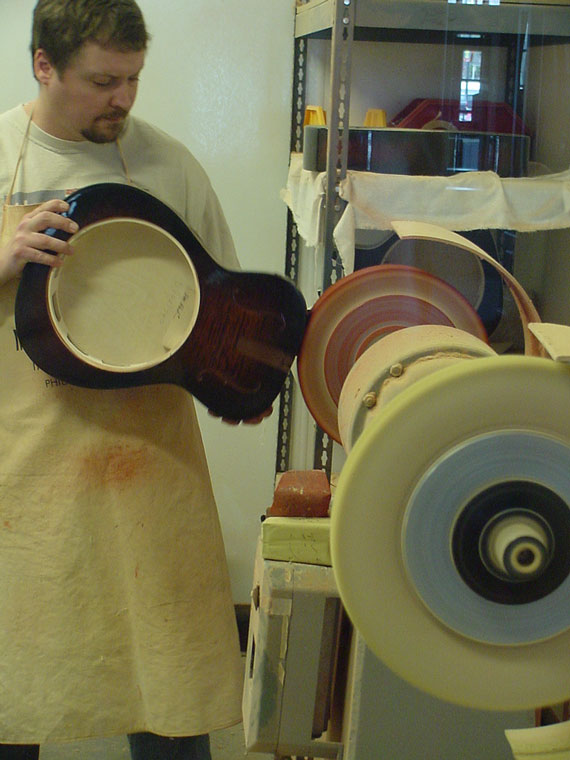
A wrong turn would send this Dobro body flying!
After the colored finish is applied, the binding gets scraped to reveal the contrast in color.
A little detail work before this banjo neck goes "into finish."
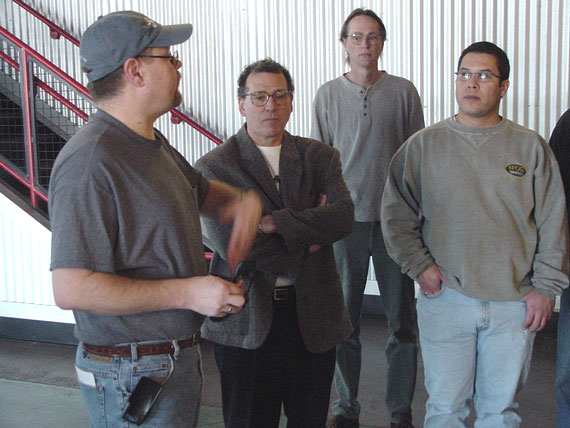
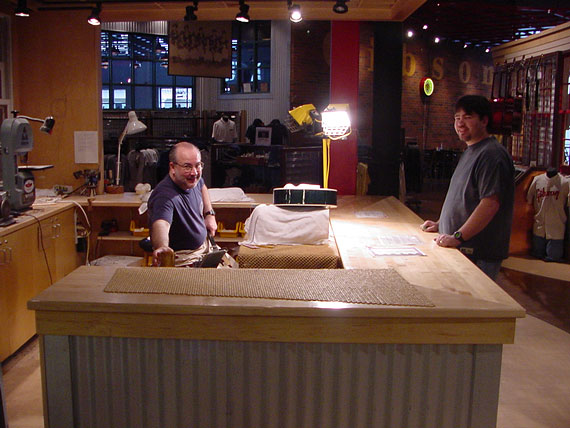
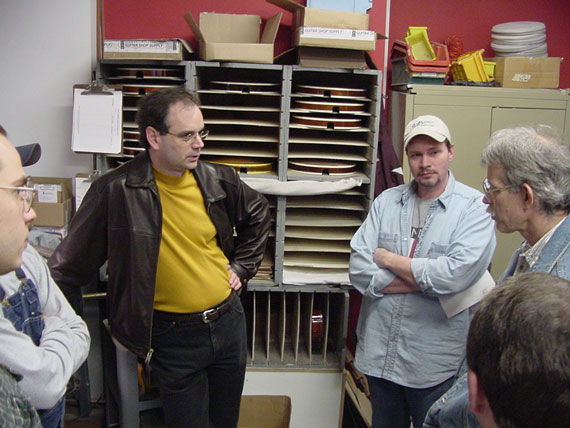
The man on the left is Charlie Derrington, head of R&D here. He met our group by the employee entrance to take us through the inside where we could really get in on the action.
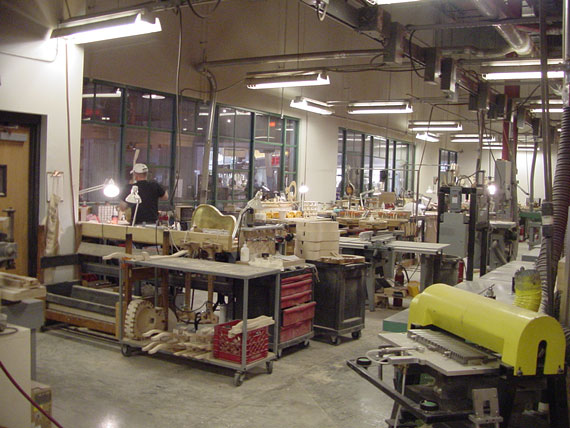
Part Two: Inside the Factory - Banjo & Dobro Production
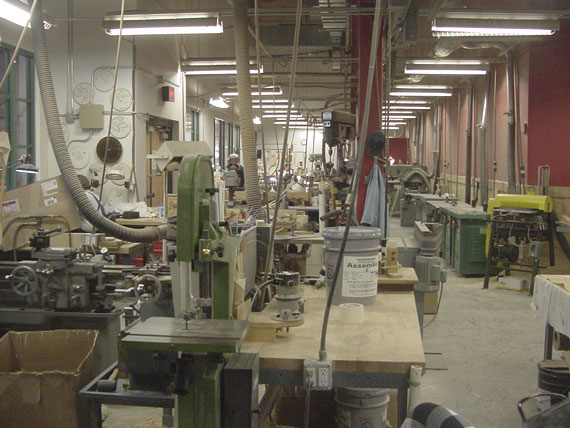
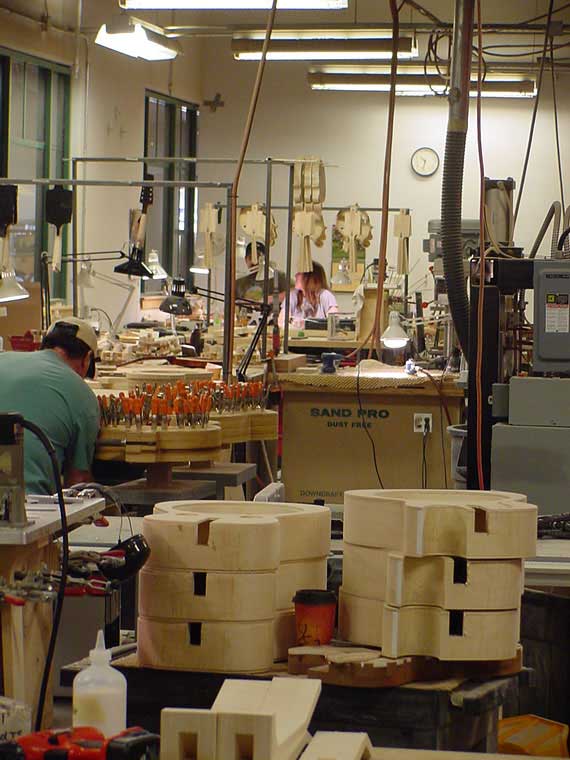
On the inside, this factory is much like you'd expect. There's a bit of dust, noise, and the usual clutter of instruments in progress, parts, tools, etc.
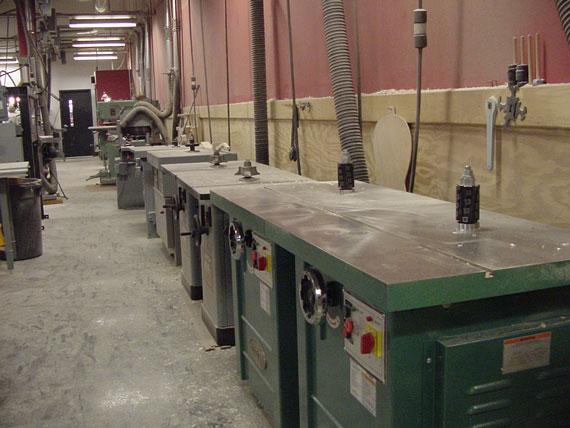
I was a bit surprised to see heavy equipment like these big shapers here. They are on the far side of the room, away from the windows. These tools are clearly the most dangerous in the shop, and the operator works facing away from the public.
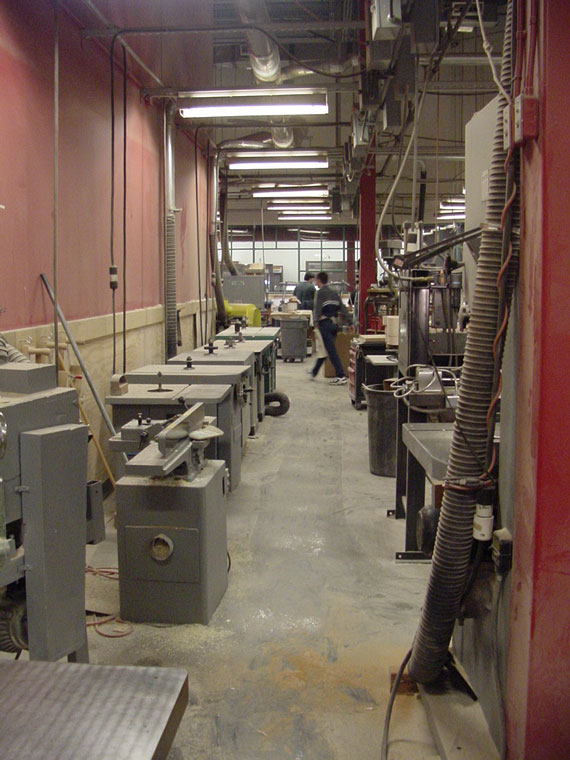
All the shapers are lined up against the far wall.
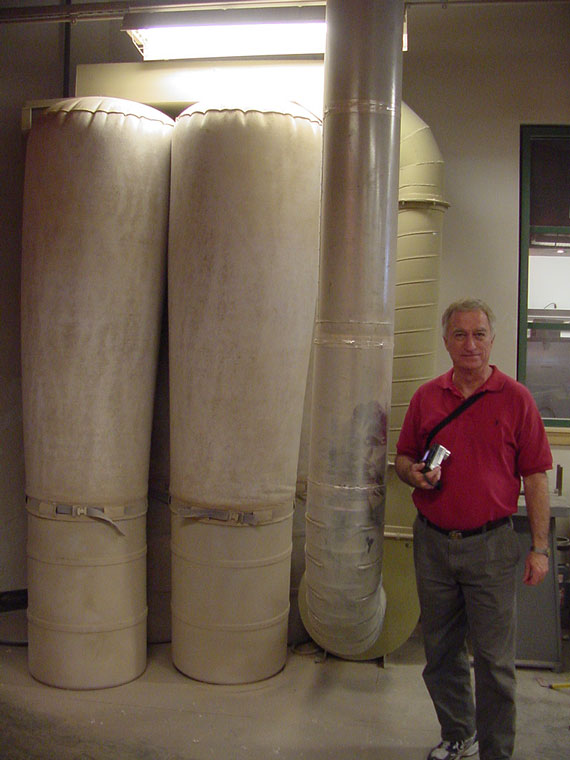
At one end of the big machine room, there's a large dust collector.
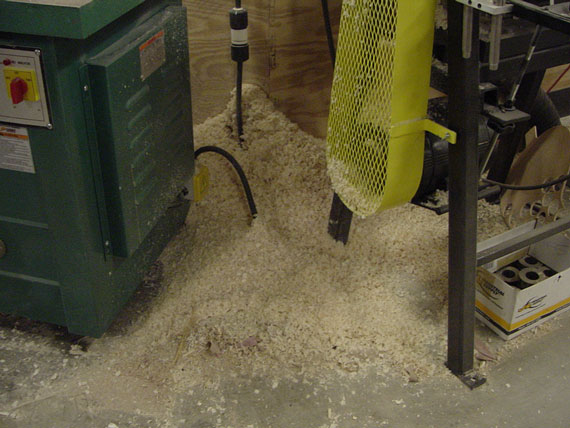
Not all of the big tools are connected to the dust collection system. . .
A bunch of mandolin bodies in progress.
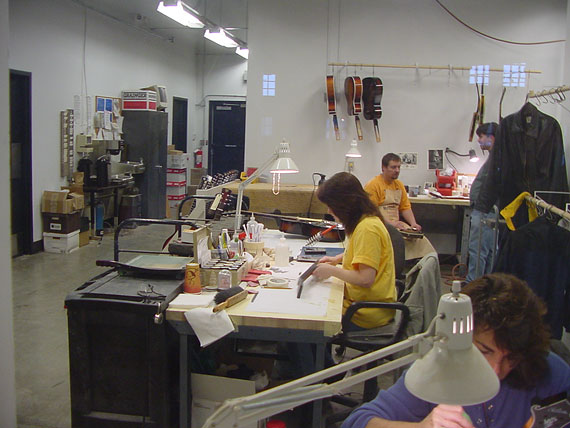
Final sanding opposite the cafeteria line at lunch time. . .
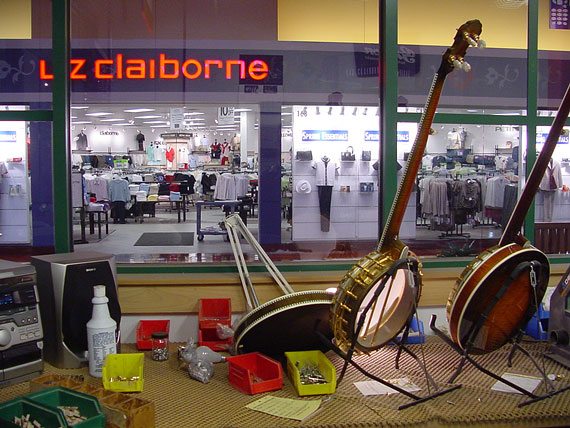
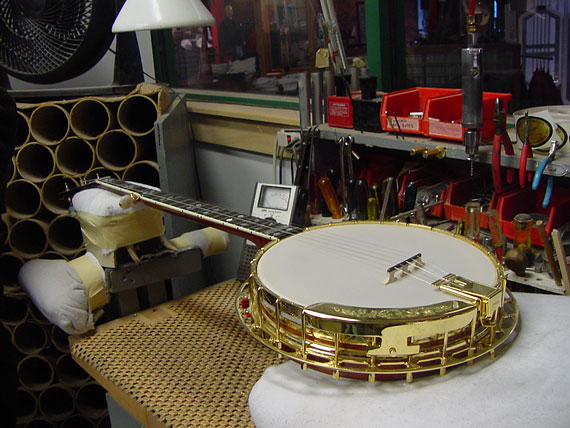
The view out the window from the banjo setup area.
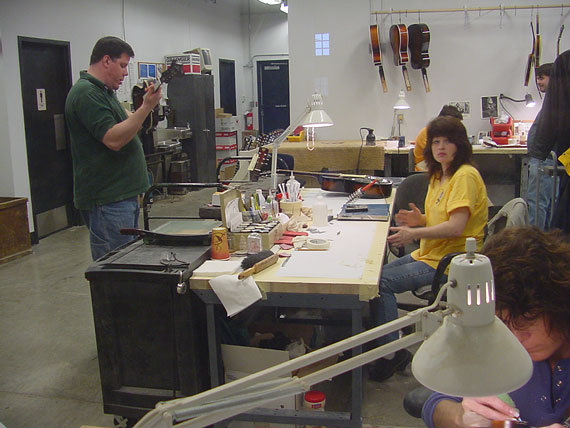
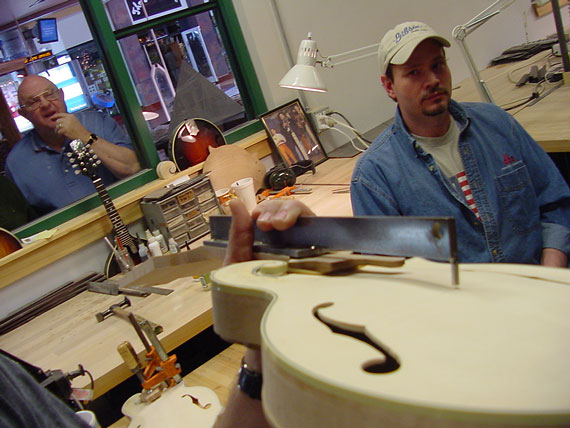
Jay Hostetler (in yellow) and Don MacRostie (far right), both from Stewart MacDonald, discuss the banjo parts they supply to Gibson. This was a business trip for all of us, you know.
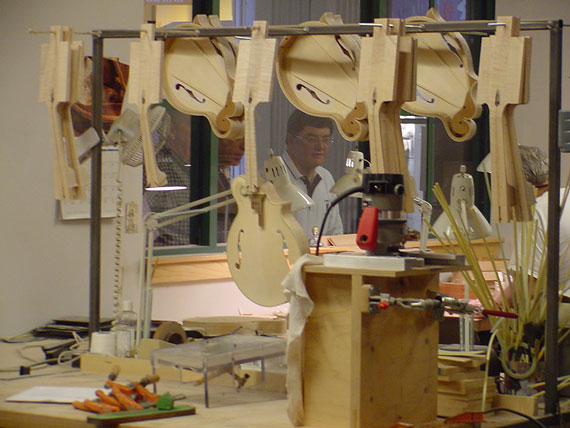
Everywhere you turn in this place, there are curious onlookers peering in through the windows.
The Dobro assembly area.
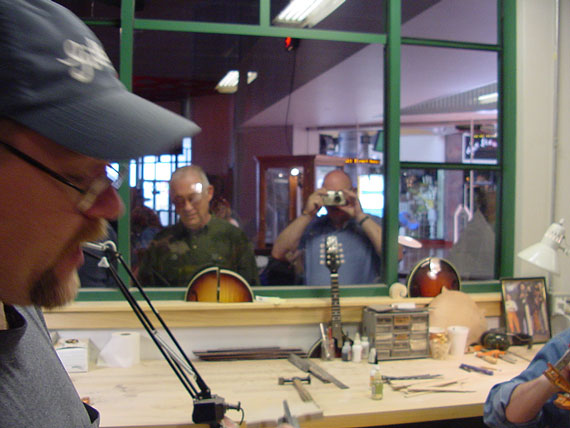
More folks like me, taking photos. . .
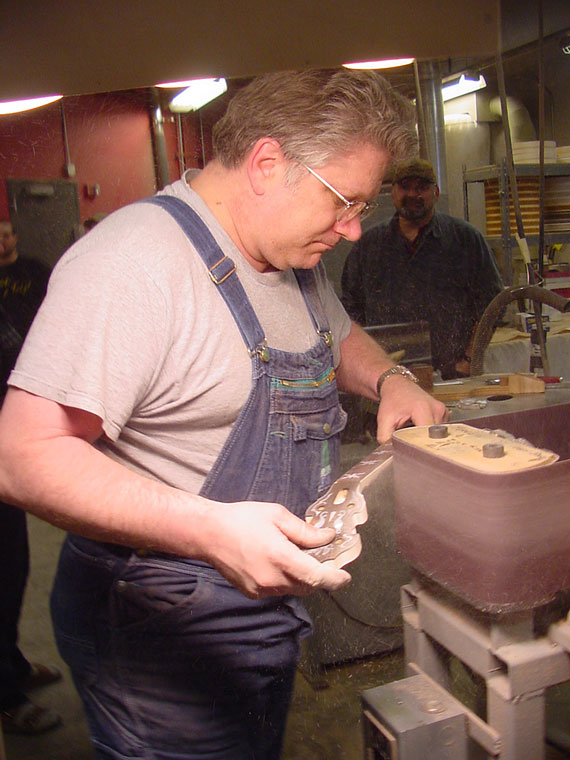
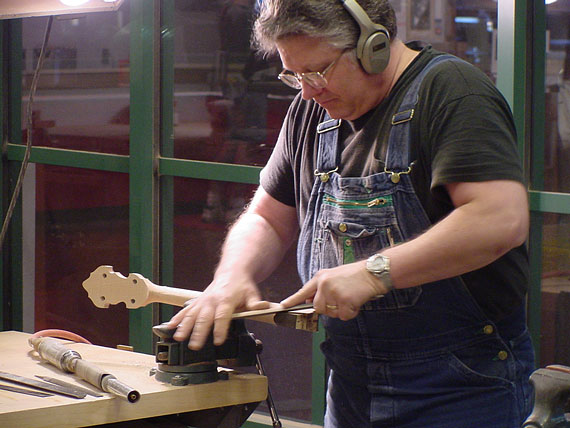
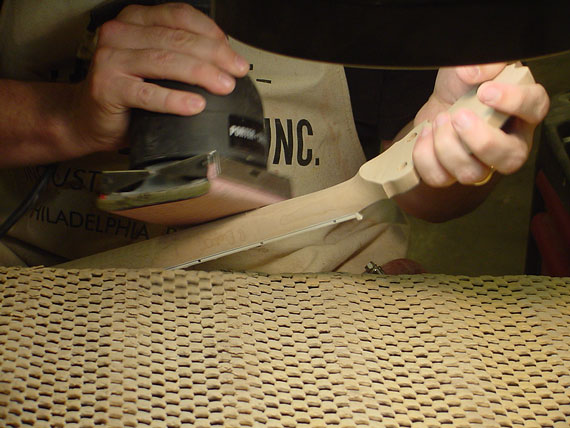
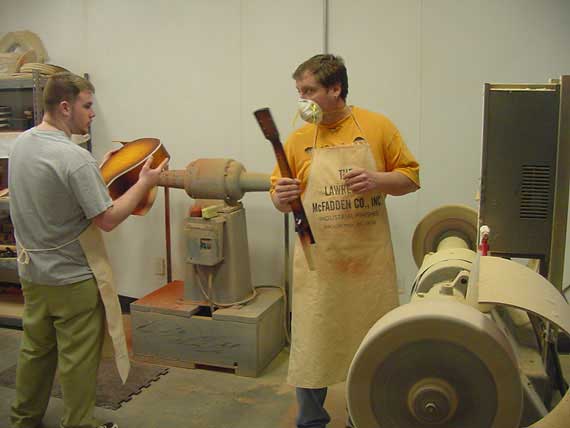
This man has been shaping Gibson banjo necks for about 15 years.
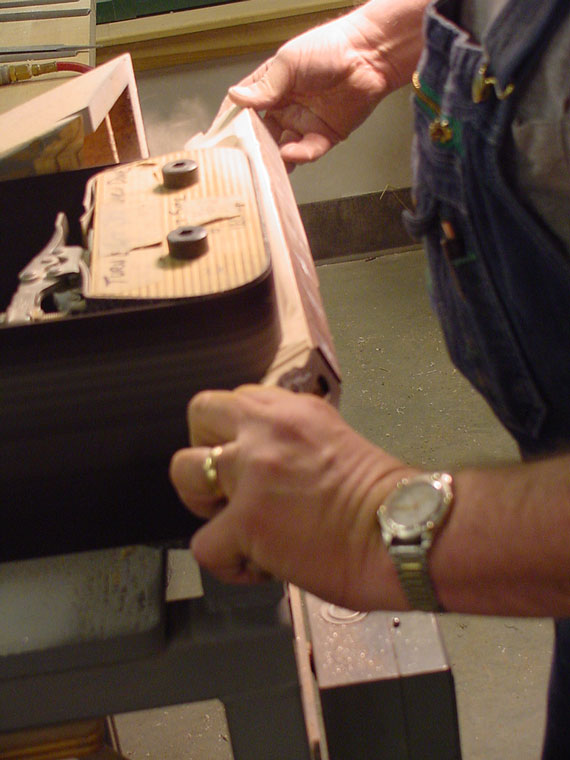
Armed with this big "dead head" belt sander, he can really plow through the wood.
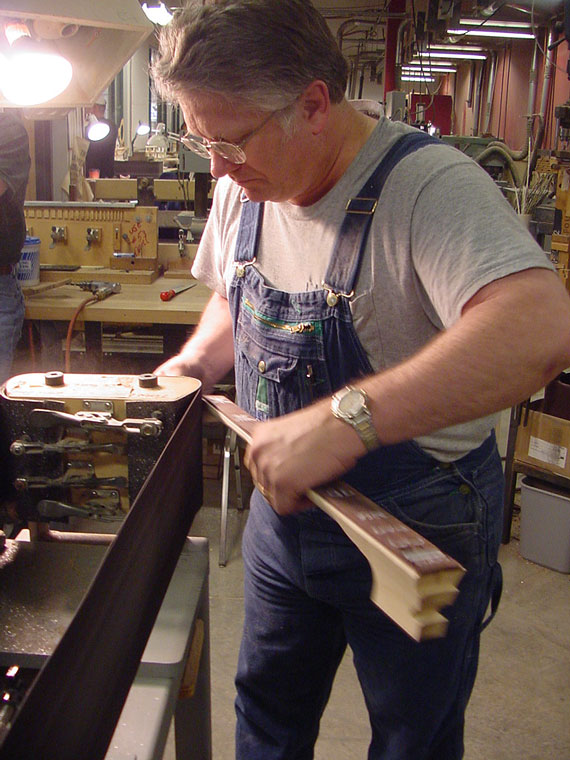
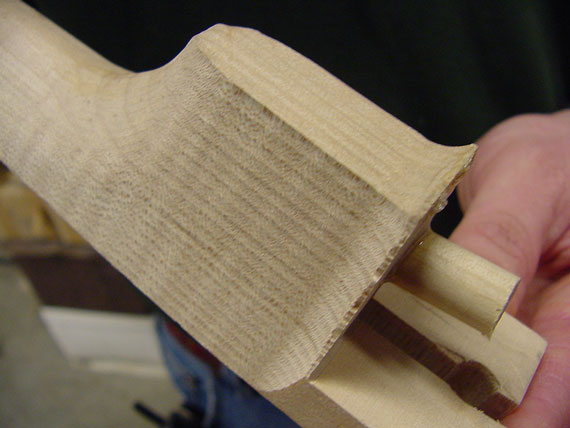
After working the shaft of the neck to shape, he rounds the areas at the heel and peghead volute.
A bit of cleanup with a hand file.
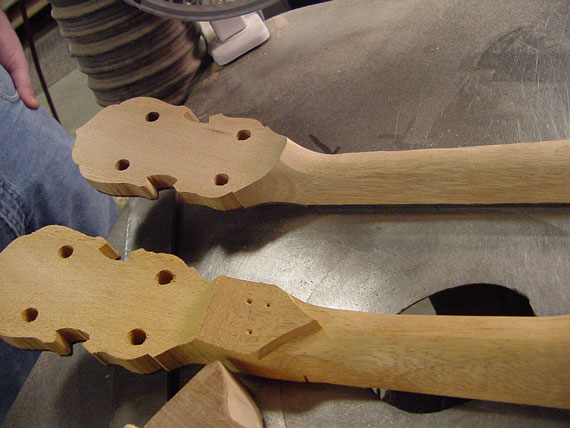
It took him about 5 minutes to go from the machined part in the foreground to the final shaped neck above. There's a lot of work left to do, but the major shaping is neat and clean.

This shop made drum sander is used for adjusting the fit of the banjo neck to the shell.
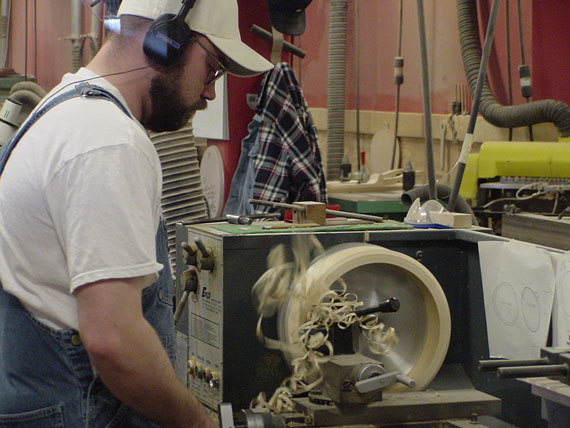
Speaking of shells, they're turned right here on this big lathe.
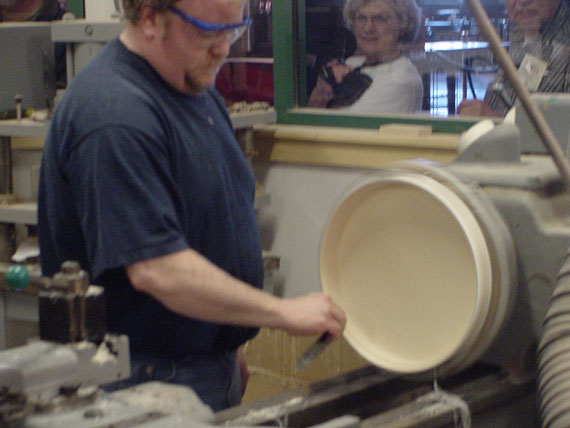
Same for resonators.
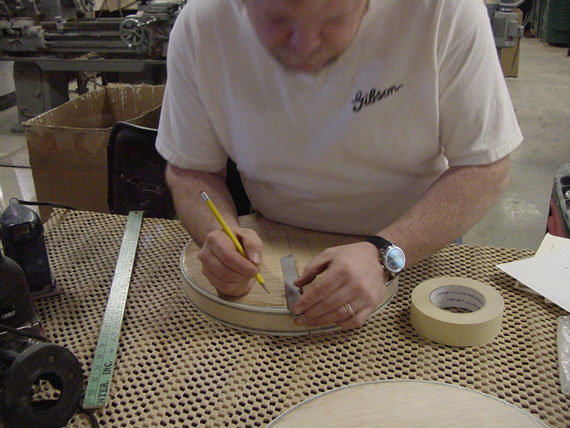
I'm not sure, but I think he's aligning the cutout for the neck heel.
Final sanding with a "jitterbug" orbital sander.
Detail sanding the inside curves.
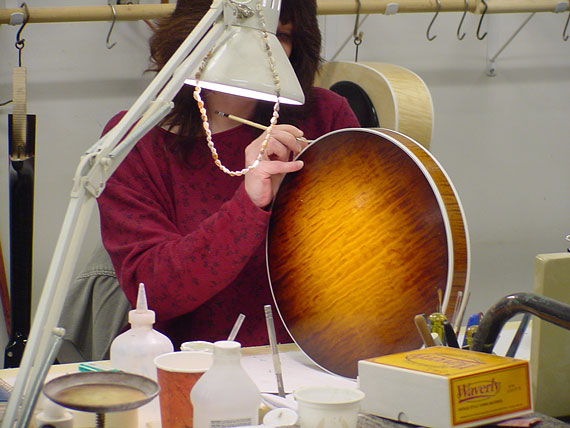
A banjo resonator gets the finishing touches.
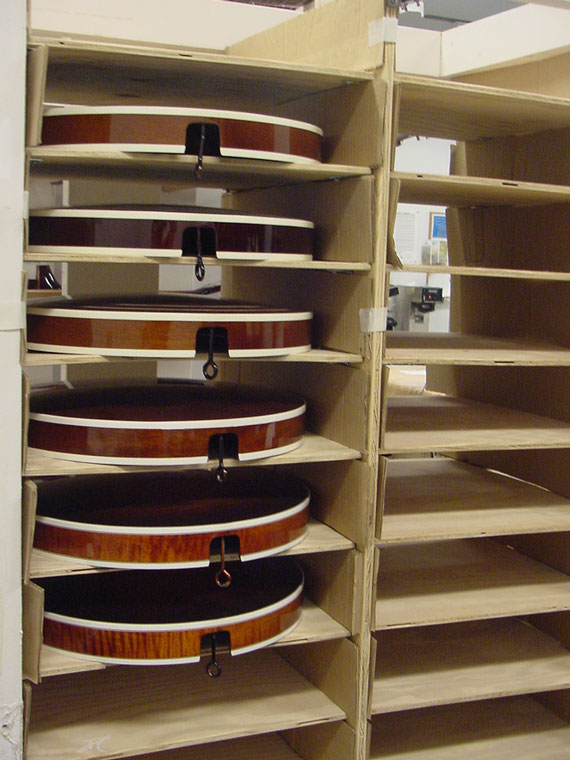
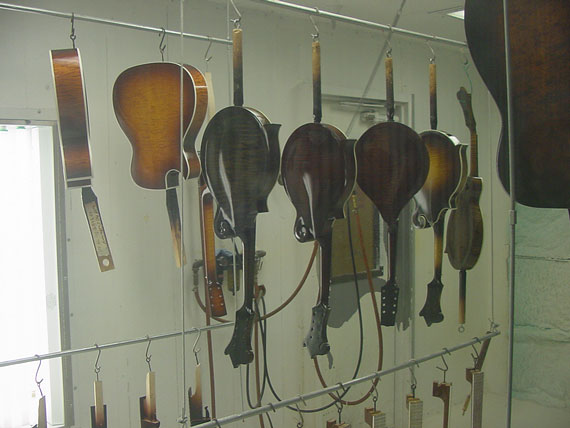
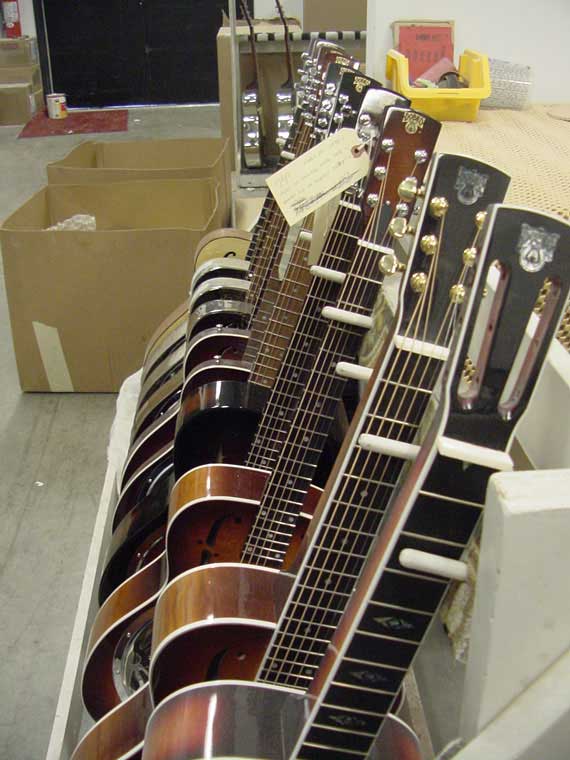
In the banjo assembly area, finished resonators wait to be attached to RB-3, Earl Scruggs, RB-250, and other models.
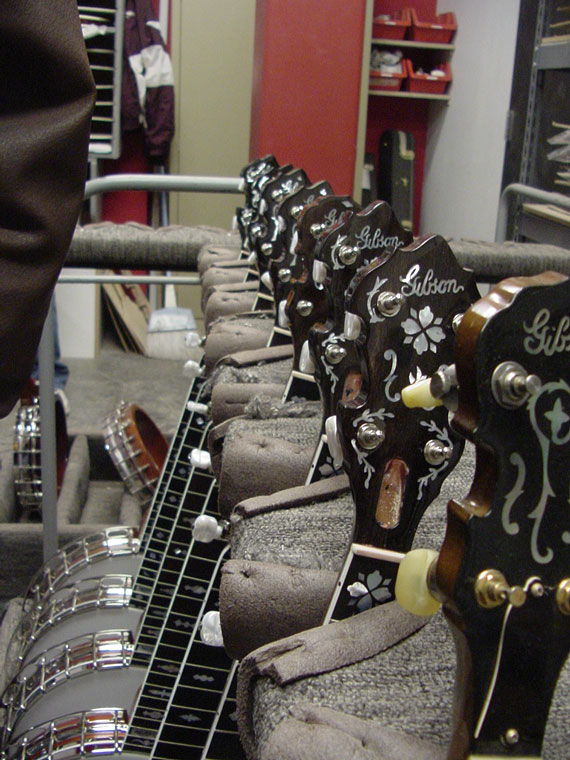
And, here are the instruments in question.
Check out this Earl Scruggs Deluxe, with its mother-of-pearl binding. (The specks are dust from all the woodwork going on nearby.)
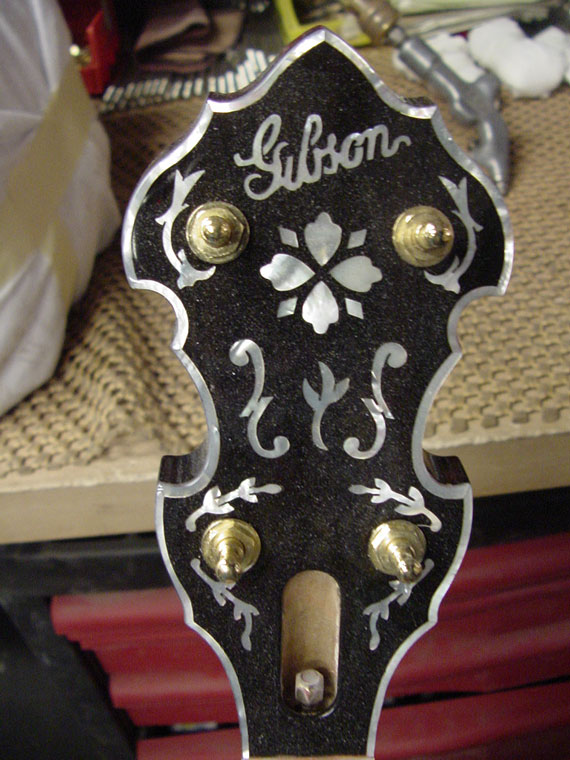
A gold plated "Granada" on the bench.
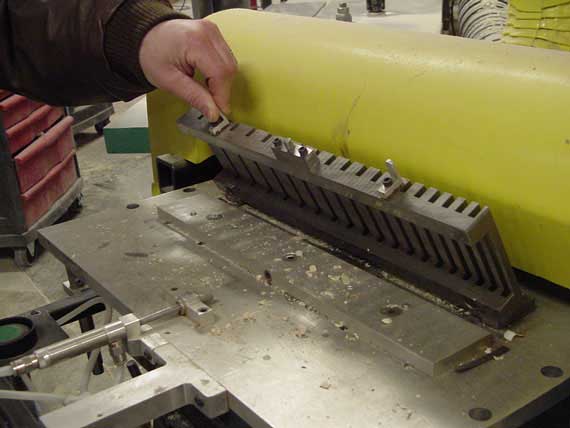
This gang saw receives a strip of basswood, and the little carrier is closed
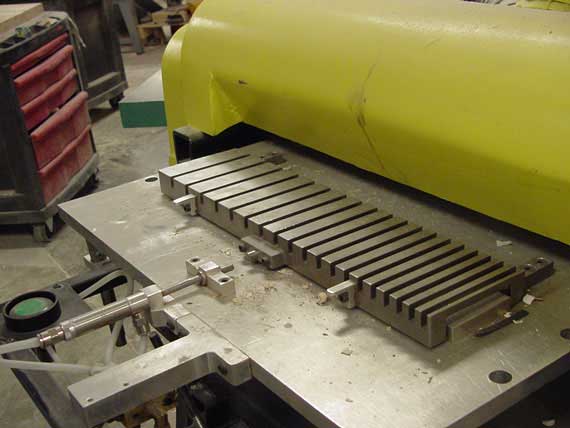
Once closed, the carrier is shoved under the saw blades, neatly cutting the kerfed lining for Dobro guitars.
The lining is glued on while the sides are in the mold, mounted on this free standing work station.
Several stations allow for a good flow of work.
Backs and tops are glued on right in the same molds.
A Dobro neck is cut to shape on one of the big shapers along the back wall.
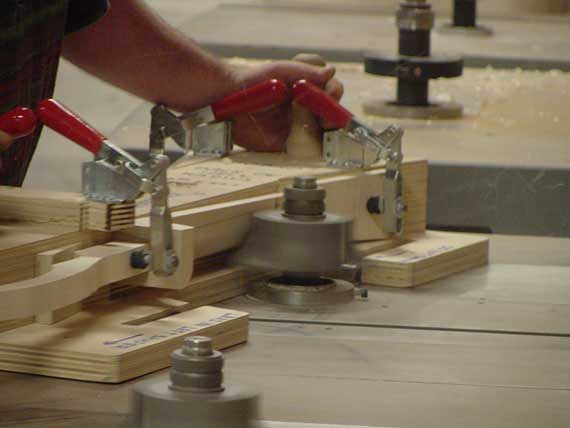
Nearby, a Dobro sound well is shaped in a router fixture.
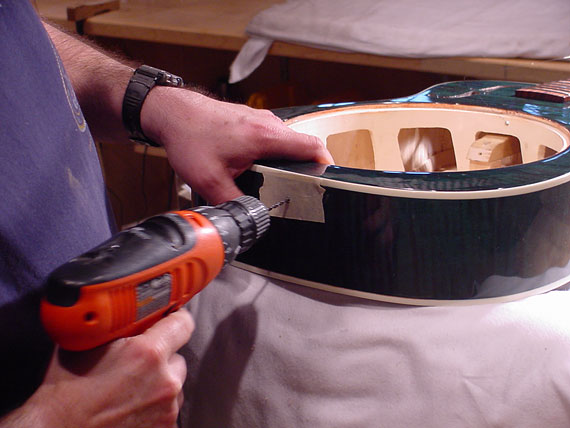
Binding the body.
Gibson uses that same heavy brown masking tape I've seen at other factories. It's stronger and holds better than the usual cheap kind.
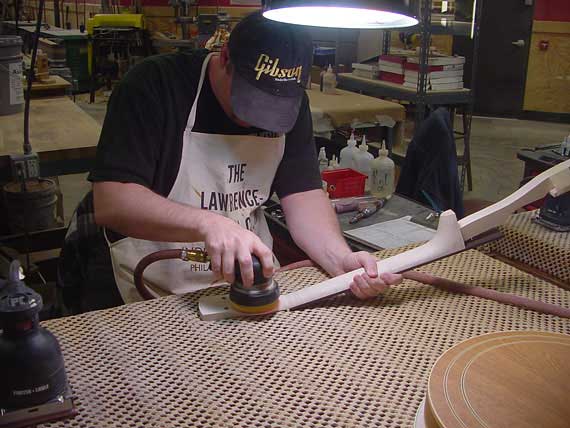
Final sanding a Dobro neck.
Stacks of Dobro bodies waiting to have necks fitted.
More detail work.
This is a metal body blues model with an interesting paint job.
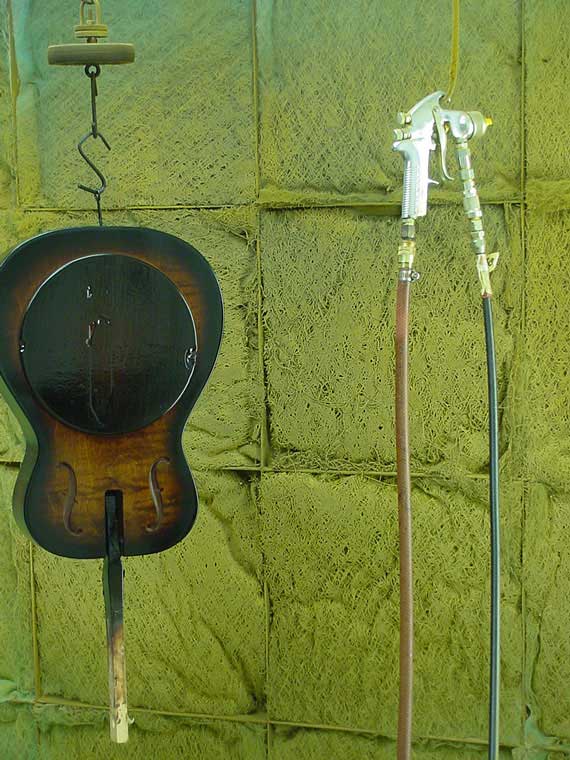
In the spray booth for that famous shaded lacquer finish.
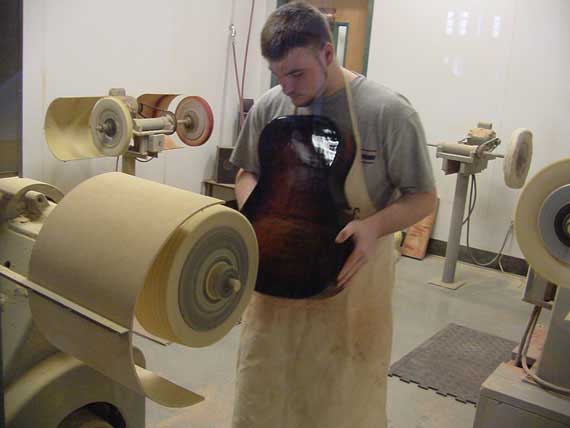
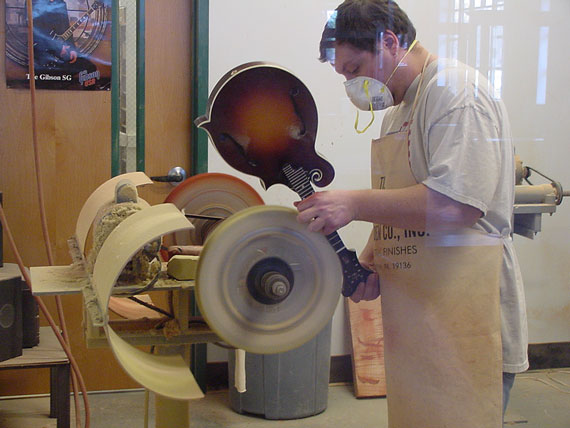
Buffing.
And more buffing.
Final assembly after finishing.
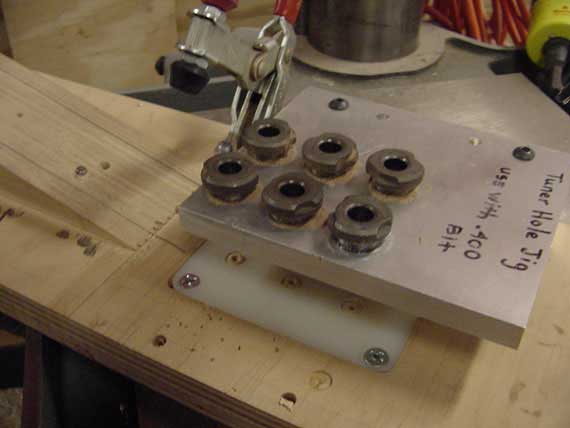
This is the peghead drill jig that's used to align tuner holes
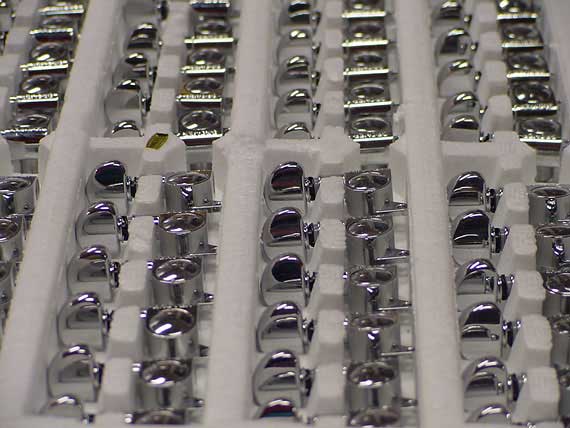
Tuners in bulk pack.
Setup.
A rack of "product."
Part Three:
Mandolin Production - Master Model F-5
I don't know about you, but I'm here to see how the famous F-5 mandolins are made. In particular, Charlie wants to show off his work on the replica 1922-24 Lloyd Loar model F-5, the "F-5 Master Model."
Tops and backs come over from the big facility downtown, where CNC equipment does the rough carving.
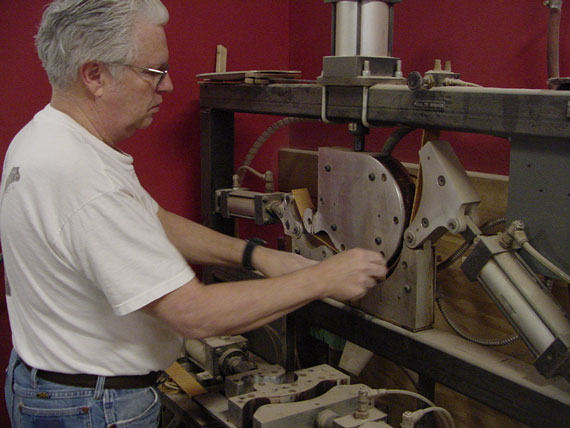
Here's a Derrington designed machine for bending the complex side of the F-5. The heavy aluminum parts are heated electrically, and air cylinders apply gentle pressure to form the sides, which have first been dunked in water for about 10 minutes.
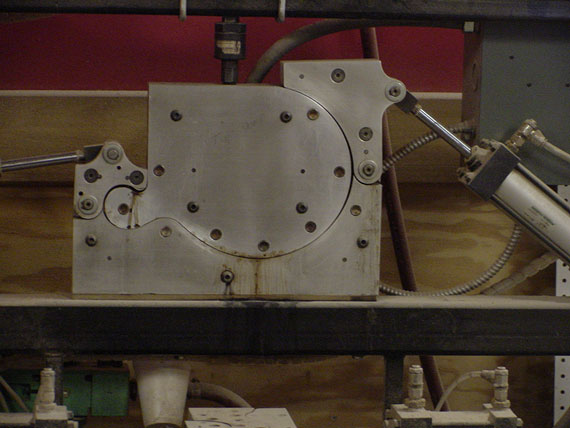
It's quite a trip to watch this thing do its job.
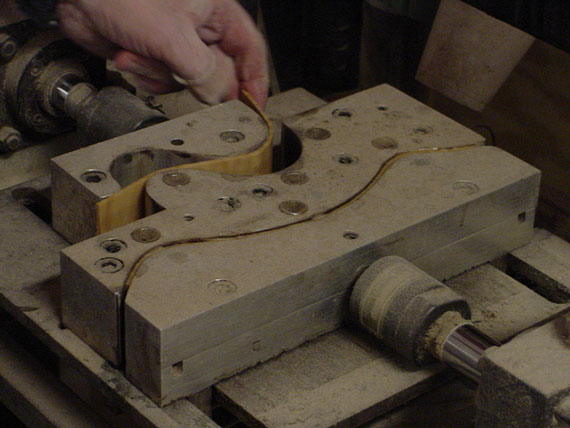
The simpler bends are done in a similar fashion.
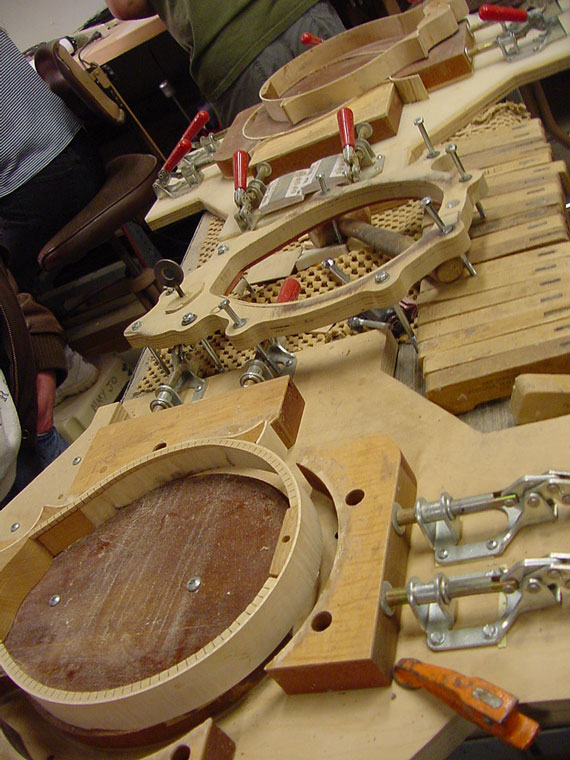
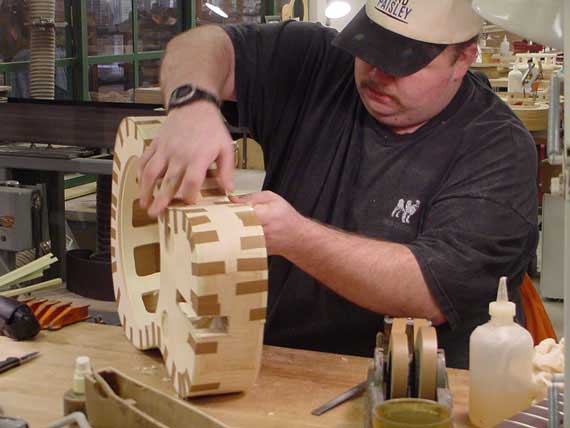
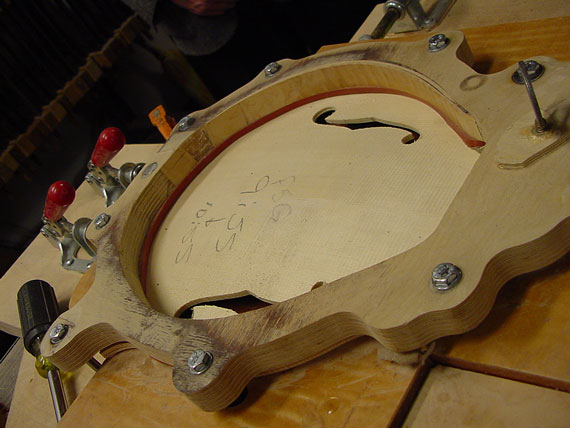
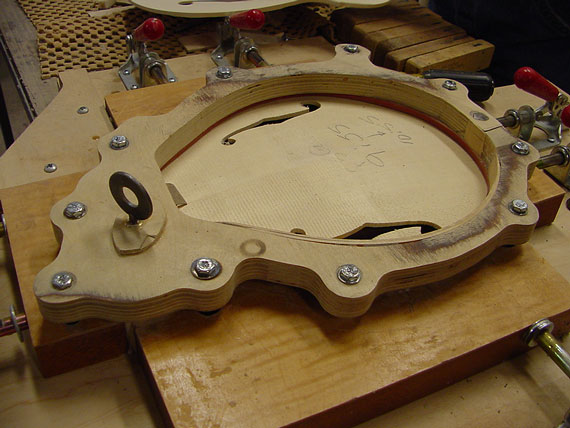
Over in the assembly area, the sides go into molds where they are held as the various components are glued in place.
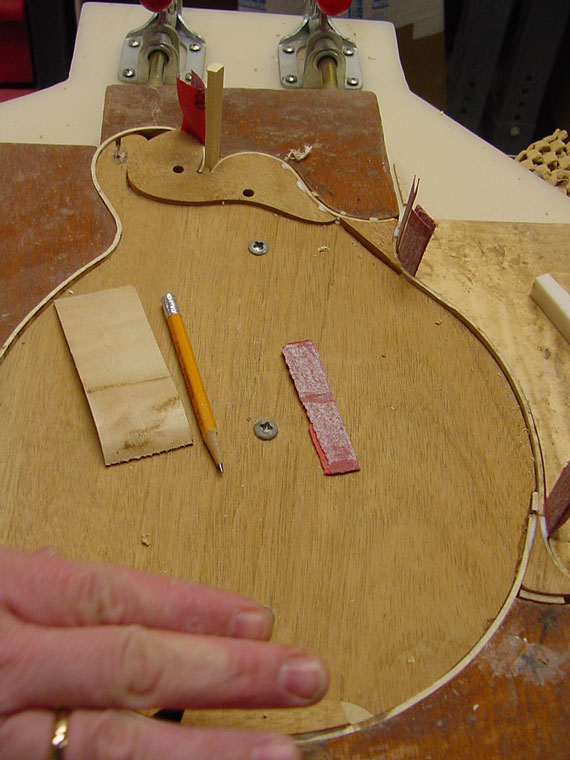
Both inside and outside molds are utilized to keep the shape consistent.
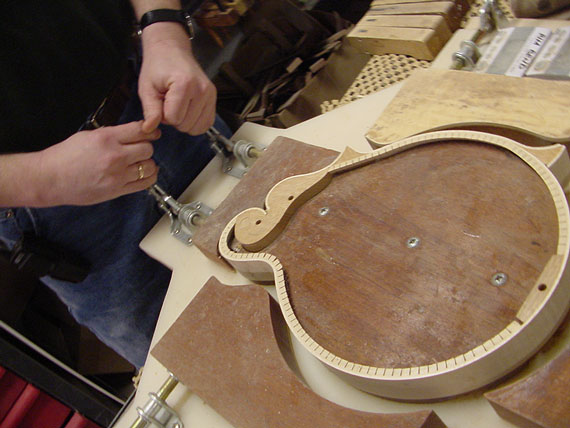
This one is done.
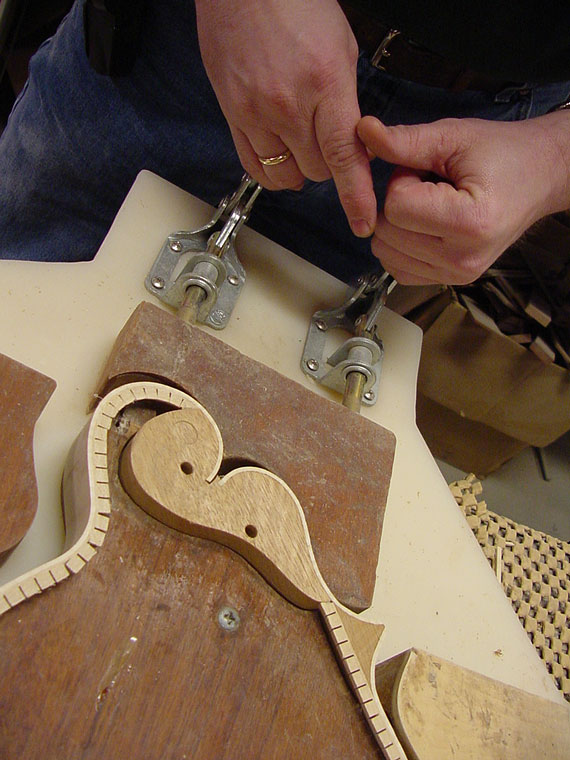
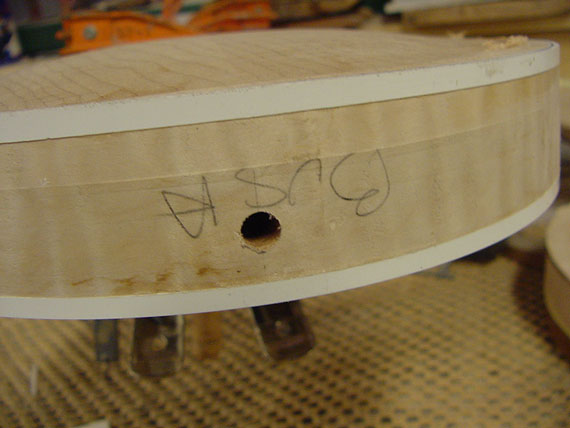
Notice the indexing holes in the neck block.
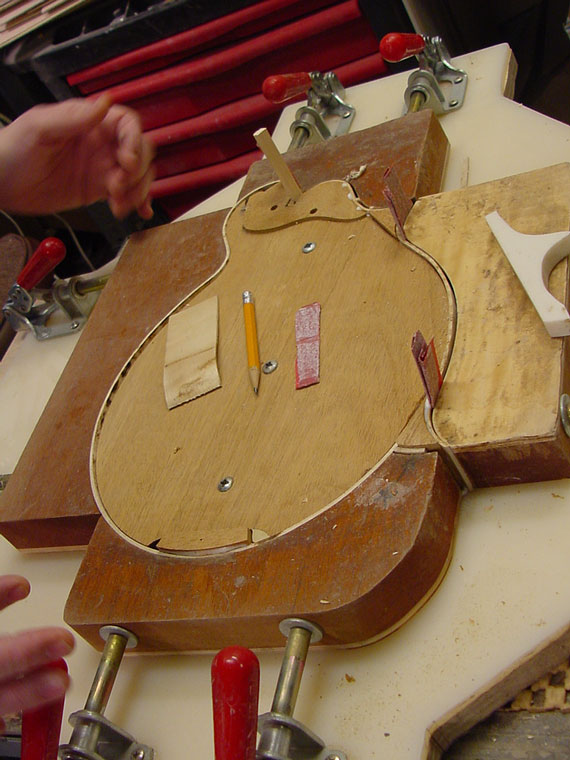
The shape is complex enough, so when a little extra pressure is needed in certain areas, simple wedges provide support.
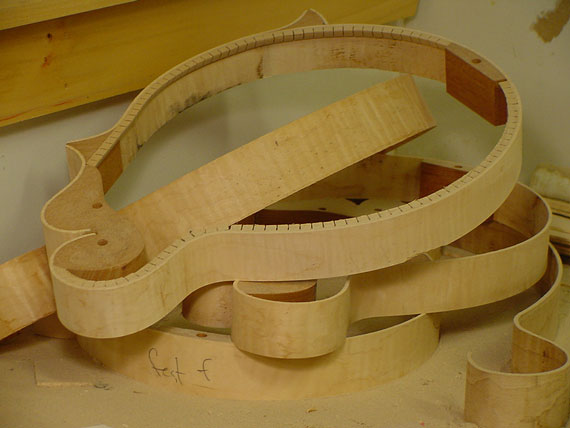
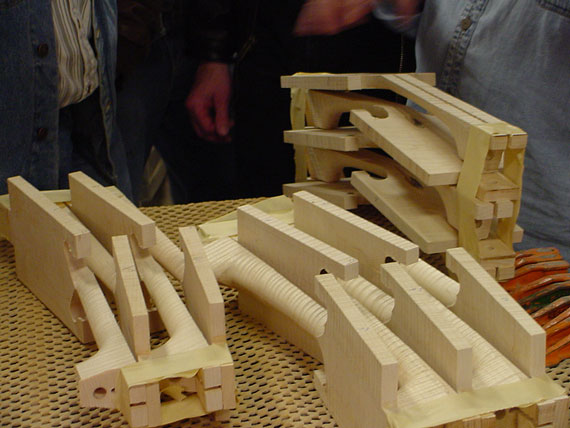
As with most any other instrument factory, there are little stacks of body parts lying here and there.
Look closely a the underside of this mandolin top and you'll see the indexing pin that fits into the hole in the neck block. Little tricks like this make factory production run smoothly.
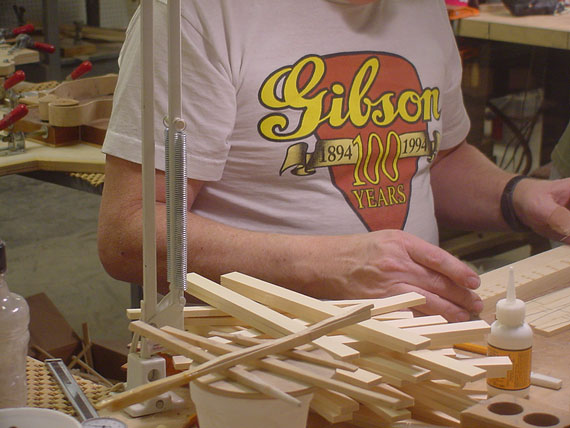
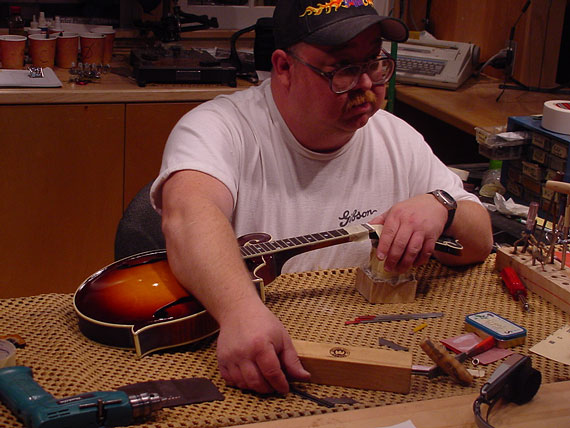
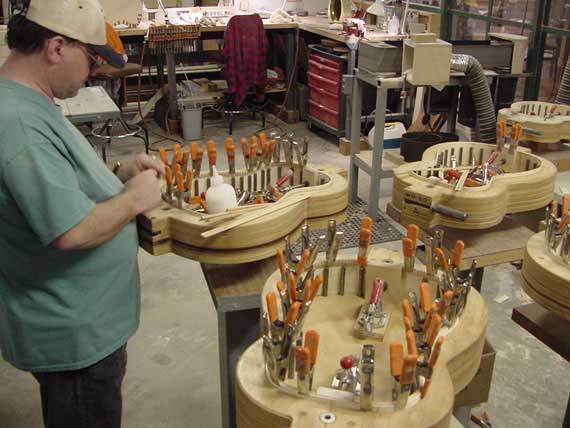
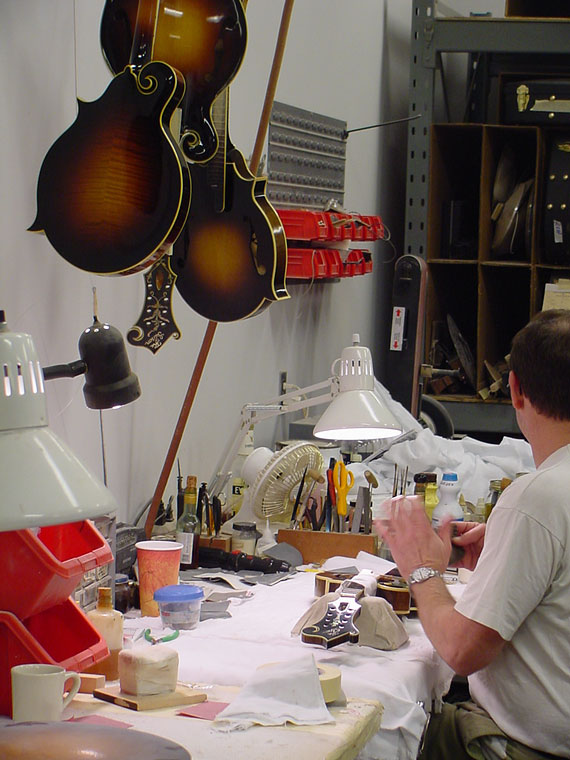
Sorting and getting ready to fit top braces.
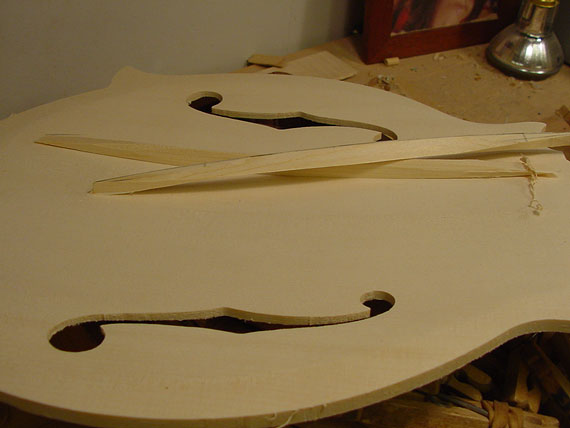
Top braces, or tone bars, are hand shaped and hand fitted to the curvature of the top.

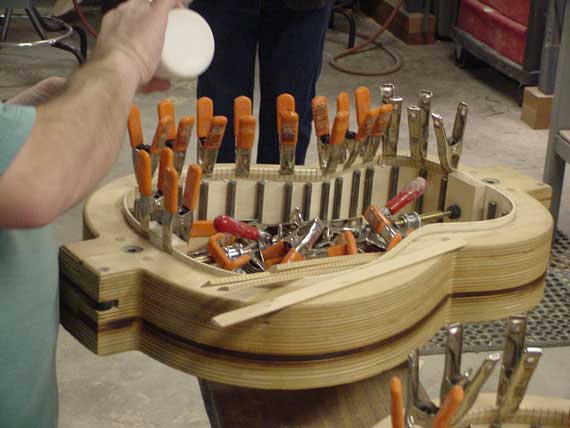
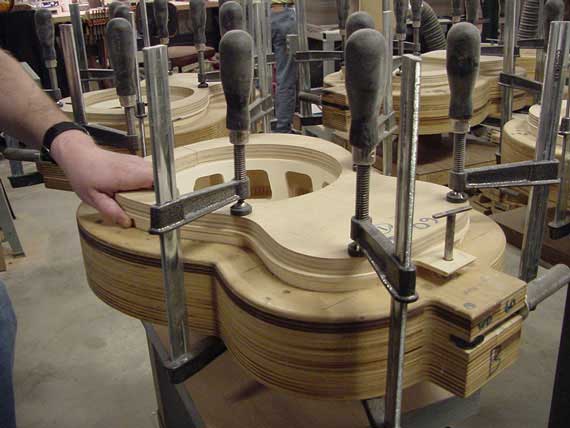
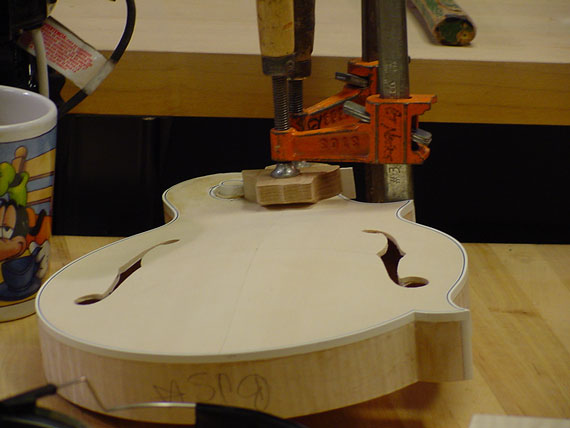
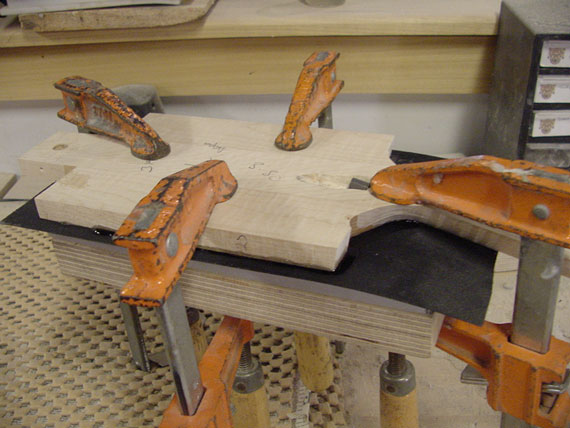
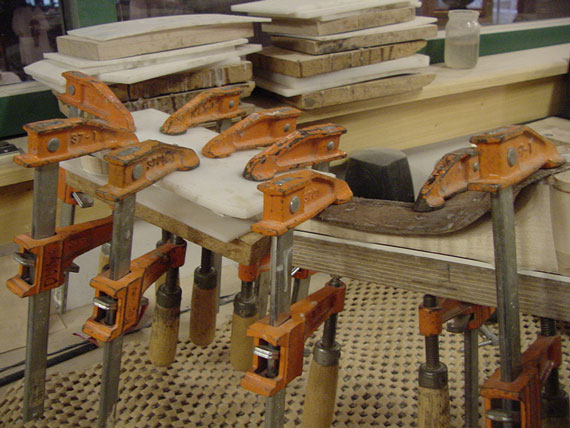
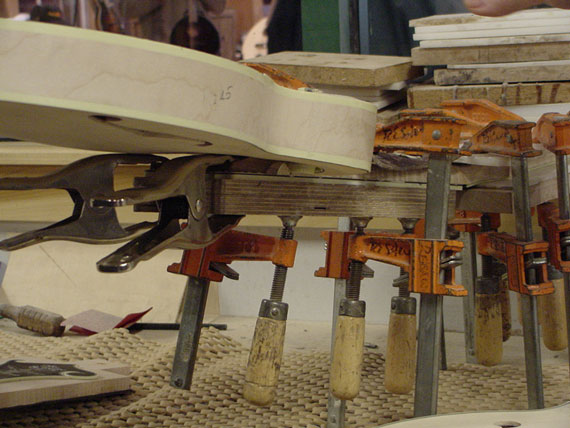
Tops and backs are clamped in place with these simple rigs.
It doesn't take long to fit up a mandolin top and glue it this way, so there's no need for sophisticated tooling here.
The heavy top caul gives good overall pressure as the glue sets. By the way, the Master Model is made entirely with hot hide glue, so it is necessary to clamp up quickly before the glue gels.
A pair of backless bodies.
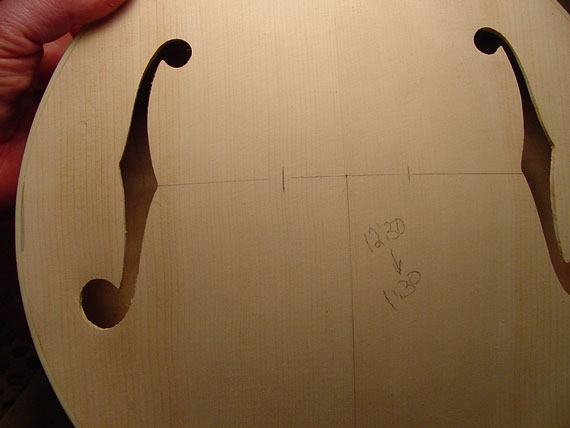
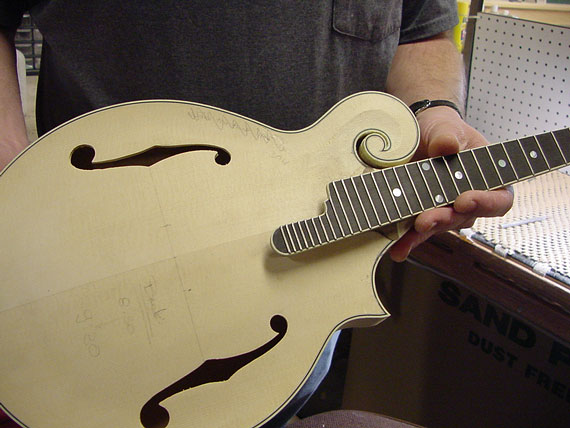
Check this out. Charlie tells me that the original Loar model had the treble f-hole 1/16" higher than the bass one. (That's one feature I never noticed!) The idea was that the bridge would then appear to span the centers of the f-holes when it was slanted slightly for best intonation. The new Master Models are also built this way.
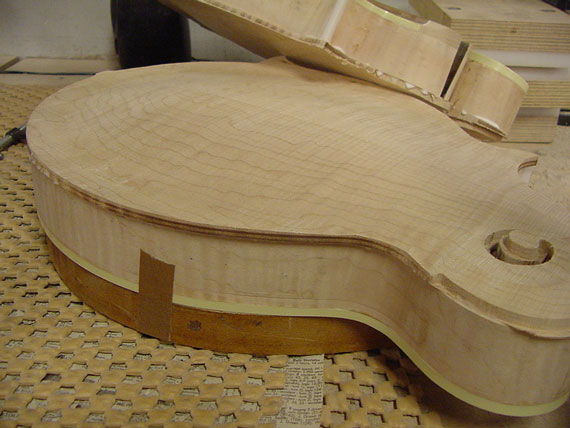
Both the tops and backs get glued on oversize. Then, the entire body is trimmed and edges sanded before the binding ledge is routed.
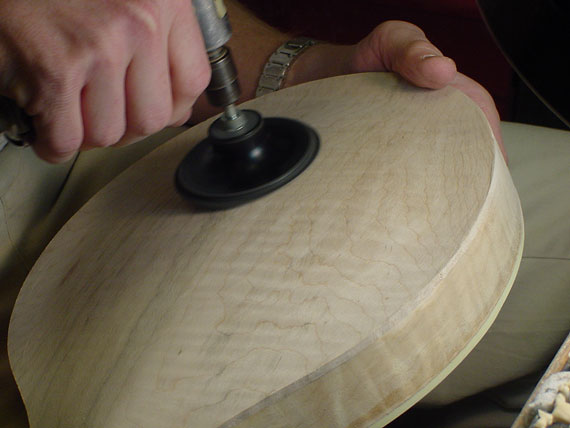
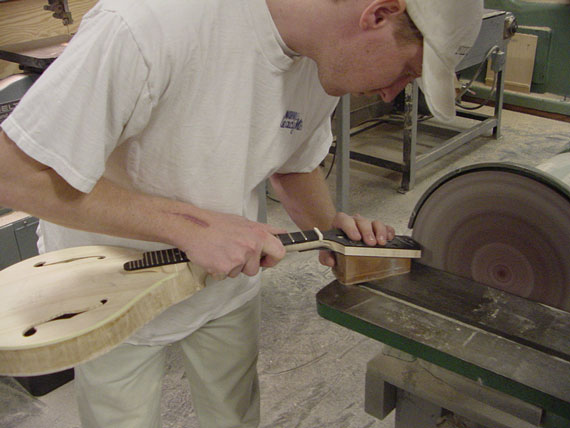
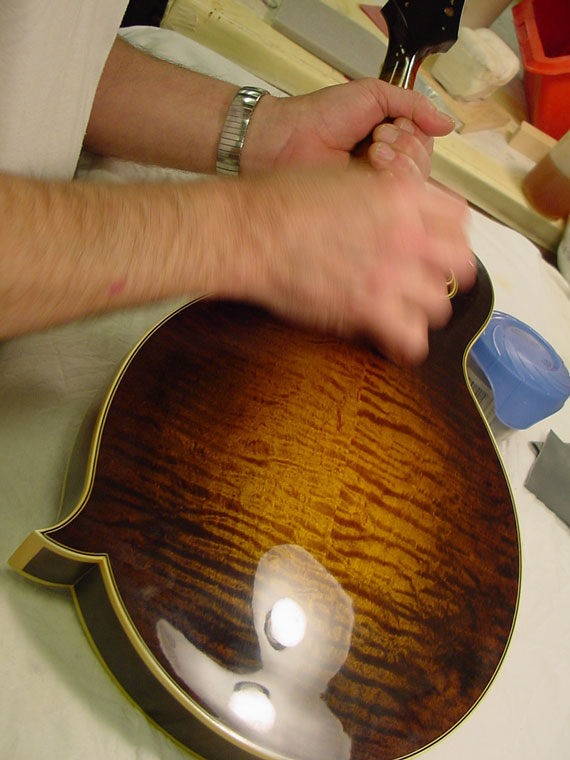
Now's the time for some final contour sanding.
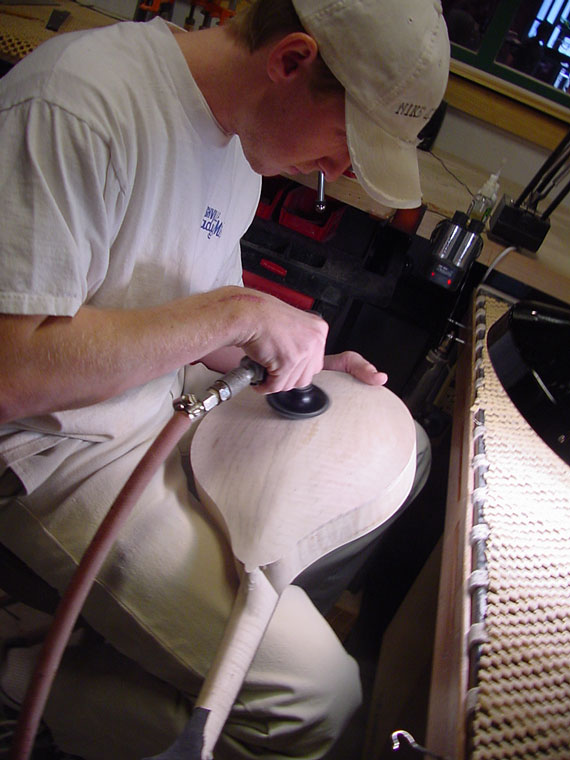
A high speed air sander helps to "fair" out all the complex curves of the back and top.

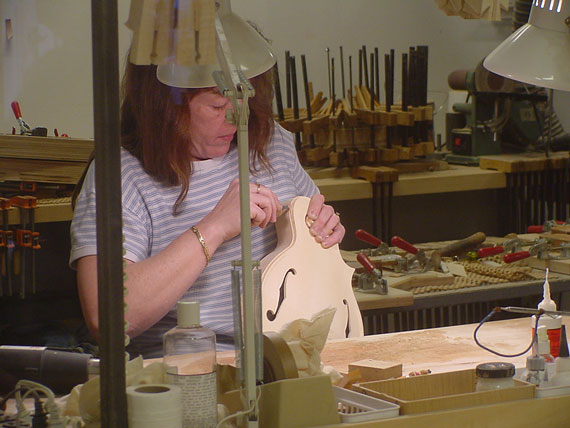
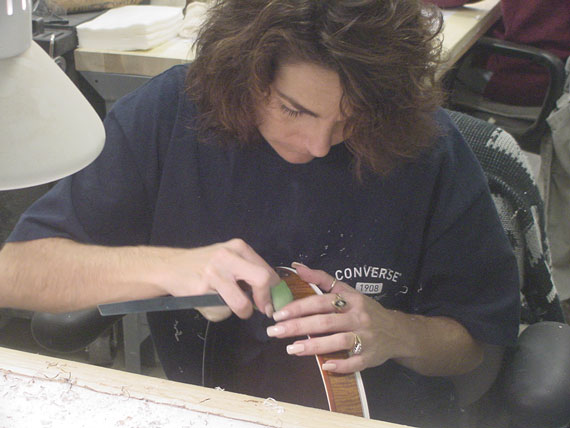
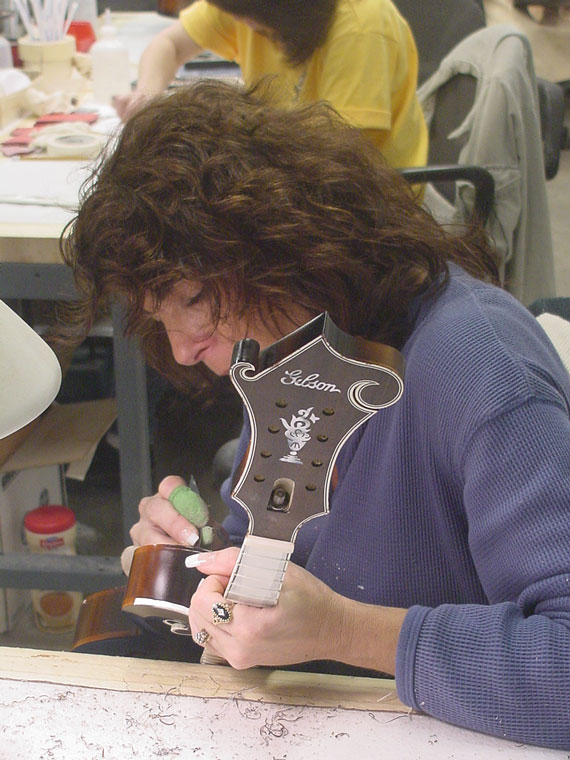
Naturally, this area is where a lot of hand work is concentrated!
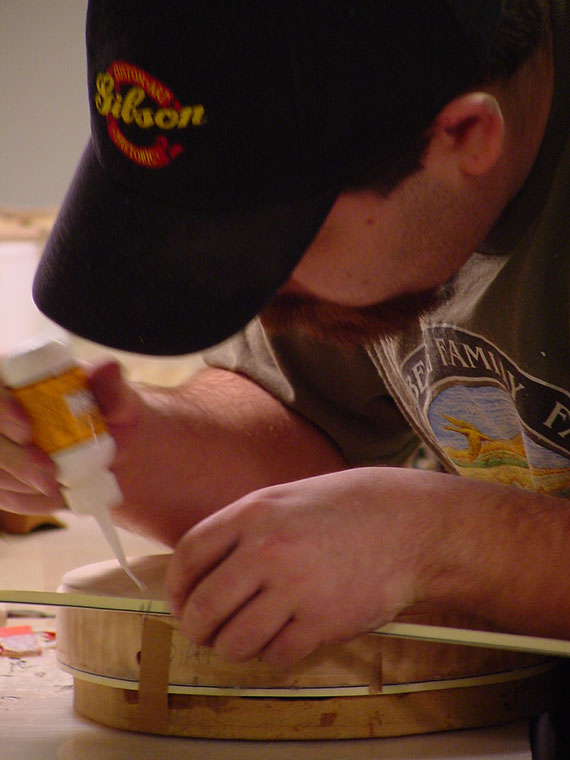
Binding the body takes quite a while, and is one of those finishing touches that take far more skill and effort than most folks realize.
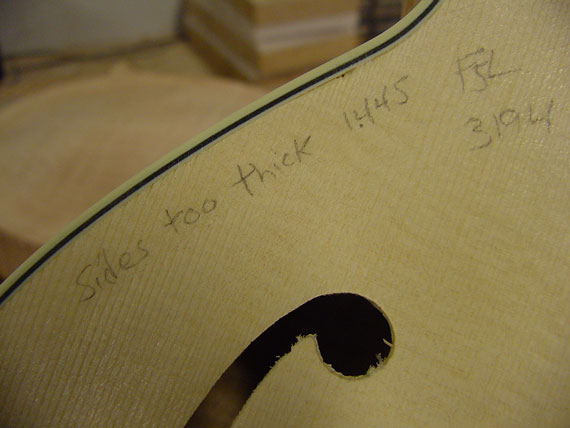
Many of these instruments have little production notes written right on them as they go.
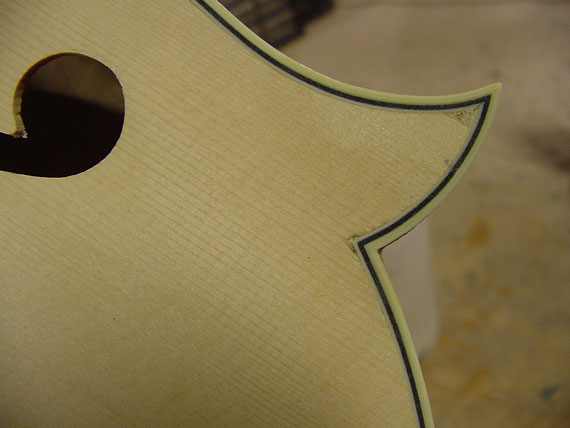
Some areas, like this point, will be covered with dark finish, so little chips can get filled without being noticed.
This one needs to have its binding leveled and final contours established.
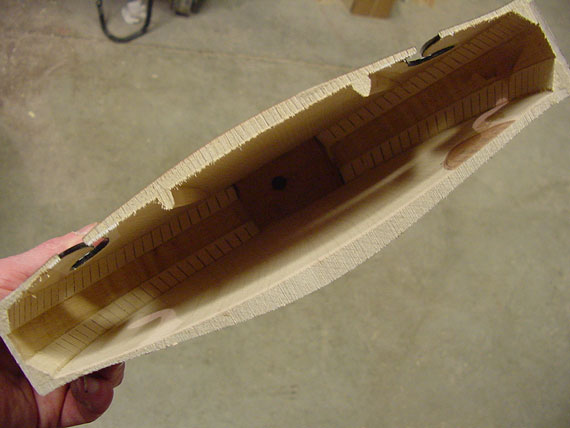
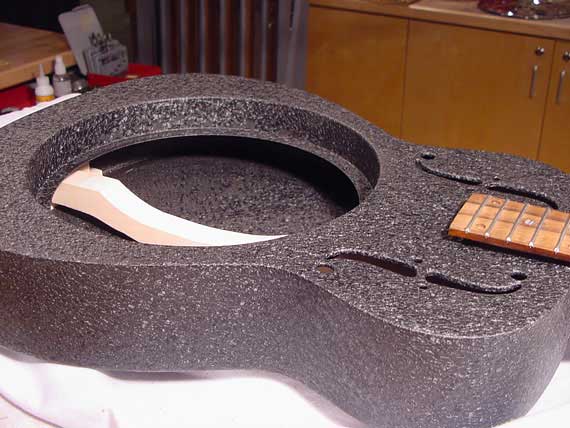
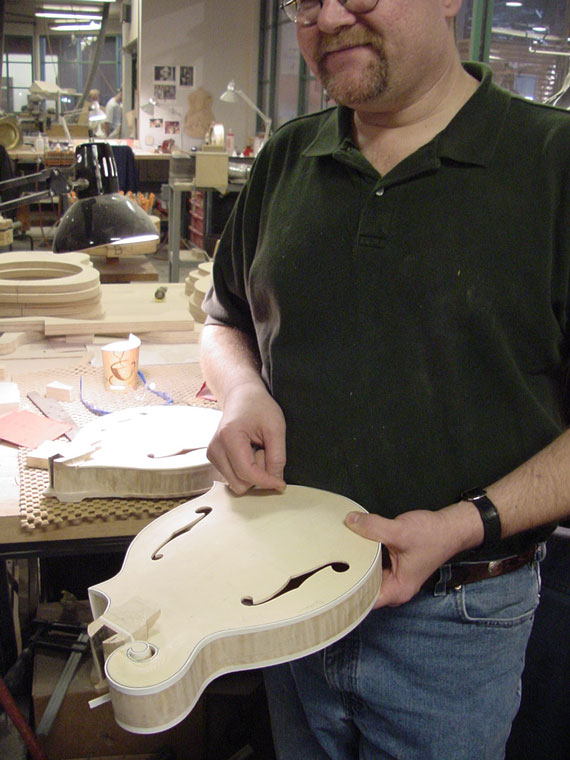
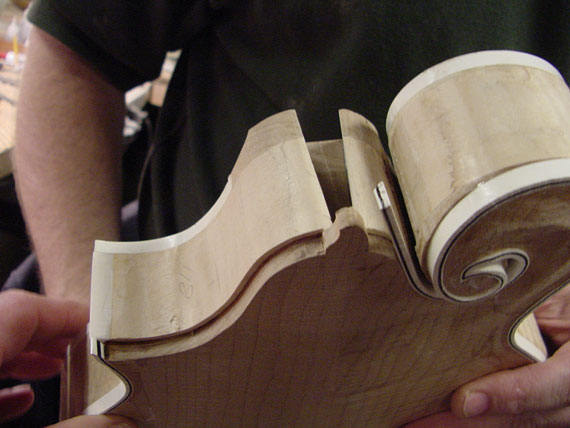
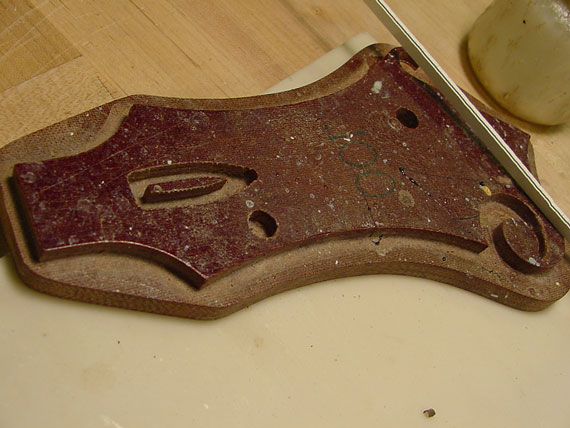
Here's one I saw lying on a bench. A good cutaway view of the inside of an "A" style mandolin.
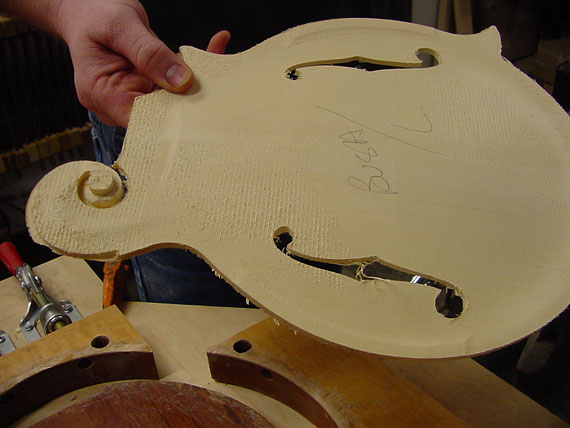
Guess we know what model this one will be!
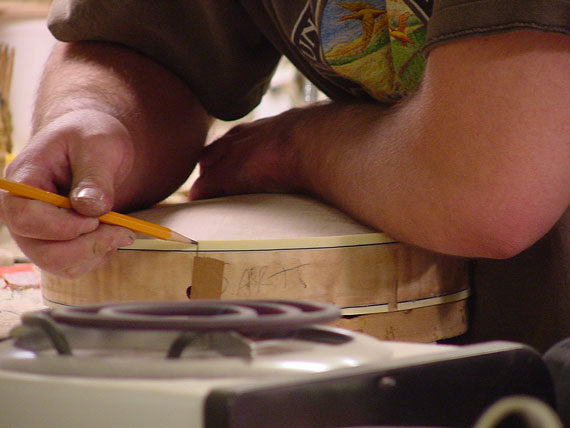
The centerline is an important thing to keep in mind as you're working with an asymmetrical body like the F-5
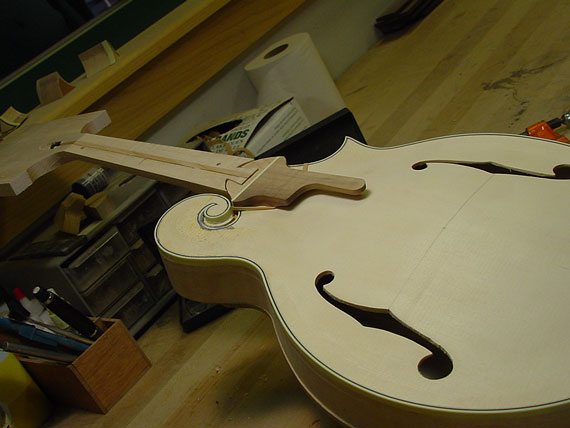
The cantilever support is glued to the neck block before the body dovetail is cut.
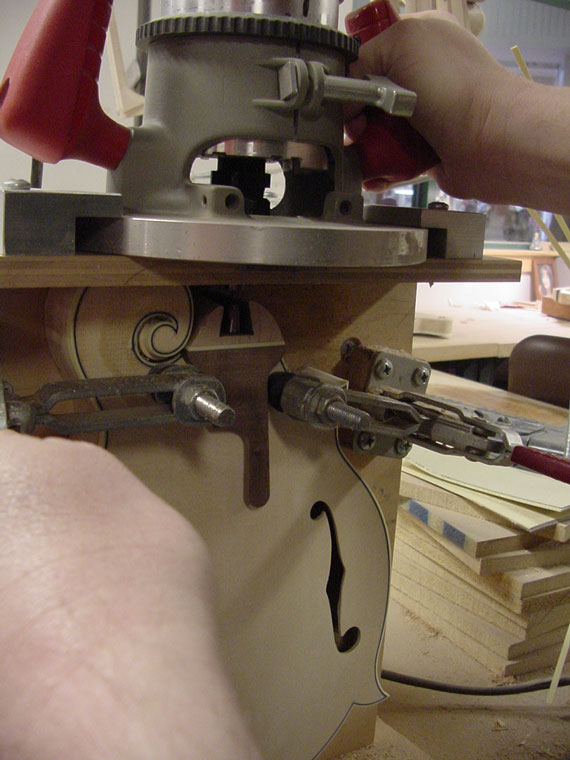
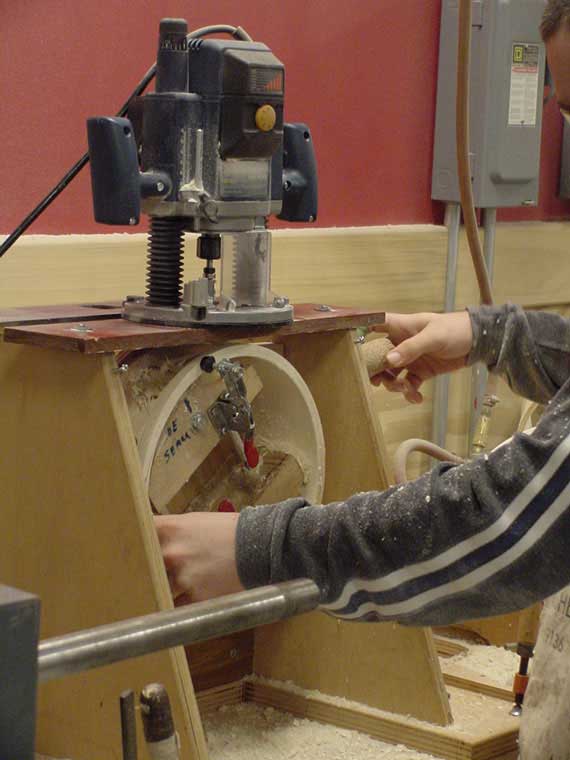
Held in a special router fixture, the body gets cut for the dovetail joint. I wasn't able to photograph absolutely every stage of construction, so some of the pictures may seem a bit confusing or out of order. The dovetail joint is actually cut before the back is glued in place.
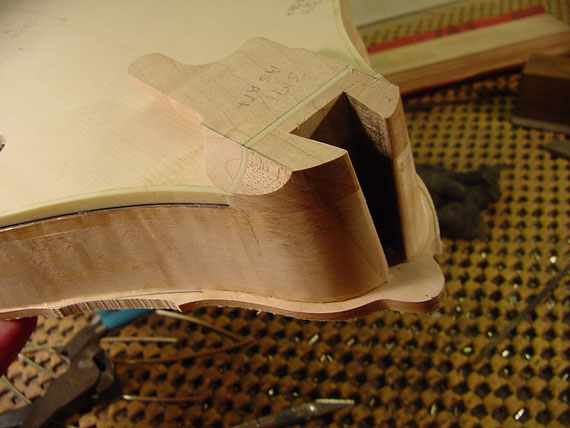
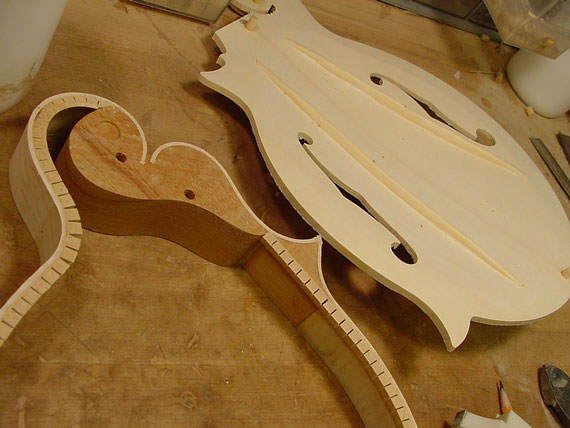
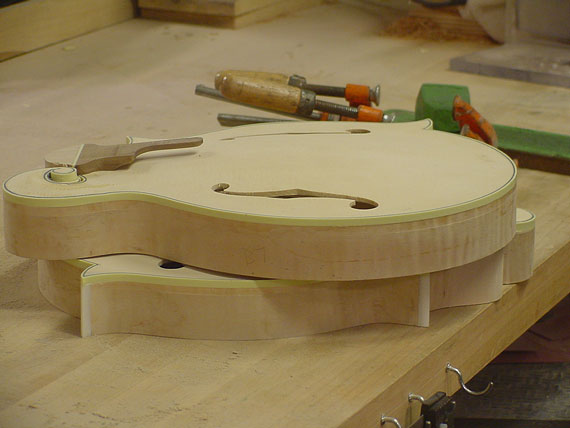
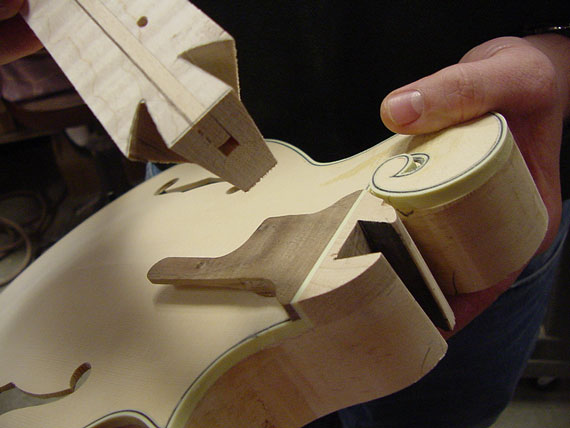
Here's the result, with the back held in place.
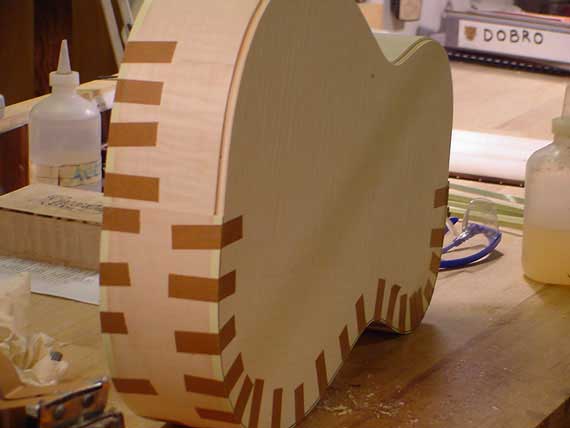
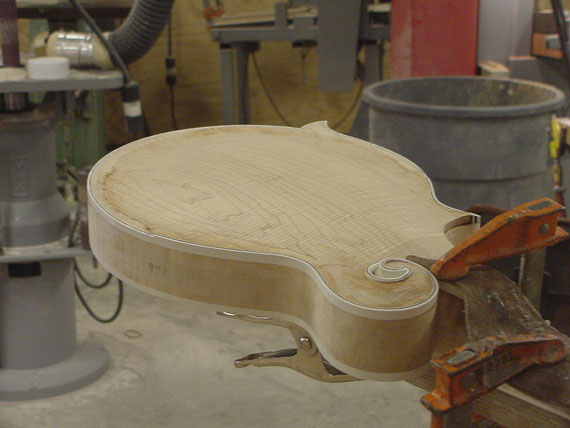
And, here's how the F-5 body looks just before the neck is attached. Notice that the back binding is not fully complete. That's because of the little section that must be fitted around the base of the neck. It's more accurate to do that piece after the neck is attached.
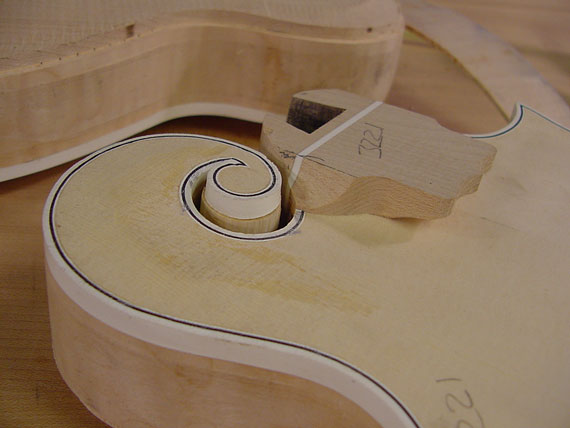
Starting to look like the real thing!
Neck billets are cut out, and matching "ears" are glued to the peghead area.
After a trip downtown to the CNC machine, neck blanks are ready for hand shaping, assembly and fitting up.
Here's the blank as it arrives at Opry Mills.
Lots of hand work left to do here! I was surprised to see how little actual CNC machining is utilized.

Truss rods are fitted, and the adjusting nut pocket relieved for wrench clearance.
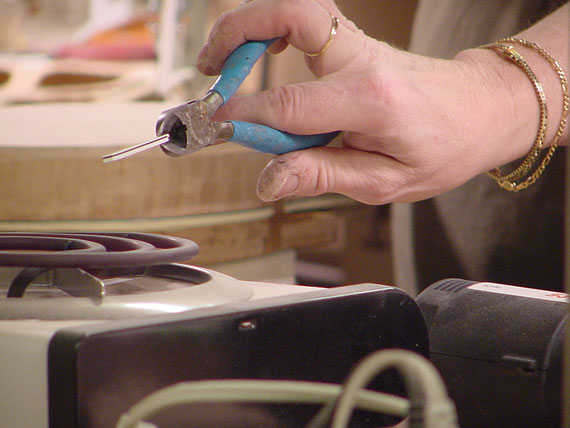
Peghead binding is a real trial. Here, strips of binding are heated above an electric hotplate element.

The heated binding is quickly formed around the peghead overlay piece.
Sometimes, a mold is used as a form for bending binding.
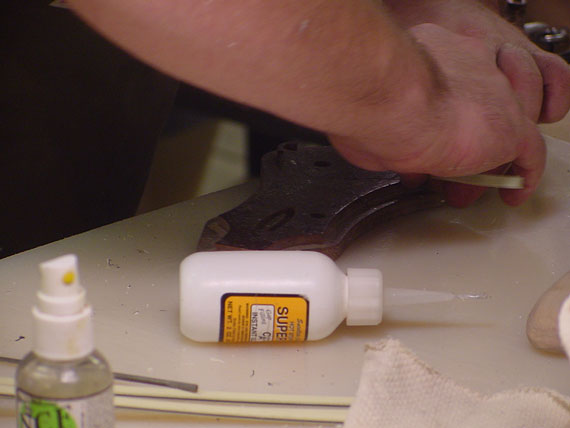
Good old cyanoacrylate. It's the right stuff to stick on ivoroid binding!
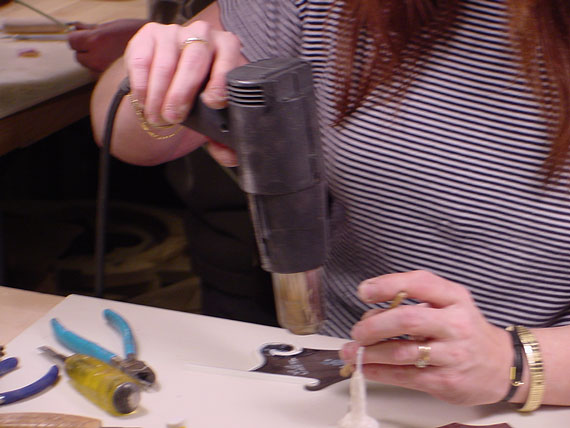
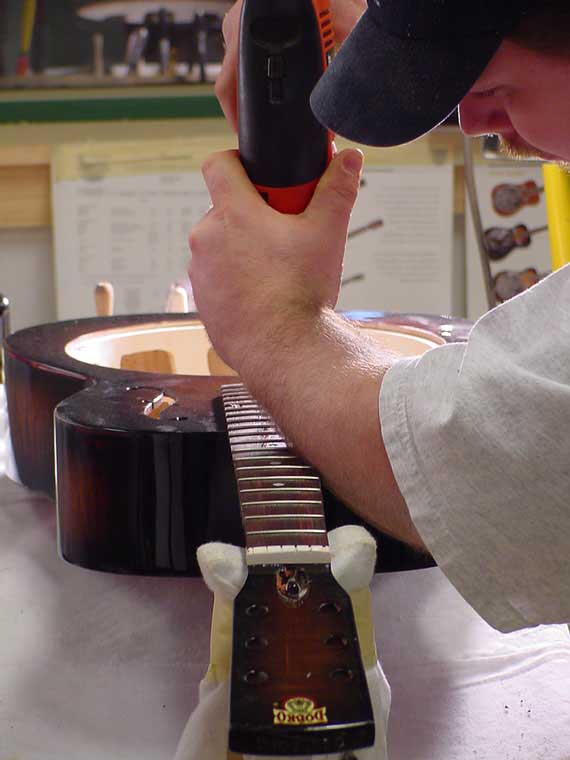
A blast from a hot air gun helps cure the glue and relax the curved binding pieces.
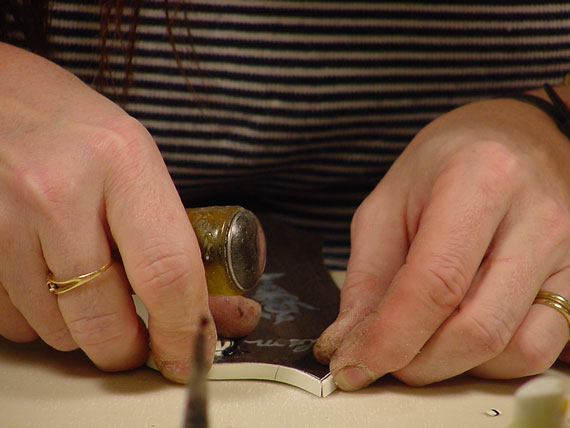
Miters are hand fitted, too.
After the binding is completed, the entire overlay takes a trip over to the big belt sander, and is leveled and smoothed before gluing up to the peghead.
Pegheads get a black veneer on the back, too.
Here, the pehgead has been cut to shape, and the face veneer is being glued on.
OK, time to fit up a neck. That's one of the most nasty neck joints in the musical instrument business. Compound curves and angles run every whichaway.
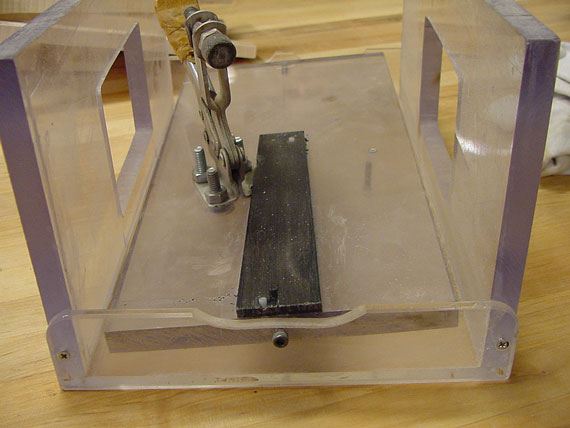
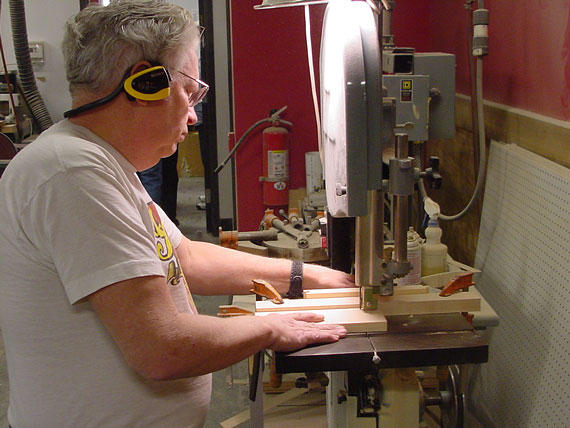
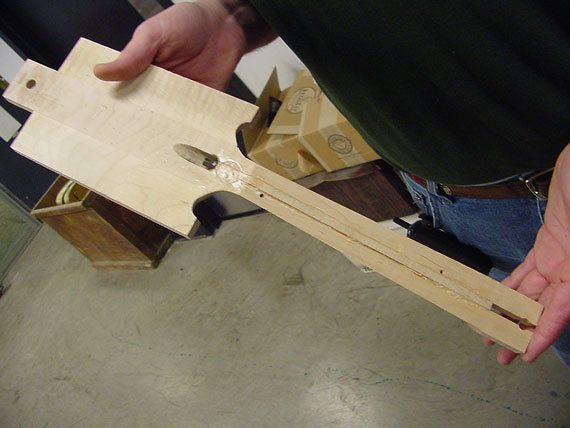
This is an interesting fixture. It's a device that holds the neck as the dovetail is cut by hand on the bandsaw.

The neck is held in place on a kind of rocker table, which tilts from side to side.
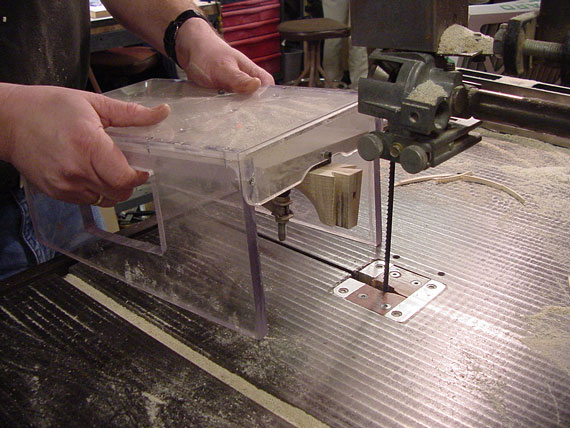
Tilting the neck to the one side, the precise dovetail angle is cut on that side.
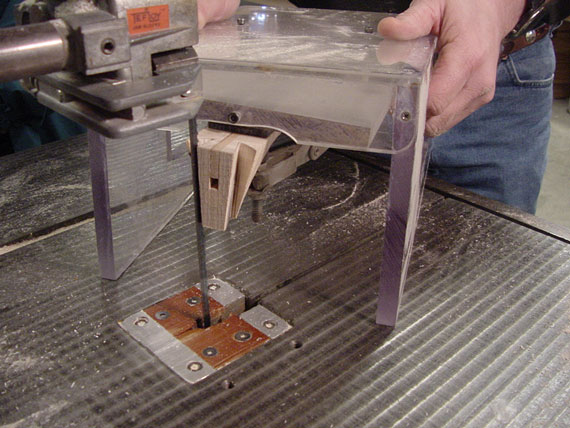
Then, clicking the holder to the other side, the opposite angle is established. Pretty slick stuff, but that still leaves a lot of hand fitting to do.
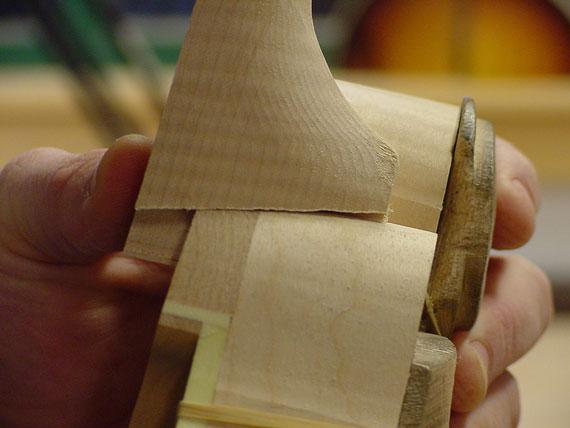
Each dovetail joint is hand carved to fit tightly.
Most of the work is done with chisels and gouges.
It takes a lot of trial fitting, whittling, filing and trying again. All the time, the proper alignment must be maintained
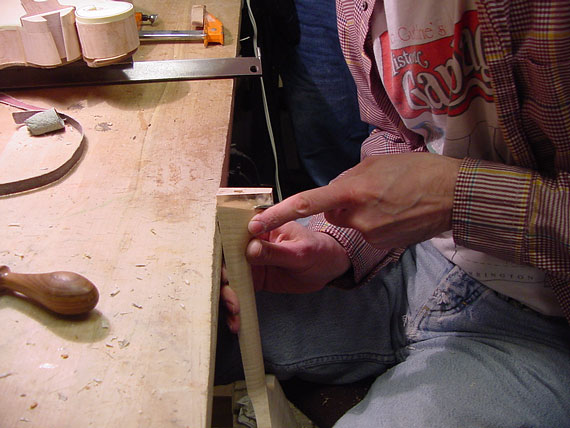
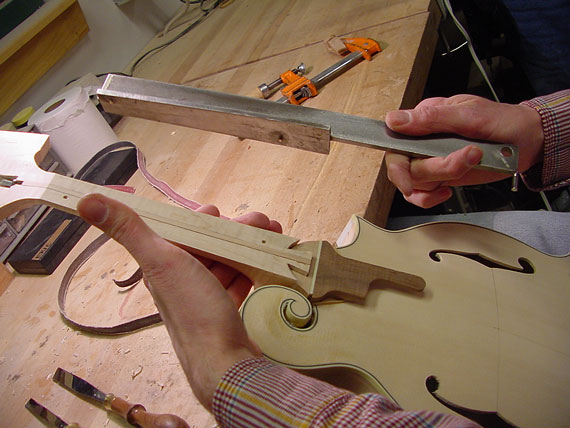
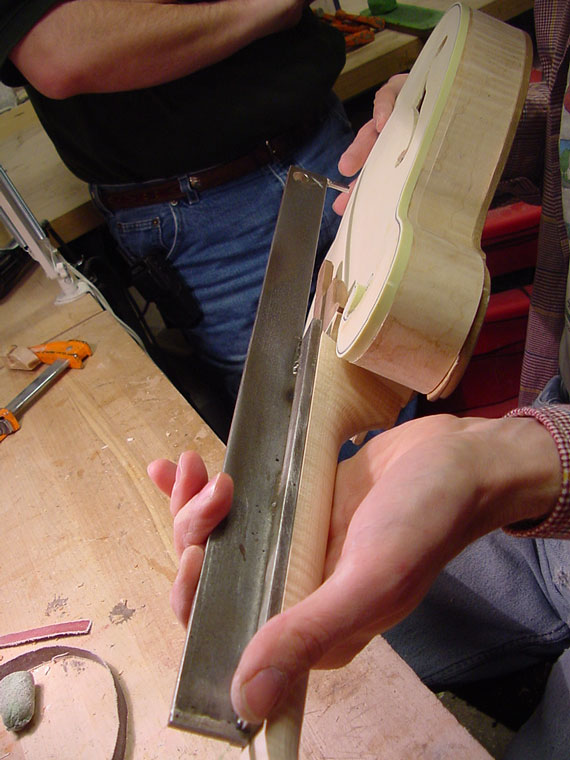
A special neck angle gauge simulates the height of the fingerboard, and guides the vertical alignment.
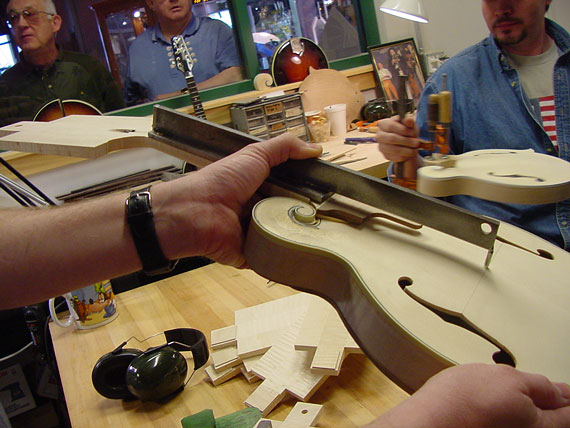
Most any day, you can walk right up to the window, and see a neck being hand fitted to a body.
After a couple hours' work, the neck fits just right. He's just holding a fingerboard in place so we get a better idea of the finished product.
Ready to glue up.
OK, no turning back now. This baby's set and glued.
An "A" style gets a bit of a peghead trim.
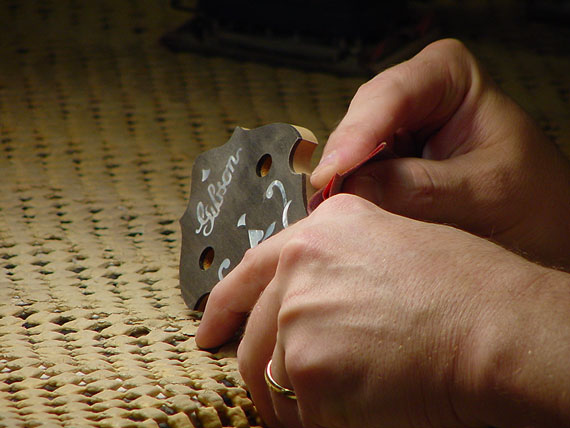
After the sunburst colors are applied, all the binding gets scraped clean.
And scraped, and scraped.
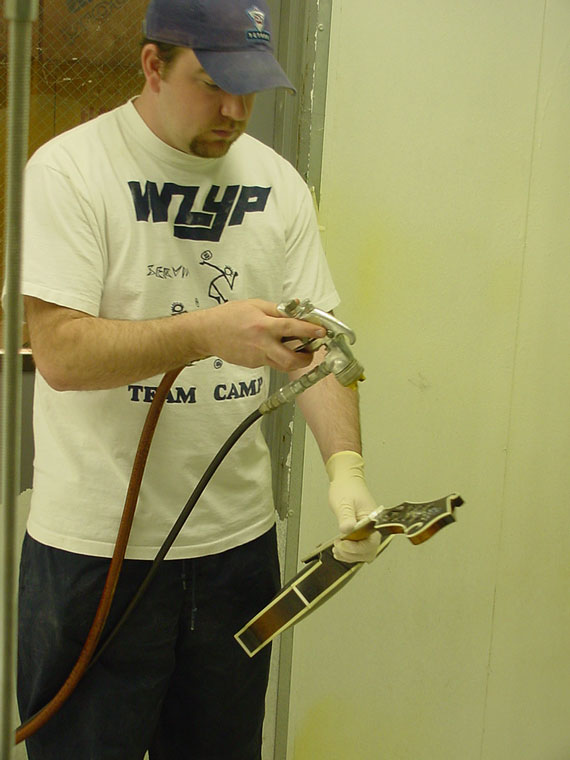
Here in the spray booth, clear coats go over the entire instrument.
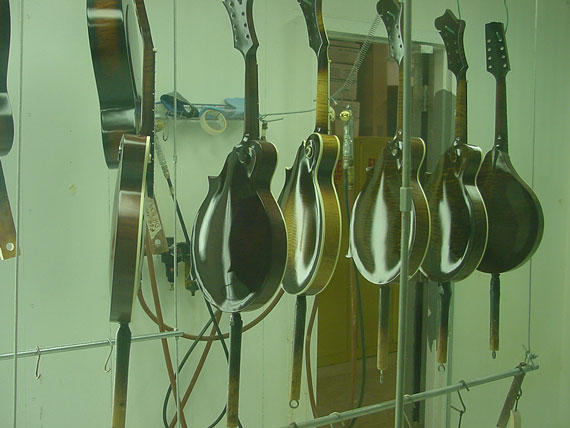
A bunch of mandolins drying.
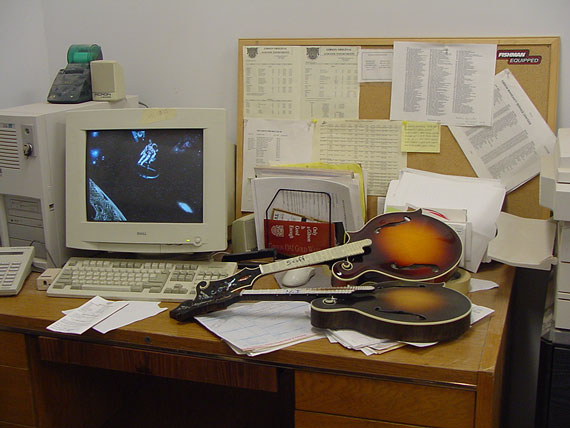
Looks like home to me.

More standard models in the spray booth.
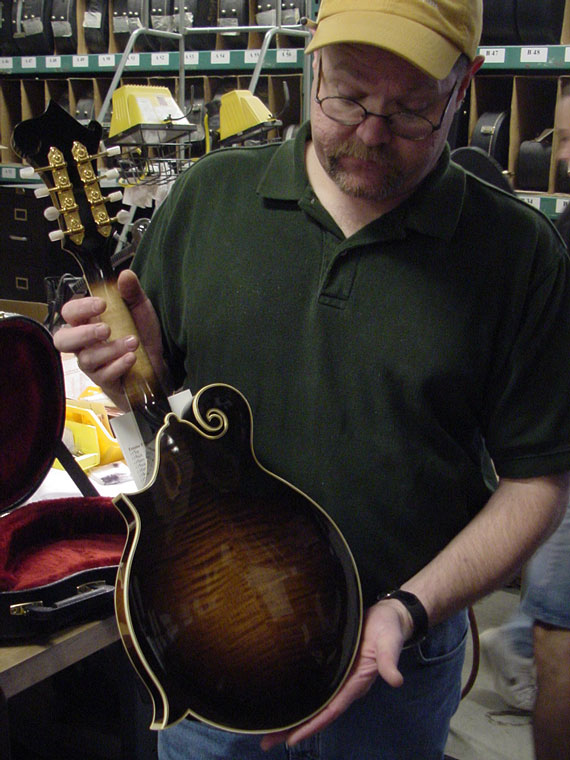
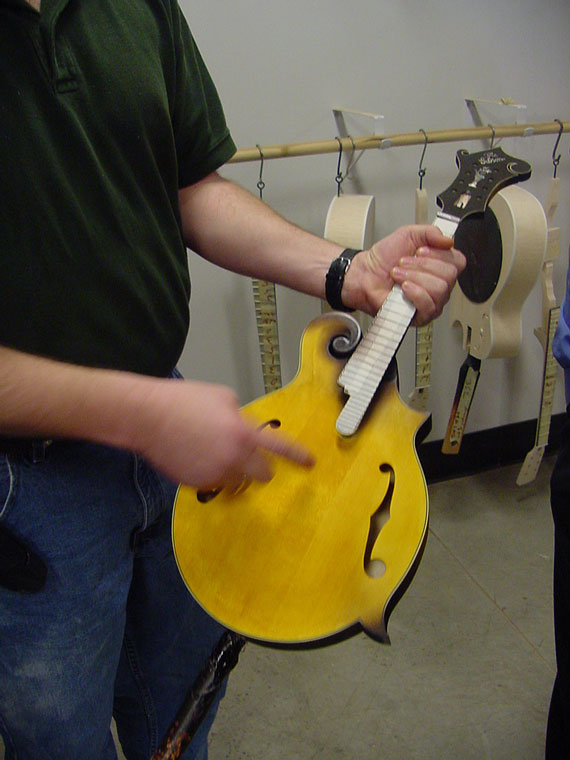
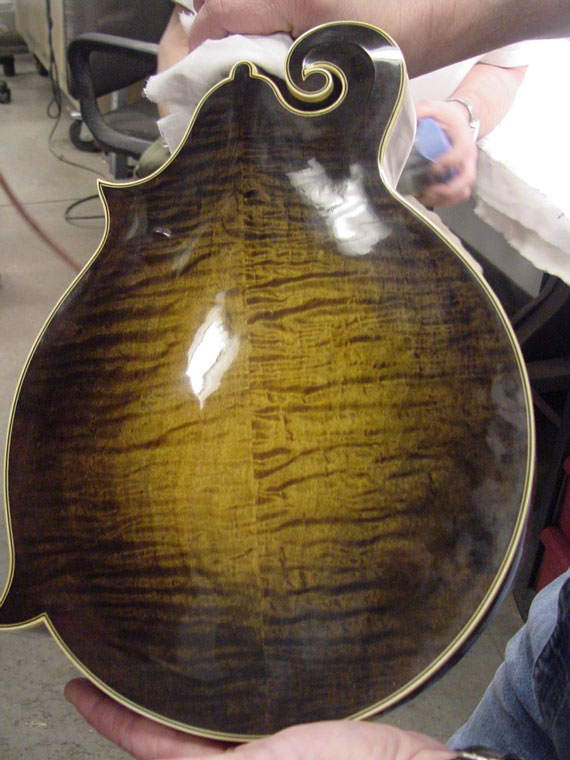
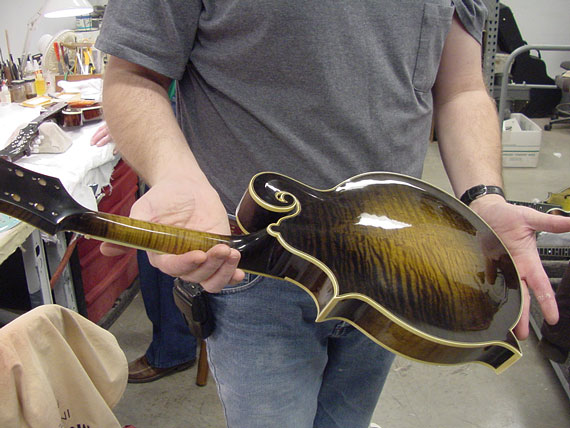
Charlie shows us the backside of a new Sam Bush model.
In fact, it's the next one actually headed for Sam Bush himself.
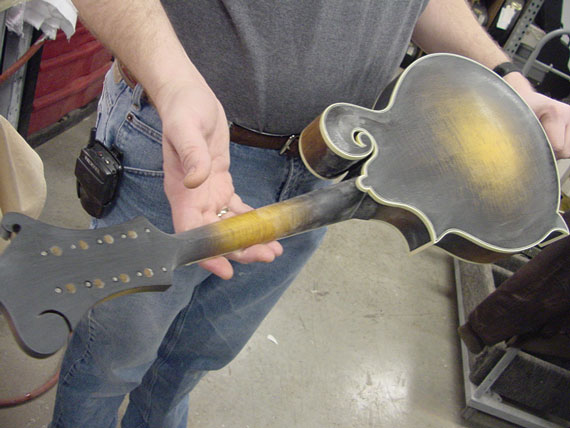
The Master Model does not go through the same spray booth line. After final sanding, the entire instrument gets a brushed coat of gamboge, the natural yellow pigment used by the old Italian master violin makers.
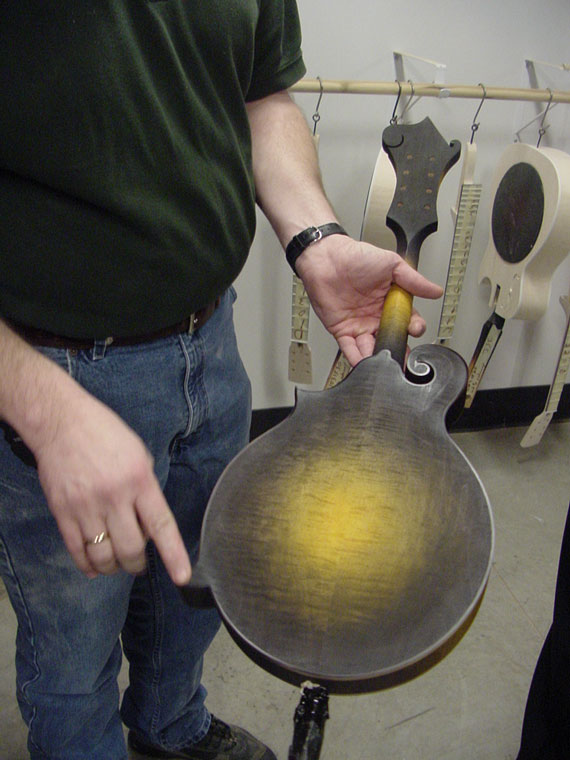
Then, the sunburst shading is produced by wiping and rubbing waterbased stain right into the wood.
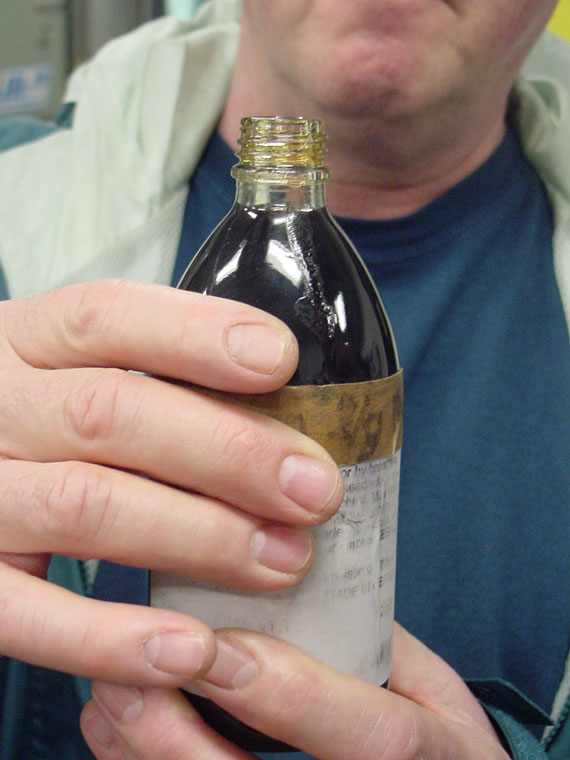
The Master Model gets a hand applied varnish finish. The varnish is made right here at Opry Mills using the classic old time Cremona formula.
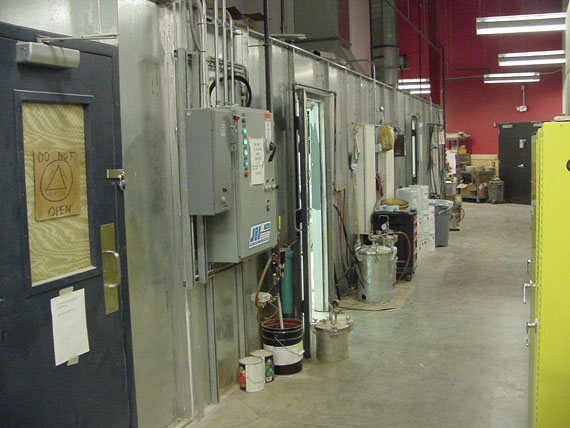
Here's a shot of the interior doors to the spray booths. The one in the foreground is a varnish curing booth. UV lights are used to cure the natural oils in the varnish. The curing time is reduced from months to days with the high intensity lights.
After the varnish is cured, it gets a "scuff sanding" to level and prepare the surface for the final French polishing.
Charlie and his assistant are the only ones who do the French polishing.
It takes a long time to produce the soft glow and level finish.
There's nothing like it, though, for that old time shine!

Only about 2 Master Models are made each month.
He can work on a few instruments at once, with some drying overhead.
Every bit of the instrument gets a slow going over.
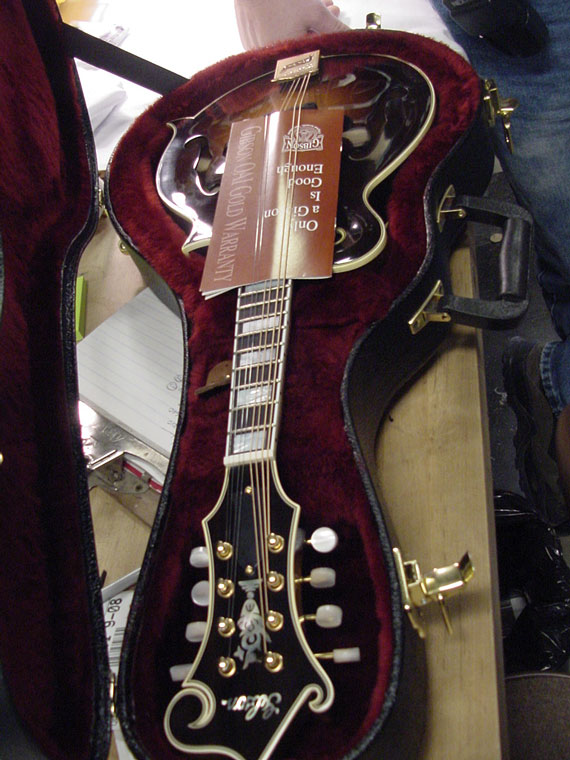
From the cut of the wood to the glow of the finish, this mandolin looks every bit like its famous predecessors.
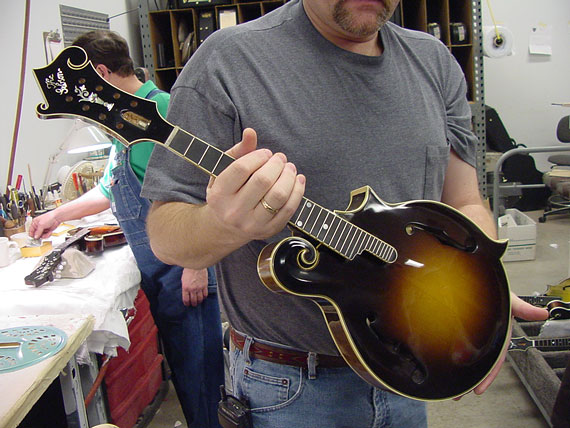
This one was just getting its very last setup operation while we visited.
And, luckily, Charlie let me take it home on the plane. The first mandolin player who saw it on display at Gryphon snapped it right up!
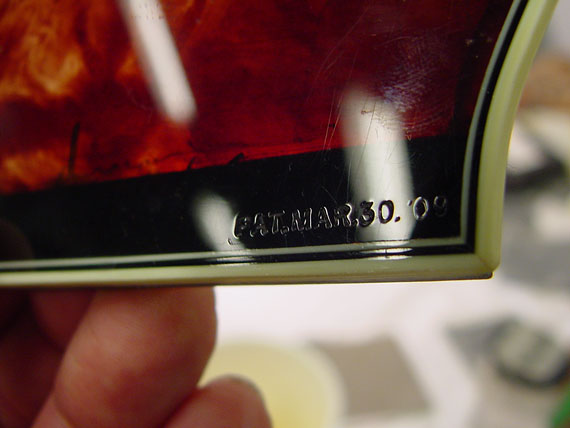
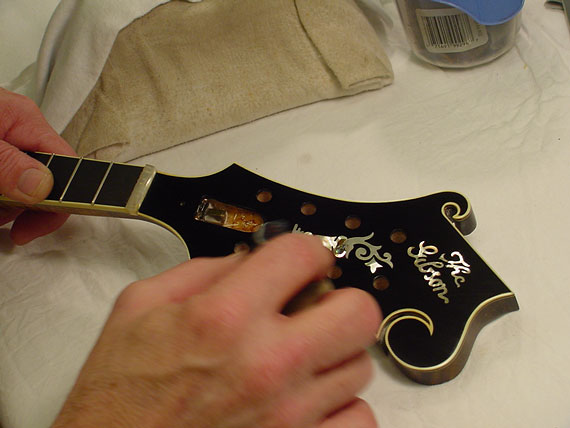
Speaking of details, even the original patent stampings are reproduced on the bridge and fingerrest..
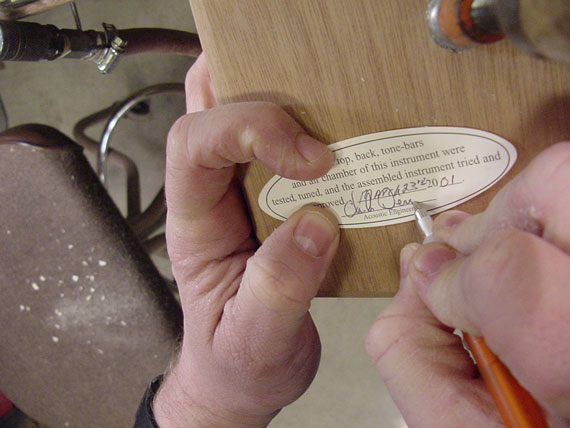
Here's Charlie, doing the final sign-off.