
Bridge Regluing
It's an everyday job, but an important one
If you're not familiar with traditional hide glue, read the Hide Glue Page.
I don't happen to have a good "before" picture, so just suffice it to say that this 1964 Martin 0-16NY had a loose bridge.
In order to remove the bridge with as little damage as possible, I like to heat it:
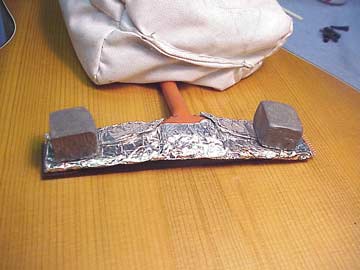
I have this special 1" x 6" rubber heat blanket, which I've wrapped with aluminum foil to keep it clean because heating rosewood bridges tends to release a lot of resin that bakes right on the rubber. On the ends I have a couple of little lead weights to hold the heater down.
Usually, I protect the top with a bit of masking tape and light cardboard, in case the lead weights were to slide off. I've left that stuff off for the photographs.
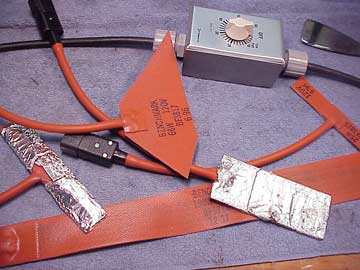
L.M.I. is a great source for these little rubber heat blankets, by the way. They sell a kit that looks like this:
There's a timer so you don't get distracted and leave the thing on long enough to burn the house down. Don't laugh, burned instruments are really common if you forget and walk away.

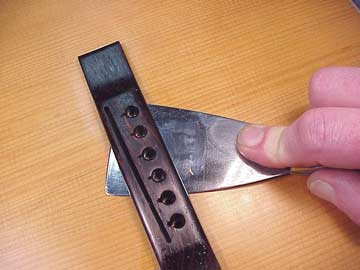
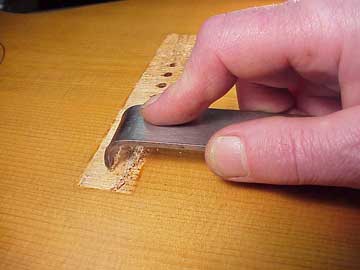
As the bridge is heating, I check it with my special putty knife:
Soon as I feel the glue giving way, off comes the heater and off comes the bridge:
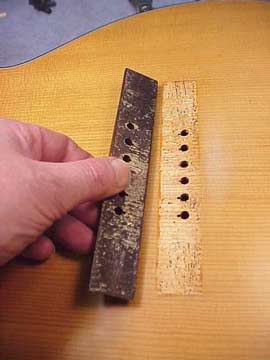
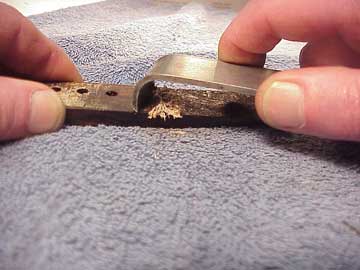
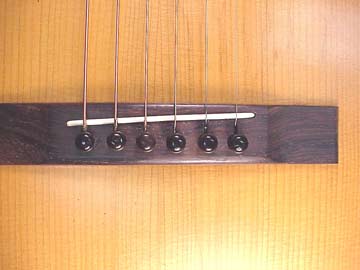
See? Nice and neat:
I have a little scraper I made from a piece of high carbon steel. It's just a bent hook, sharpened to about 45 degrees. I touch up the sharp edge with a diamond pocket hone, and carefully scrape the gluing surface:
I go for as much gluing surface as possible, so I scrape carefully right to the edge where the bridge sits. Some manufacturers have the a portion of the bridge sitting right on the finish. It looks neater that way, but I'm putting function ahead of form, especially because the bridge glue joint had already failed. Even if the surface appeared perfectly clean I'd scrape lightly to remove any oxidation that might interfere with glue adhesion.
OK, same for the bridge. I scrape off the old glue residue, and expose a fresh smooth gluing surface:
Time to clamp up.
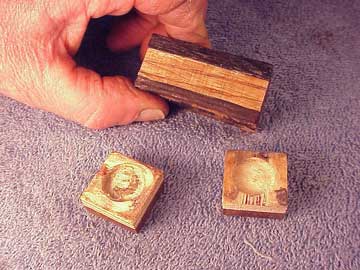
Here are my favorite bridge clamping cauls:
The one I'm holding has a flat ebony top and a thick shoe leather curved bottom which roughly corresponds to the top surface of the bridge. The smaller square ones are for the bridge tips and they have 1/2" holes drilled in the center of the fact that contacts the bridge. That way, clamping pressure is distributed right to the edges, and there's no tendency for the bridge tips to curl away from the guitar top.
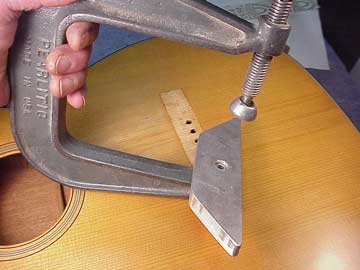
I've threaded the lower jaw of my big C-clamp to accept a variety of 1/2" thick aluminum cauls, each of which matches a common bridge plate:
These aluminum cauls are easy to make because you can cut aluminum on a band saw with the same blade and speed that you use for wood.
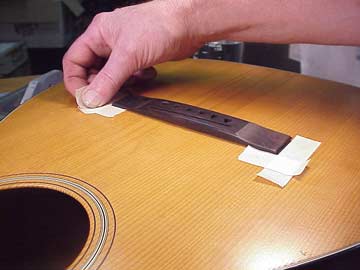
Laying the bridge in position, I mark the ends and one edge with two layers of masking tape:
That way, when I'm hustling to get the bridge glued on, I can just slide it into exact position and I won't be confused by trying to see through the glue squeeze-out.

To keep the joint warm during clamping, I pop the bridge into the microwave for a few seconds to bring the temperature up to about 150 degrees:
This isn't dangerous as long as the heat is not prolonged, or elevated too high.
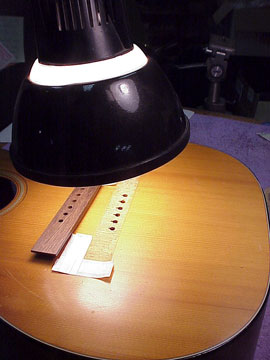
Sometimes, I'll warm both the top and the bridge with my regular desk lamp and its 75 watt bulb:
I don't like heat lamps, and find them a bit difficult to control, so I hardly ever use mine.
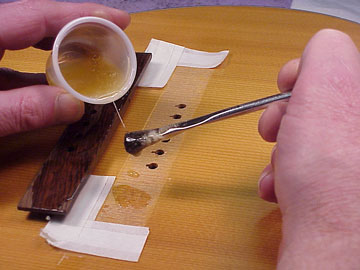
Working quickly, using my no-glue-pot hide glue method, I brush glue onto both surfaces:
Gotta move fast with hide glue!
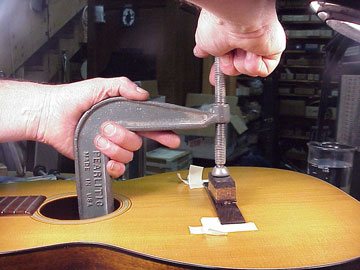
I squish the bridge down onto the top and slide it until it just touches the tape. Hot hide glue has a really good initial "tack" so it doesn't tend to slide around as I apply the big clamp to the center:
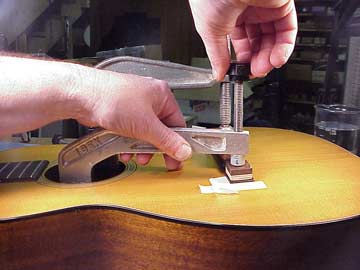
I add my smaller clamps to the ends:
These clamps bear nicely on the aluminum caul beneath, and the little cauls on top even out the pressure.
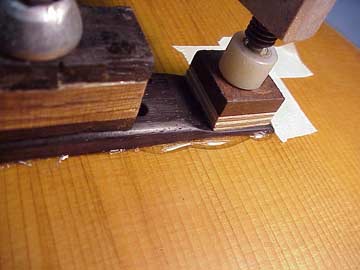
I want to see a nice squeeze-out of liquid, not gelled, hide glue:
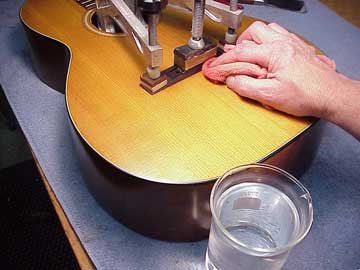
The hide glue cleans up easily with some of the warm water left in my beaker:
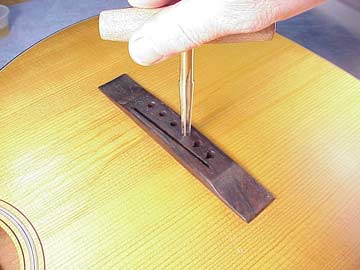
I always leave the bridge clamped overnight at least, and longer if the workroom is particularly cold in the winter. Just a touch with my bridge pin reamer is all it takes to clean the dried glue out of the bridge pin holes:
All done, and ready to rock!