
Celluloid Fingerrest
Not a pickguard, it's an elevated Celluloid Fingerrest
Or is it? Jazz guitars and carved top mandolins are frequently fitted with elevated "finger rests" to allow a comfortable platform for the fingers of the picking hand. A pickguard is thin and glued to the top of a flat top instrument. We often refer to a "fingerrest" as a "pickguard" for convenience because of the similarity of function. Recently, Gibson, has made the switch to calling them pickguards.
Next, there's the spelling. Is it one word like chinrest, or is it two words? Is it hyphenated? I've always liked the look of "fingerrest" so that's the spelling I'll use.
OK, 'nuff of that.
Most vintage instruments had fingerrests made of celluloid, ranging in thickness from a little under 3/32" to over 1/8." Because of celluloid's tendency to decompose, making new fingerrests is definitely part of the restoration of arch top instruments.
Builders have shaper templates and fixtures to help the binding process, but repair technicians usually do everything by hand. That's the way I work, because I rarely make two alike in the same year.
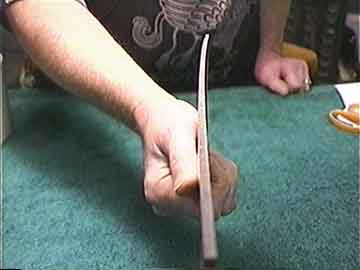
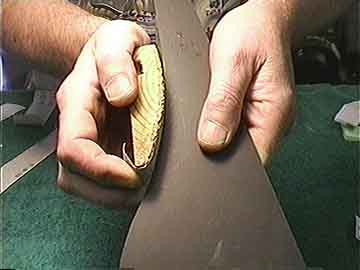
First I'll select the thick celluloid piece I'm going to use, and choose which side will face up. Here, I'm using tortoise colored celluloid that's quite thick, namely .135 in. I notice that the sheet already has a slight curvature, so I'll orient my pattern so that the curve arches upward in the center:
Otherwise, the fingerrest may appear to "sag" when mounted on the guitar, in this case a Martin F-9 from the 1930s. Later, when I'm buffing it, I can straighten it while it's warm from the buffer, but I figure that it may "want" to return to this kind of curve as it ages.
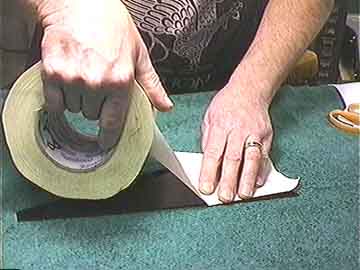
In order to draw my pattern easily, I'll cover the top surface with masking tape:
I like this sign makers "transfer tape." I can easily draw on it, and it is porous enough to accept a water based glue if I want to place a photocopy of my pattern on top.
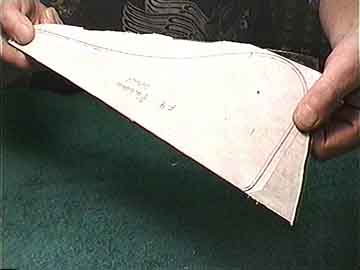
That's what I'm doing here. I have a pattern drawn, including the binding, so I can trim the celluloid right to the edge where the binding will be glued:
I've glued the pattern to the taped fingerrest using the same gluing technique I use for labels. I've soaked my photocopy of the pattern in dilute glue, and simply squidge it onto the surface and smooth it down. I don't have to wait for the glue to dry before cutting, but it helps.

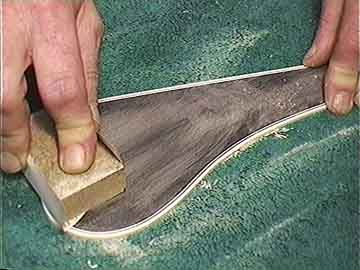
First thing is to true up the straight edge that goes next to the first string. Nothing like my sharp Stanley #60 low angle block plane for this job:
Next, I'll introduce the fingerrest to Mr. Bandsaw and my small belt sander. I'll cut it to within about 1/16" of my line, and then true it up on the sander. I have to be careful with the sander and use a new sharp belt because of the danger of overheating and burning celluloid.
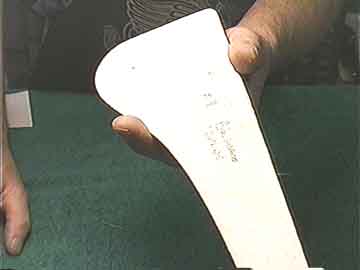
Here's the rough cut fingerrest, sanded, with its pattern still on:
I'll true up the curves with a series of curved sanding blocks and some 100 grit aluminum oxide paper:
I like to work from the backside, so I can see the edge clearly.
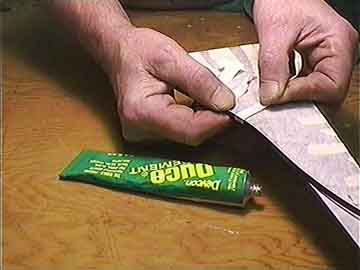
Binding goes on in layers, if possible, to avoid problems bending around the corners and curves. I use Duco cement, and narrow masking tape to hold it in place:
I make sure to keep the top surface protected during all gluing because the glue will really eat into the celluloid and I don't want it to show in the final product.
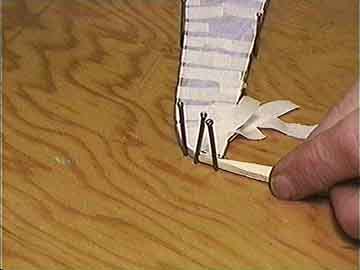
Especially at mitered corners, I may have a bit of trouble getting the tape to hold the binding down, so I'll stake out the fingerrest with some finishing nails, and use wedges to press trouble spots right into place:
It's a pain to get those mitered corners cut just right, but it really pays off in the final product, so if I miss the cut, I strip off the binding and start over!
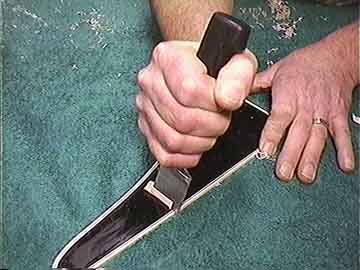
A few days later, at least, I'll scrape the binding flush with the surface:
Here my scraper is an old kitchen knife sharpened to a chisel type point. I can really bear down and pull neat shavings off. I have the blade partially protected with tape to reduce scratches on the surface of the fingerrest, but I'm really not too concerned, because I'll sand and buff the entire piece anyway.
I'll start with about 280 grit sandpaper and a cork block to flatten the surface and level the binding:
This fingerrest goes on a vintage instrument that has a finish which is amber from age and ultraviolet exposure. I'll be spraying it with amber lacquer to match the original finish, so I won't be sanding with anything finer than 208 grit. Later, I'll sand it level with 600 grit used wet, and buff it as I would a lacquer finish on a guitar.
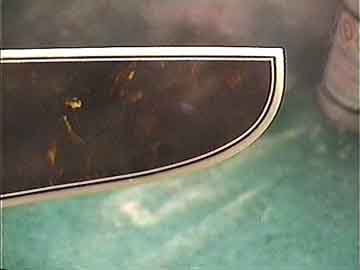
Here's that mitered corner:
I bought the narrow black and white already laminated, so I mitered the corners when I glued them on. The ivoroid outer layer is thick, and just laps over at the corner. You can't see the joint because the Duco cement melted and "welded" the pieces together.
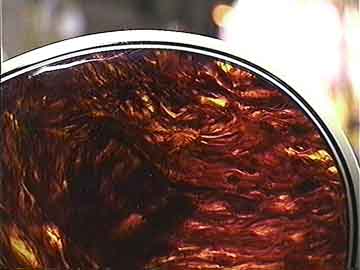
By the way, here's the effect of not protecting the surface when gluing up:
See the dimple in this Gibson mandolin fingerrest? It probably didn't show up until the finished buffed piece had been sitting around for a while.
The solvent in the glue causes the celluloid to swell, and when it is sanded level and buffed, it looks perfect. Then the solvent is released VERY slowly over a period of weeks or months, and the dimple forms as the celluloid shrinks back.
Check out the article on Mounting Celluloid Fingerrests.