
1887 Martin 2-1/2 40
A big restoration
This is an expanded version of the eleven page photo article I wrote for the August 1999 edition of Acoustic Guitar Magazine.

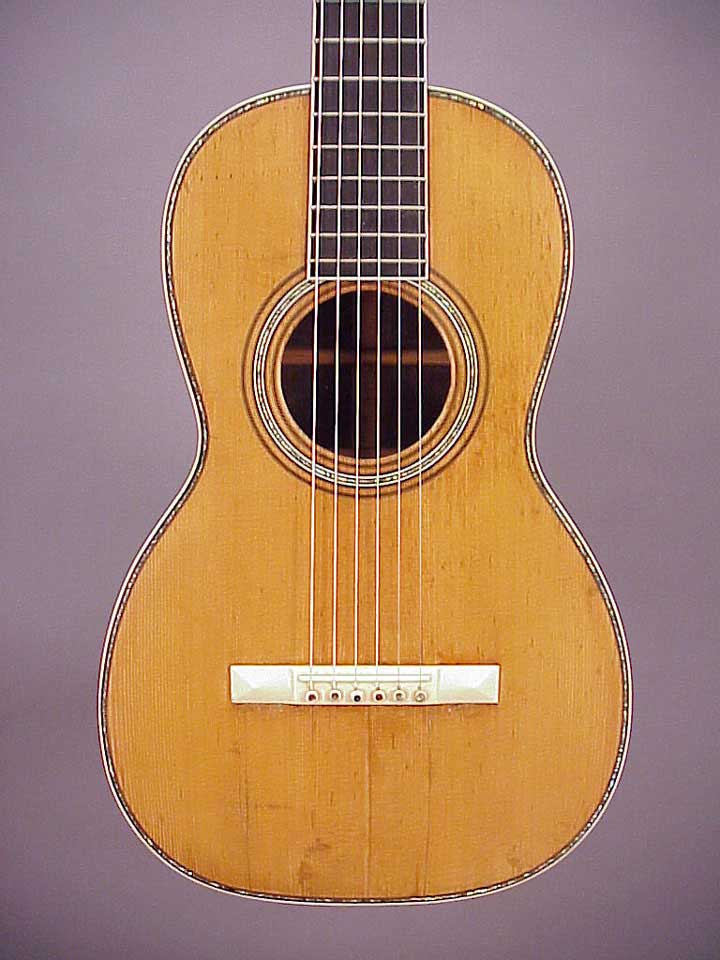
Here's the patient, a Martin guitar, style 2-1/2 40, made in 1887.
According to its last owner, this instrument had been carried through equatorial Africa during the 1960s by a missionary who had it set up with steel strings. Considering its age and treatment, its survival is a testimony to good workmanship and the quality of well fitted hide glue joinery.
This and the next two photos are "after" shots, because I don't have any full pictures of the damaged guitar.

The back and sides are of Brazilian rosewood, the top is spruce, and the neck is Spanish cedar - all typical materials for Martin instruments of this period.
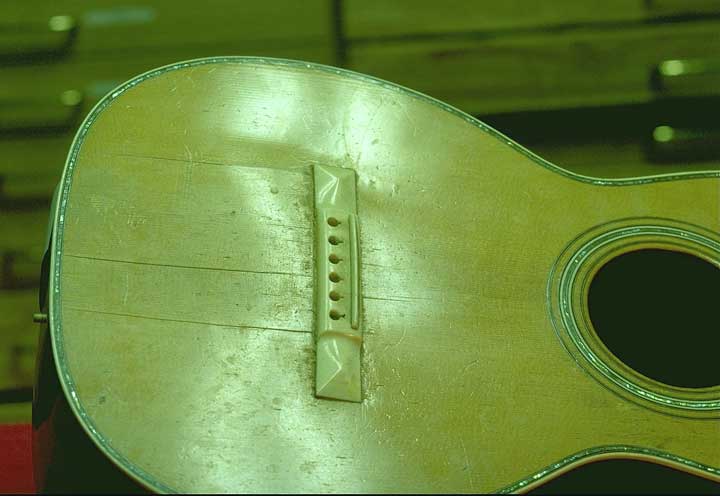
The white binding, heel cap, tuner buttons, nut, bridge, bridge pins and saddle are all original, and made of elephant ivory. Although synthetic ivory (ivory grained celluloid, or "ivoroid") was available for instruments in 1887, Martin continued using ivory for bindings until around 1920.
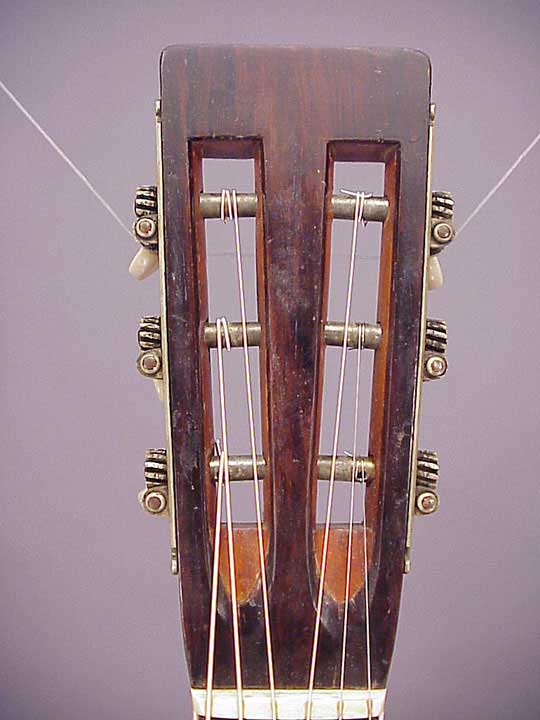
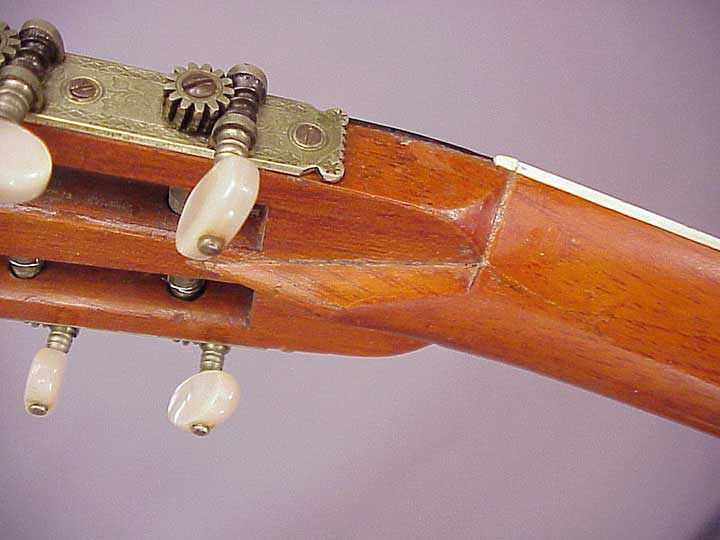
Typical of the period - the plain slotted peghead with no company logo. On the back of the peghead is a simple stamping that reads: "C. F. Martin, New York." This vintage guitar is often called a "New York Martin" but like all Martin guitars after 1839, was made in Nazareth, Pennsylvania. (Martin's sales agency remained in New York until the turn of the century.)
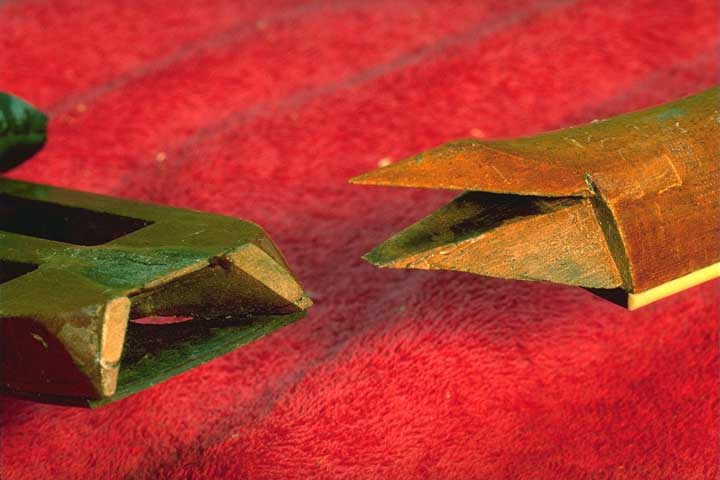
The back of the peghead had been smashed, and although the glue joints held well, the wood was badly broken in the area.
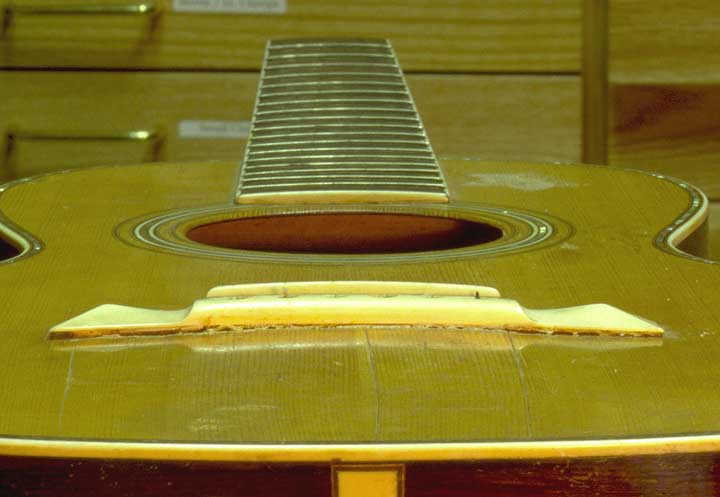
The bridge had become loose a while ago, and I suppose it laid around unnoticed with the strings up to full tension.
Because of the long term "over-stringing" with steel strings and the loose bridge, the top had become terribly distorted and showed a very large bulge behind the bridge. Notice also, the shrinkage cracks in the top which resulted from exposure to heat and low humidity.
I started the job by loosening the "tongue" of the fingerboard over the body, and removing the 15th fret to allow access for my steam needle. I drilled a 1/16" hole for the steam needle, right through the fret slot into the cavity at the end of the dovetail joint.
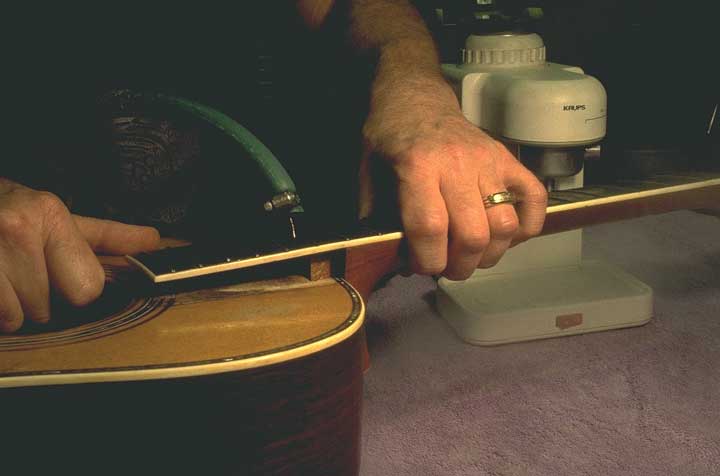
In the background you can see my steam generator, an old expresso milk steamer. These things work well for loosening old dovetail joints.
As you can see, the joint came apart well with relatively little steam damage to the surrounding finish.
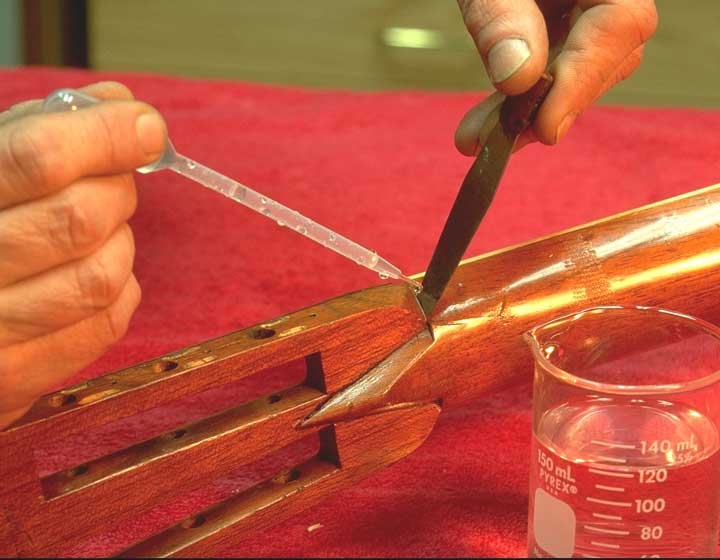
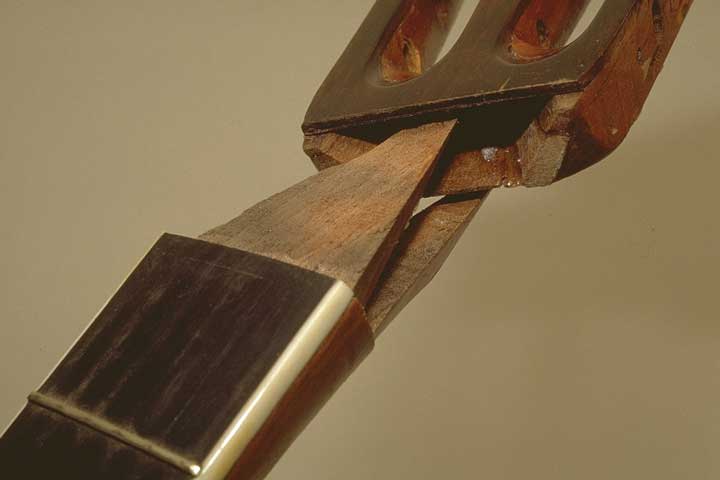
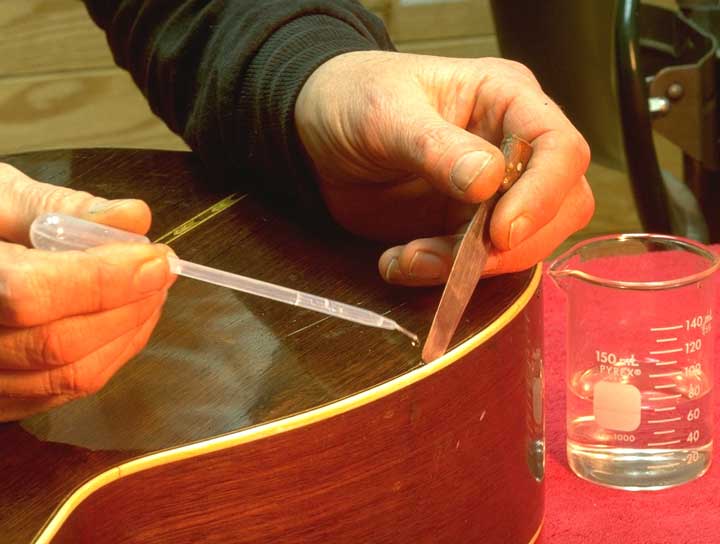
Turning my attention to the other end of the neck, I spent the better part of a day with a water pipette and palette knife slowly "teasing" the old hide glue peghead joint apart.

It was a tedious process, but I didn't want to use heat for fear of damaging the original shellac finish which was in reasonably good shape.

Here, I've gotten the original joint disassembled, and I'm beginning to get the old crack open.
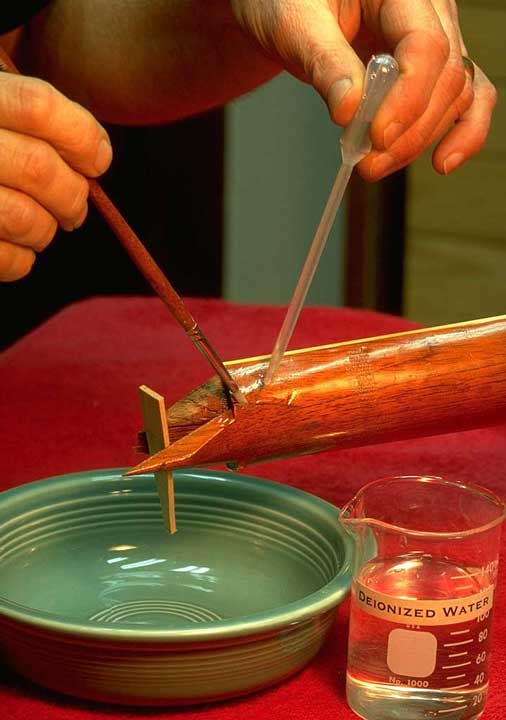
I used deionized water, because it's effective in cleaning old dirt without adding any contamination that might impair the adhesion of my new hide glue. Naturally, I used hot hide glue exclusively for this restoration, because the instrument was made with it, so that's what future repairers would expect to encounter.
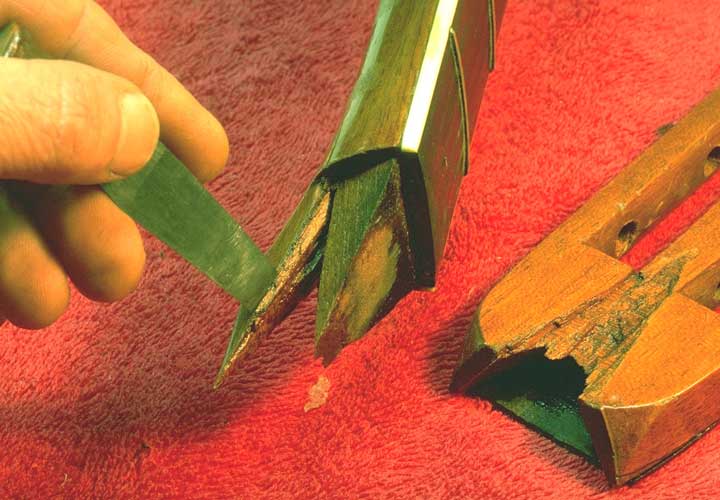
Here's the last broken flake coming off the old joint.
Rather than simply reglue the entire joint and broken pieces all at once, I chose to rebuild the joint to photograph it for Richard Johnston's book
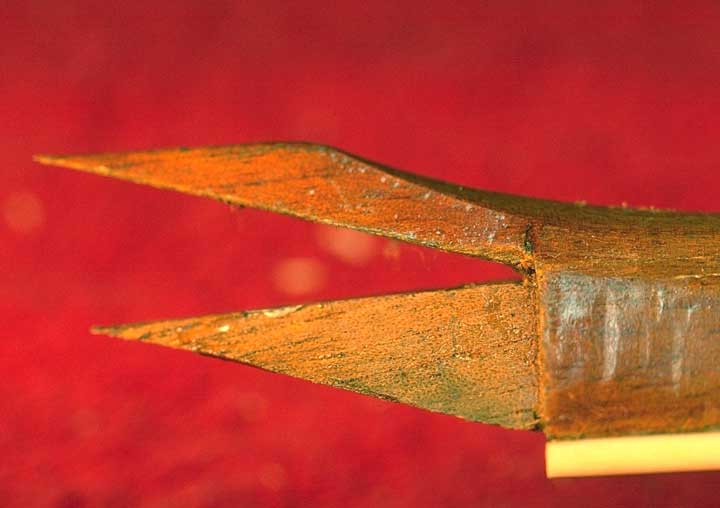
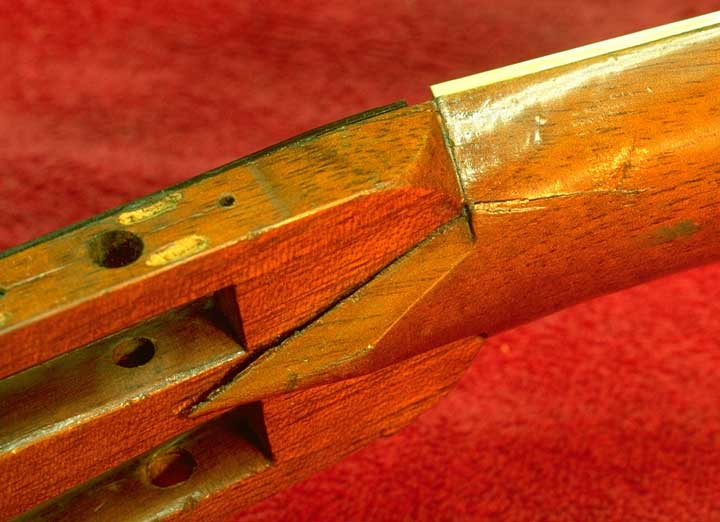
So here it is. The famous "diamond" or "dart" that you see on the back of the peghead of many Martin guitars. Originally, this little carving was a reinforcement for the jointed peghead.
Julius Borges, maker of the fine Schoenberg guitars, tells me this is is a modified "bridle joint."
Any way you look at it, this is a fine piece of joinery. Martin hasn't used this joint since about World War I, but still they carve a vestigial tribute on the back of the neck of every D-28, and many other models.

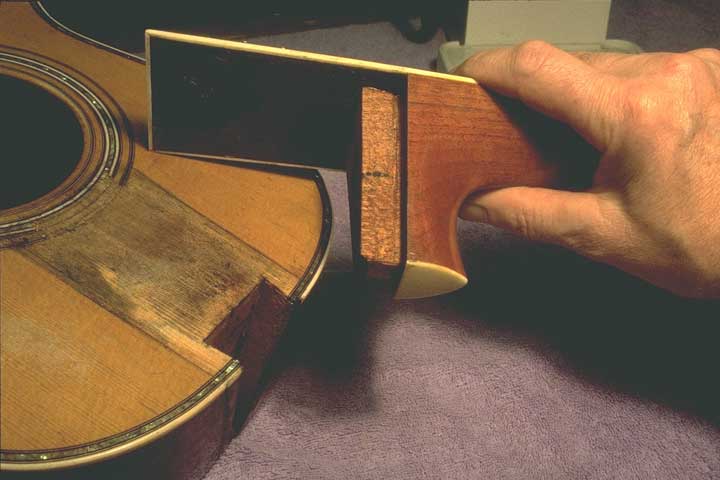
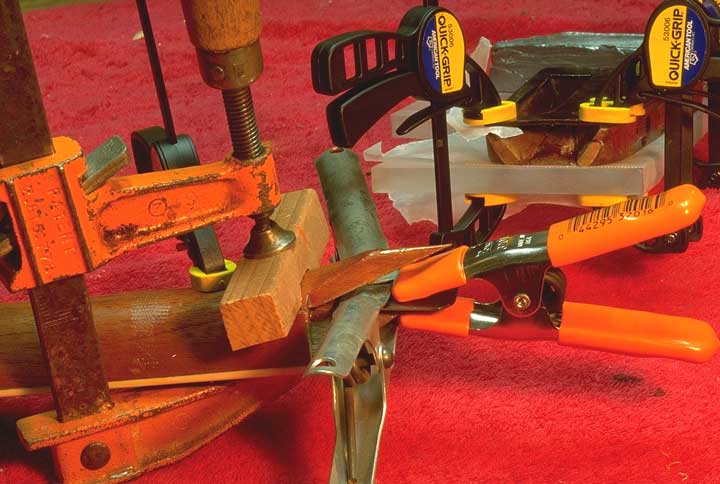
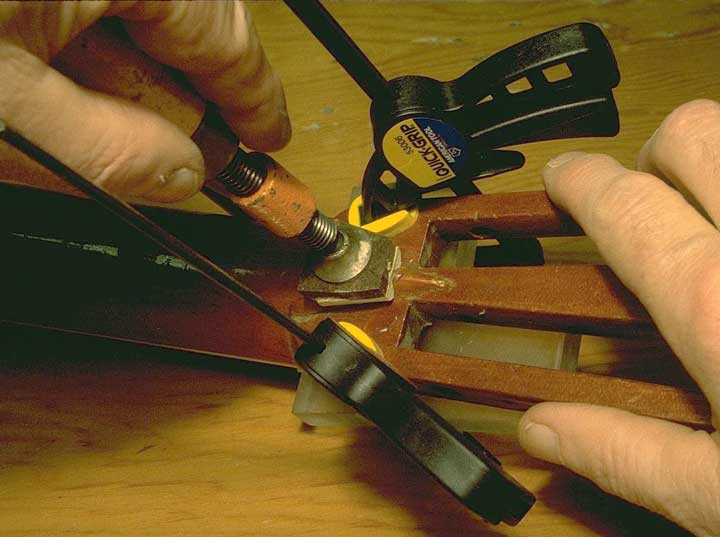
I could have easily damaged that fragile little finger when I clamp the joint back together, so I got out my Quick Carve. It's a fast setting catalyzed compound used for pattern making.
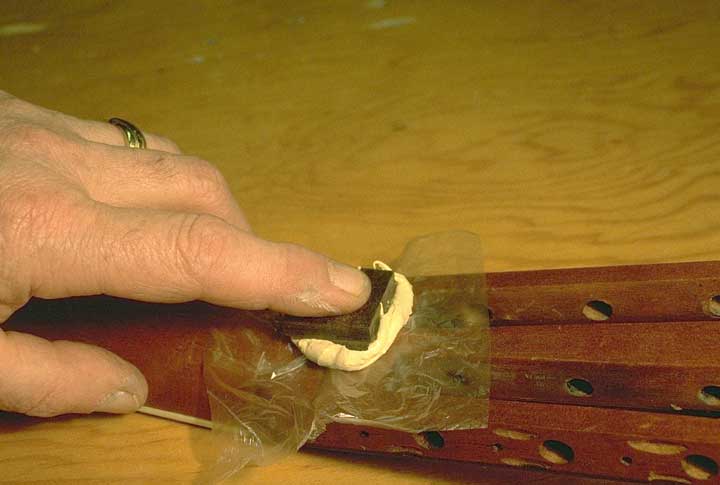
Protecting the neck with plastic film, I squished a bit of Quick Carve onto the area, and backed it with a piece of Masonite.
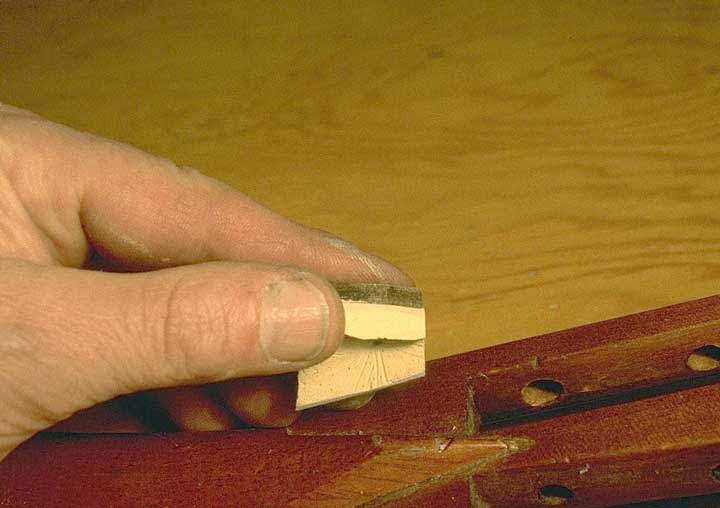
That gave me a perfect molded clamping caul so I could safely glue things back together.
Here's the peghead joint all clamped up.
And all finished, with the tuners back in place.
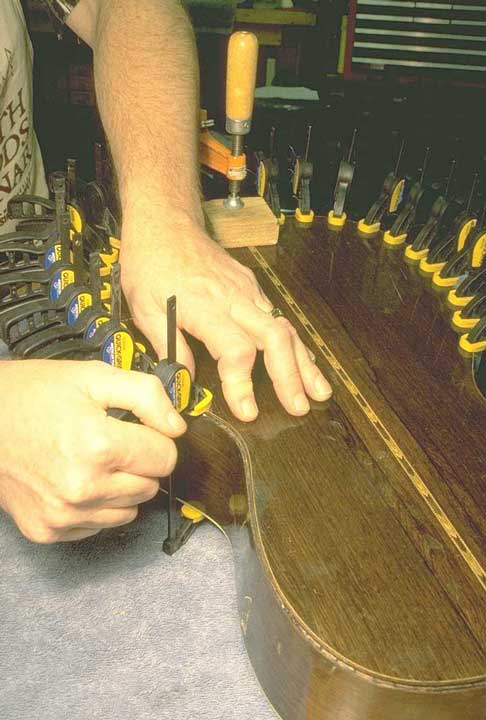
Back to the water and palette knife for some more tedium. It took a long while to get that old ivory binding off!
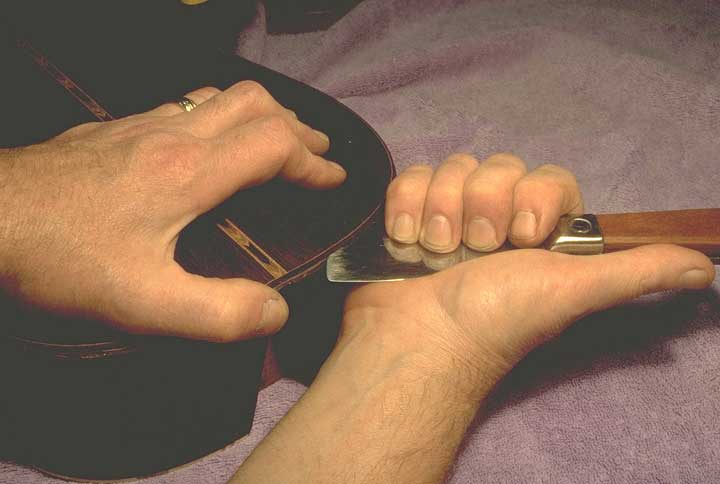
Prying the back loose went smoothly, and I could hear the familiar crackle of the hide glue as the lining joints broke apart.
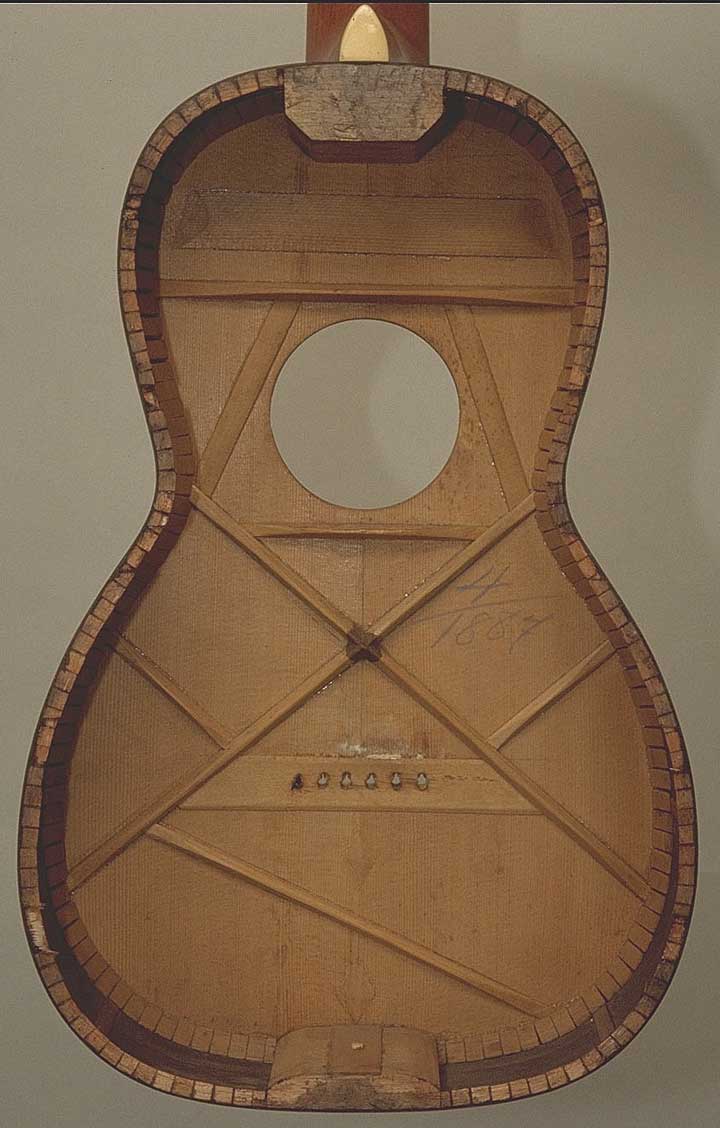
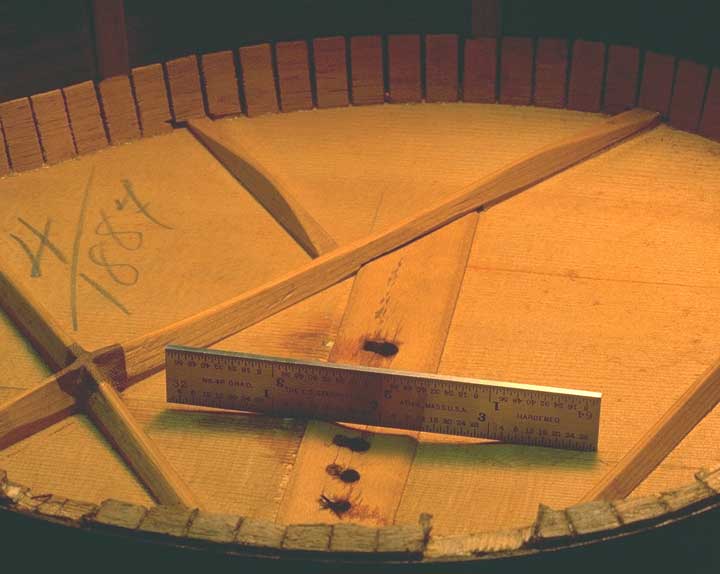
No doubt about the age of this guitar. The shop foreman did us a favor by dating the inside of the top. Such top dating was customary for Martin through most of the 1880s and all of the 1890s. I only wish they'd started the practice earlier! All the top bracing was still tightly glued in place, and everything looked in good order, except for that distorted bridge area.
Speaking of which, take a look at the shape of the top. Pretty bad warping around that poor old bridge.
I heated and pried off the bridge plate to discover that the top was broken completely through across the grain in front of full length of the bridge, through some of the bridge pin holes, and partly through the back of the bridge. The bridge itself basically fell off when I removed the strings.
I moistened the top and clamped it to a flat plate, with lots of clamps and heavy interior cauls. I simply set it aside for a few weeks to help flatten it out.
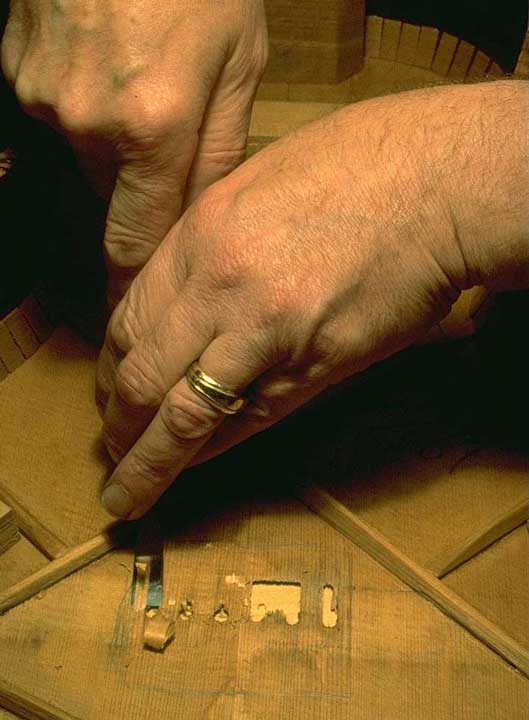
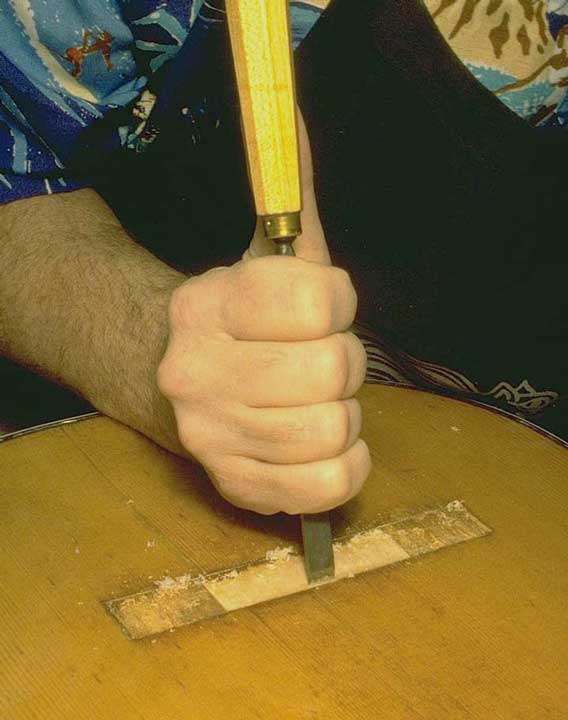
Returning to the job, I started to prepare the area for rebuilding. Taking my 1/2" wide bent chisel, I carved away the top in the area of the cross grain cracks.
Using my smallest flat "finger plane" I created "ramps" in front and behind the bridge.
By now, the entire area covered by the bridge had been removed from the inside, and the ramps were complete.
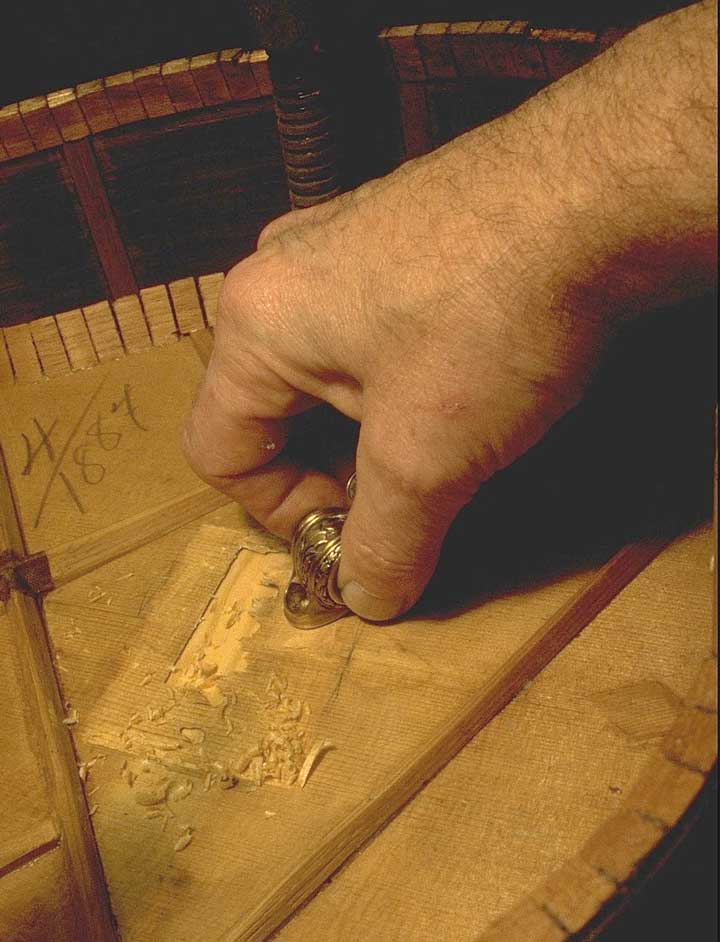
I took the time to plane the top to a thin razor edge, so my new top material would lay in right up under the bridge.

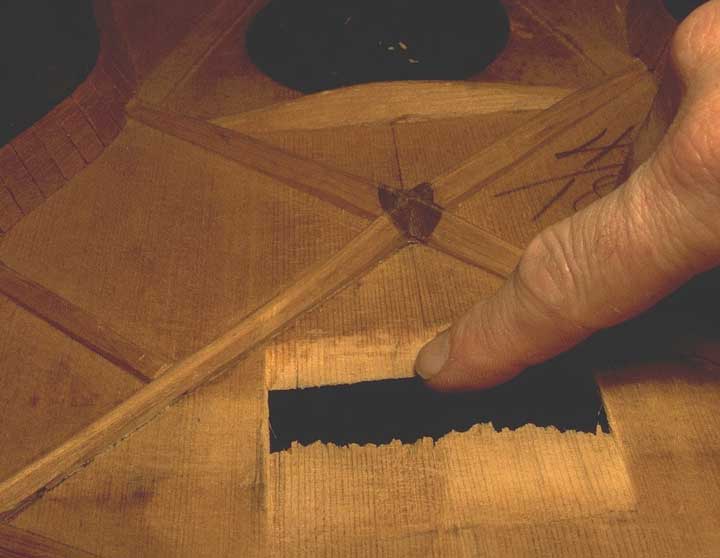
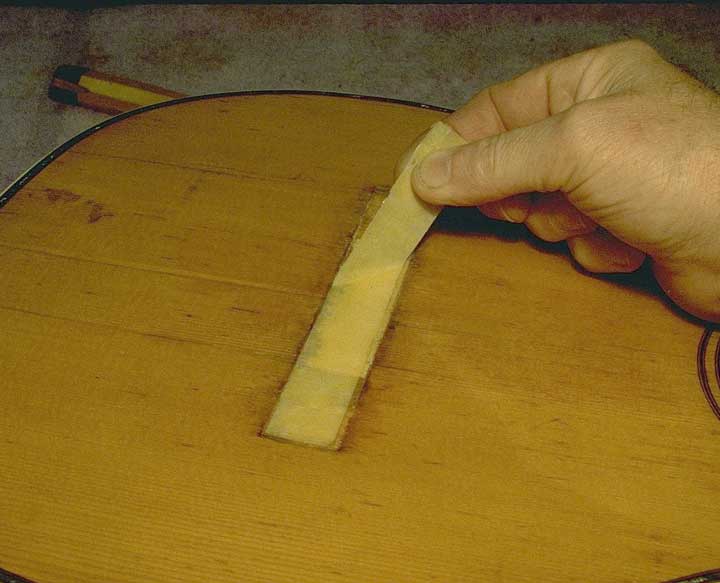
To get the best new top repair material, I split my own billet of spruce. With literally no runout, it had the maximum grain strength.
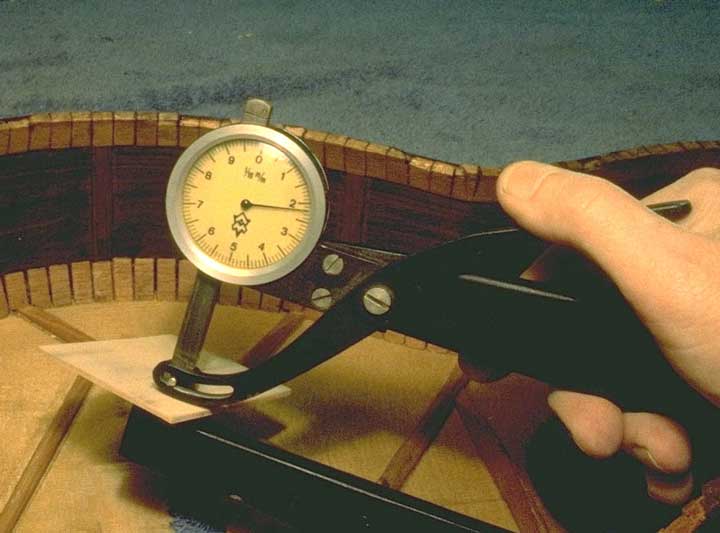
I measured the top and made my new patch material just the same thickness.
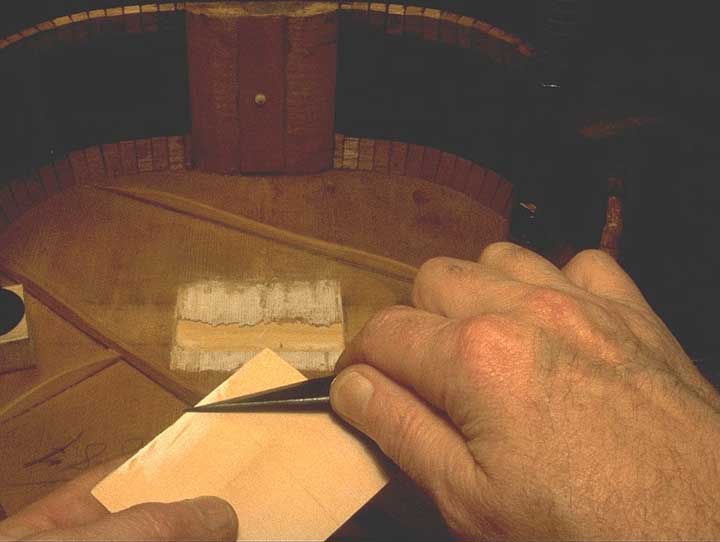
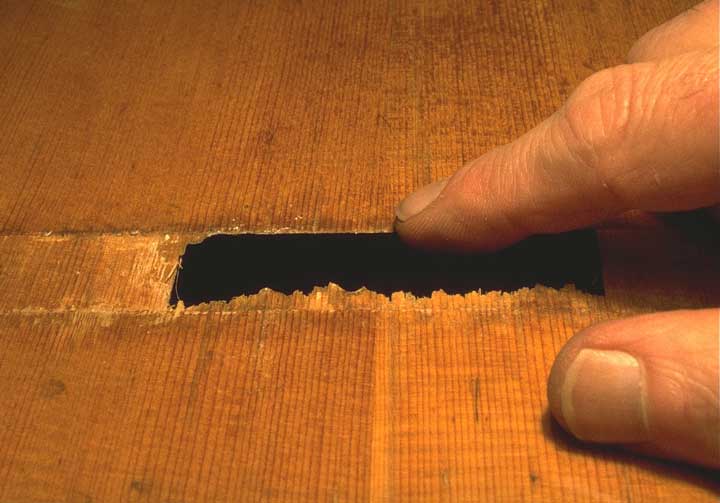
"Chalk-fitting" is the traditional method of getting a good match. I fitted, tried, carved, refitted, retried, and recarved until my new patch fit right in.
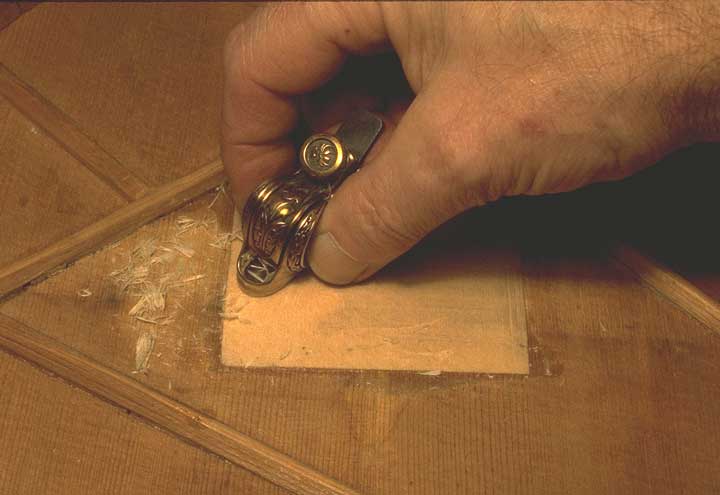
After gluing my patch in place, I finished it down with my small finger plane, checking to make sure the final dimension was the same as the original thickness.
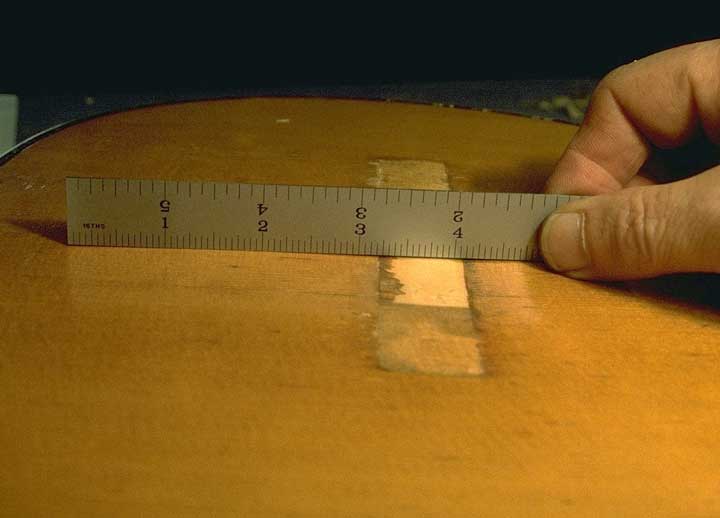
Hide glue is especially important in this application, because it has absolutely no tendency to "creep" or slide under high stress, even when heated. One thing for sure, there's plenty of stress around the bridge on a guitar! A you can see, the result was a nice flat surface for regluing the original bridge. Even though I added new wood, it wouldn't show under the bridge.
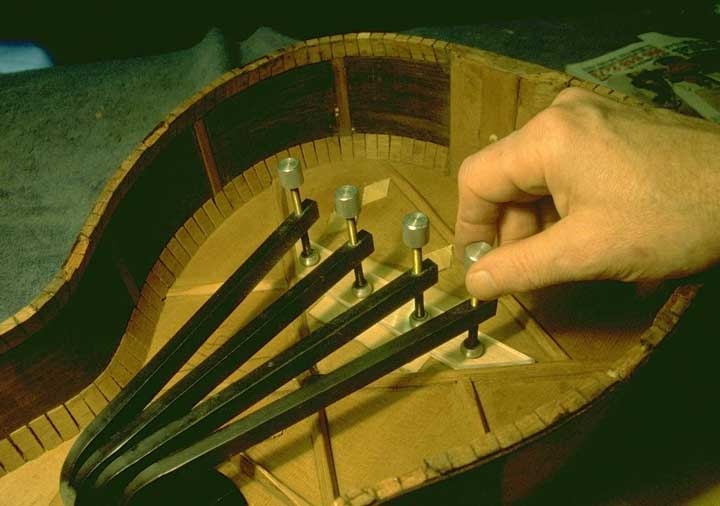
Next I scrubbed the top cracks with more deionized water to clean them as best I could. Gluing and clamping the cracks was easy, what with the back removed!
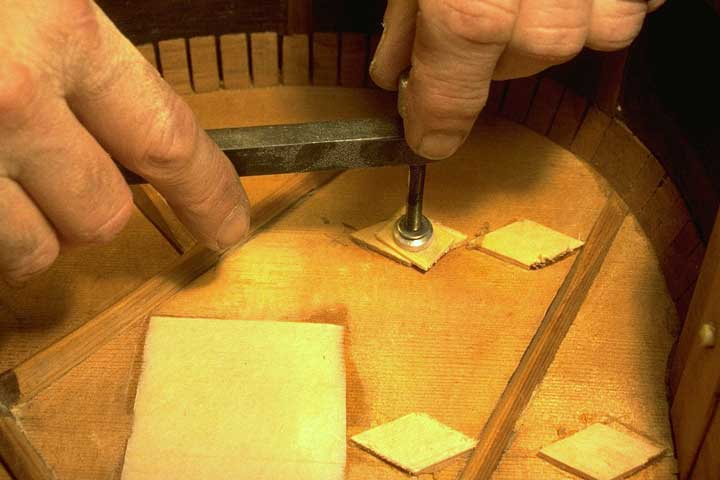
Over each of the cracks, I positioned and glued diamond shaped patches, the same size and shape as the original top joint reinforcing diamonds. Any shape patches would work, but I thought it was nice to match Martin's style while I was at it. . .
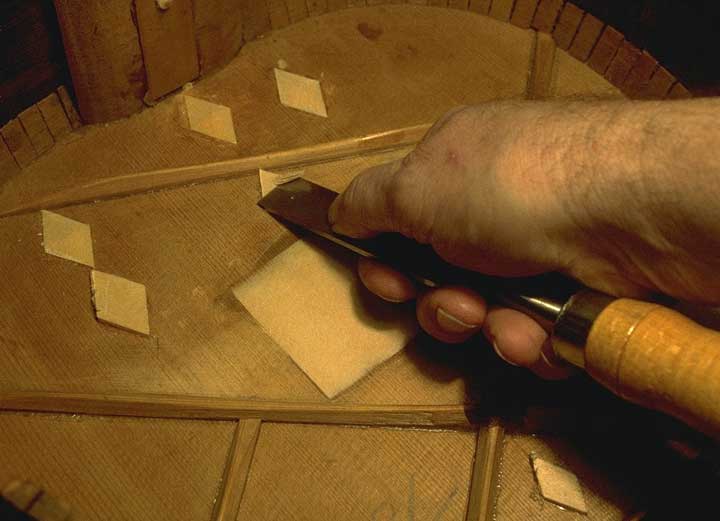
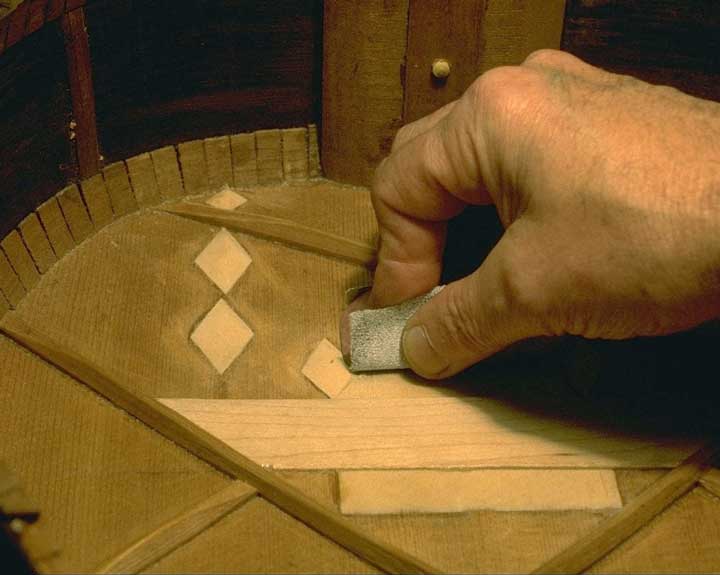
Then, with the bent chisel, I carved each patch down to a "feather edge" Patches with tapered edges are just as strong, and are lighter. Additionally, they won't spring loose if the top is flexed in that area.
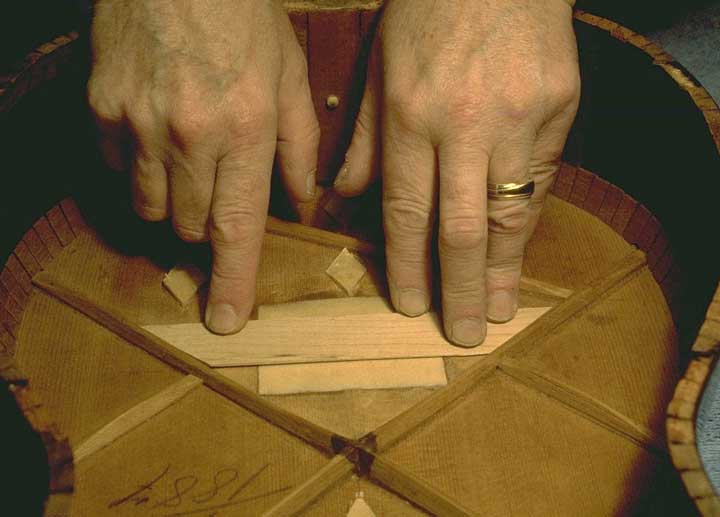
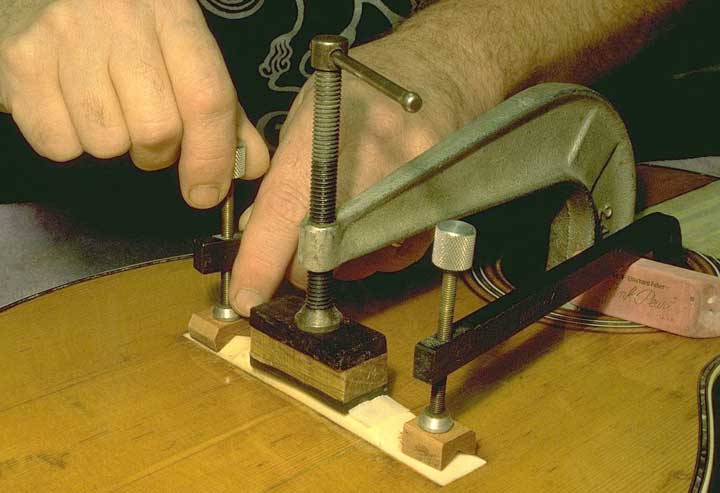
The original pencil marks were still visible for me to align the new bridge plate. I made my new bridge plate the same dimension as the original. No need for an oversize bridge plate because I'd already rebuilt the spruce in the area, so it was strong as new.
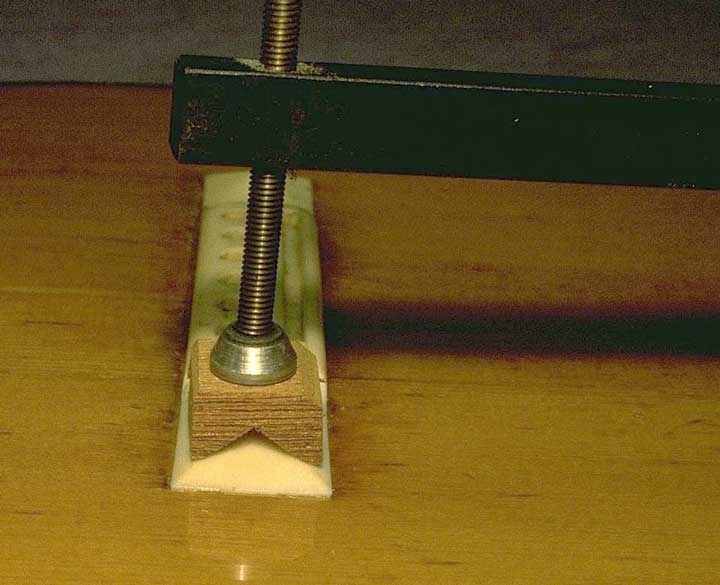
I clamped the bridge plate, as I clamped everything inside the top, up against a heavy flat plate to keep the top flat as possible during the rebuilding.
A final sanding of my new interior parts.
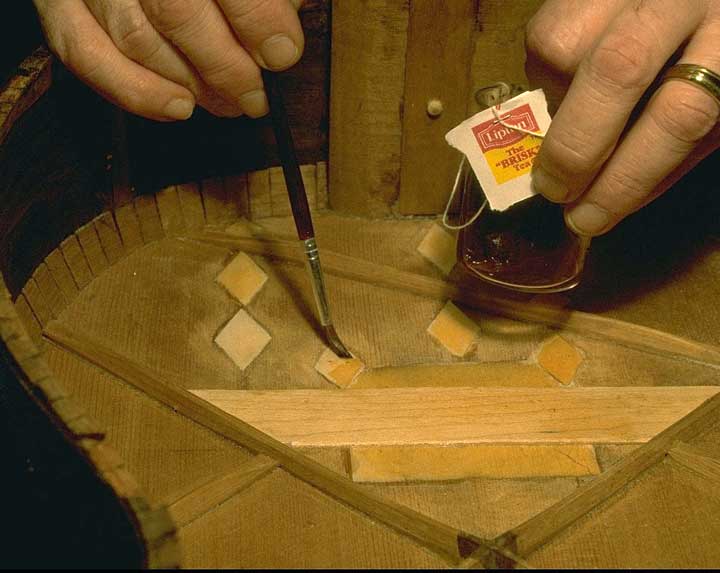
And a quick brush with some strong tea. I'm not trying to hide the repair, but simply cut down the brilliant white glare of the new spruce parts.
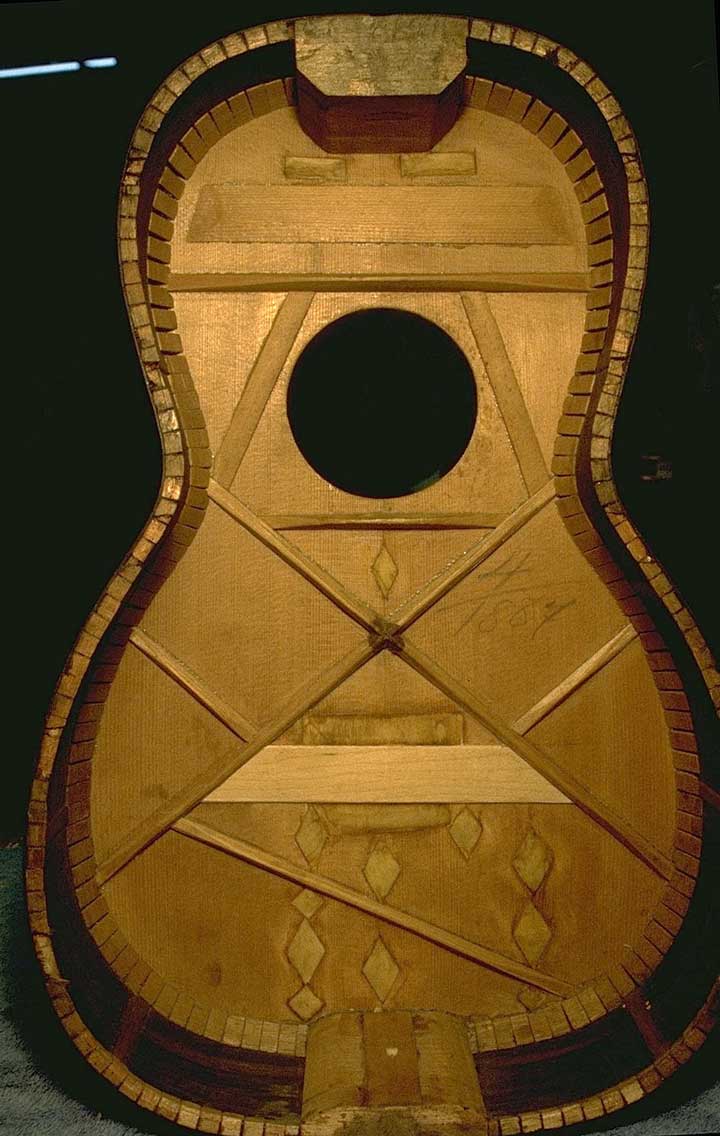
Here's the completed repair from the inside. I thought about it for a while, but finally decided to install the bridge plate in the original position, using the original pencil marks, even though it's a bit crooked.
I really love these little one-handed clamps. They make regluing backs a lot more fun!
I used my little chisel to clean up the glue squeeze-out.

I reglued the binding with hide glue, too.
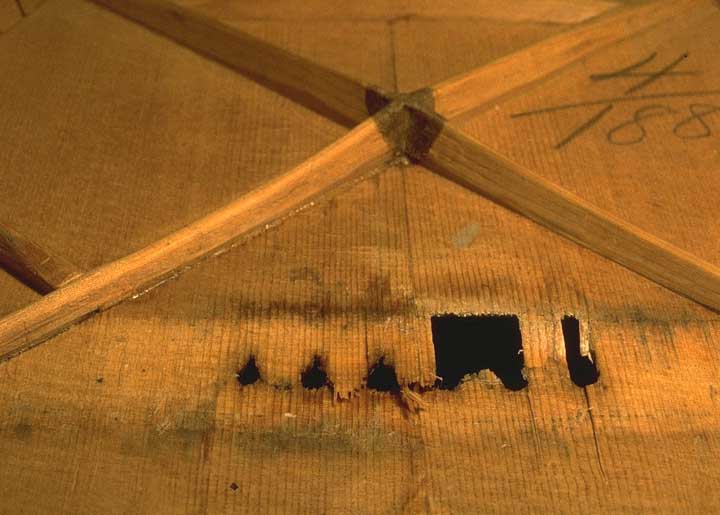
All over the top there were these little black dings, places where the finish had been broken and dirt had gotten rubbed in. I carefully picked the dirt out of the worst of them, about a hundred or so.
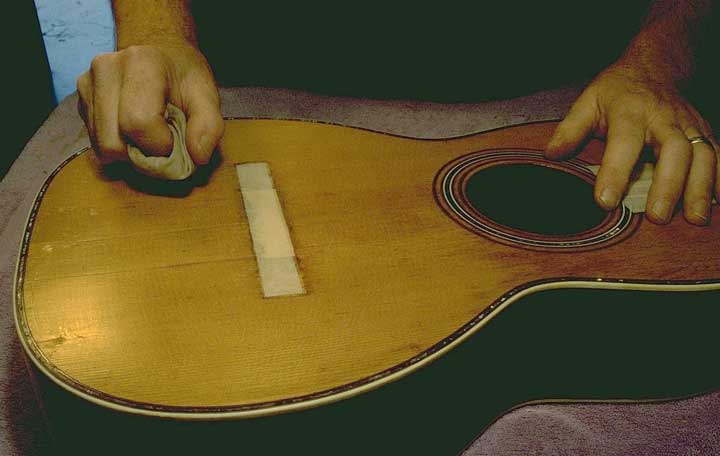
I scuff sanded the top with 220 grit paper, and brushed on a thin coat of shellac. On the following days, I French polished the top to add a bit of thickness to the finish, and to brighten things up a bit.

The finish looks far from perfect, but I think it looks "well attended-to."
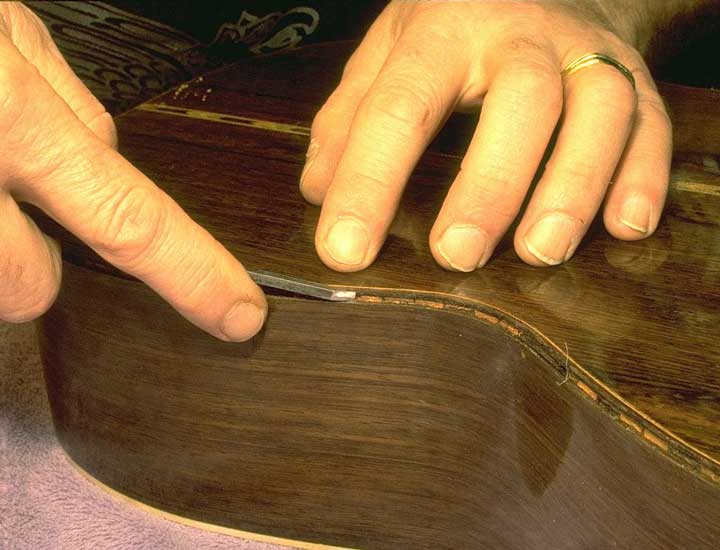
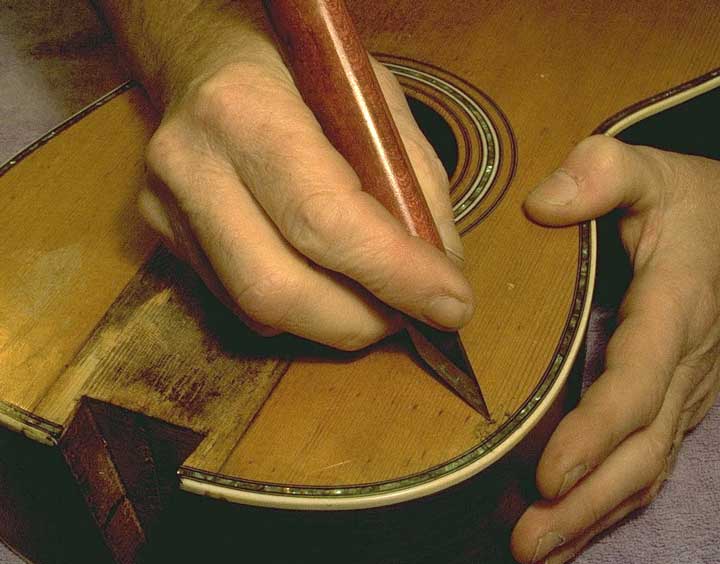
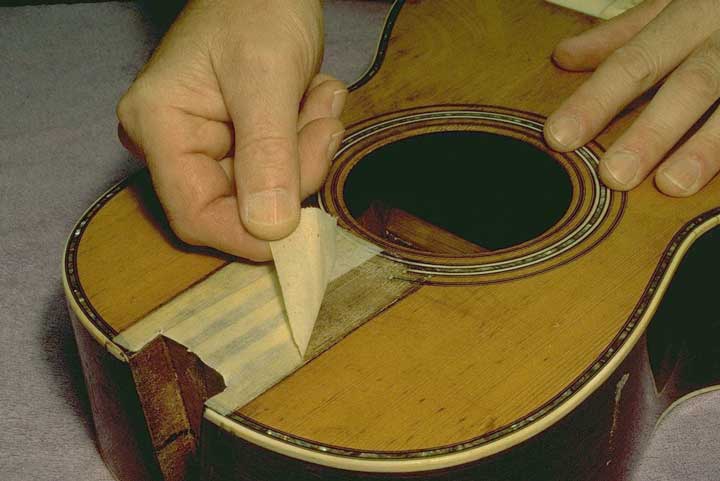
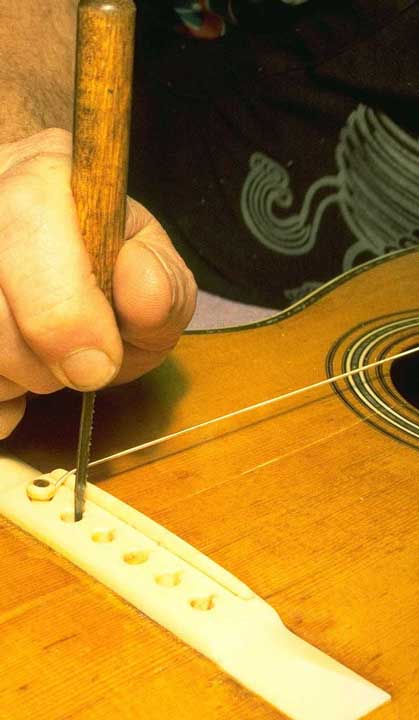
I removed the masking tape over the bridge area,

Positioned and Scribed around the bridge,
And scraped the gluing surface clean.
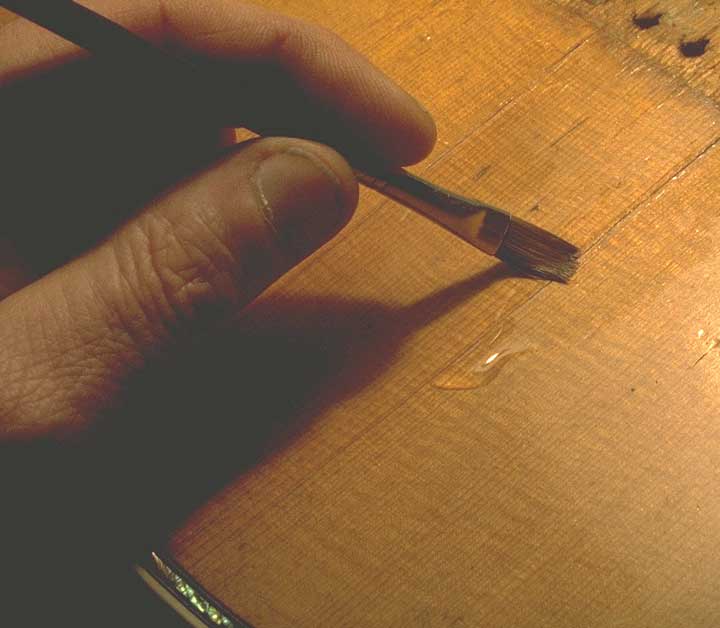
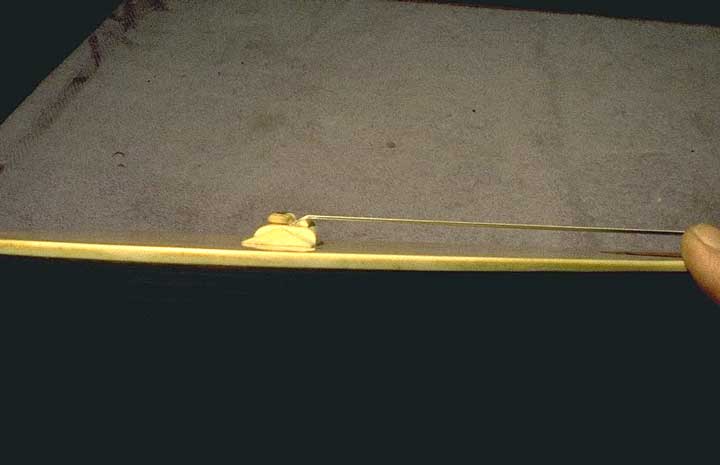
I used hide glue for the bridge, too. It sticks reasonably well to almost any clean surface, and works well with ivory.
Notice my little clamping caul. It delivers pressure to the edges of the bridge to make sure that they will be glued flat to the top. Ivory doesn't, but some wood bridges tend to curl up a bit as a result of water absorption during the gluing process.
The masking came off the fingerboard gluing area.
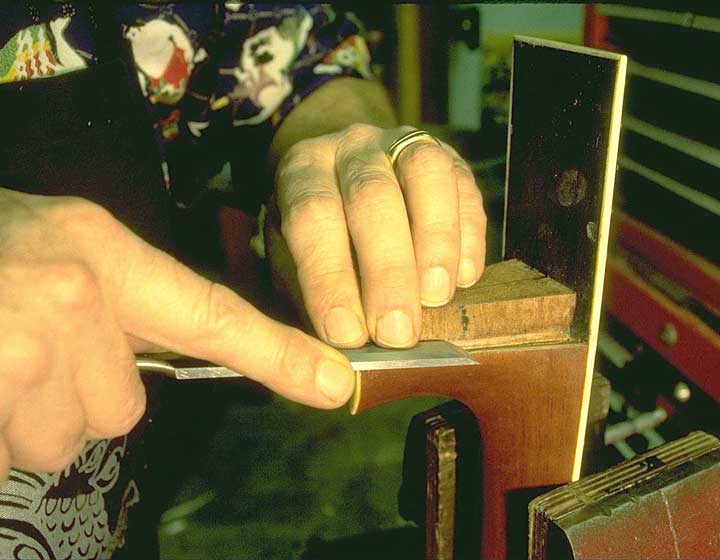
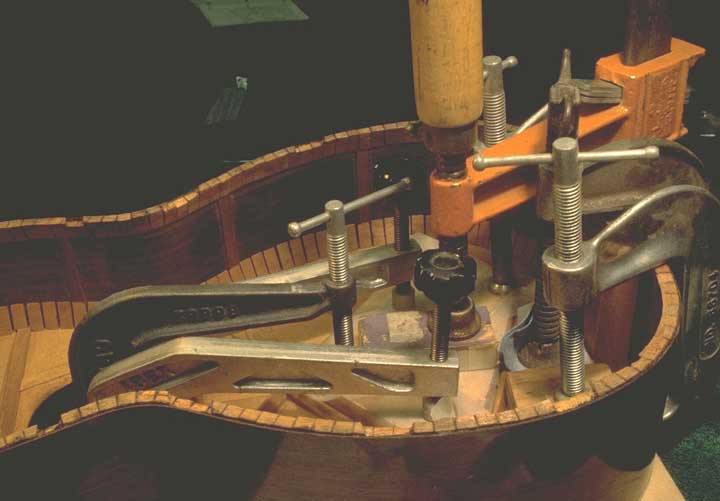
I undercut the "cheeks" of the heel dovetail and used my sharpest chisel to fit the joint.
Naturally, the neck needed to be reset to the correct angle after all these years.
I have a caul that fits over the frets, so I don't press them down into the fingerboard when I clamp the neck back in place.
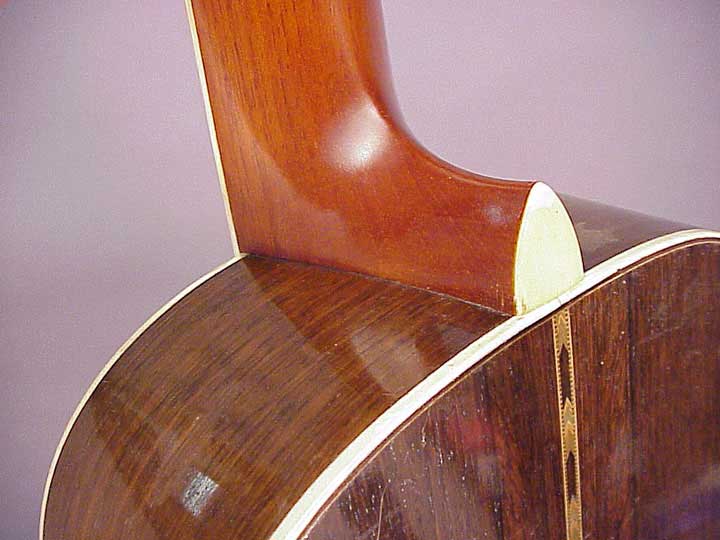
Here's the heel, all fitted and glued up.
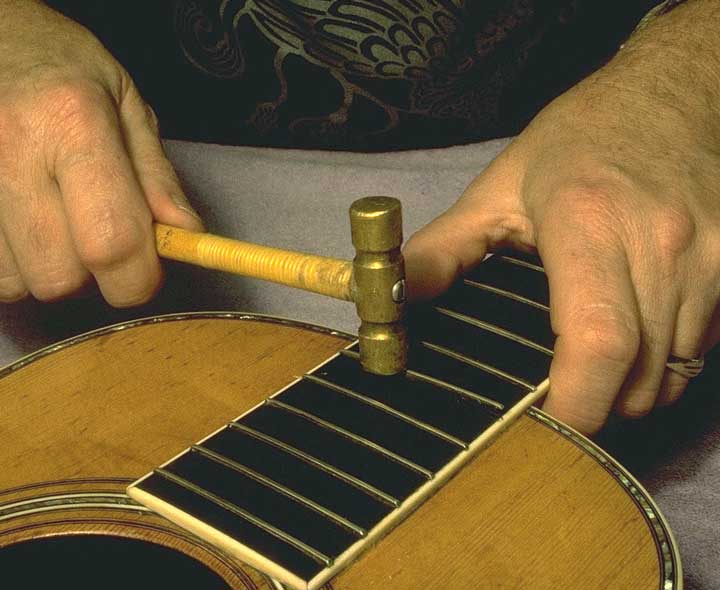
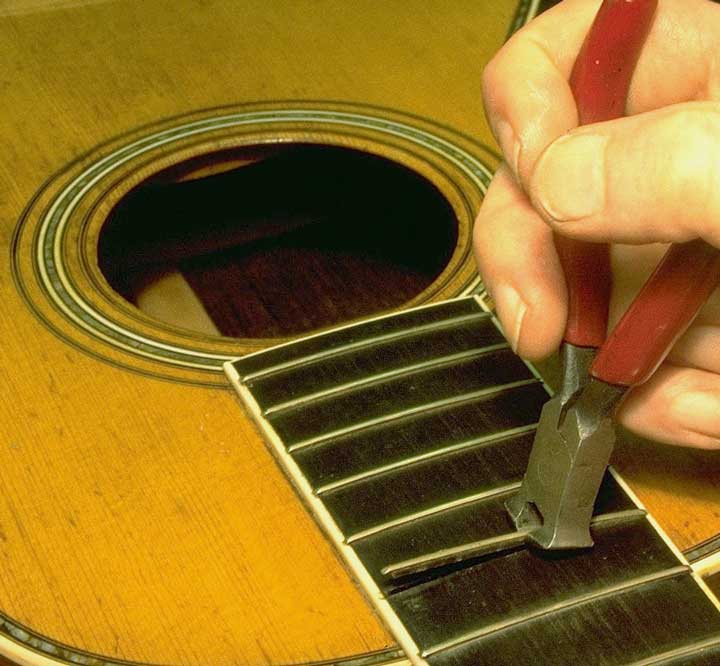
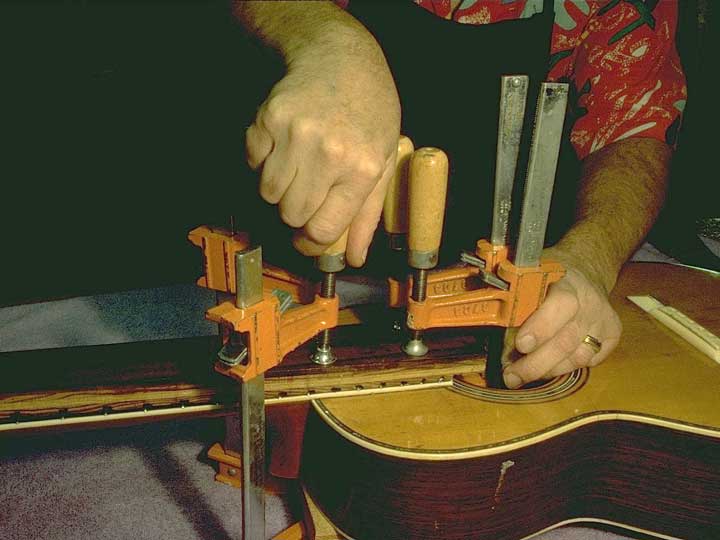
Time to tap the fifteenth fret back in place.
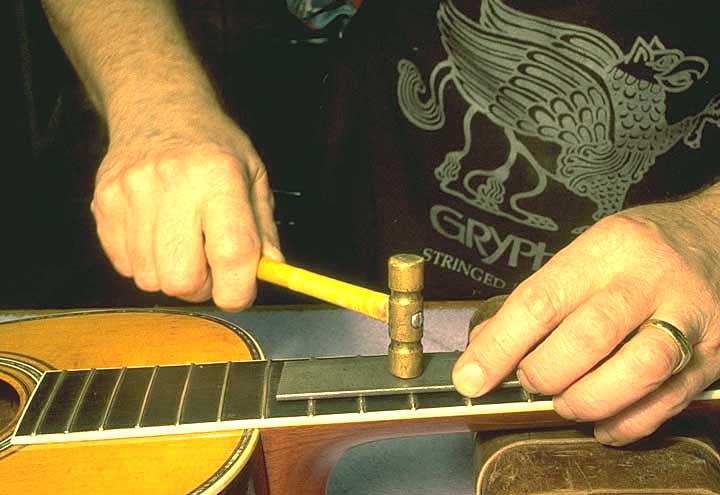
And time to tap all the frets level with my little steel plate.
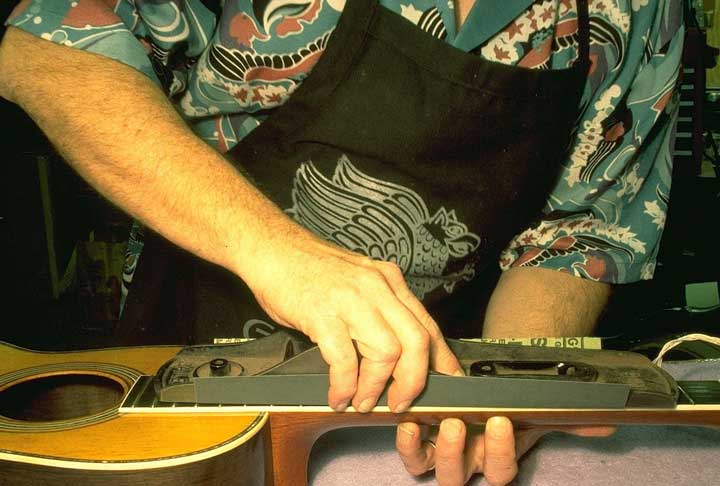
A quick leveling of the frets,
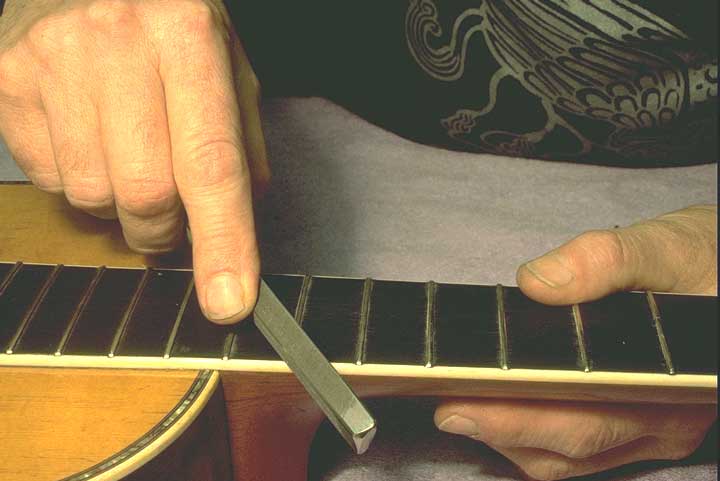
A bit of rounding,
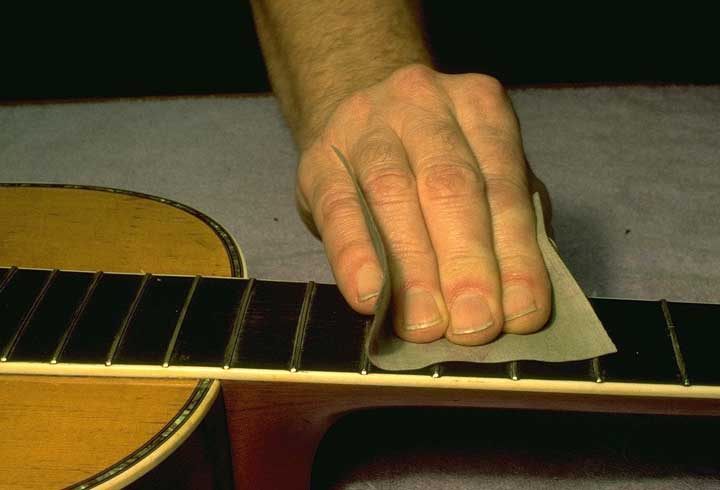
And polishing. Check out neck resetting and "bar fret" refretting if you'd like more about these processes.
The final setup: cleaning out the glue, and notching the top and bridge plate to match the bridge. I restrung with compound silk and steel strings, for the steel string sound with reasonably low tension.
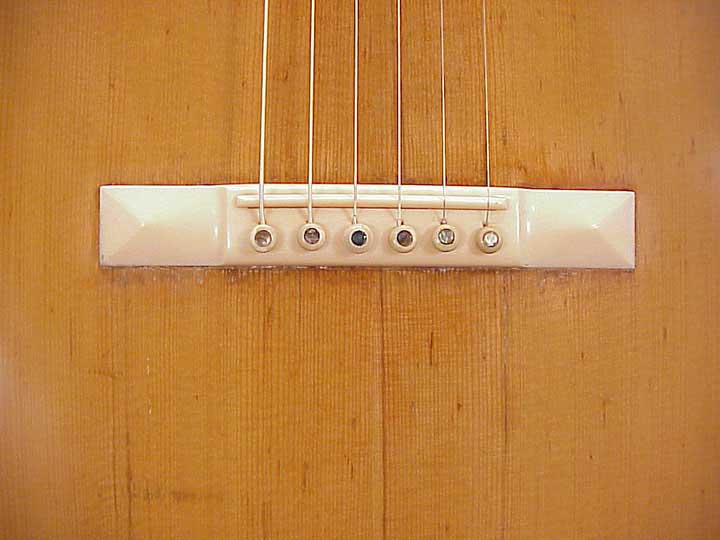
Here's the top, six months after the job was done. Looks just like a new guitar. Nice and flat, solid and straight.
With all the damage this guitar had seen in recent years, we're lucky that all the ivory parts were present and intact. I must admit, though, that one of my very favorite jobs is carving Martin style ivory bridges. Thankfully, we still have antique ivory available (not cheap!) for such restorations.
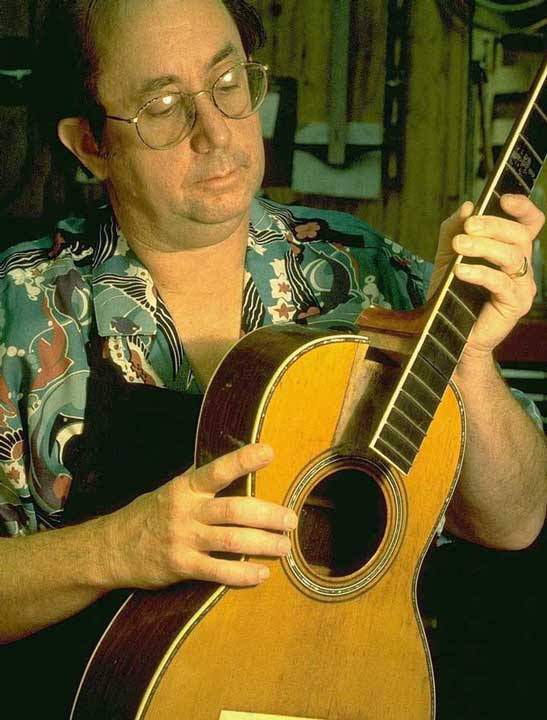
Overall the guitar looks good again, and I suspect it's ready for another lifetime's service.
This old fellow sounds terrific, too.
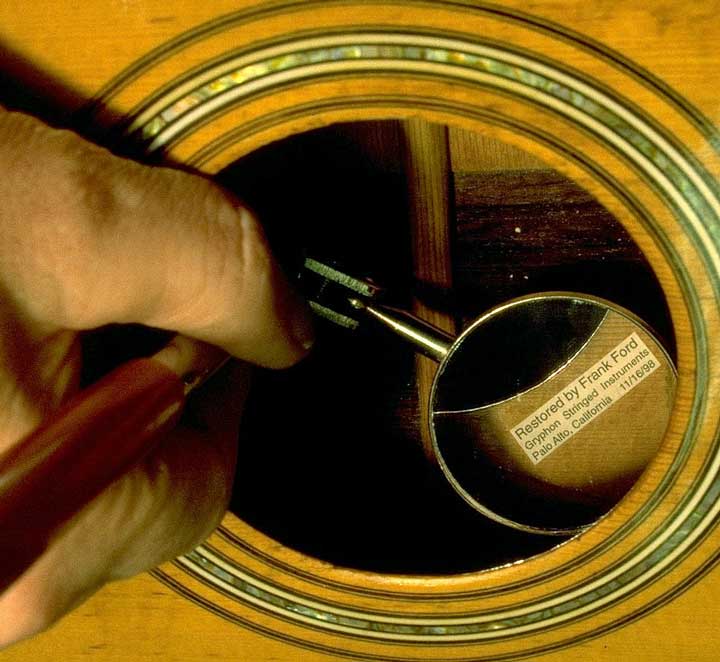
A final ego piece - a little label, printed backwards. I really appreciate repair labels when I encounter them. . .